User Management
Follow the section to refer procedures to create and modify users and assign them role and scope based access.
 |
Create User with Role and Scope Based Access Control
You can create a user in the Netskope IoT Security UI and assign the role and scope access control rights to the user. Follow the procedure:
 |
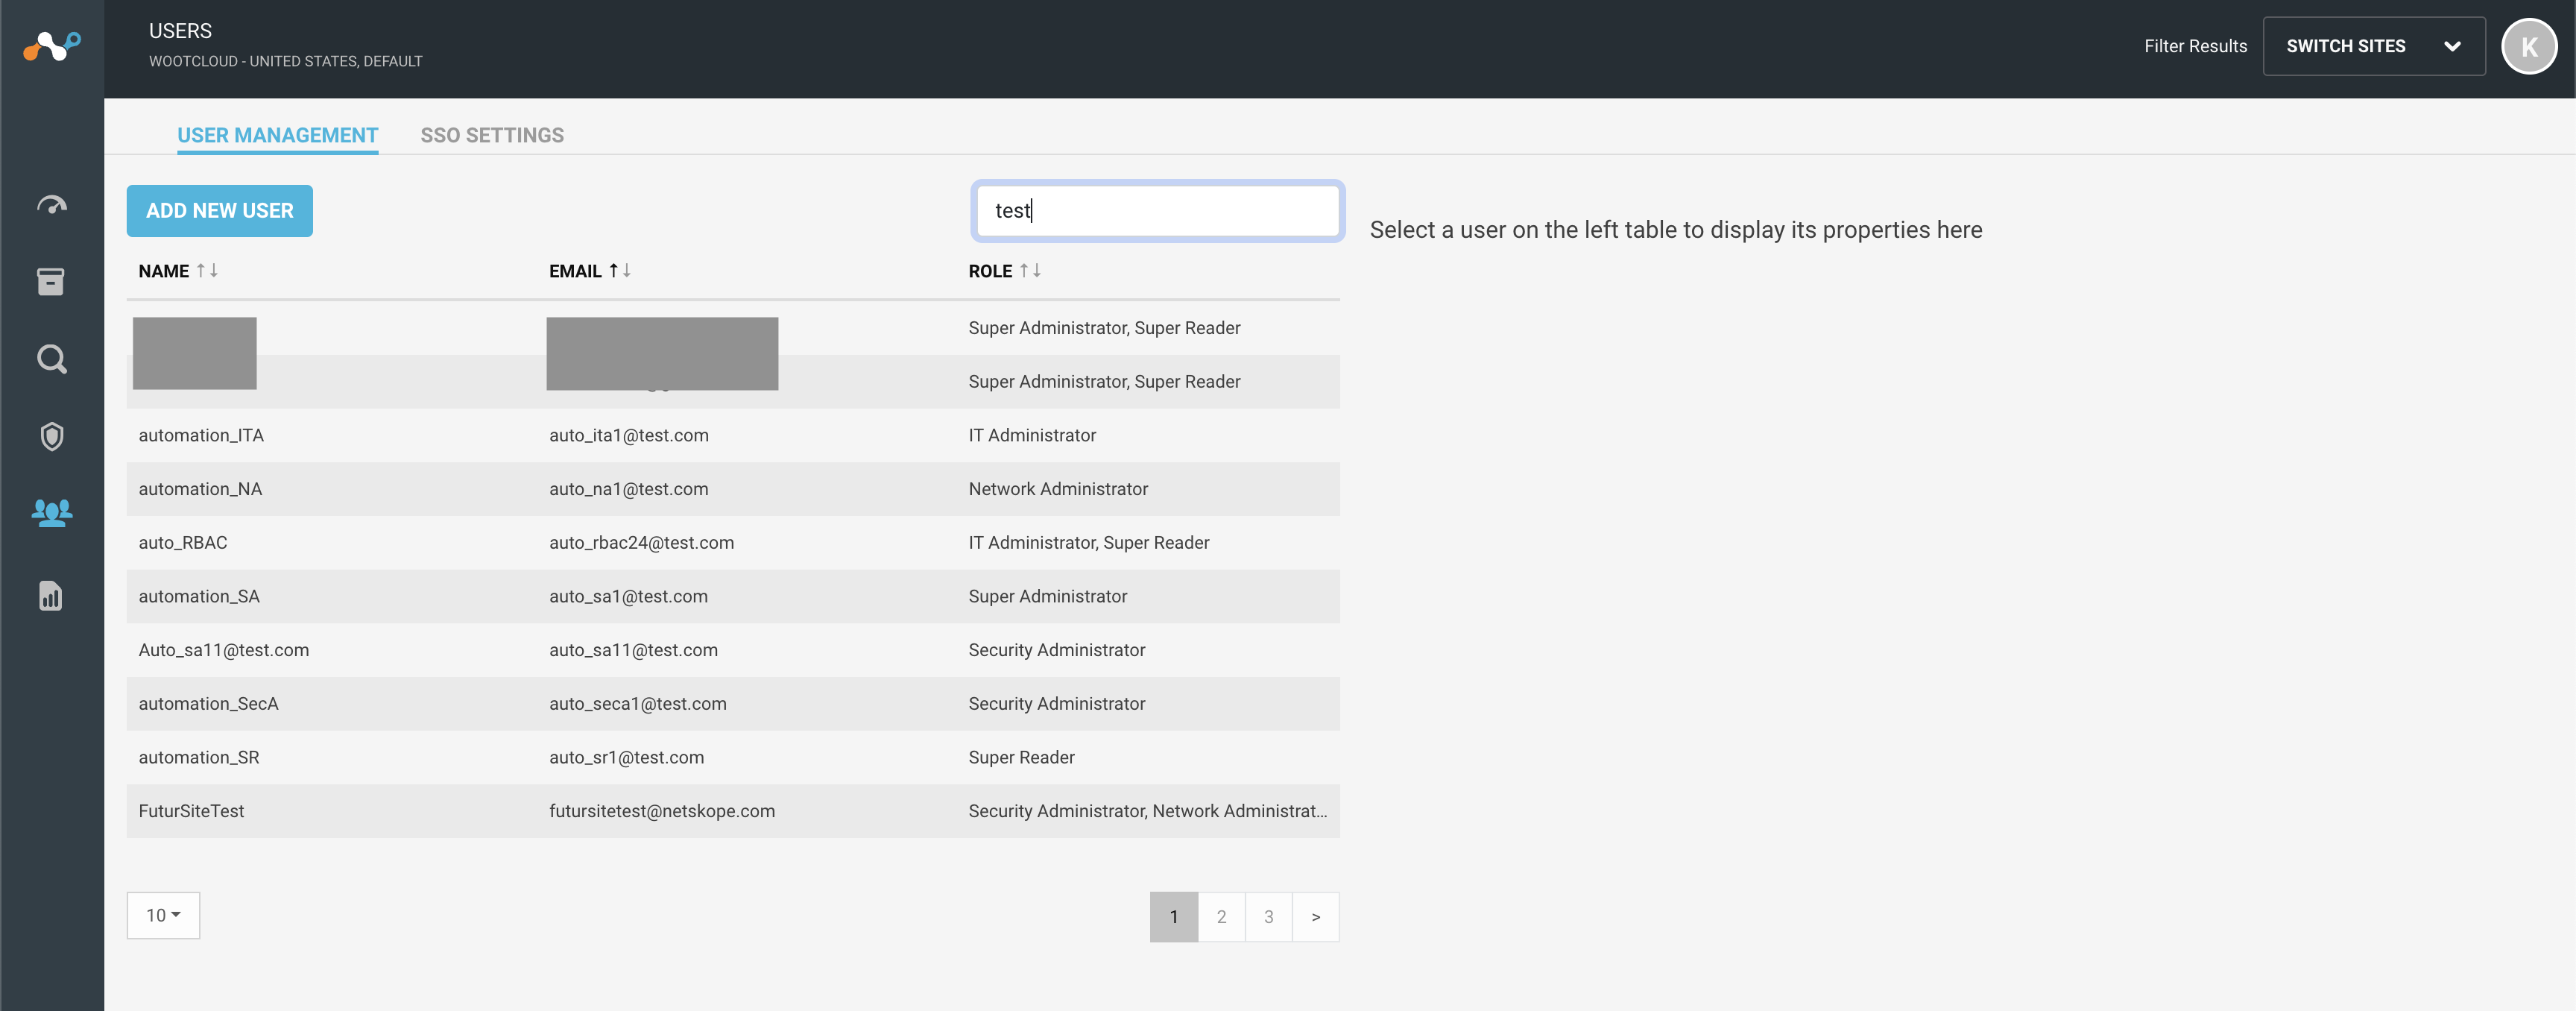
Navigate to Manage > Users menu.
Click on the Add New User button in the User Management tab.
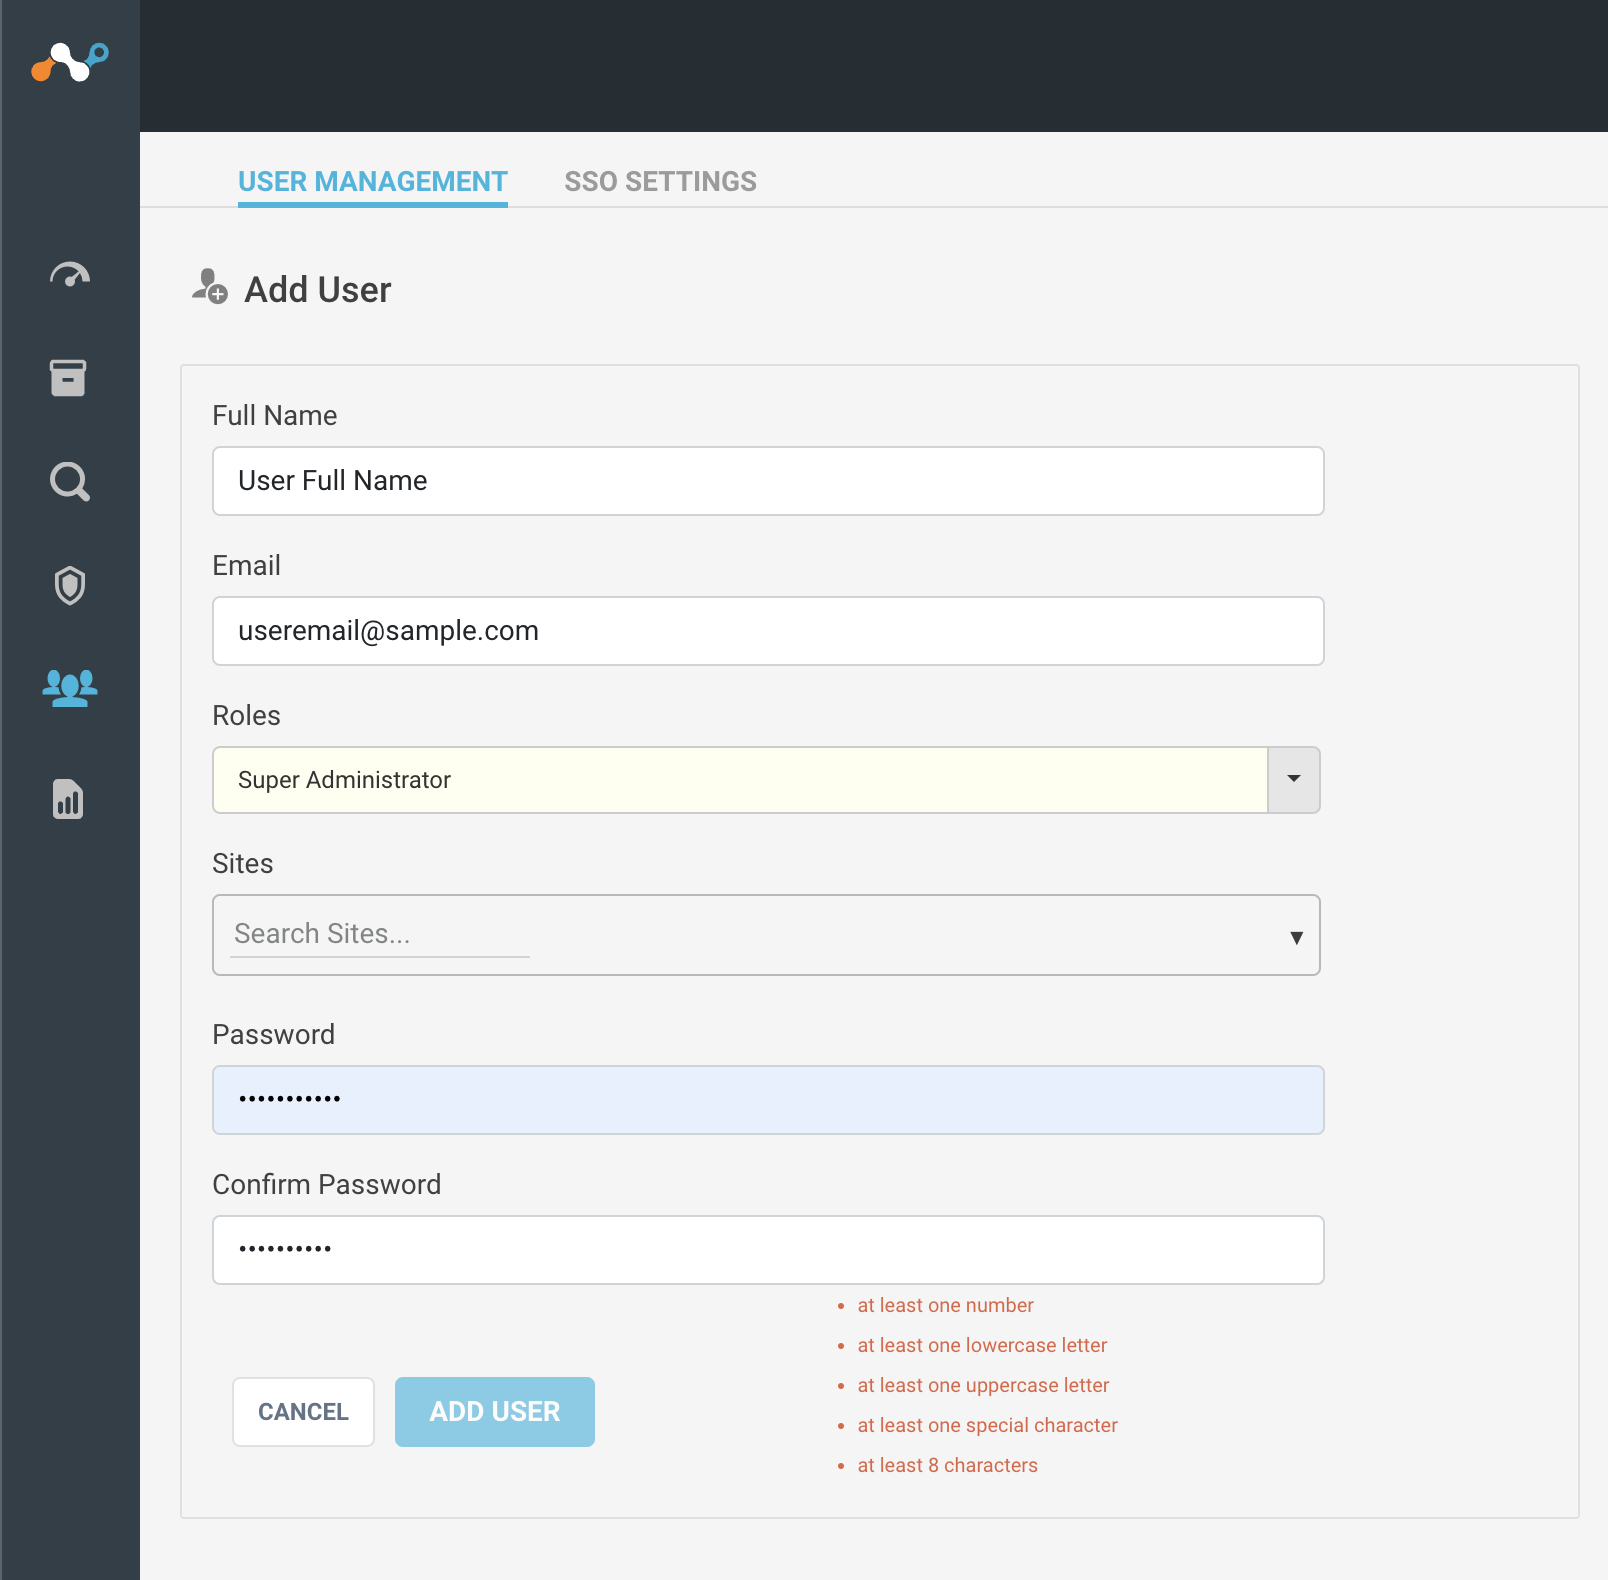
Enter the full name of the user.
Fill in the user email address.
Select the user role from the dropdown list for the role based access control. You can select one or more roles for one user.
Select the site to assign to the user for scope based access control.
Set the password for the user and confirm it again.
Click the Add User button.
Modify an User Access Control
You can edit or delete the existing users. Follow the procedure to modify the user access controls:
 |
Navigate to Manage > Users menu.
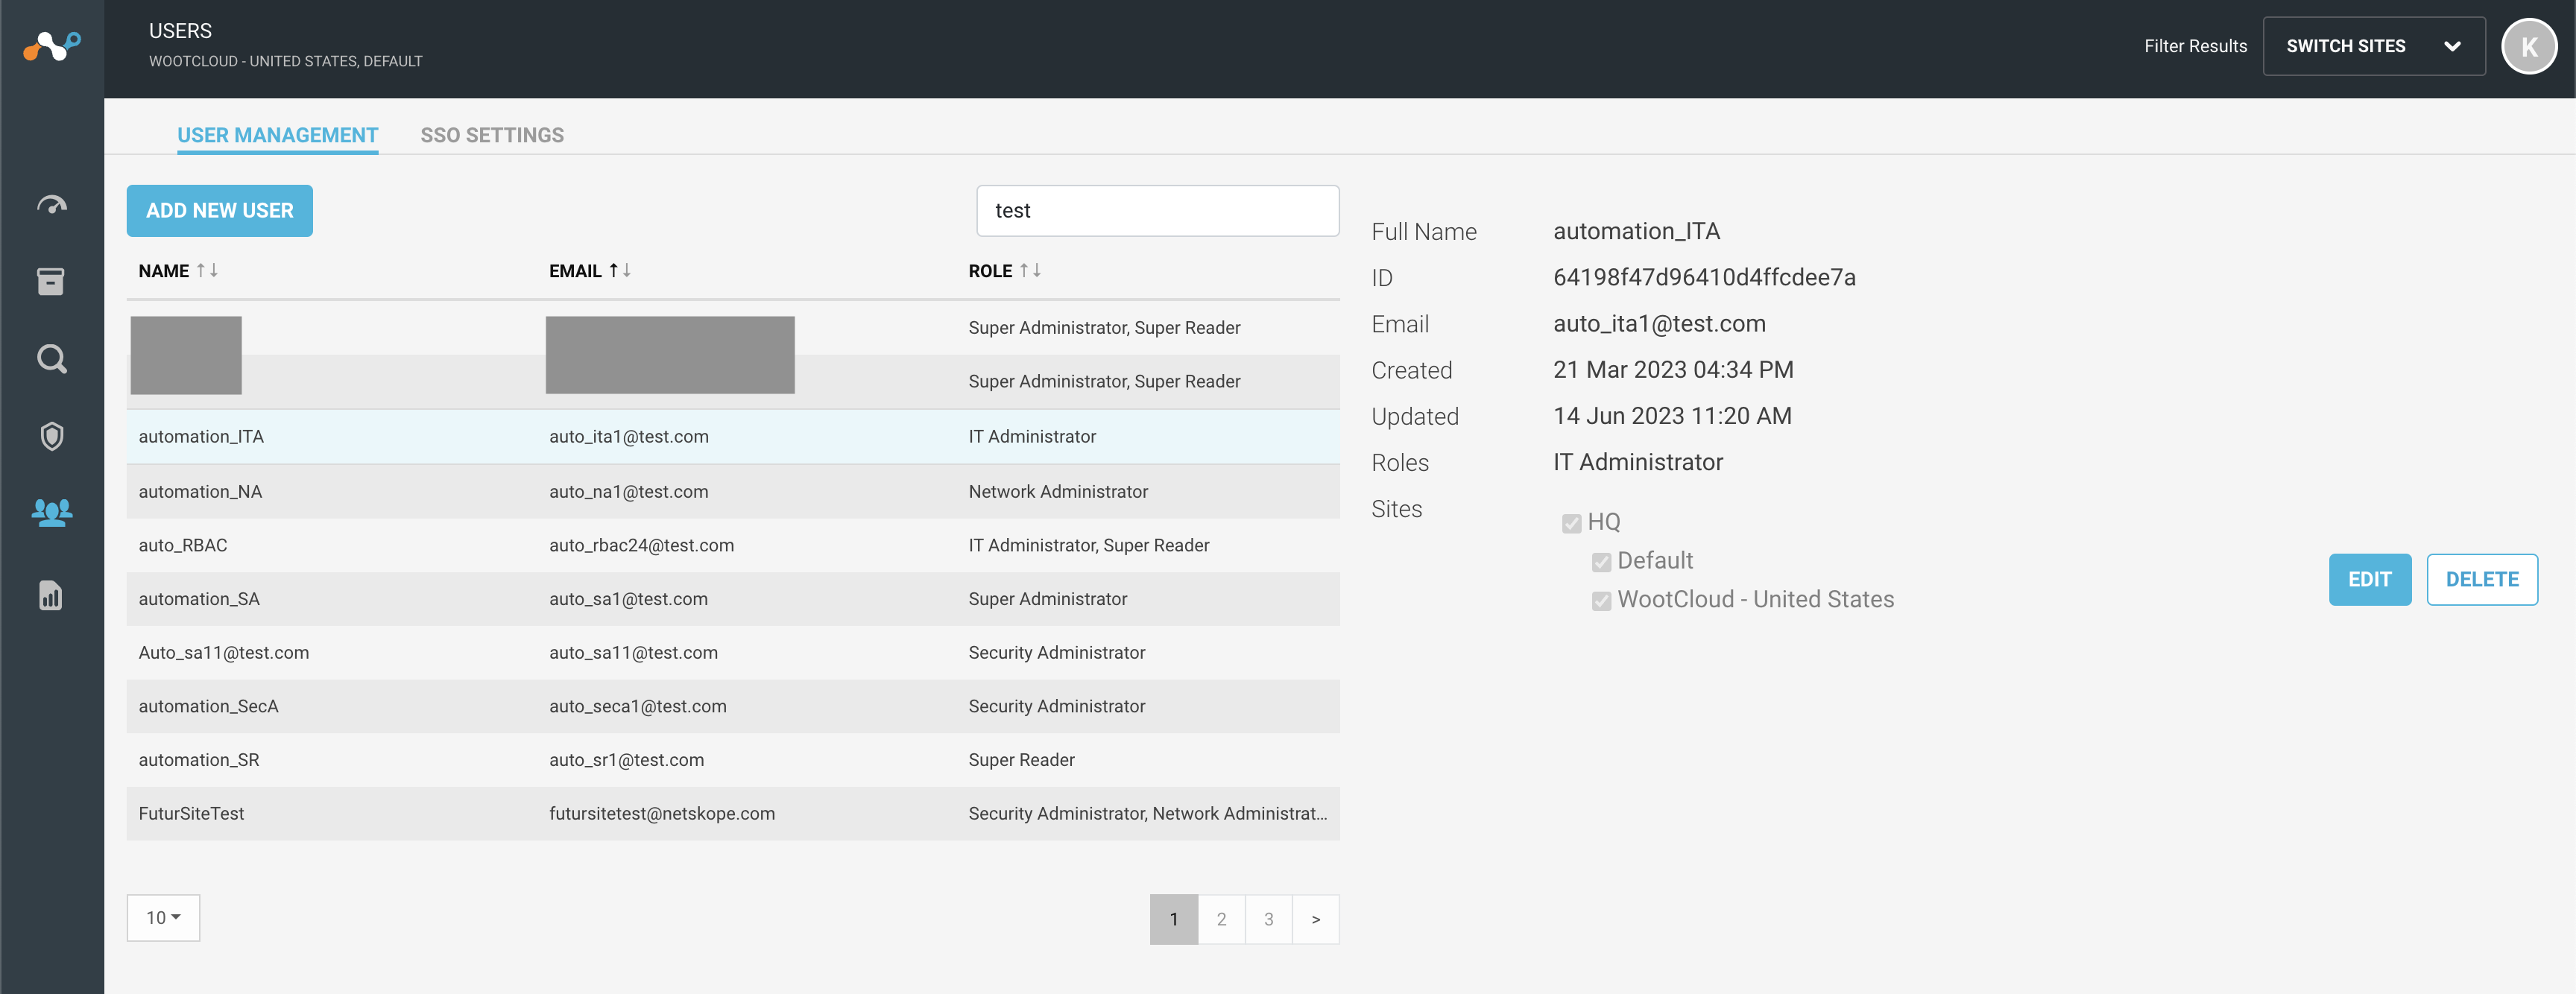
Click on any user you wish to modify in the User Management tab. You will see the user details on the right side of the screen.
Click the Edit button and a new window will appear to edit the user.
You can modify the user's full name, role and site scope.
Click the Save User button.
SSO Settings
By default, all SSO users are assigned the Super Reader role and have access to all the sites. Super Administrator configures the default role and scope of the SSO users who will log in for the first time. After the first log in, this user is treated like any other user and the role and scope can be modified.
A Super Administrator can follow the procedure to modify the default user access controls to the first time logging in SSO users:
 |
Navigate to Manage > Users menu.
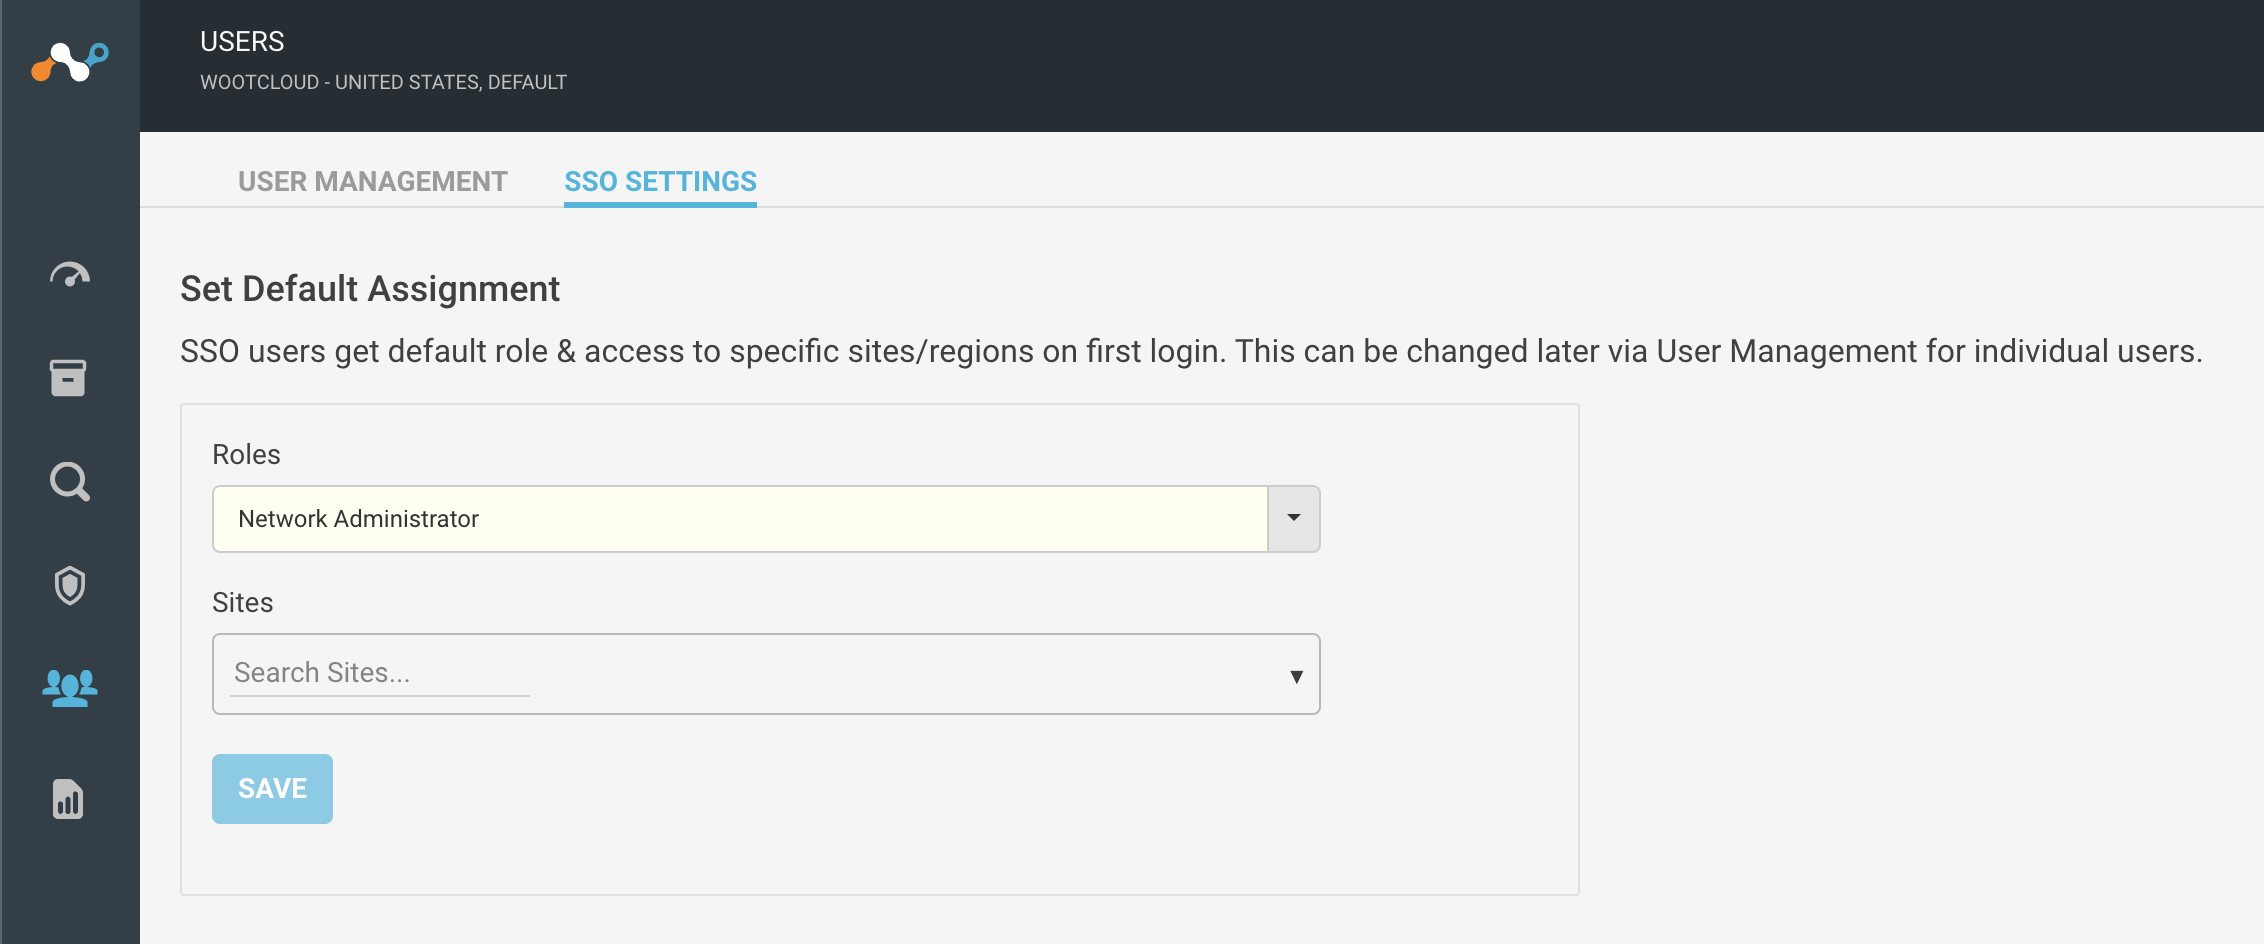
Navigate to the SSO Settings tab.
Select the role from the dropdown.
Select the sites to control the scope for the SSO users.
Click the Save button.