Configure Okta for the Next Generation API Data Protection
To configure Okta for the Next Generation API Data Protection, follow the instructions below.
Prerequisite
Before configuring Okta for the Next Generation API Data Protection, review the prerequisites.
The API Access Management Admin role is required to create an application in Okta and grant access to Netskope.
The Super Admin role is required to grant Okta API scopes.
Create an Application in Okta
Okta authenticates users by a specific authorization URL, and not a centralized authorization endpoint. The user should create the application and provide the client ID, client secret, and Okta domain values. This ensures Okta will connect to your application and retrieve audit log entries through the API.
To create an application in Okta, follow the instructions below:
Log in to your Okta admin console at https://{your--domain}.okta.com with an API Access Management Admin role.
On the left navigation, navigate to Applications > Applications and click Create App Integration.
Figure 26. Okta Create App Integration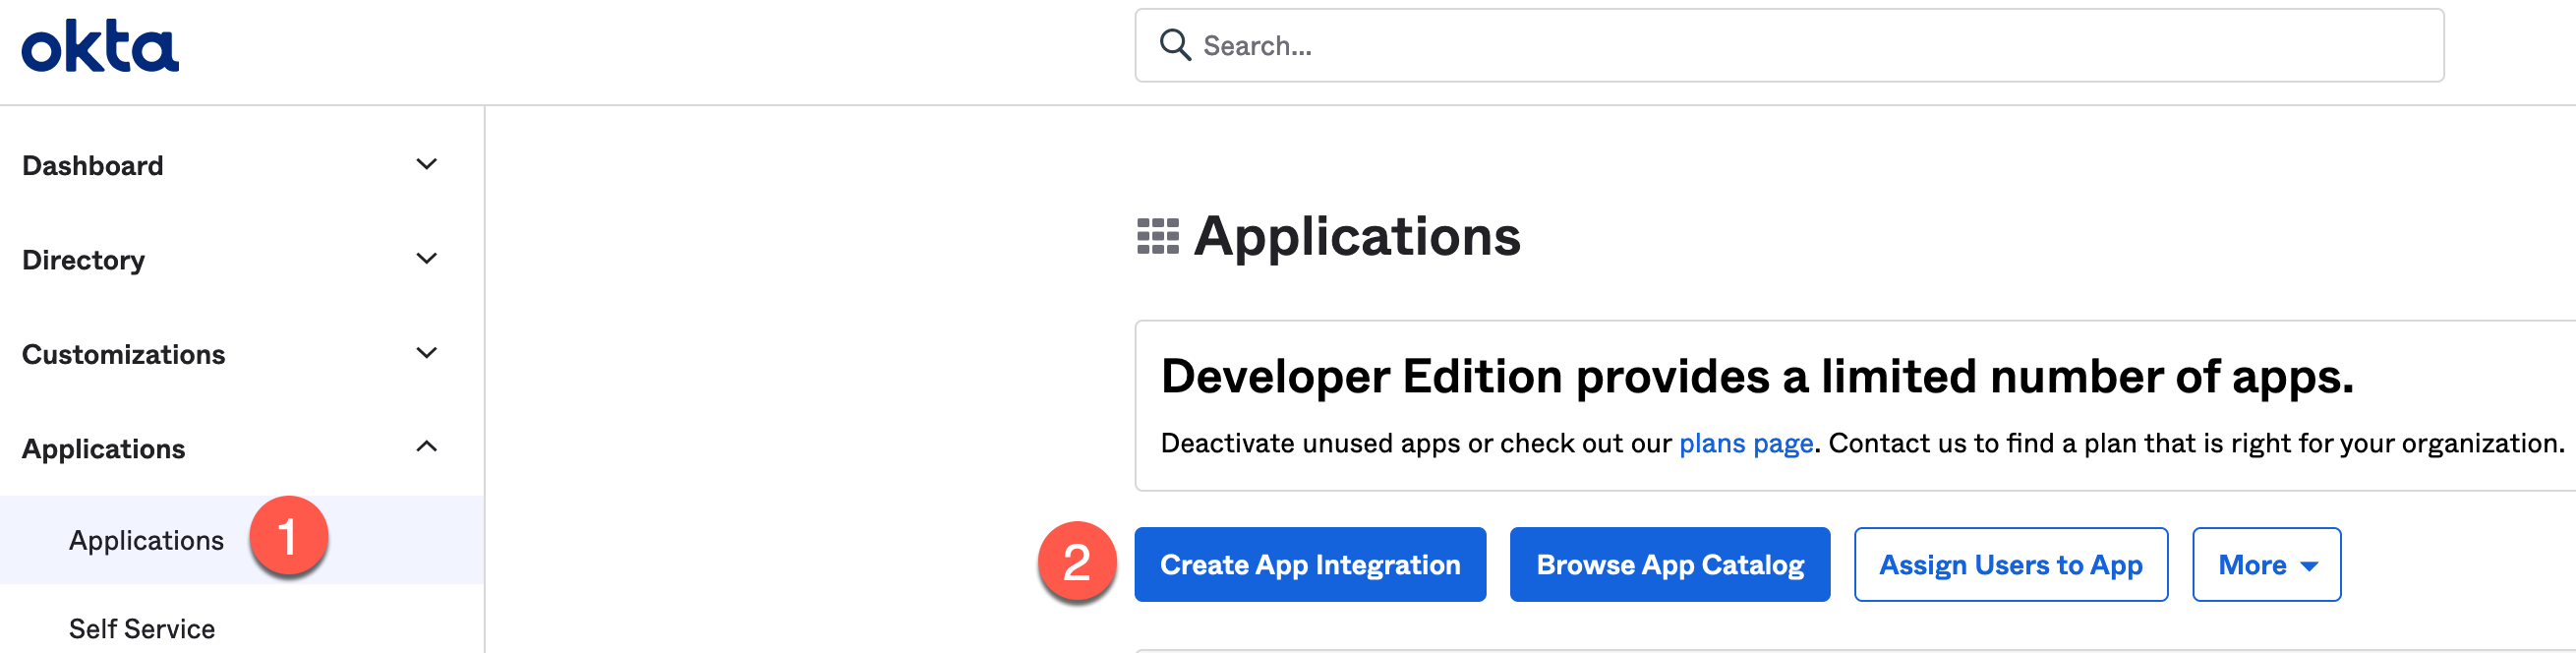
For the Sign-in method, select OIDC - OpenID Connect and for Application type, select Web Application.
Figure 27. Okta Create a New App Integration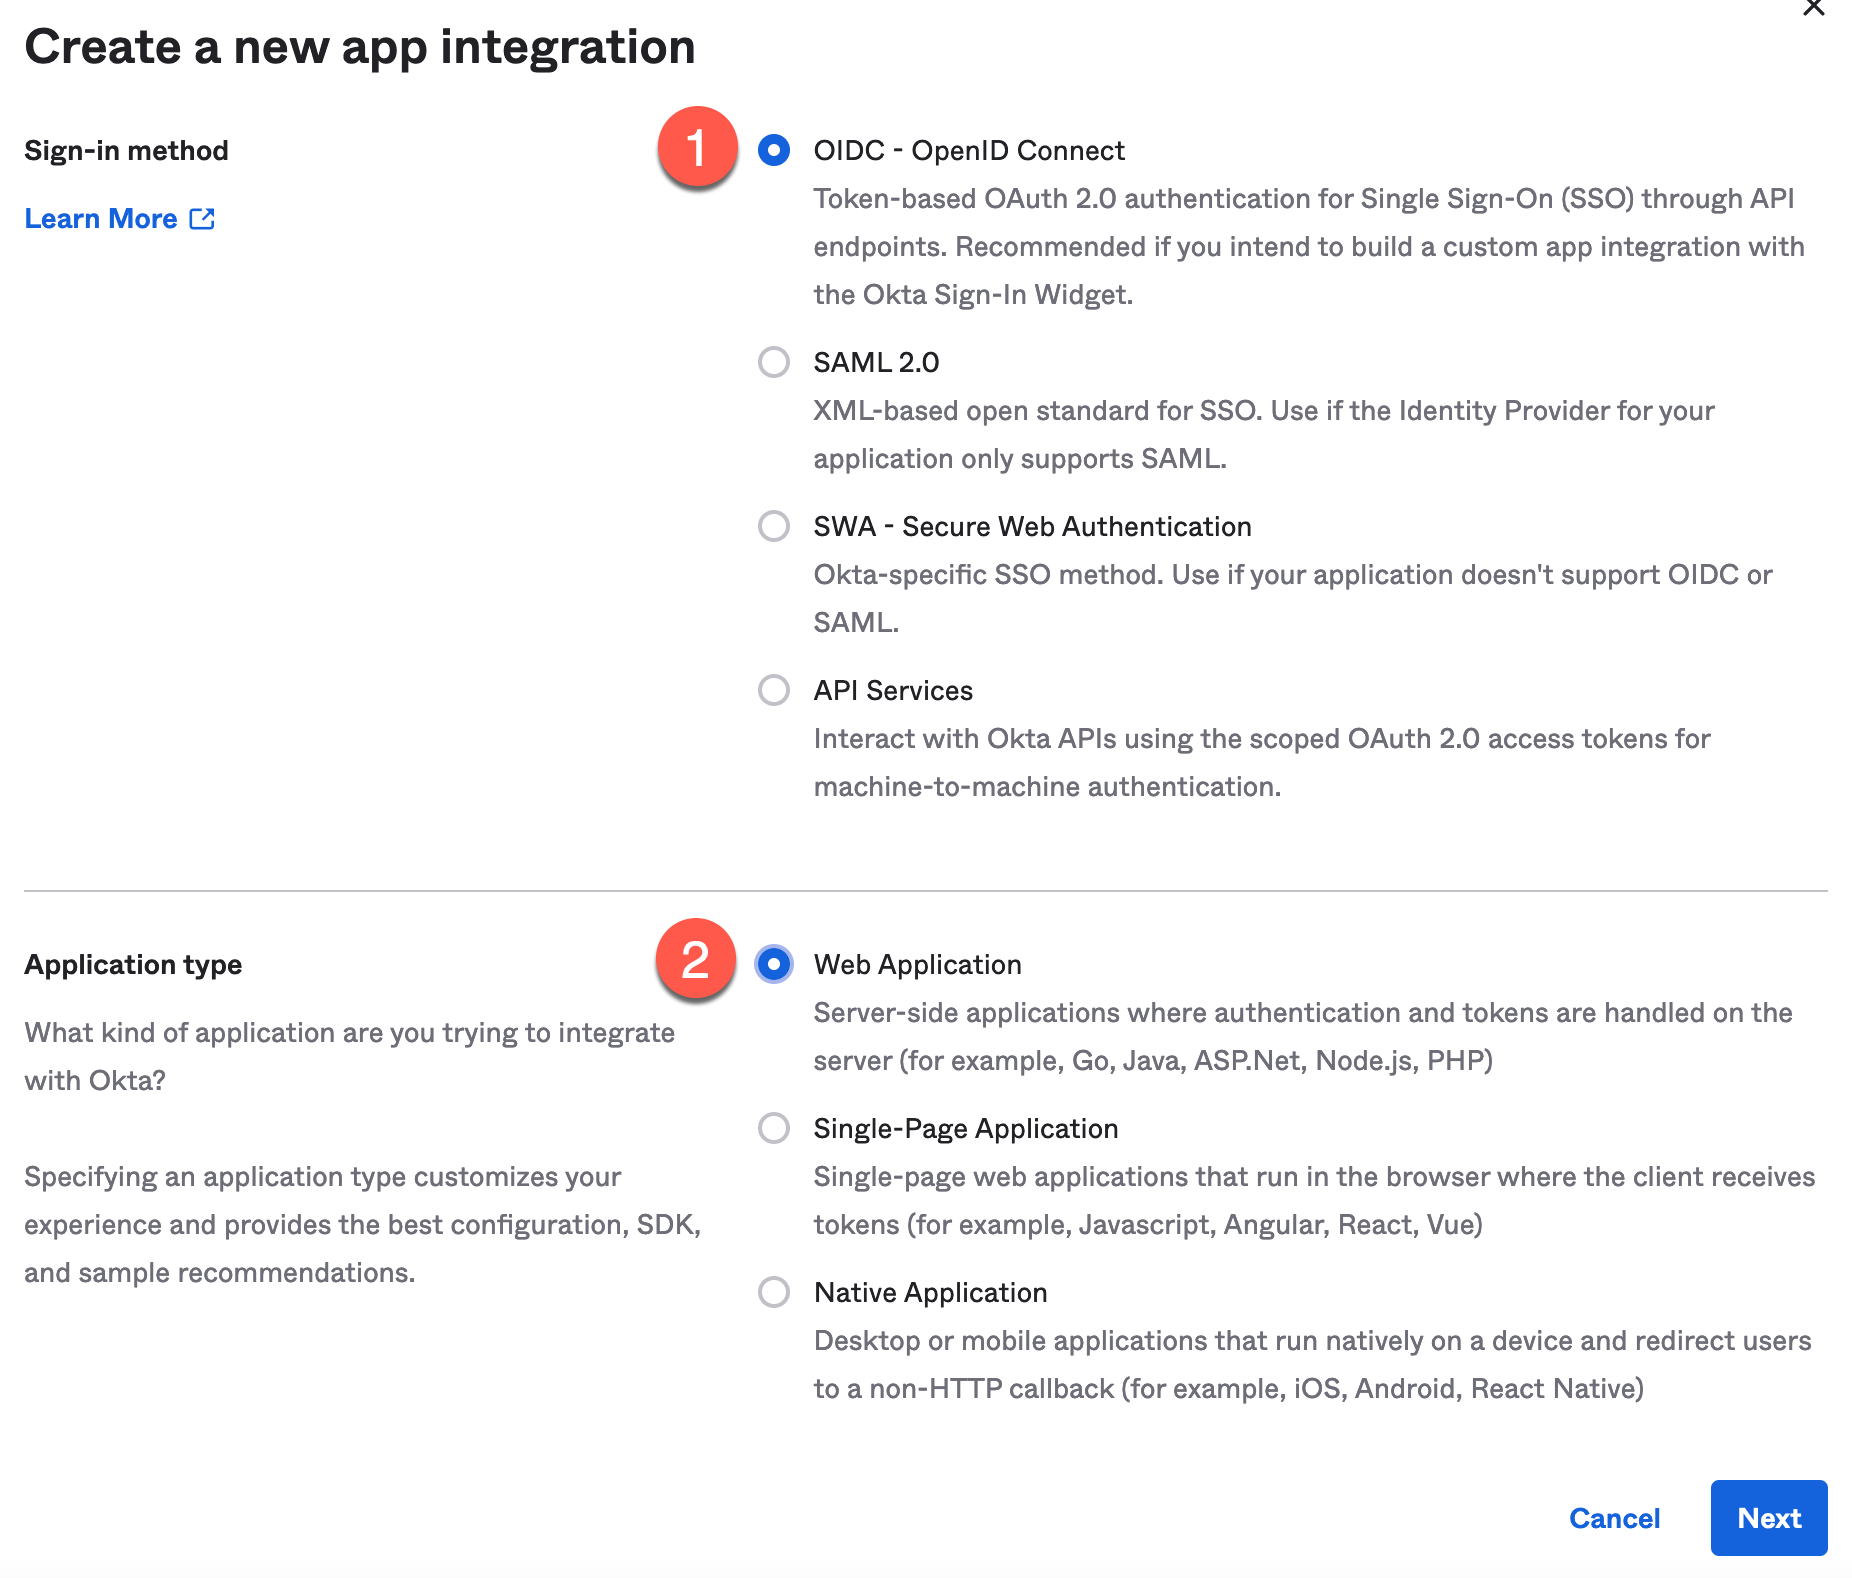
Click Next.
In App integration name, enter the name of the web app.
Figure 28. Okta New Web App Integration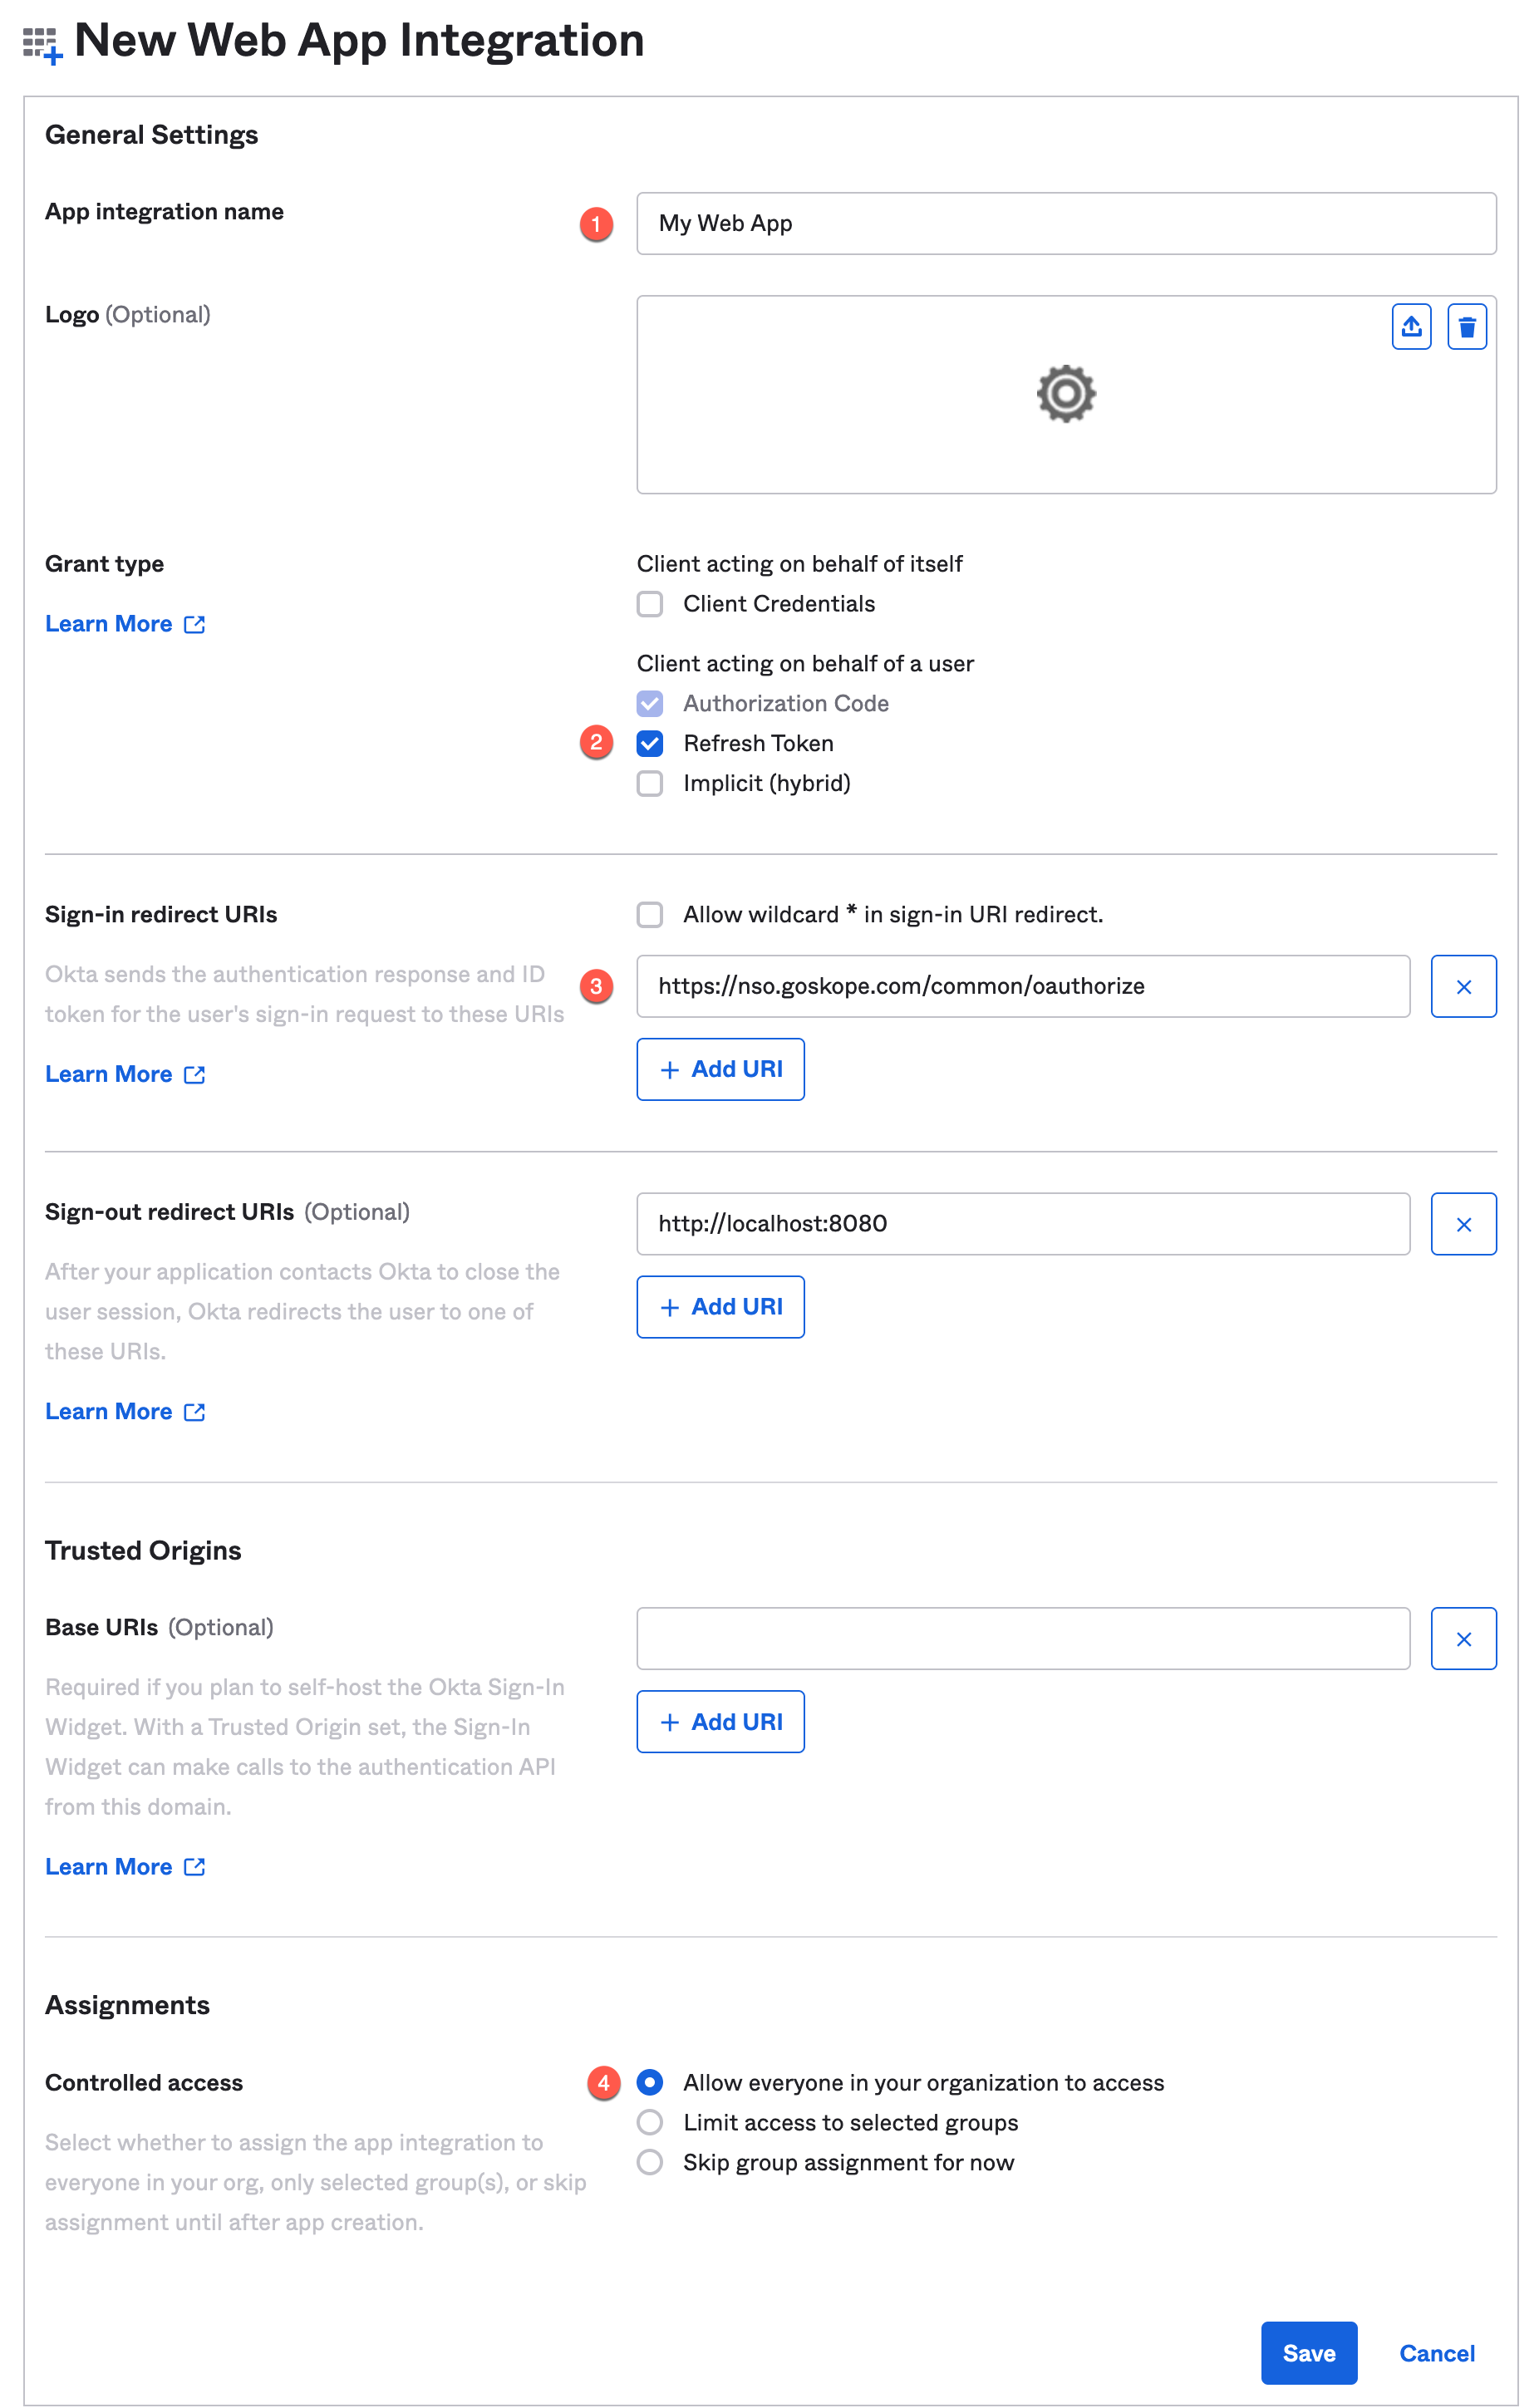
Under Grant type, select the Refresh Token checkbox.
In Sign-in redirect URIs, enter
https://nso.goskope.com/common/oauthorize.Under Assignments, select the Allow everyone in your organization to access option.
Click Save.
You will be redirected to a page displaying information related to the new application.
Note down the Client ID, Client secret, and Okta domain values.
Figure 29. Okta Client Credentials and Domain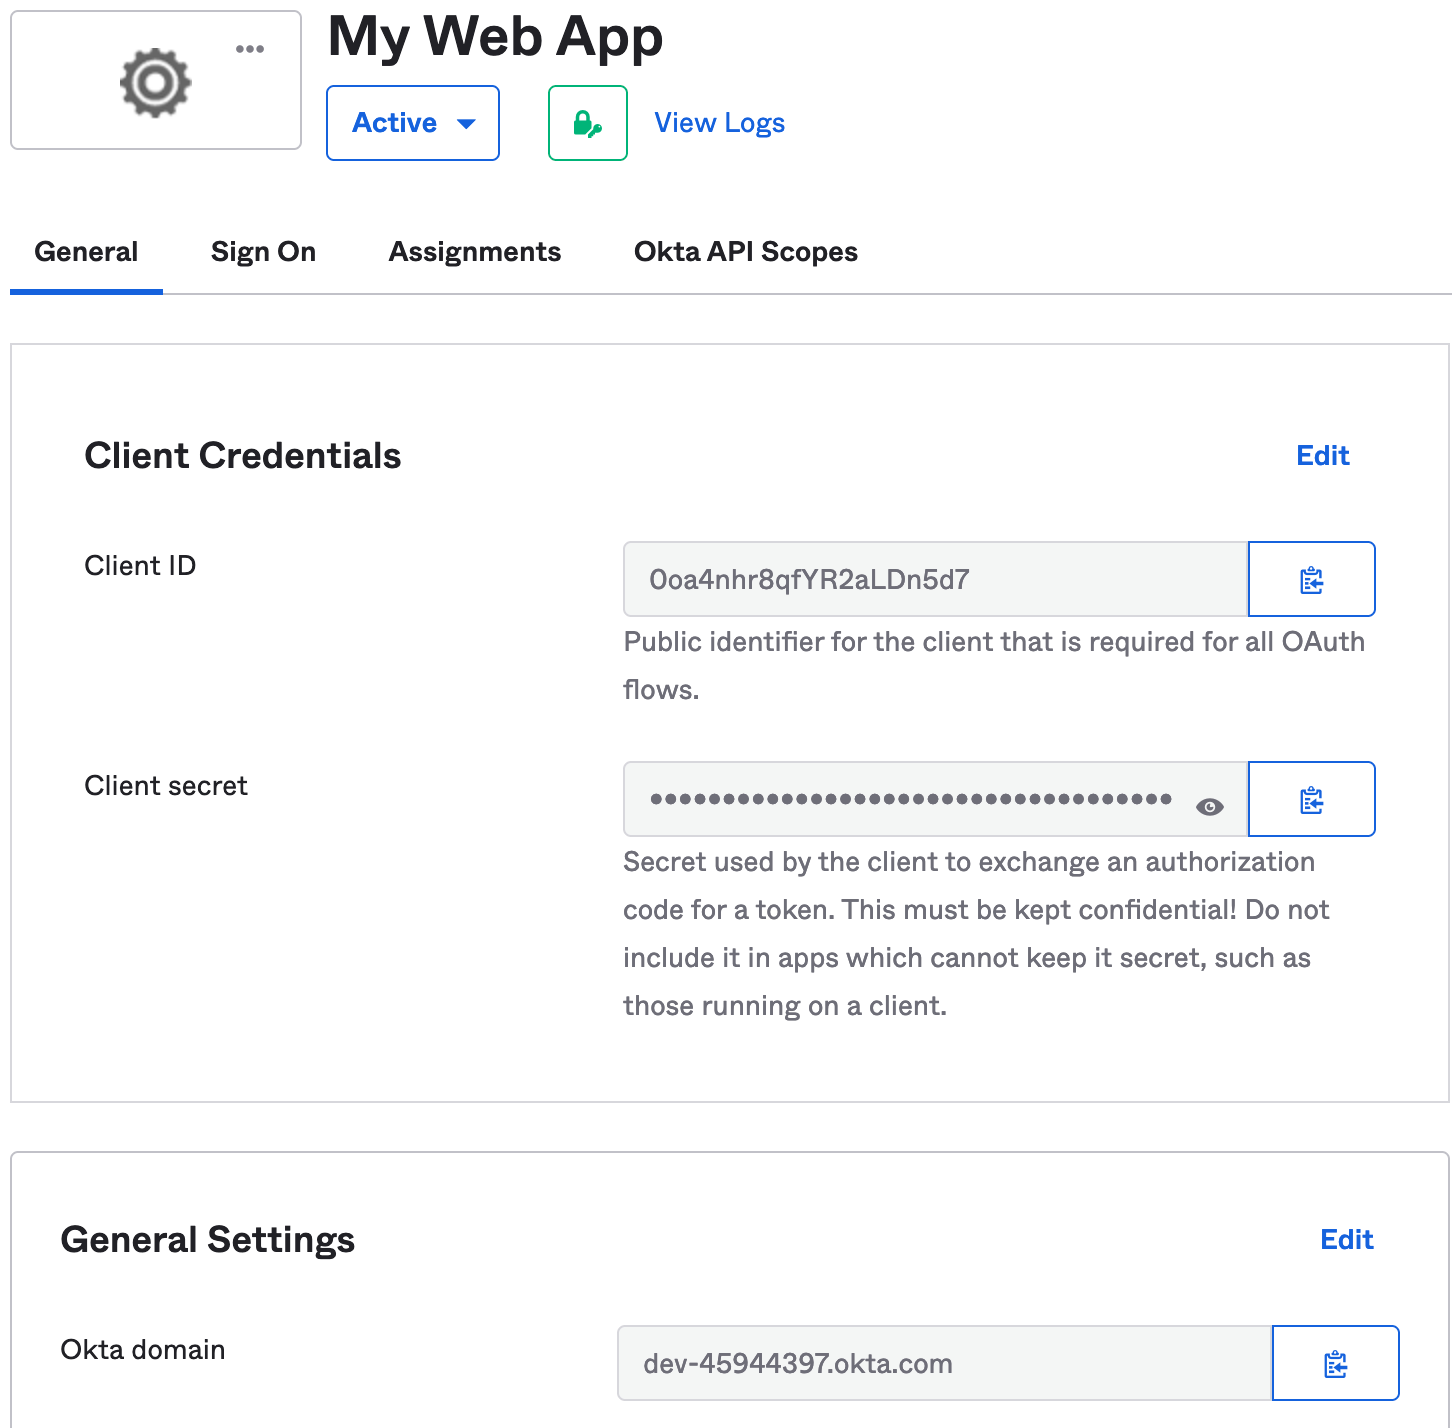
These values will be required when you configure the Okta instance in the Netskope UI.
Log off from your Okta admin console.
Grant Okta API Scope
Once you have created the application in Okta, you should grant the required Okta API scopes to the application. To do so, follow the steps below:
Important
Only the Super Admin role has permissions to grant scopes to an app.
Log in to your Okta admin console at https://{your--domain}.okta.com with a Super Admin role.
On the left navigation, navigate to Applications > Applications.
Under Browse App Catalog, identify the new application you created and click on it.
Figure 30. Okta Browse App Catalog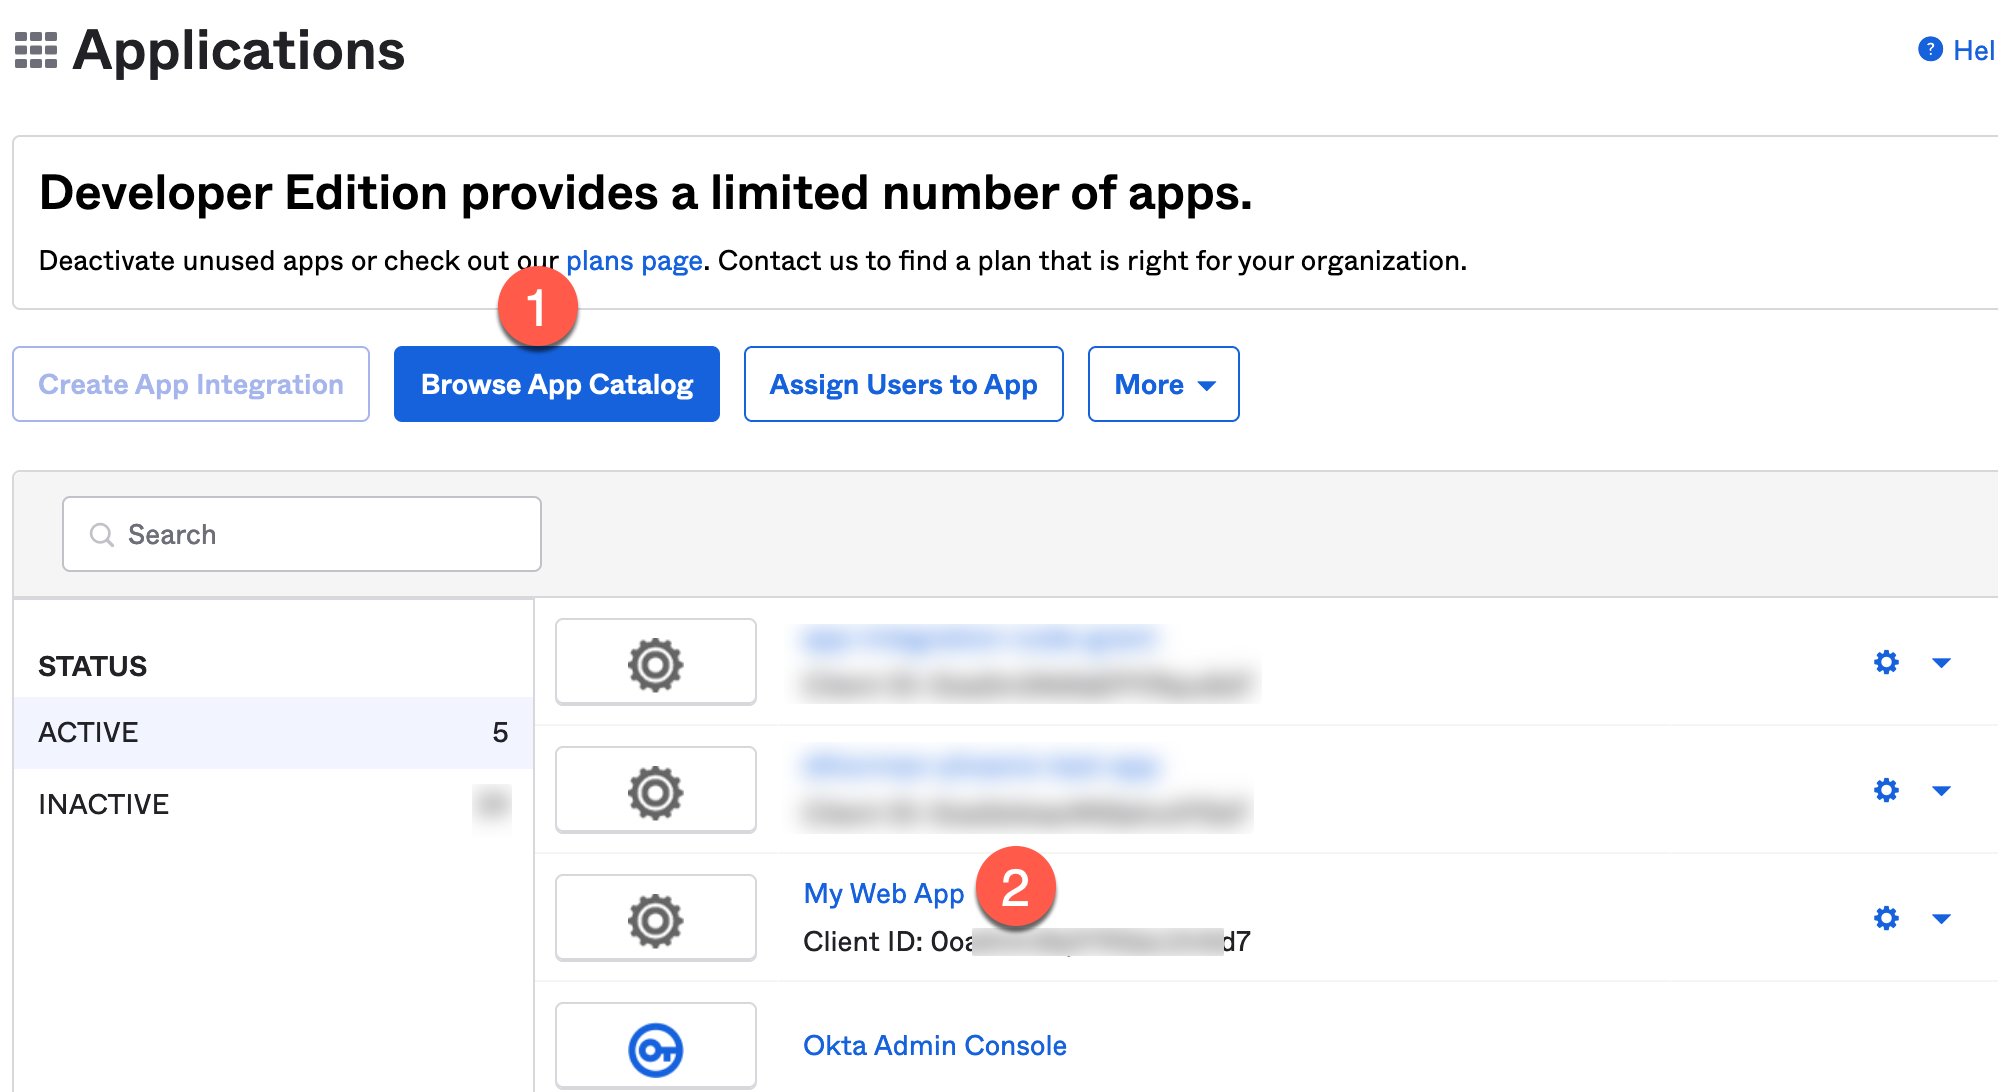
Under the General tab, scroll down to the General Settings section. Click Edit and then select the Use persistent token option for Refresh token behavior and click Save.
Figure 31. Okta Refresh Token Behavior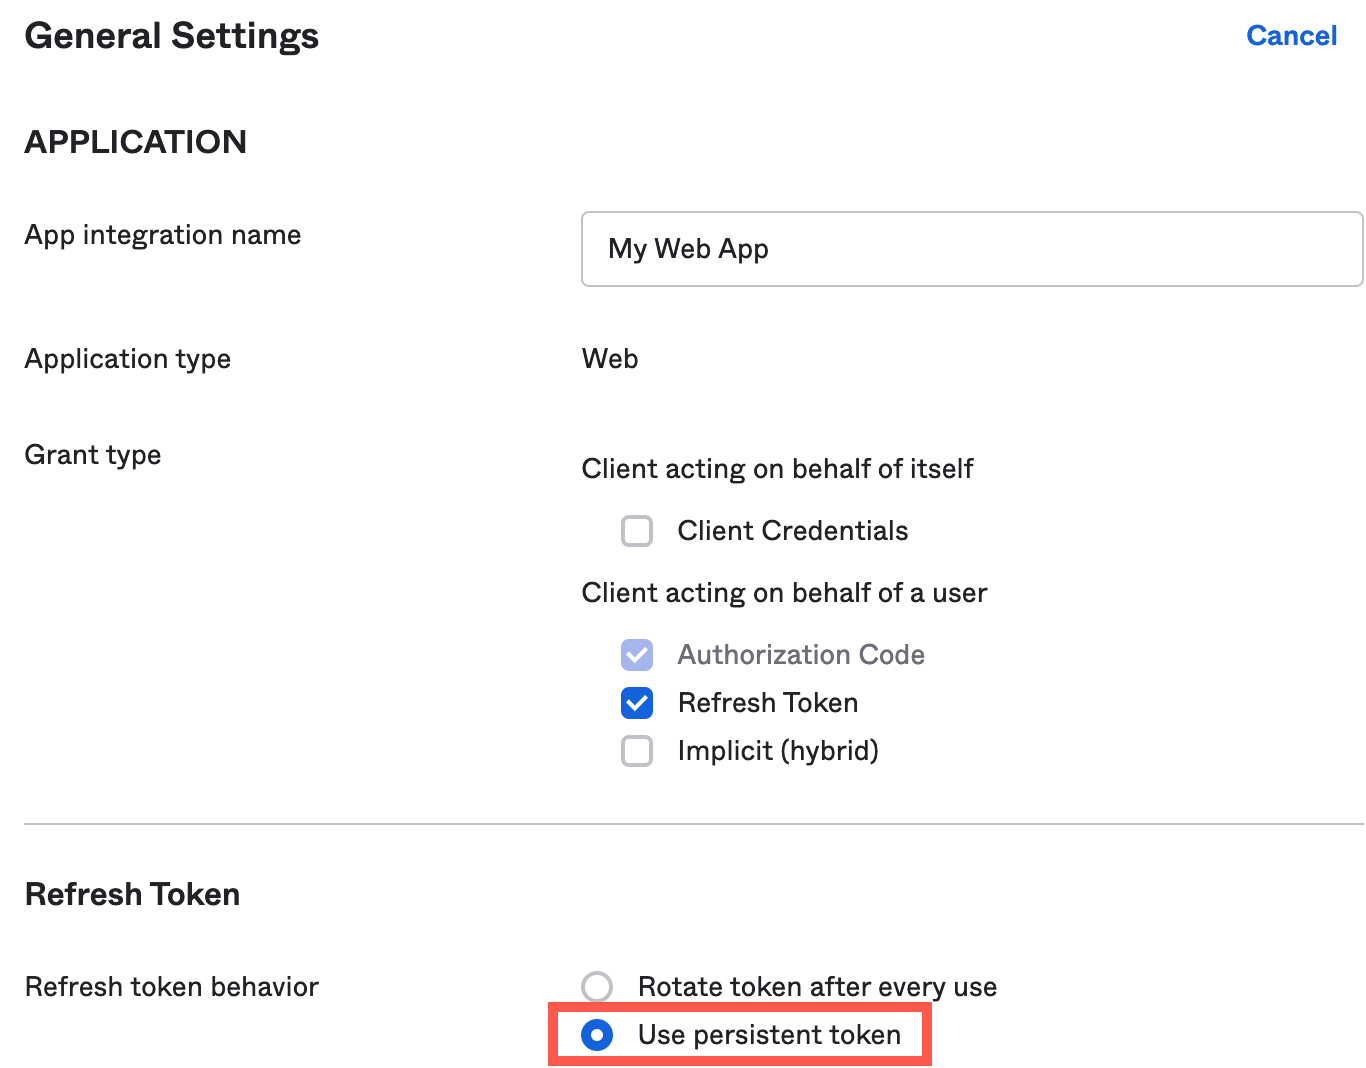
Under Okta API Scopes tab, grant the okta.logs.read and okta.users.read scopes.
Figure 32. Okta API Scopes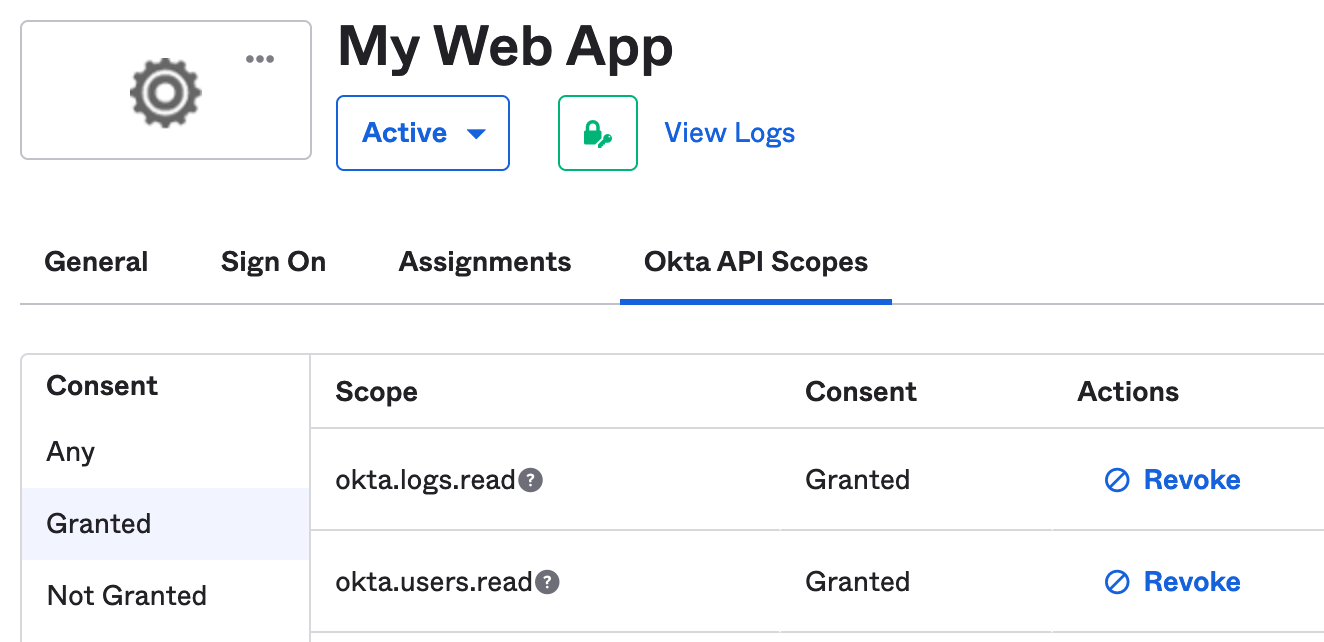
(Optional) If your Okta configuration has any third-party Identity Providers (IdP) other than Okta, for example, Google, Microsoft, etc., navigate to Security > Identity Providers, click an existing IdP entry and note down the IdP ID, or create a specific IdP for granting access to Netskope.
Figure 33. Okta Identity Providers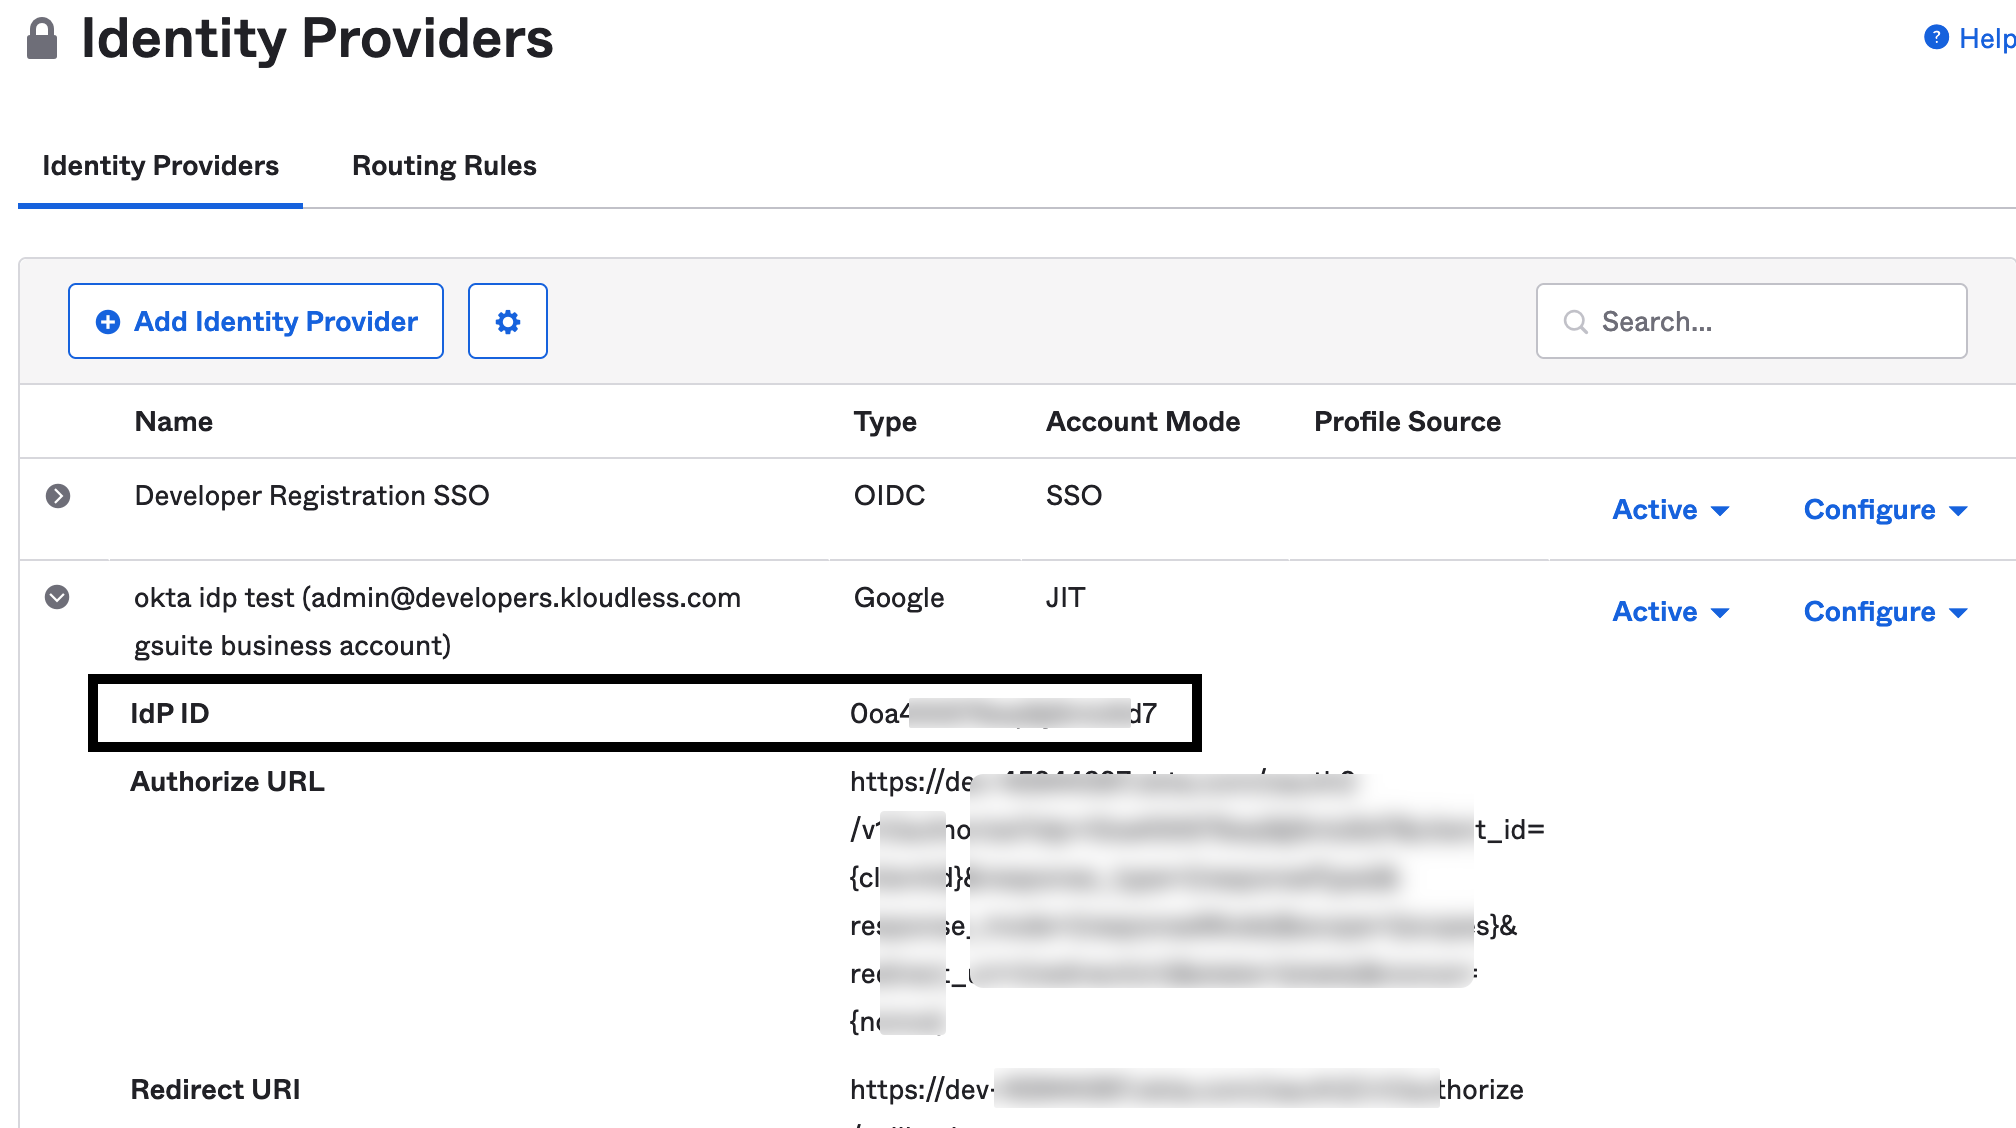
For additional IdP information: Add an external Identity Provider
Configure Okta Instance in Netskope UI
To authorize Netskope to access your Okta instance, follow the steps below:
Log in to the Netskope tenant UI: https://<tenant hostname>.goskope.com and go to Settings > API-enabled Protection > SaaS > Next Gen.
Under Apps, select Okta and click Setup Okta Instance.
The Setup Instance window opens.
Enter the following information as noted in step 10 and 5 from the earlier procedures:
Domain: Enter the Okta domain name without the web protocol. Example: {your--domain}.okta.com
Client ID: Enter the client ID.
Client secret: Enter the client secret.
(Optional) External Identity Provider ID: Enter the IdP ID from step 5 (from Grant Okta API Scope). If this field is left empty, Netskope uses the default Okta IdP.
Click Grant Access.
You will be redirected either to the Okta or 3rd party SSO login page based on the value you entered in step 3d above.
Enter the Okta or 3rd party SSO login credentials.
Note
For Okta login page, log in using the API Access Management Admin role.
After logging in, you will be redirected to the successful result page. Click Close.
Refresh your browser, and you should see a green check icon next to the instance name.
In the current release, you can receive audit events and standard user behavior analytic alerts in Skope IT. To know more: Next Generation API Data Protection Skope IT Events.