Microsoft Azure Monitor Plugin for Log Shipper
This document explains how to configure the Microsoft Azure Monitor integration with the Cloud Log Shipper module of the Netskope Cloud Exchange platform.
Event Support | Yes |
Alert Support | Yes |
WebTx Support | No |
A Netskope Tenant (or multiple, for example, production and development/test instances).
A Netskope Cloud Exchange tenant with the Log Shipper module already configured.
Microsoft Azure Application’s Tenant ID, Client ID and Client Secret
Microsoft Azure Log Analytic Workspace
Microsoft Azure Monitor Data Collection Endpoint
Microsoft Azure Monitor Data Collection Rule
Connectivity to the following host: https://portal.azure.com/
Configure a Log Analytics Workspace.
Configure an Application and get your Tenant ID, Application ID and Client Secret.
Configure a Data Collection Endpoint and get your DCE URI.
Configure a Basic Table in Log Analytics Workspace and get your Data Collection Rule Immutable ID.
Assign a Permission to DCR and DCE.
Configure the Microsoft Azure Monitor plugin.
Configure a Log Shipper Business Rule for Microsoft Azure Monitor.
Configure Log Shipper SIEM mappings for Microsoft Azure Monitor.
Validate the Microsoft Azure Monitor plugin.
Click play to watch a video.
Log in to Azure and select Log Analytics Workspace
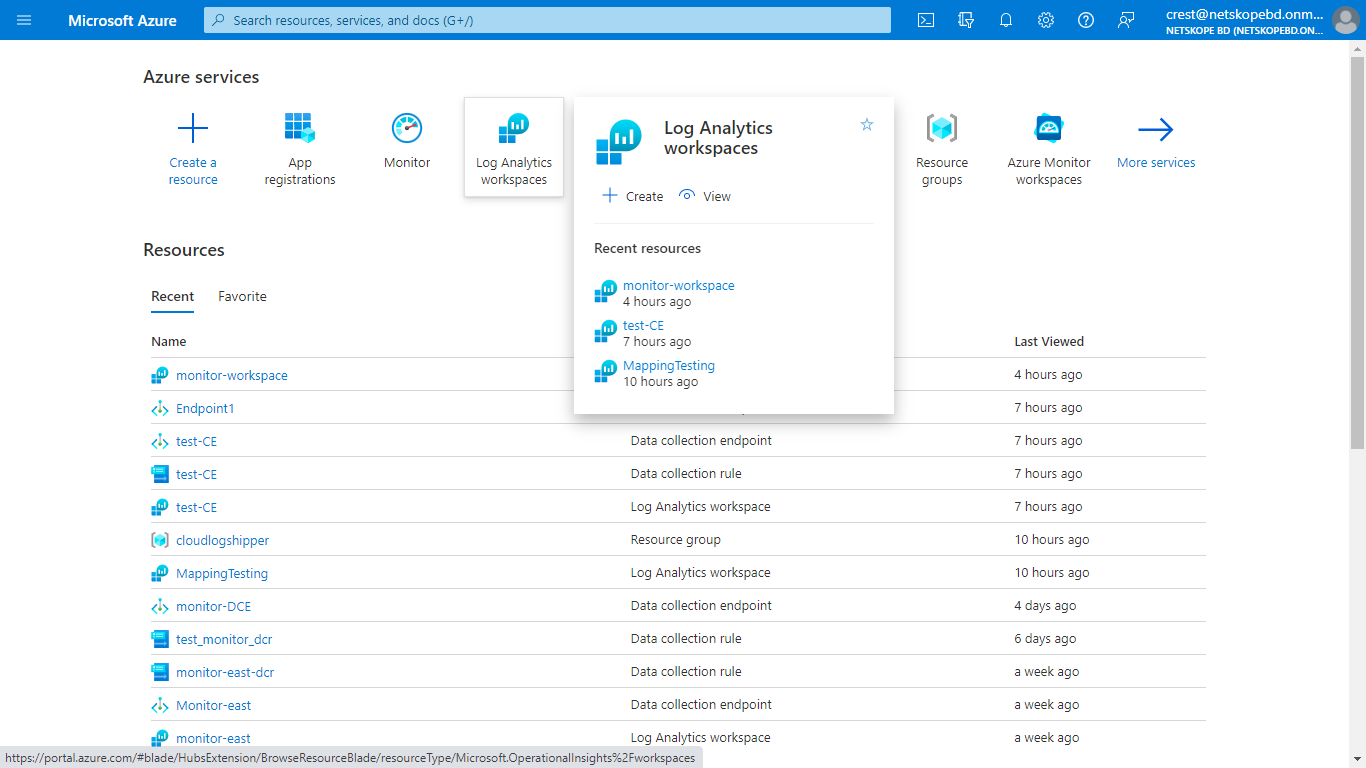
Click Create Tab on the top.
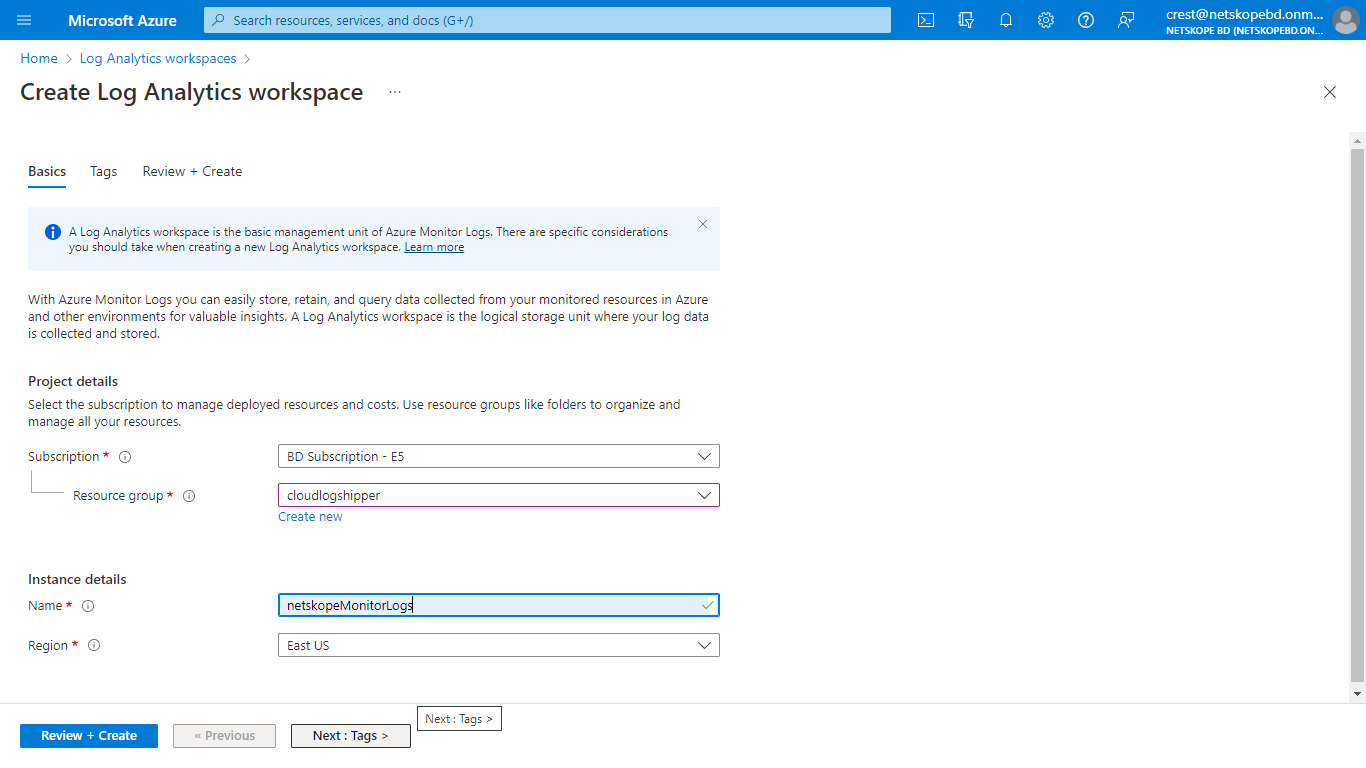
Select Subscription, and then select an existing Resource Group (or create a new one).
Enter a name for your Log Analytics Workspace, select a region, and then select Next > Next > Create.
Log in to Azure with an account that has the Global Administrator role.
Go to Azure App Registration > New Registration.
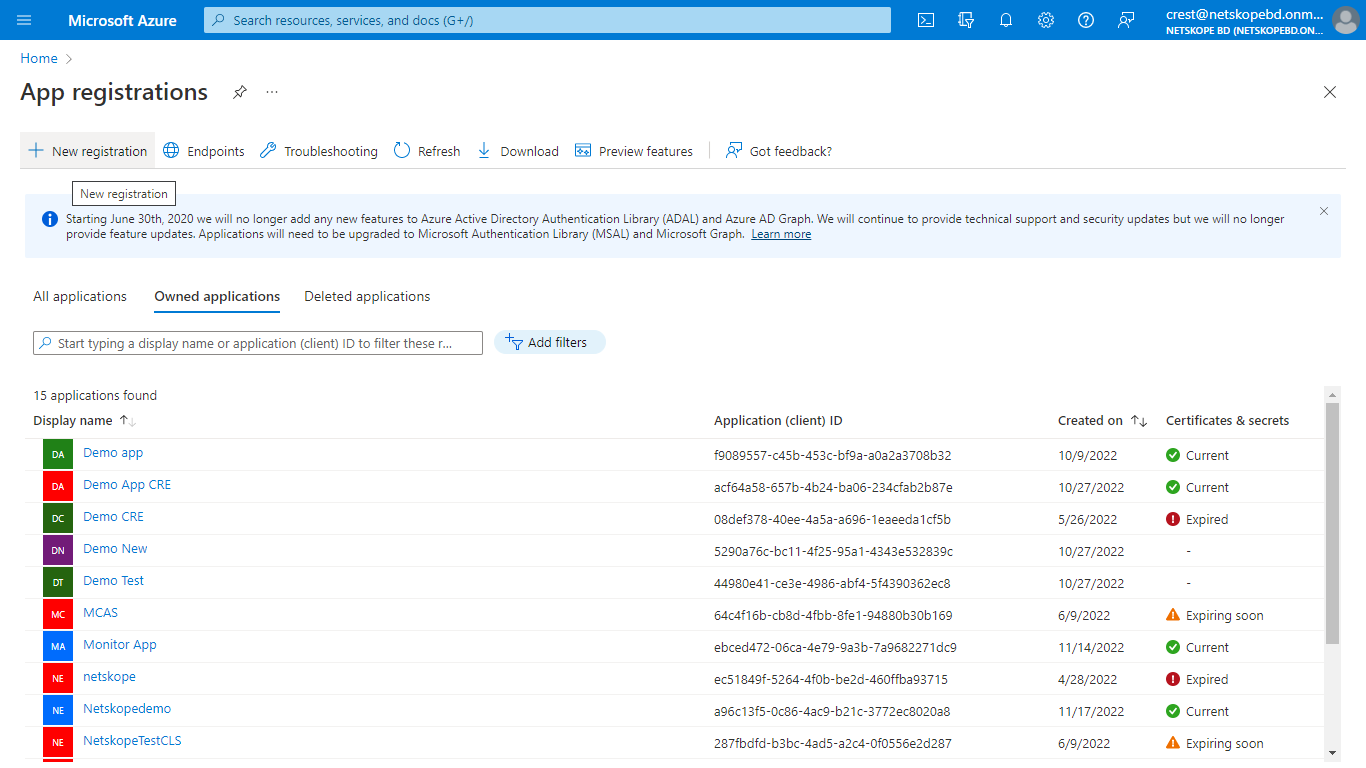
In the registration form, enter a name for your application, and then click Register.
Make a copy of the Tenant ID and Application (client) ID on the application page.
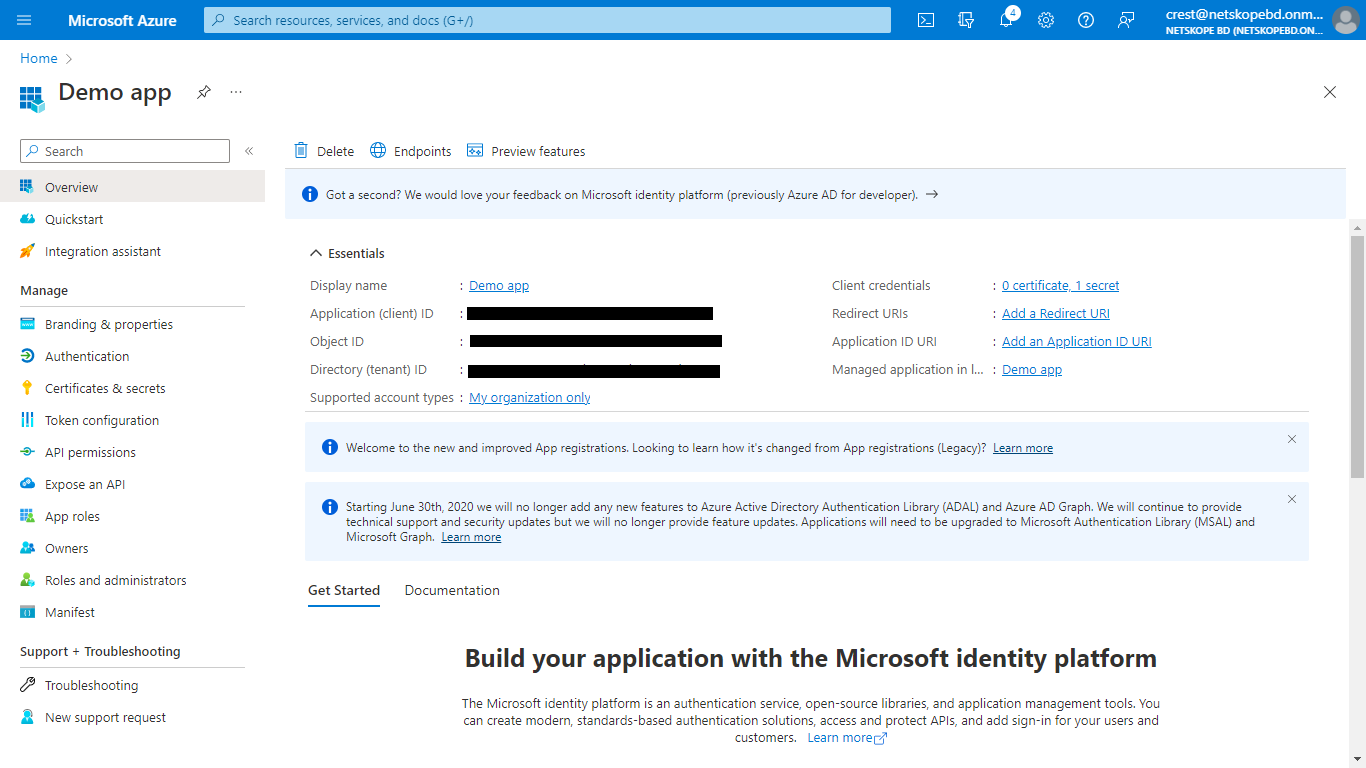
Click Certificates & secrets, and then click New client secret to generate Client secret. Add a description and Expire time, and then click Add.
Copy the value of Secret, as it will only be displayed once.
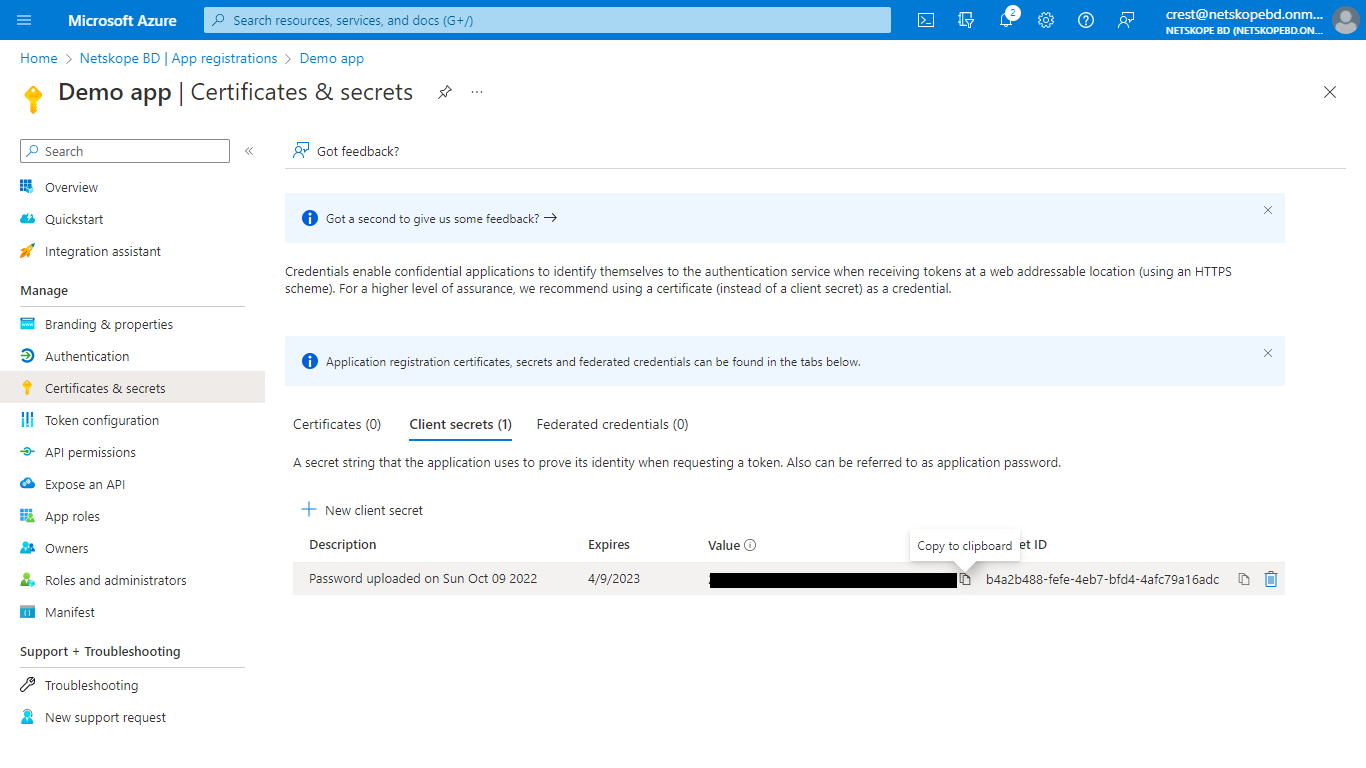
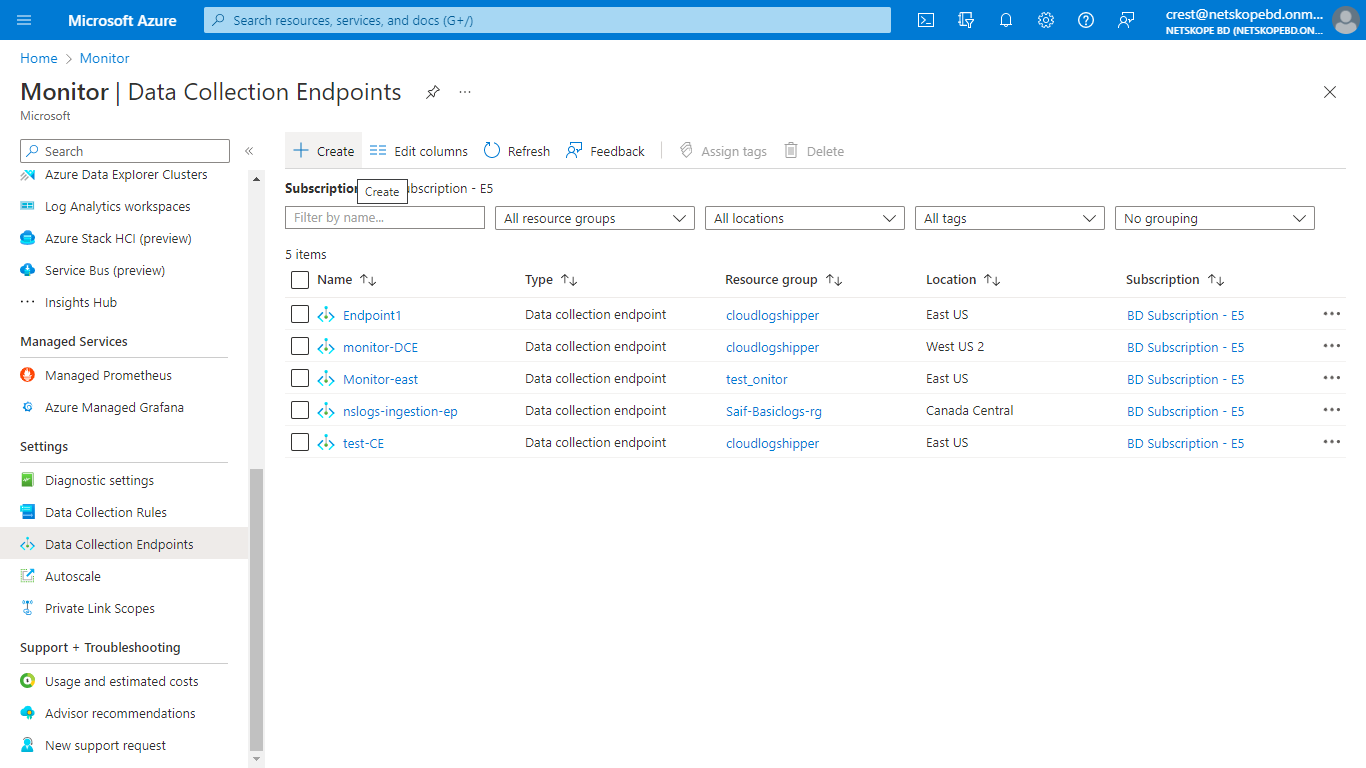
Go to Azure Home and select Monitor from the Azure services.
Select Data Collection Endpoints on the left panel, and then select Create.
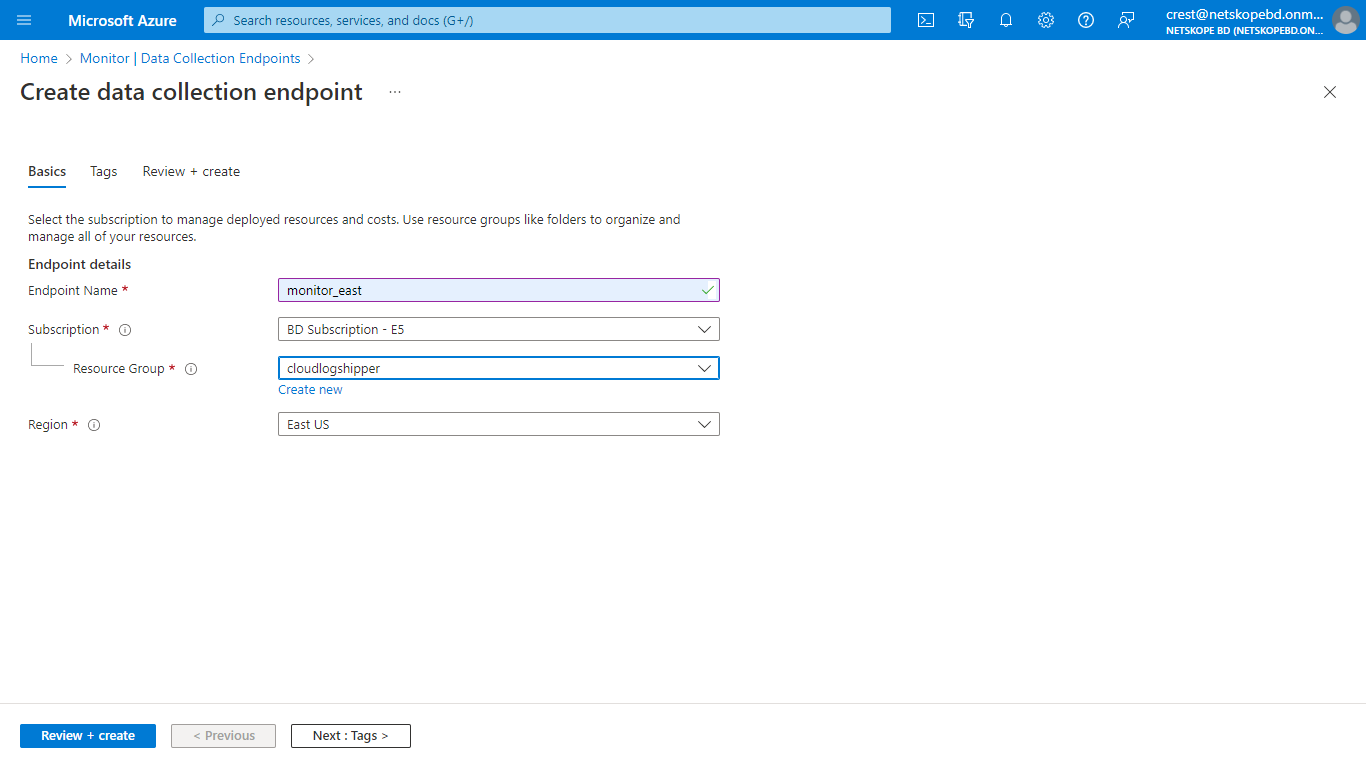
Enter a name for the Data collection Endpoint, select a Subscription and Resource Group, select a region (make sure that this region is the region of your Log Analytics Workspace) and click Review + create.
From the Overview tab, copy the Logs Ingestion that will be your Data Collection Endpoint DCE URI.
A Custom Log Analytics Table requires sample data to be uploaded for which to create a json file on your system with the following content:
[
  {
        "RawData":  {
        },
        "Application":  "",
        "DataType": "",
	"SubType": "",
	"TimeGenerated": "2022-11-01 12:00:00.576165"
    }
]
On the Azure home tab, go to Log Analytics Workspace, select the workspace created previously, select Tables. Click Create and select New Custom log (DCR based).
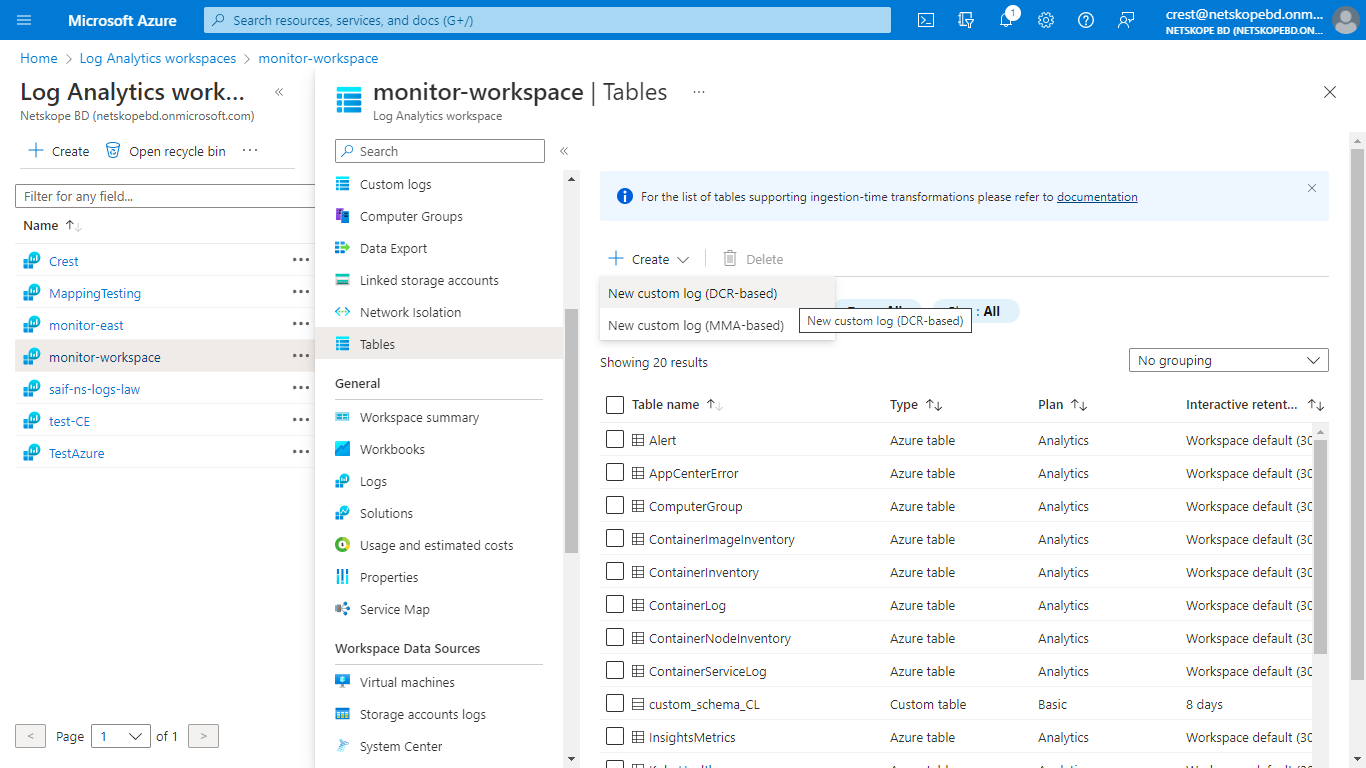
Enter a name for the table.
For Data Collection Rule, click Create a new data collection rule and select a Subscription and Resource Group from the dropdown lists. Enter the region for your Log Analytics Workspace, and click Done.
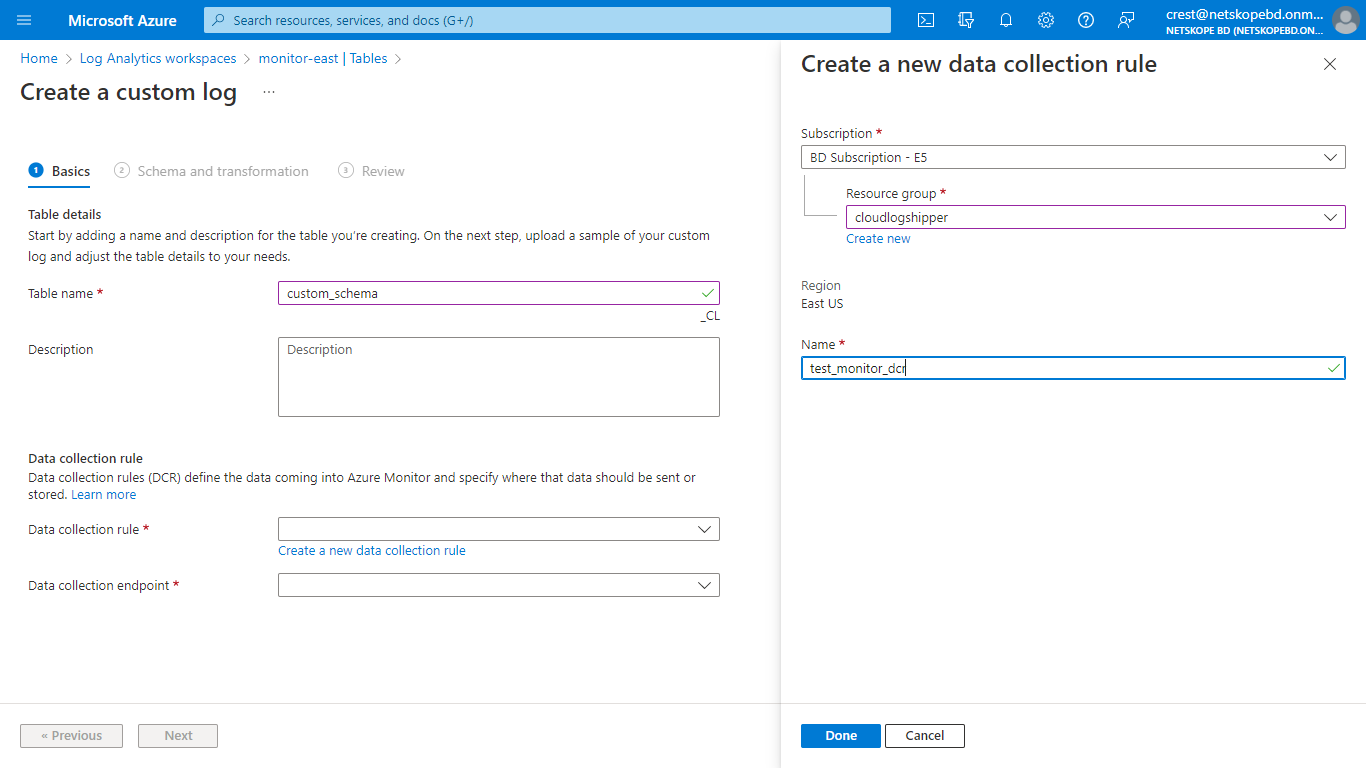
The new Data Collection Rule will be selected in the Data collection rule field, and then click Next.
On the Schema and Transformation tab, click Browse for Files and select the sample data json file you created previously.
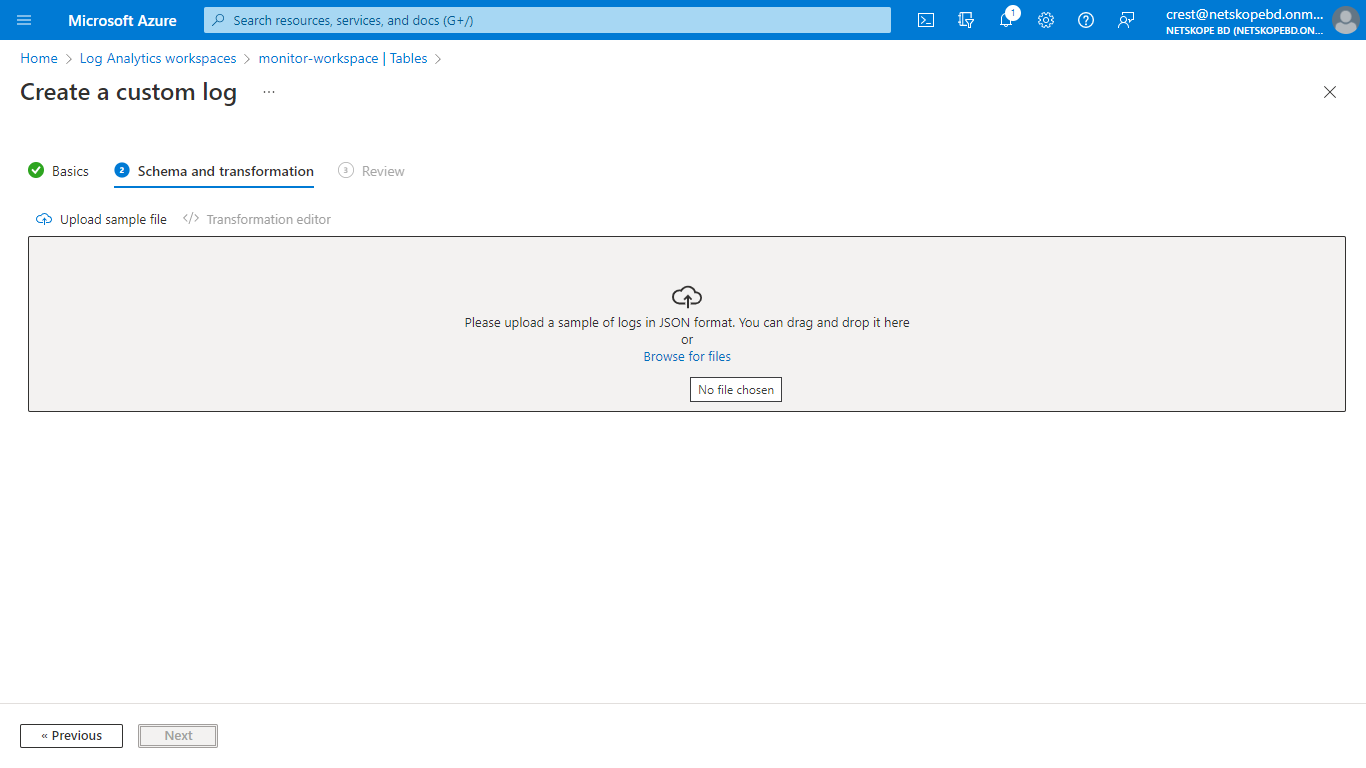
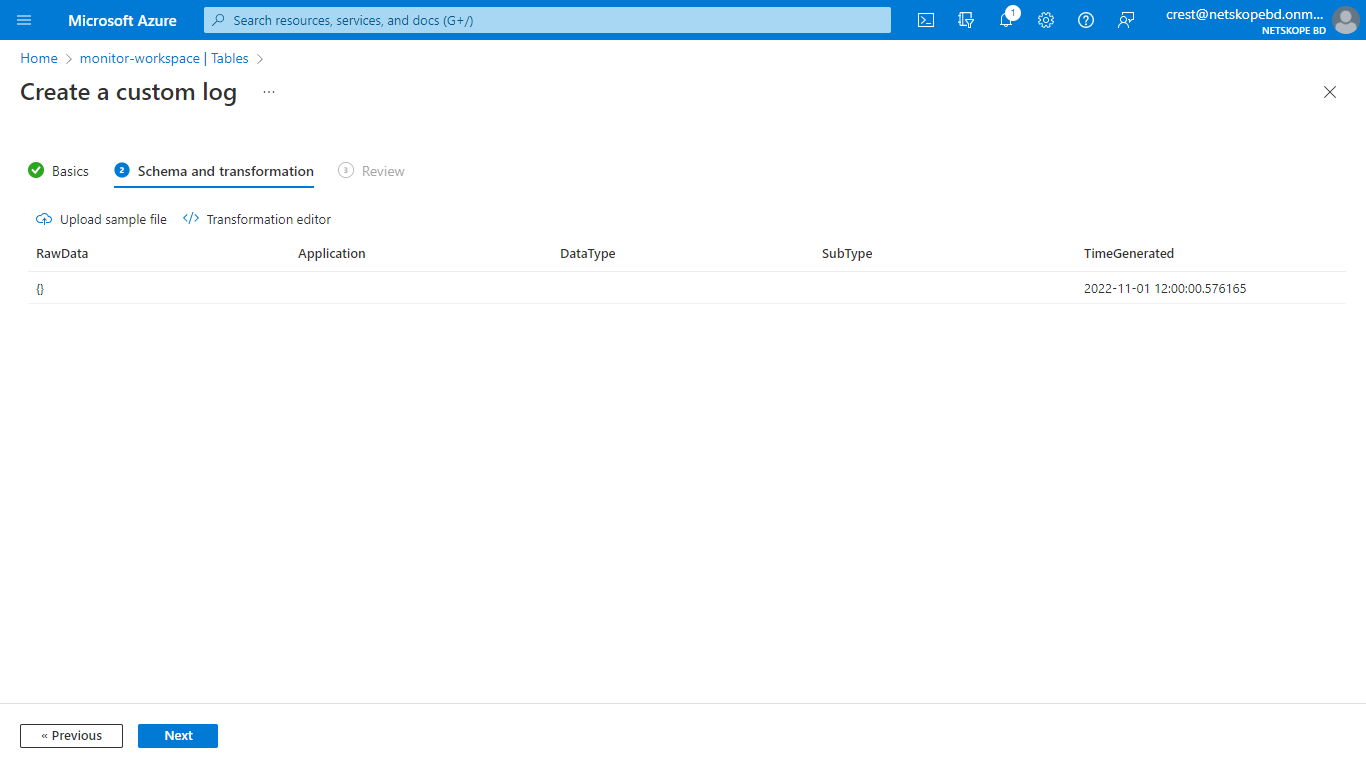
Click Next and then click Create.
A Custom Log Table will be created with the suffix
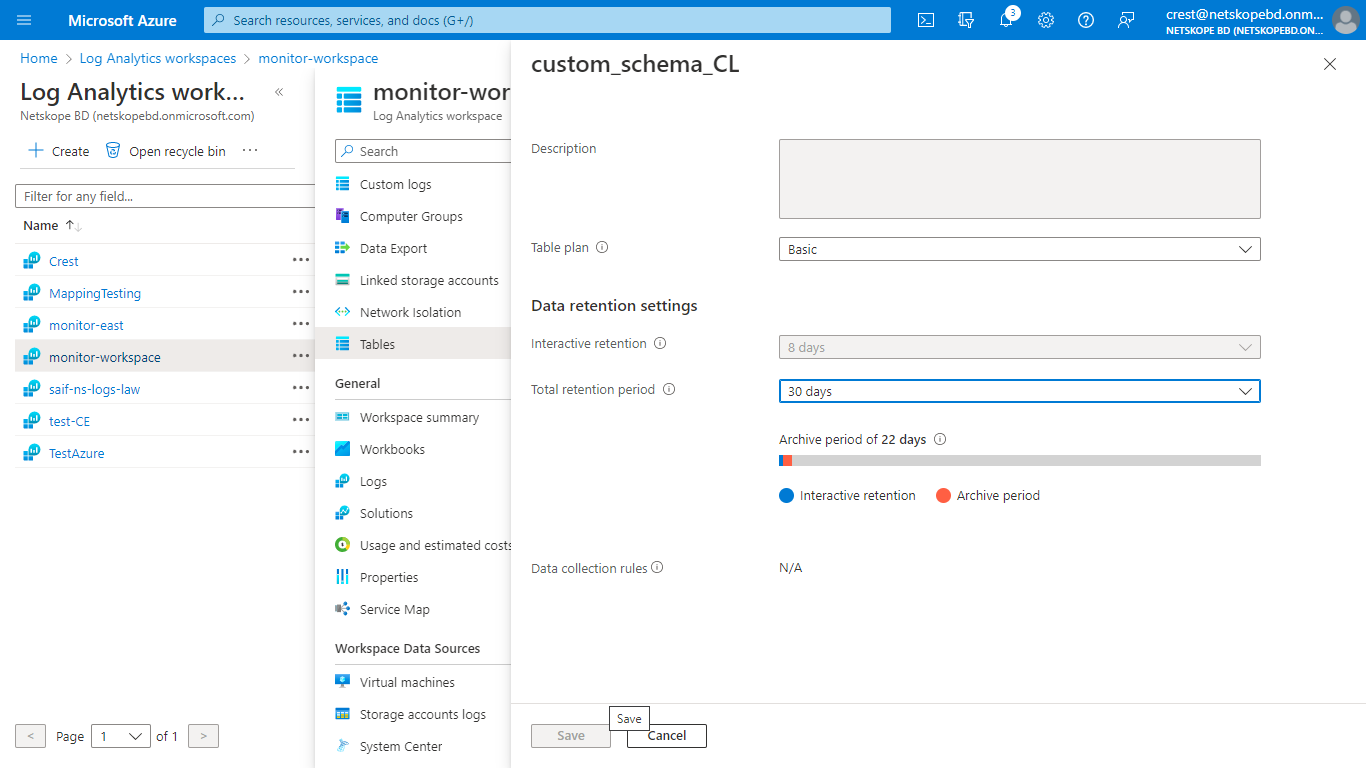
_CL. By default, a table plan will be Analytics. To convert it to Basic table, search for your table and click on the three dots at the right.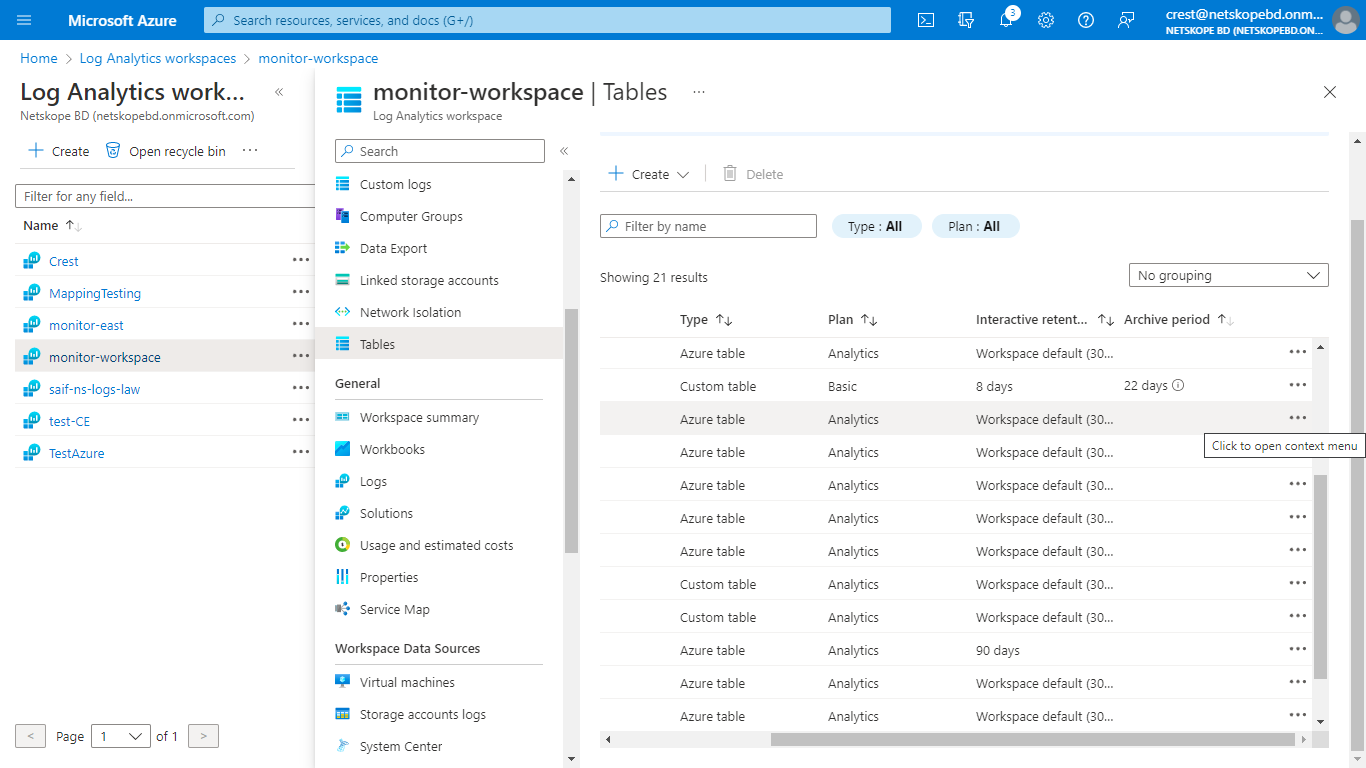
Select Manage Table, and in the table plan field, select Basic.
Select the retention period as per your requirement and click Save.
Note
Here we are changing the table Plan from Analytics to basic as The Basic log data plan lets you save on the cost of ingesting and storing high-volume verbose logs in your Log Analytics workspace for debugging, troubleshooting, and auditing.
If table plan is not changed and kept as Analytics, the Logs will still be ingested in the Table without any issue.
The Analytics’table has a configurable retention period from 30 days to 730 days. The Basic table has Retention fixed at eight days.
Basic Logs tables retain data for eight days. When you change an existing table's plan to Basic Logs, Azure archives data that's more than eight days old, but still within the table's original retention period.
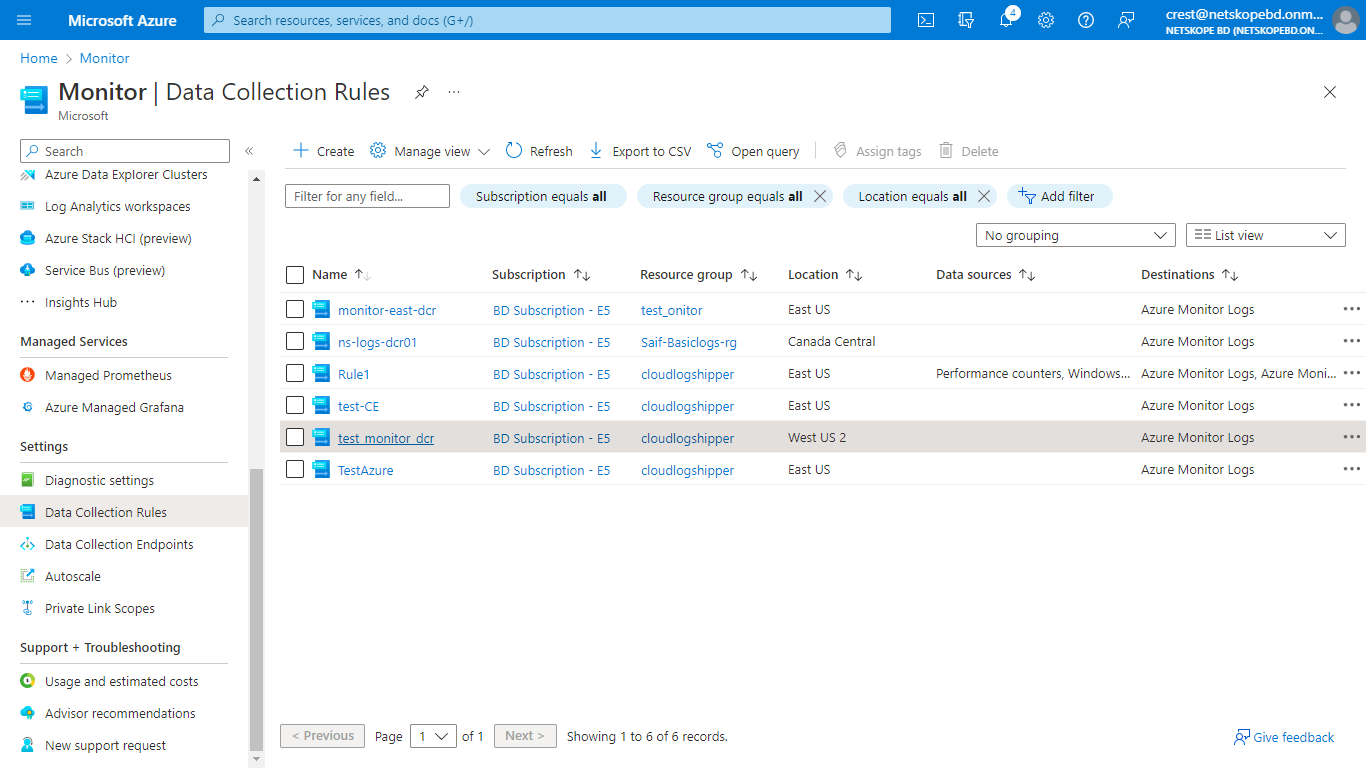
To get the Data Collection Immutable ID, go to Home, select Monitor from the Azure Services > Data Collection Rules, and then select the DCR created by you while creating the Custom Table.
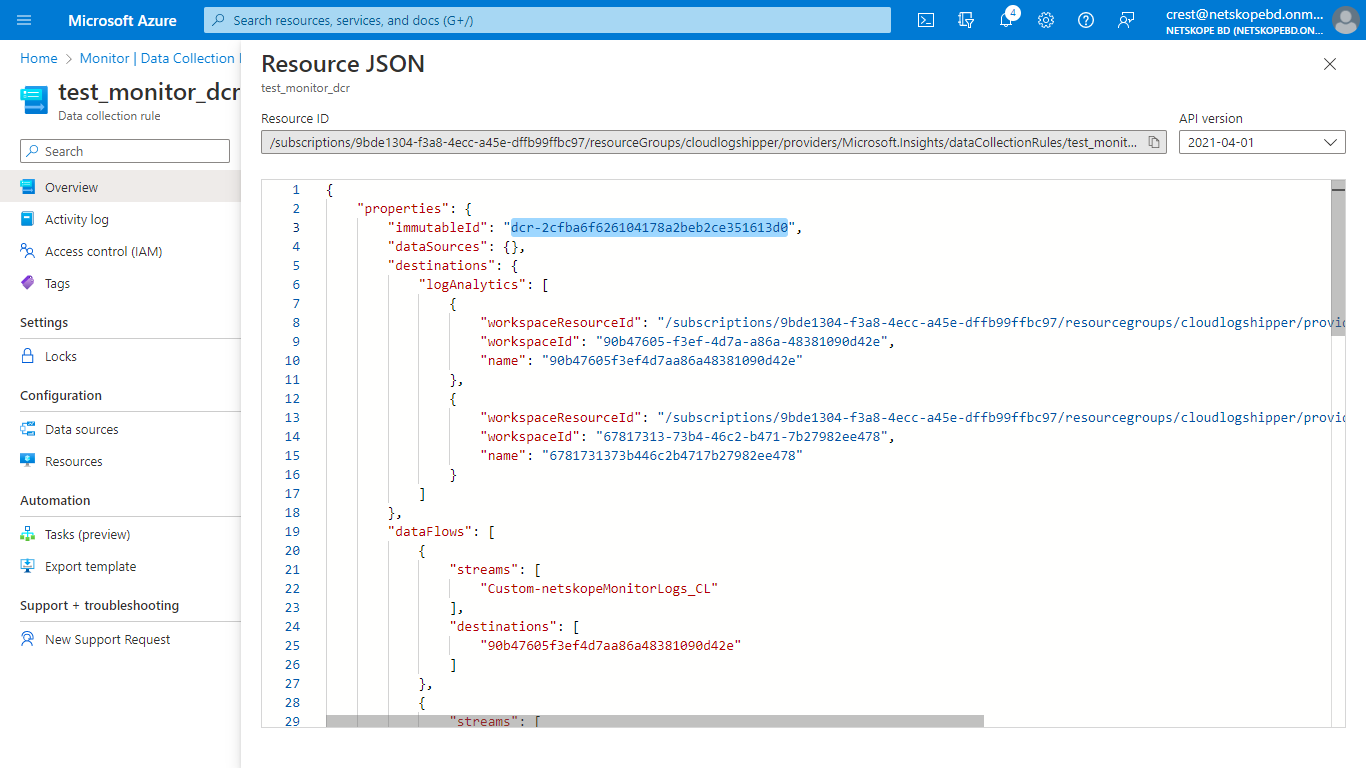
In the Overview tab, click JSON View from the top right corner, and copy the immutableId.
On the Azure Home page, go to Monitor > Data Collection Endpoint and select the Endpoint created previously.
Select Access control (IAM) and click Add role assignment.
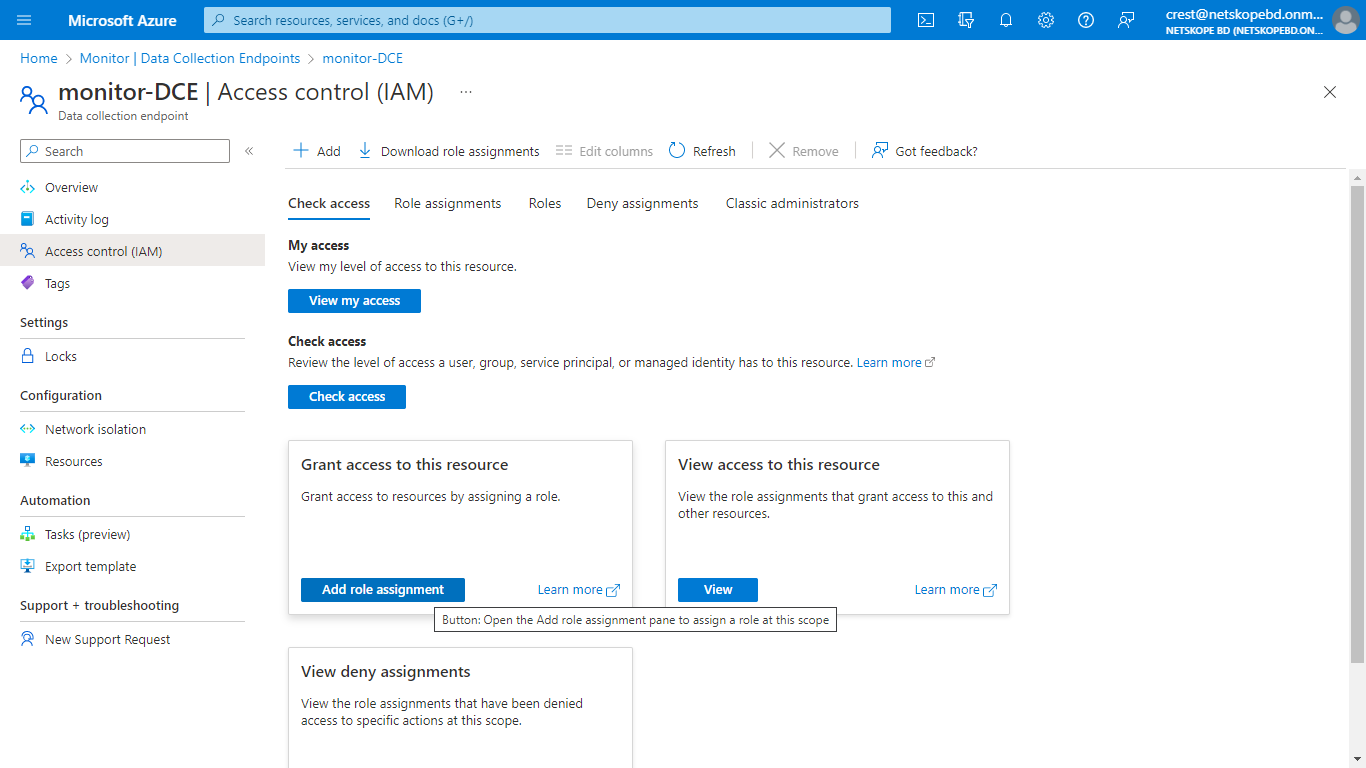
From the list of roles, select Monitoring Metrics Publisher and click Next.
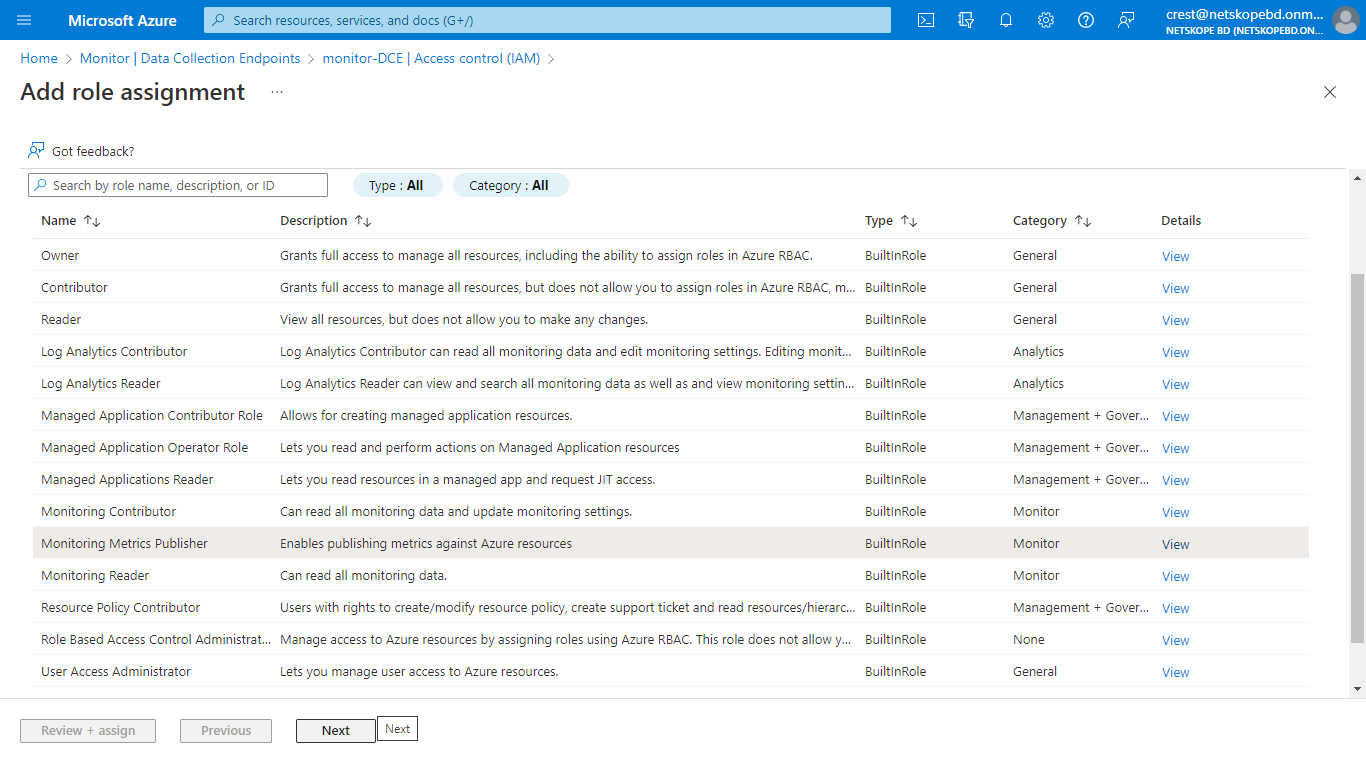
Select User, group, or service principal for which to assign access.
Click Select Members and search for the Application you created in the search box, and then select it.
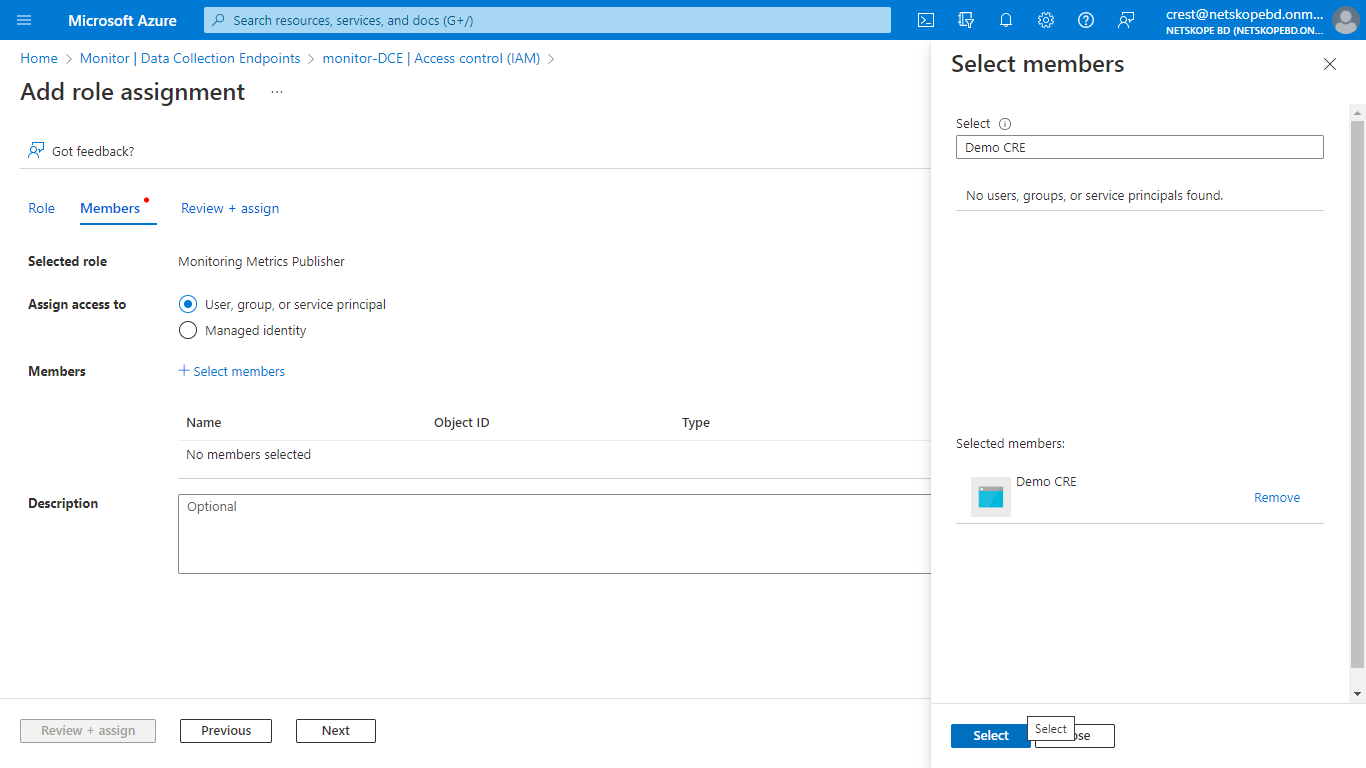
Click Review + assign.
Repeat these same steps to assign permissions to the DCR (Data Collection Rule).
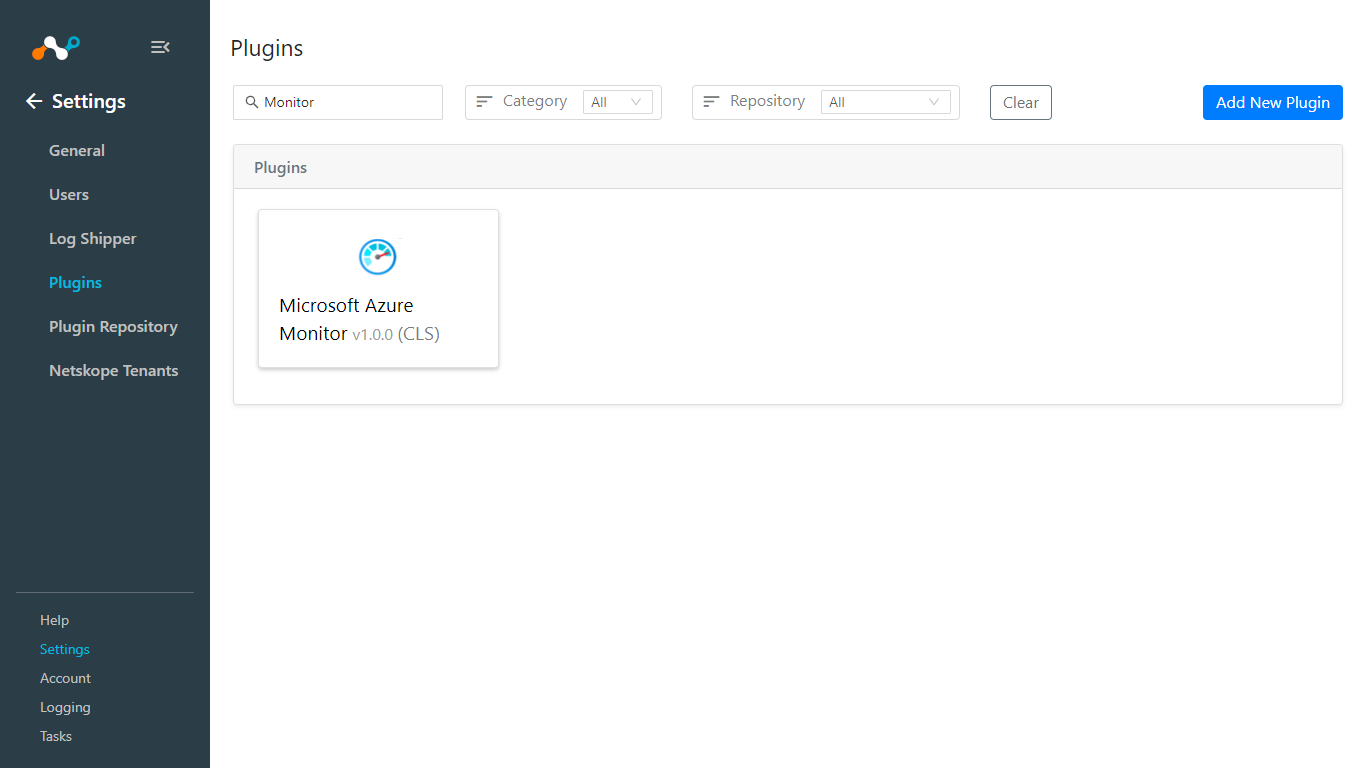
In Cloud Exchange, go to Settings > Plugins.
Search for and select the Microsoft Azure Monitor box to open the plugin configuration page.
Enter a Configuration Name a select a valid Mapping. (Default Mappings for all plugins are available. If you want to create a new mapping, go to Settings > Log Shipper > Mapping).
Transform the raw logs is enabled by default, which will transform the raw data on the basis of Mapping file. Turn it off if you want to send Raw data directly to Azure Monitor.
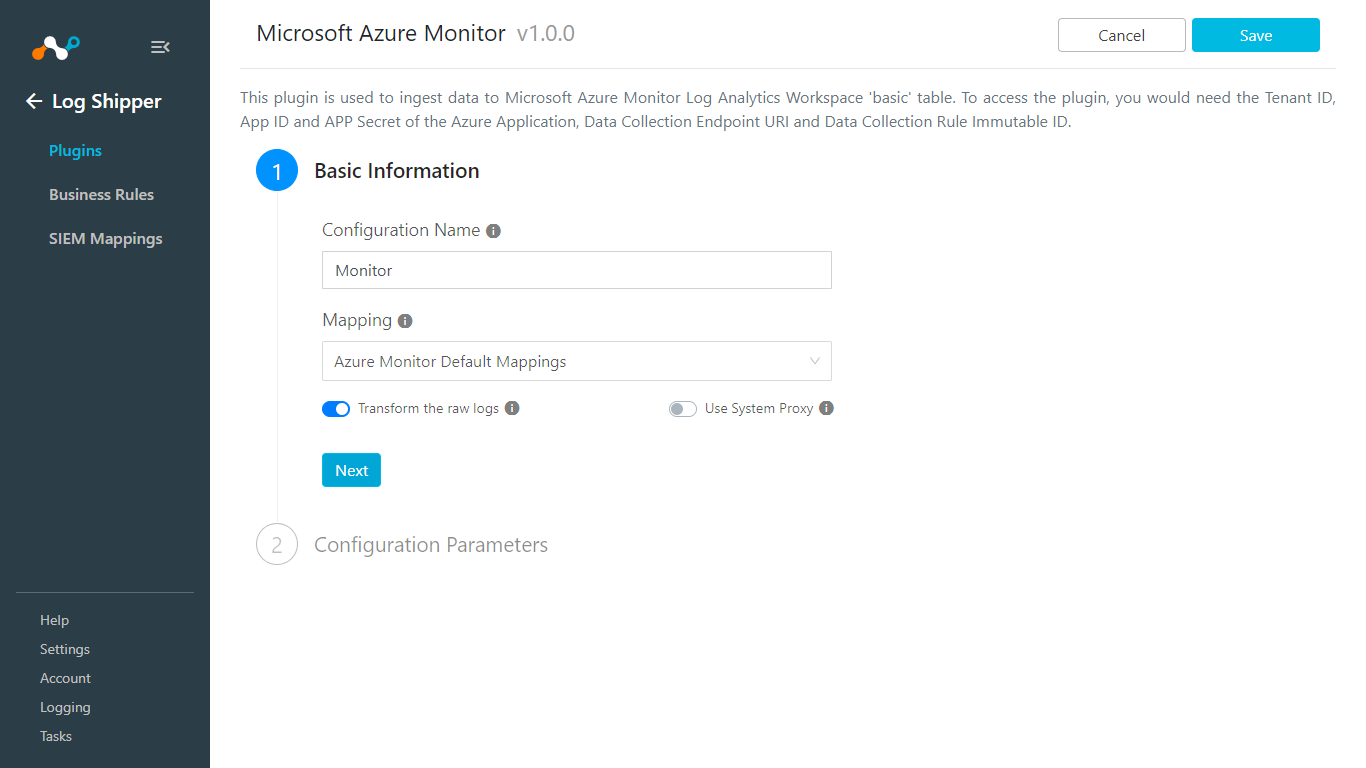
Click Next.
Enter the Tenant ID, App ID, and App Secret obtained while creating Azure Application in the previous steps.
Enter the DCE URI (Log Ingestion) and DCR ImmutableID obtained previously.
Enter the Custom Log Table Name.
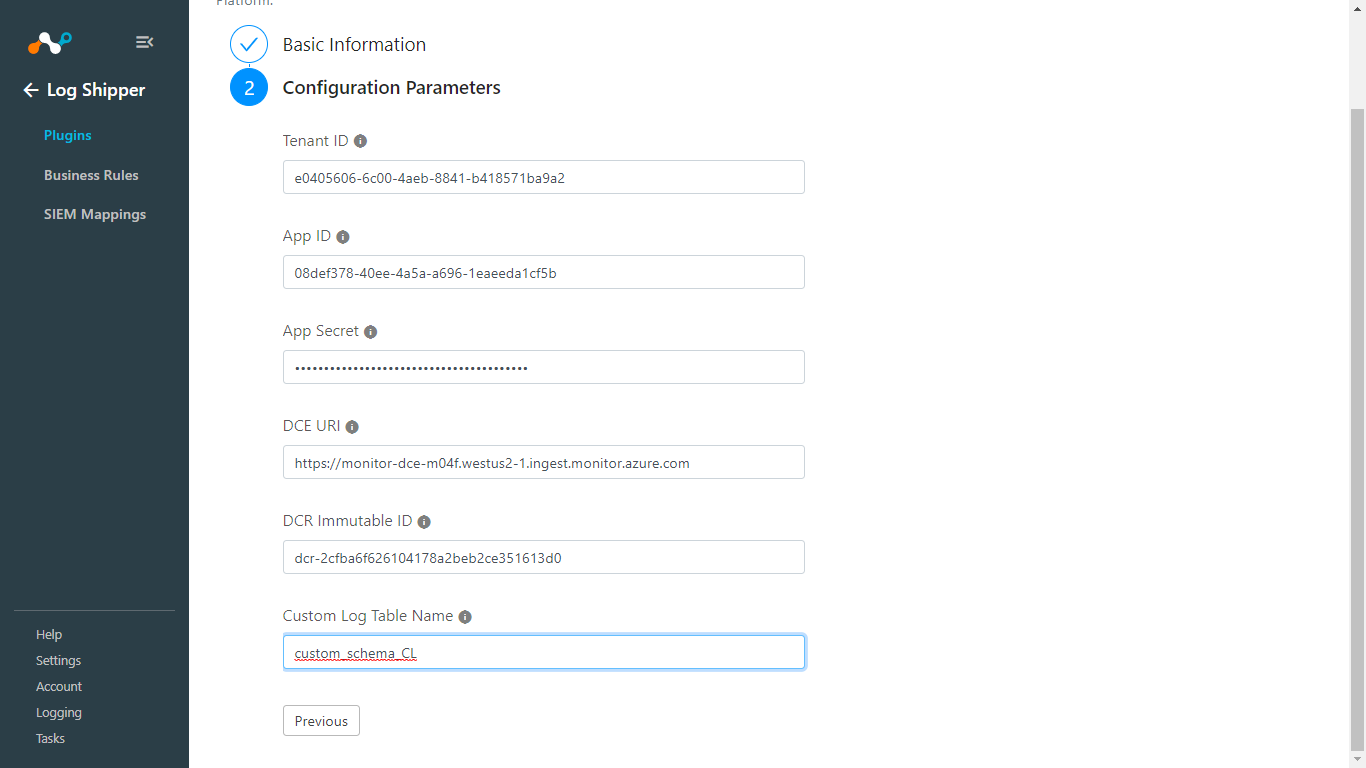
Click Save.
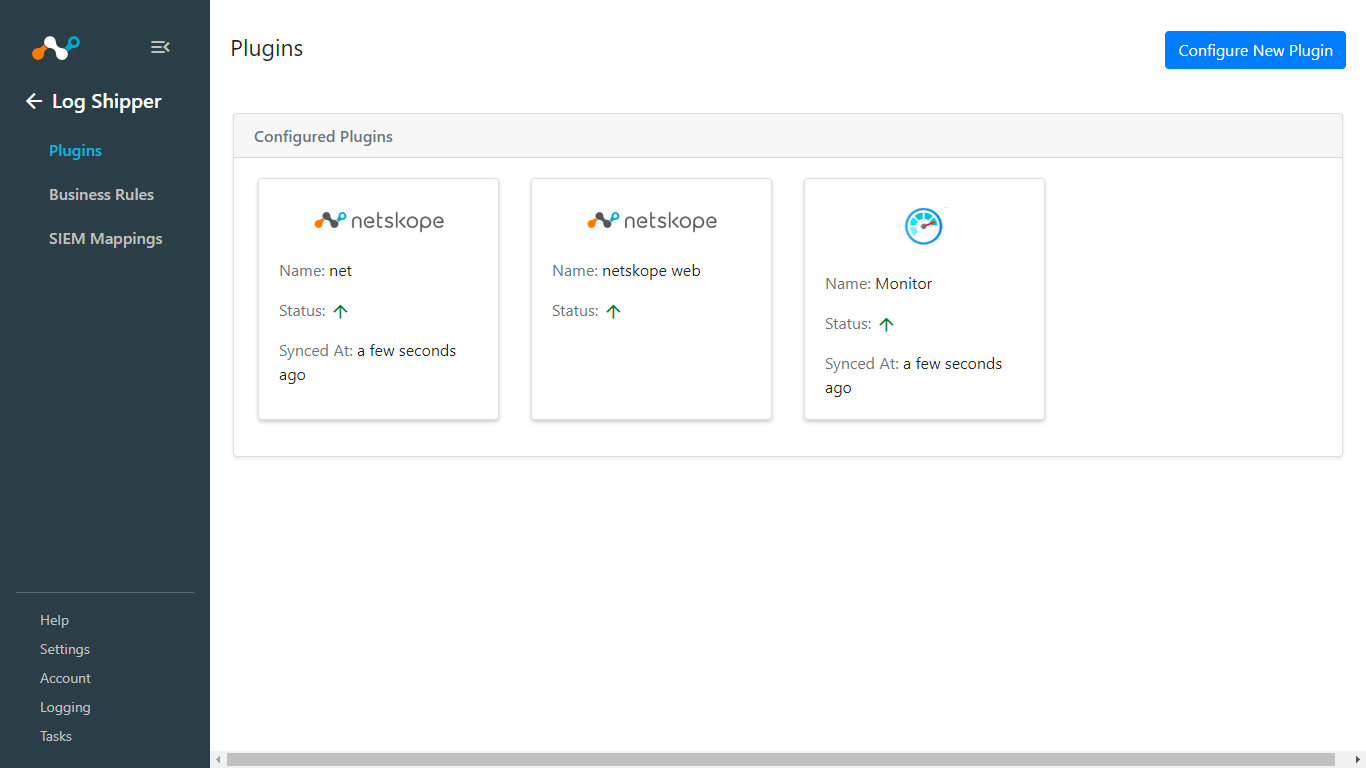
Go to Log Shipper > Business Rules.
Click on the Create New Rule.
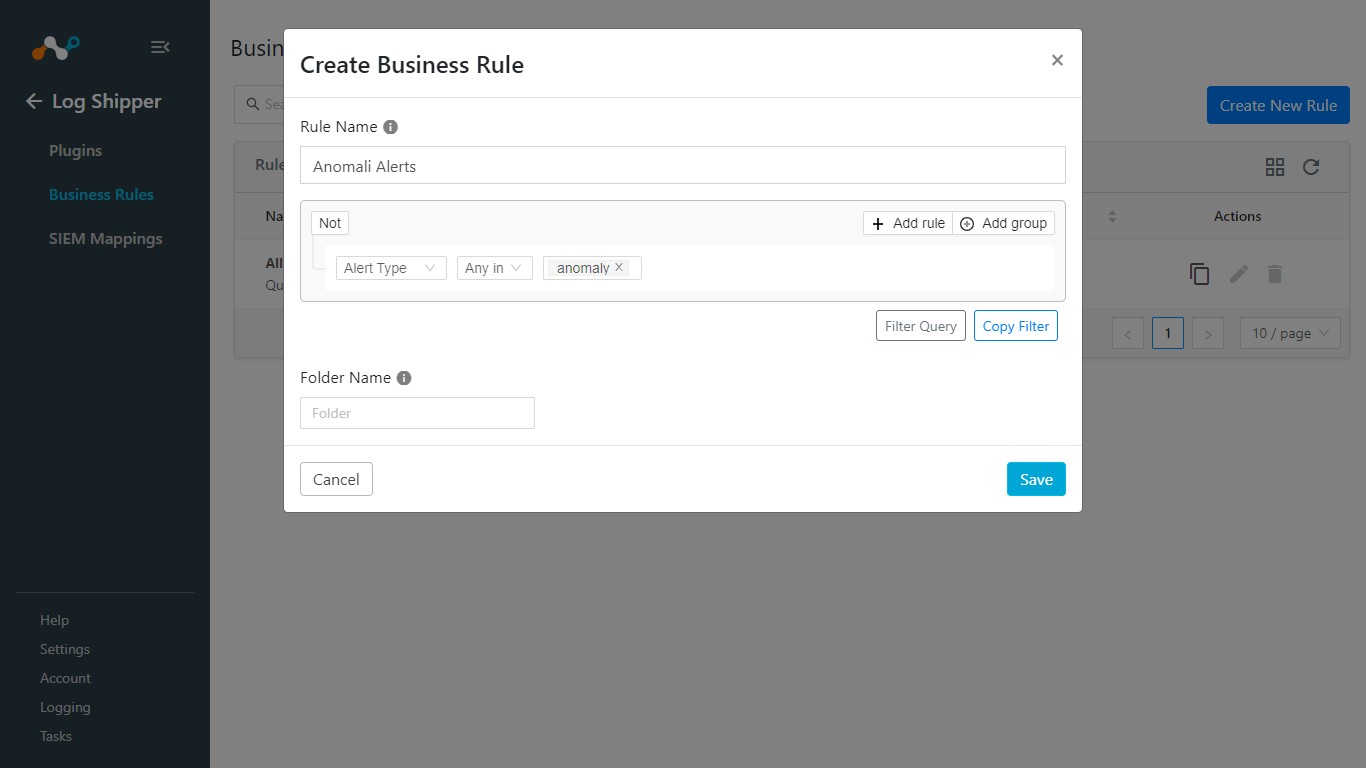
Enter a Rule Name and configure a filter. Enter a Folder Name, if any.
Click Save.
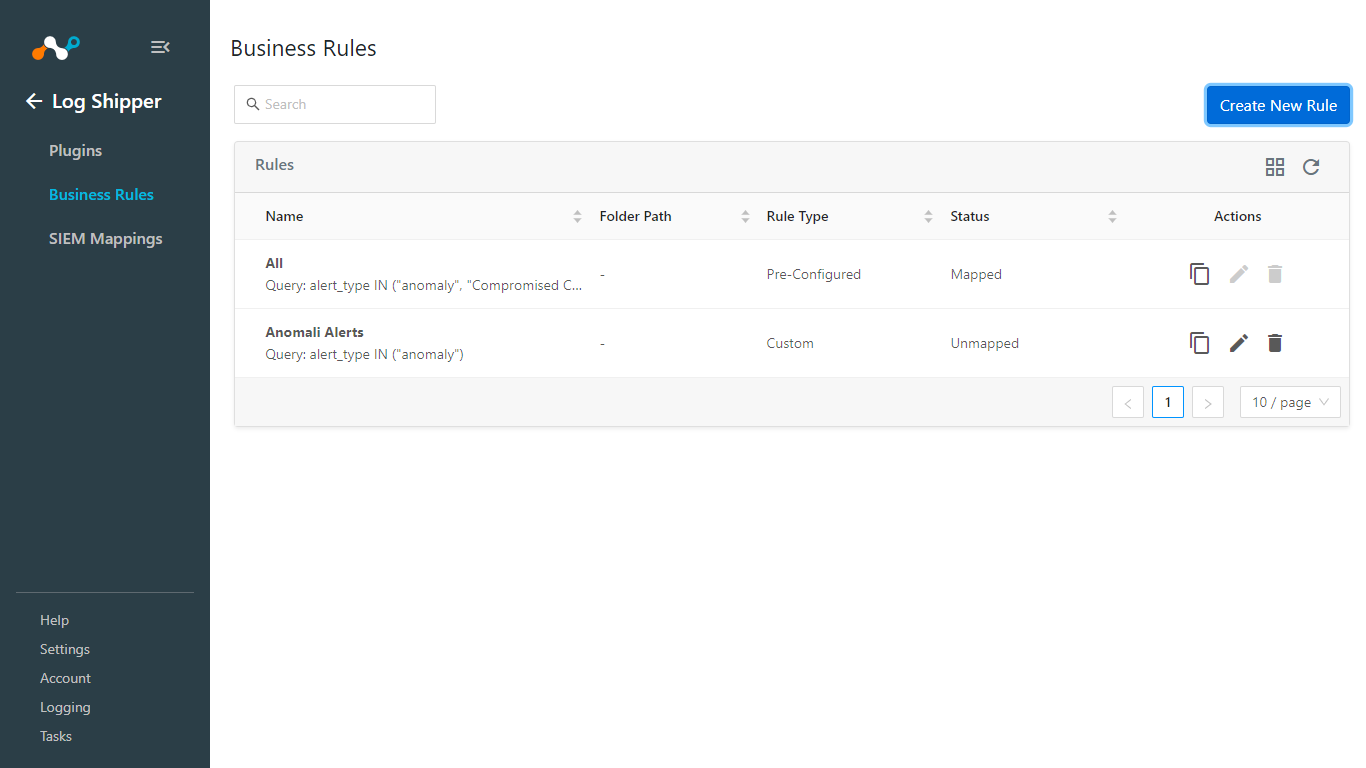
Go to Log Shipper > SIEM Mappings > Add SIEM Mapping.
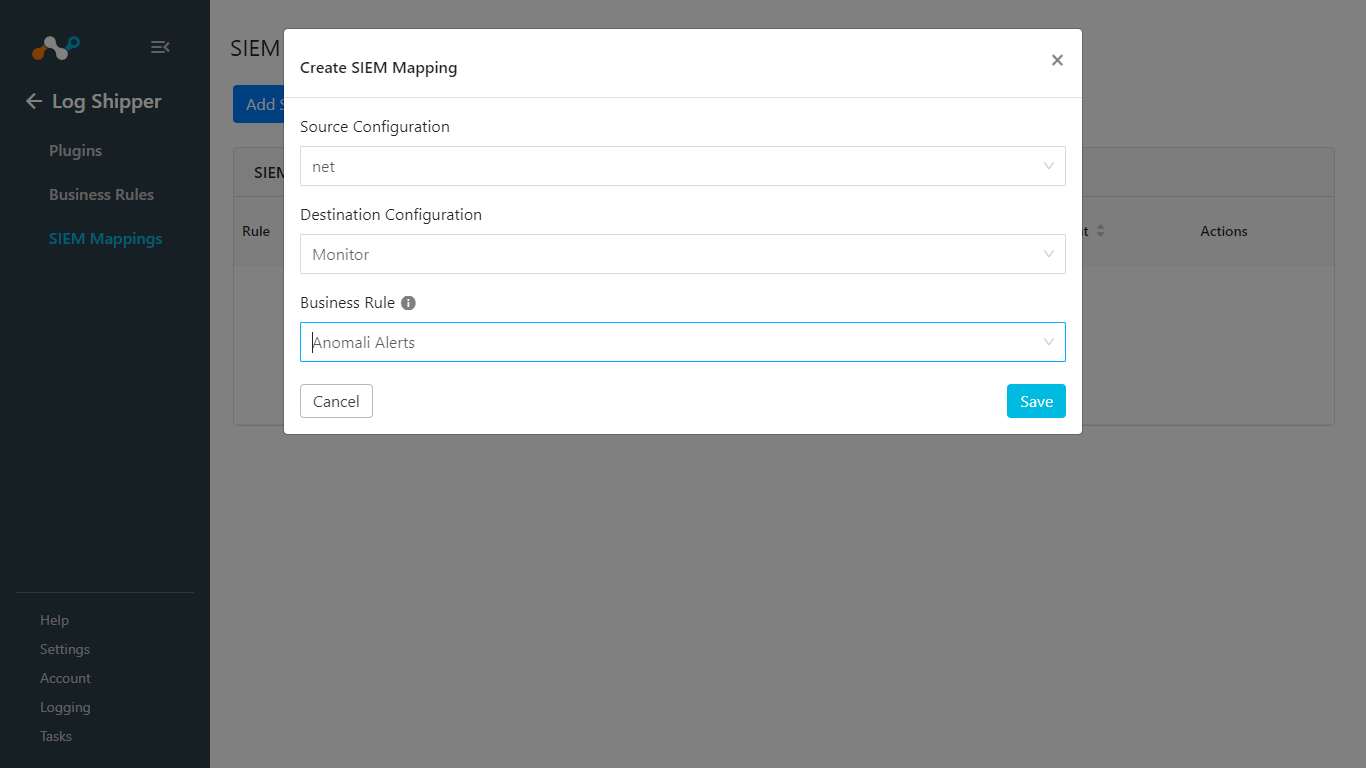
Select a Source Configuration, Destination Configuration, and Business Rule.
Click Save.
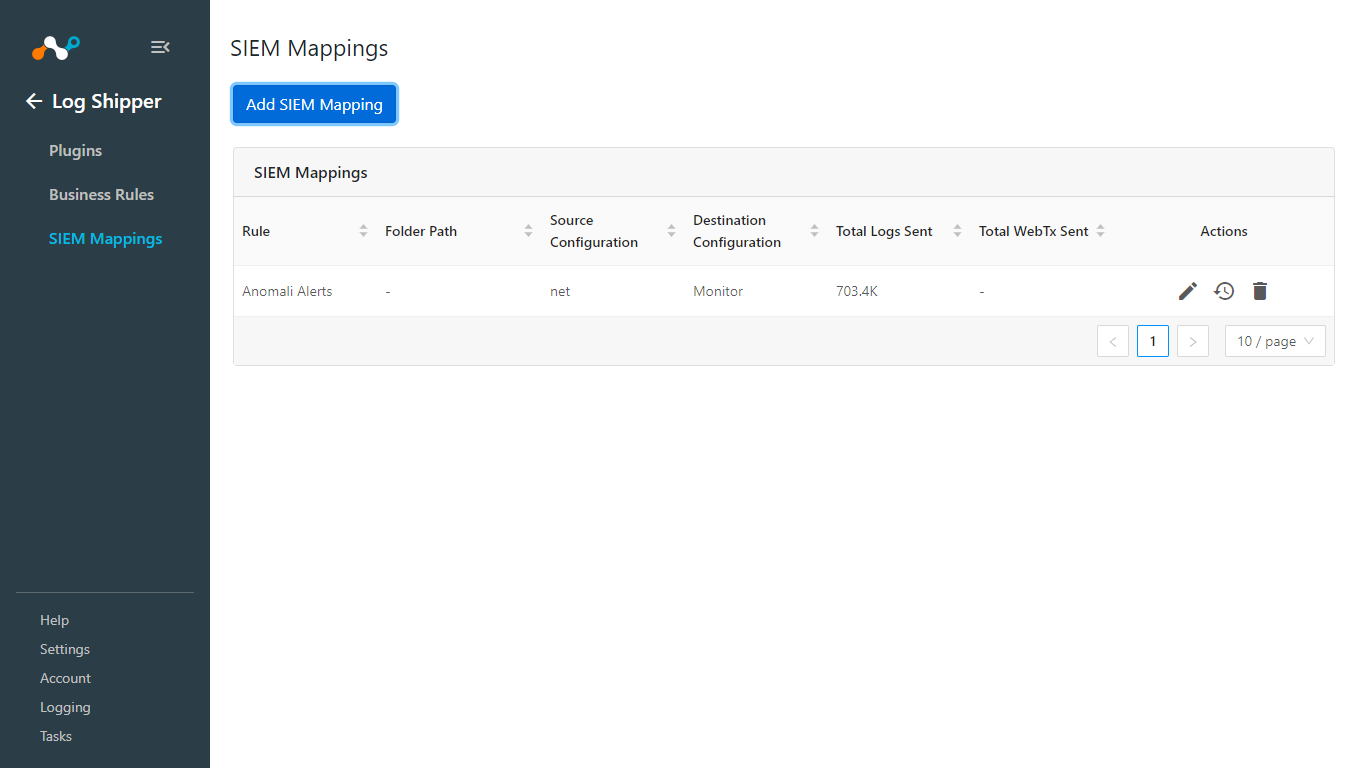
In order to validate the plugin workflow, you can check from Netskope Cloud Exchange and from Log Analytics Workspace.
Note
Make sure you have added the SIEM Mapping before confirming your data ingestion.
To validate from Netskope Cloud Exchange, go to Logging and and search the logs with message that contains ingest
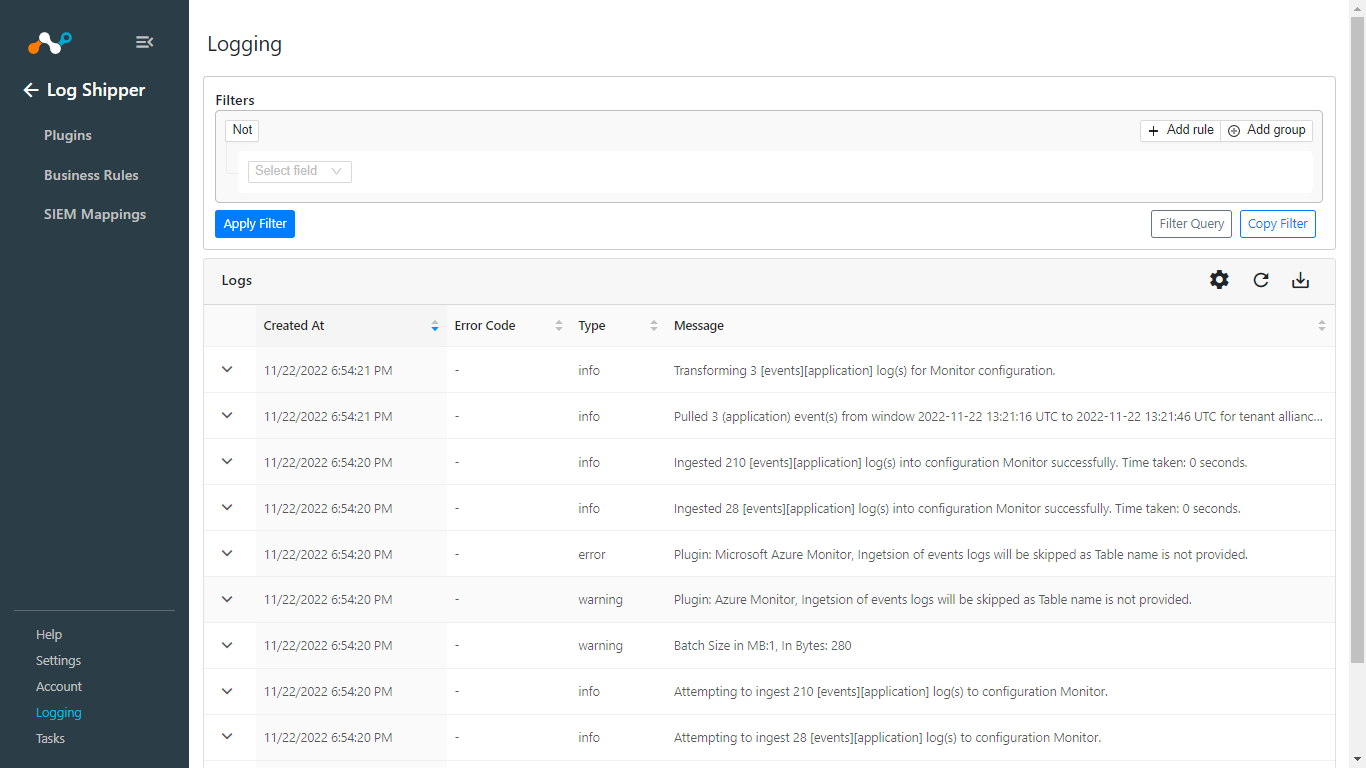 |
To validate from the Log Analytics Workspace:
In the Azure portal, go to Log Analytics Workspace service, select the Log Analytics Workspace that you created and select Logs under the General Category from the left panel.
Write the Custom Log Table Name in the query editor and click Run. You can select the Time Range from the top to filter out Logs.
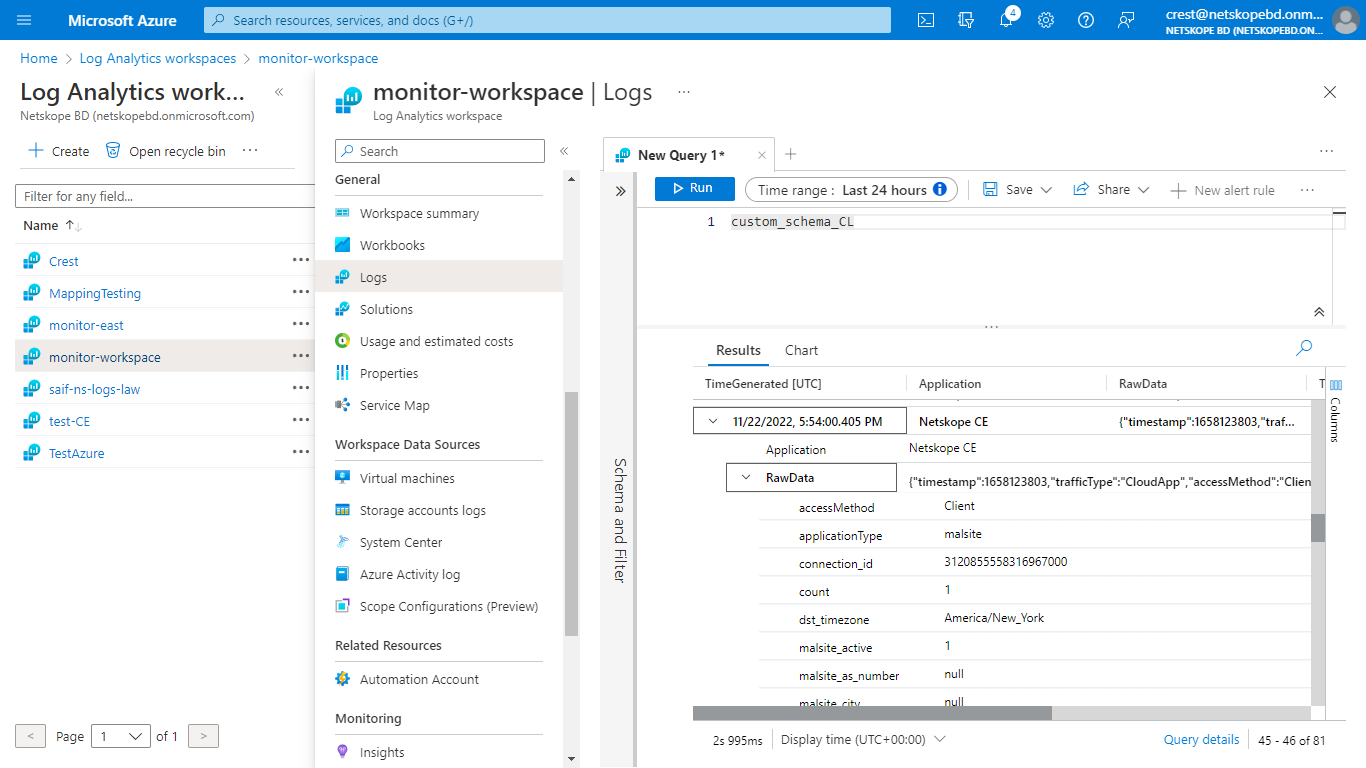
If received error code 403 and Log error message Ensure that you have the correct permissions for your application to the DCR., check if you have assigned permissions to the correct Data Collection endpoint. It may take up to 30 minutes to reflect the assigned permissions.