Configure the Log Parser Appliance on the Management Plane
You can use dedicated log parsing appliances to scale performance.
To configure an appliance for log parsing:
Log in to the log parser appliance using the credentials
nsadmin/nsappliance. You should see thensapplianceprompt.Your appliance has the factory default settings, so initialize it by issuing the following command:
nsappliance> initialize initializing the box... enter admin email: enter admin password: password: setting up user... done. setting admin password... done. initialization successful.
You will be prompted for an admin email address and password, just like when a management appliance was being initialized, but this time the credentials are not relevant. They will only be used if this device is ever repurposed as a management appliance.
After initialization completes, enter
configureto start configuration mode to set the hostname. When finished, entersaveto activate the configuration:nsappliance> nsappliance> configure Entering configuration mode nsappliance# set system hostname log01 nsappliance# save Restarting config agent Restarting messenger Restarting ssh tunnel service Configuration saved lp01(config)#
Set the required inbound interface on the appliance by entering these commands:
lp01(config)# set interface inbound ip <IP address> lp01(config)# set interface inbound gw <gateway address> lp01(config)# set interface inbound netmask <subnet mask>
Tip
To review your entries, enter
show interface.Set the DNS server IP address by entering this command:
lp01(config)# set dns primary <dns server IP address>Enter
saveand wait for the prompt to return. This may take as long as 4 or 5 minutes while the appliance fully configures itself for the first time.lp01(config)# save Restarting all services Restarting networking services Restarting resolvconf Restarting DNS proxy Restarting log Configuration saved lp01(config)#
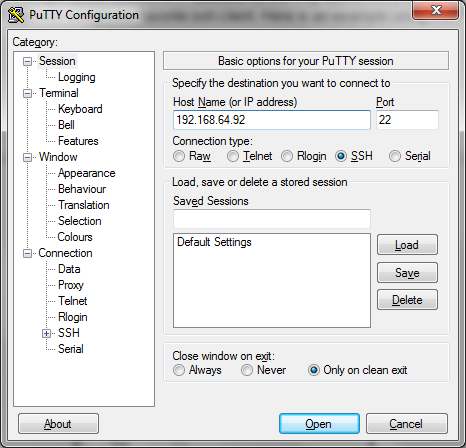
Now that you have configured the inbound interface's IP address for the log appliance, try to connect to it using your preferred ssh client. Here is an example using PuTTY running on Windows:

In this example, you logged in using
192.168.64.92for the IP address specified for the inbound interface. When the connection is open, you can log in using the credentialsnsadmin/nsappliance.If the connection is successful, all further configuration changes should be done over ssh. If the connection is not successful, you can adjust the network settings over IPMI as described in step 5 above.
Enter
exitto leave the config mode.Enter
exitto leave the nsshell and exit the log appliance console.Note
All further configuration changes should be made using this SSH access method.
Access SSH and enter the
configurecommand to start configuration mode.Point this appliance to the local (on-premises) management appliance inbound IP address:
lp01(config)# set management-plane location local
If you're configuring a combined, all-in-one appliance, enter this command instead:
set management-plane location on-box
Enter the management appliance local inbound IP address by entering this command:
lp01(config)# set management-plane local inbound-ip <IP address>Get your license key from your Netskope tenant UI ( Settings > Security Cloud Platform > On-Premises Infrastructure ), and then enter the license key entering this command.
lp01(config)# set system licensekey <licensekey>Note
A license key is only required if you will be downloading upgrade packages from the Netskope cloud.
Enter
save.