Proxy Chaining
Note
Contact your Sales Representative or Netskope Support to enable this feature for your account.
Netskope proxy chaining allows you to send traffic from your on-premises proxy to the Netskope Cloud. You must configure the proxy chaining URL in your own proxy, and then add your proxy's public IP address or range to the allowlist below so Netskope can trust traffic from your proxy chain. Netskope won't accept any traffic from an IP address that's not listed below.
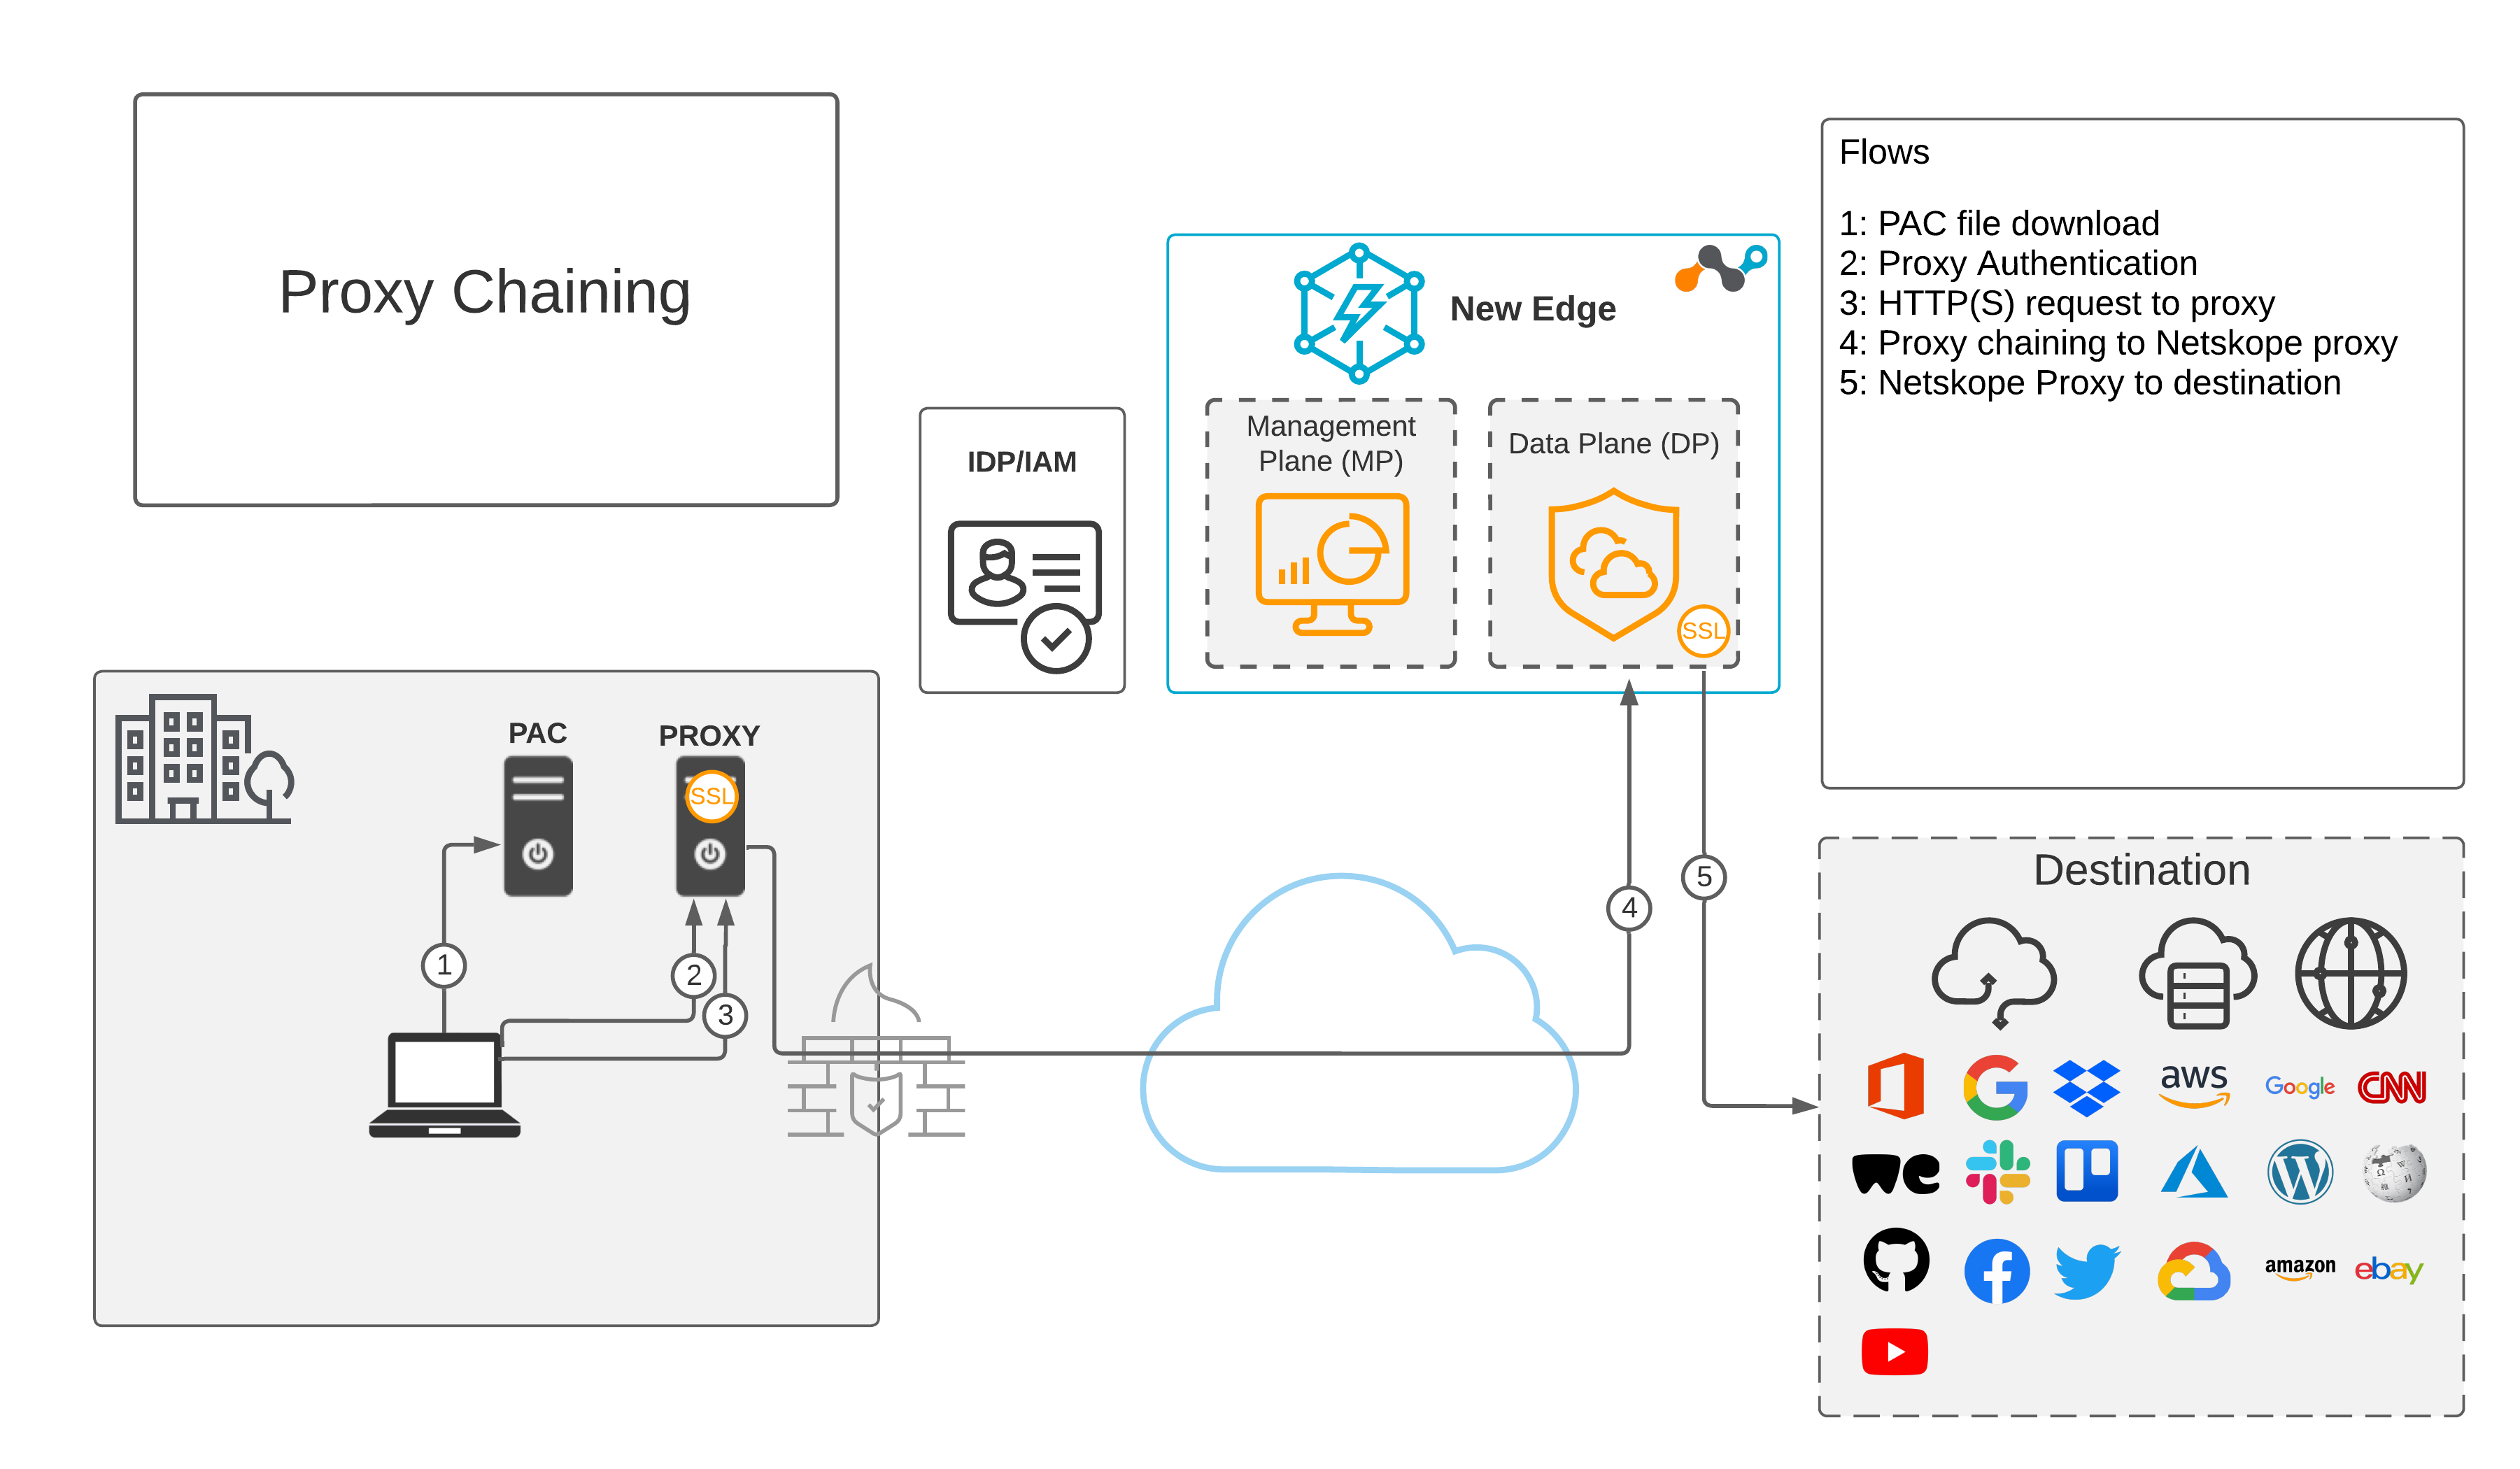
The following diagram illustrates the traffic workflow for proxy chaining with Netskope Secure Web Gateway:

General Guidelines
When configuring proxy chaining, consider the following:
To obtain your proxy chaining URL, contact Netskope Support.
Ensure that you configure your downstream proxy to send X-Forwarded-For HTTP header for all HTTP requests. The X-Forwarded-For header is used to uniquely identify the tenant user.
For your proxy, ensure you add at least one header X-Forwarded-For or X-Authenticated-User HTTTP header inside the SSL tunnel. Netskope recommends adding both headers. However, the proxy must perform SSL decryption to add HTTP headers inside the SSL tunnel.
Configure your proxy to trust the Netskope certificate for SSL interception. You can download the certificate in Settings > Manage > Certificates > Signing CA.
About the Proxy Chaining Page
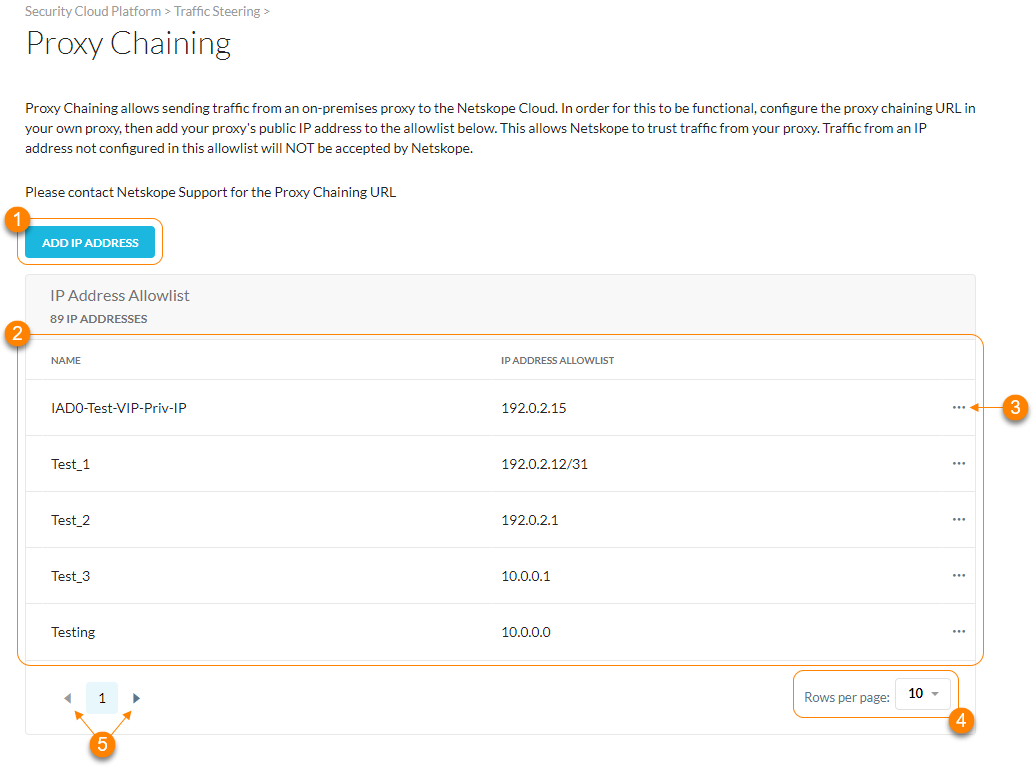
On the Proxy Chaining page (Settings > Security Cloud Platform > Proxy Chaining), you can:
Add a proxy IP address to the Netskope proxy chaining allowlist.
View a list of IP address allowlists. For each allowlist, you can see:
Name: The name of the proxy IP address allowlist.
IP Address Allowlist: The proxy IP or CIDR addresses in the allowlist.
Click
 to choose one of the following options:
Edit: Modify the IP address allowlist. To learn more: Adding the Proxy IP Address to the Proxy Chaining Allowlist.
Delete: Delete the IP address allowlist.
View up to 30 allowlists per page.
View multiple pages of the table.
