Configure Azure SCIM Integration to Onboard Users to Netskope
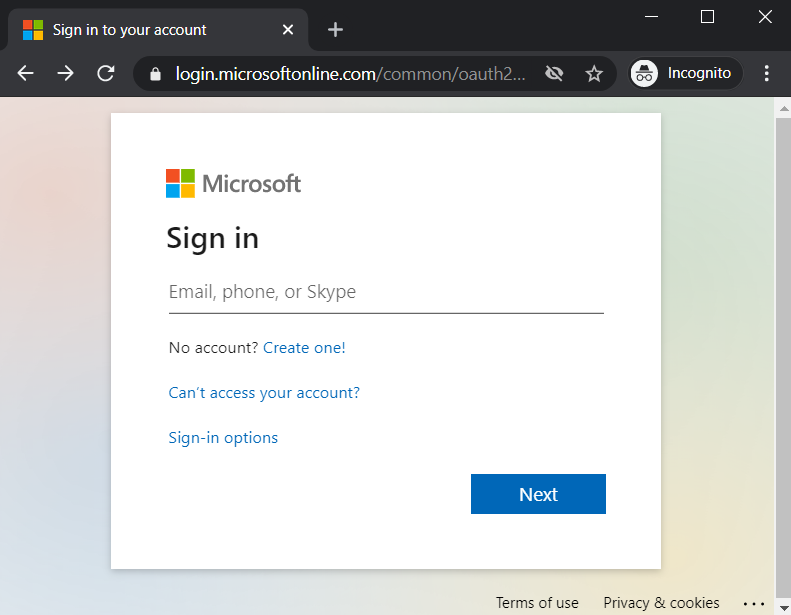
Log in to Azure AD console.
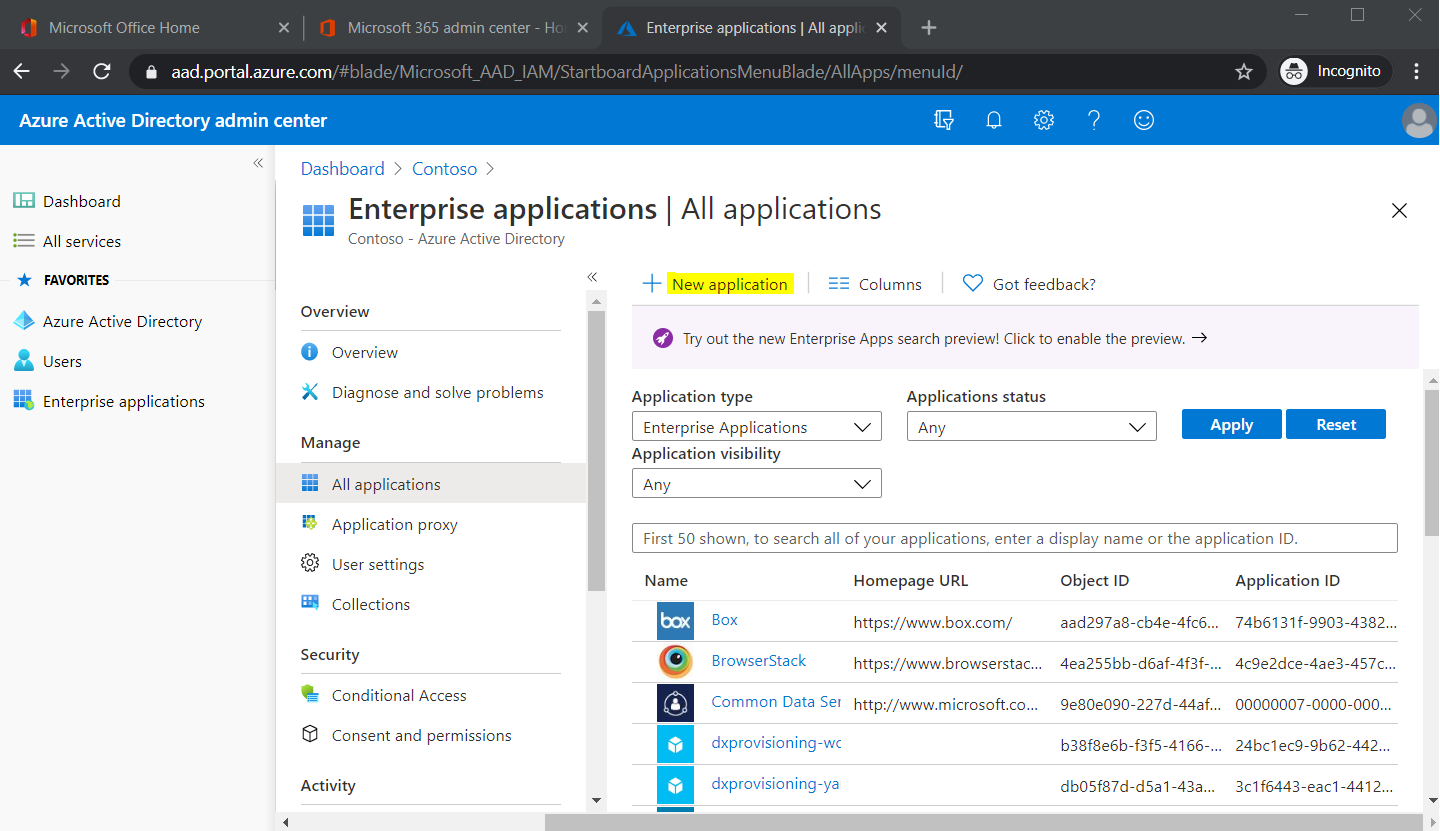
Go to Azure Active Directory > Enterprise Applications. Click New Application.
Search for
netskopeand select Netskope User Authentication from the list.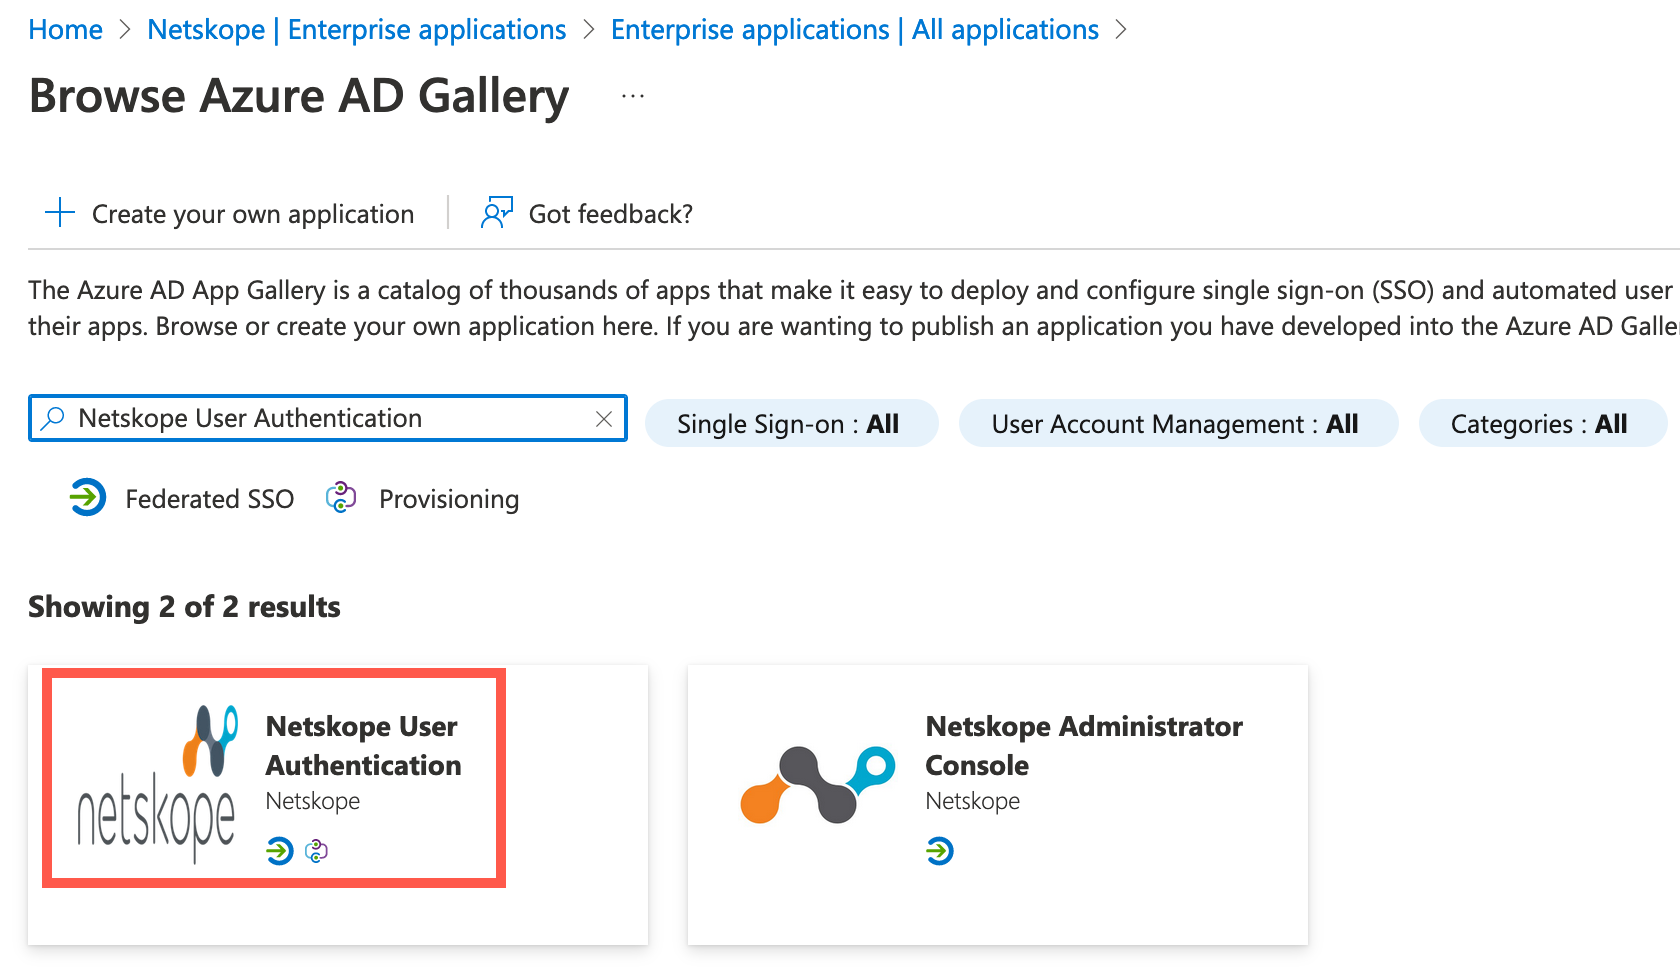
Enter a Name: Netskope SCIM and click Add.
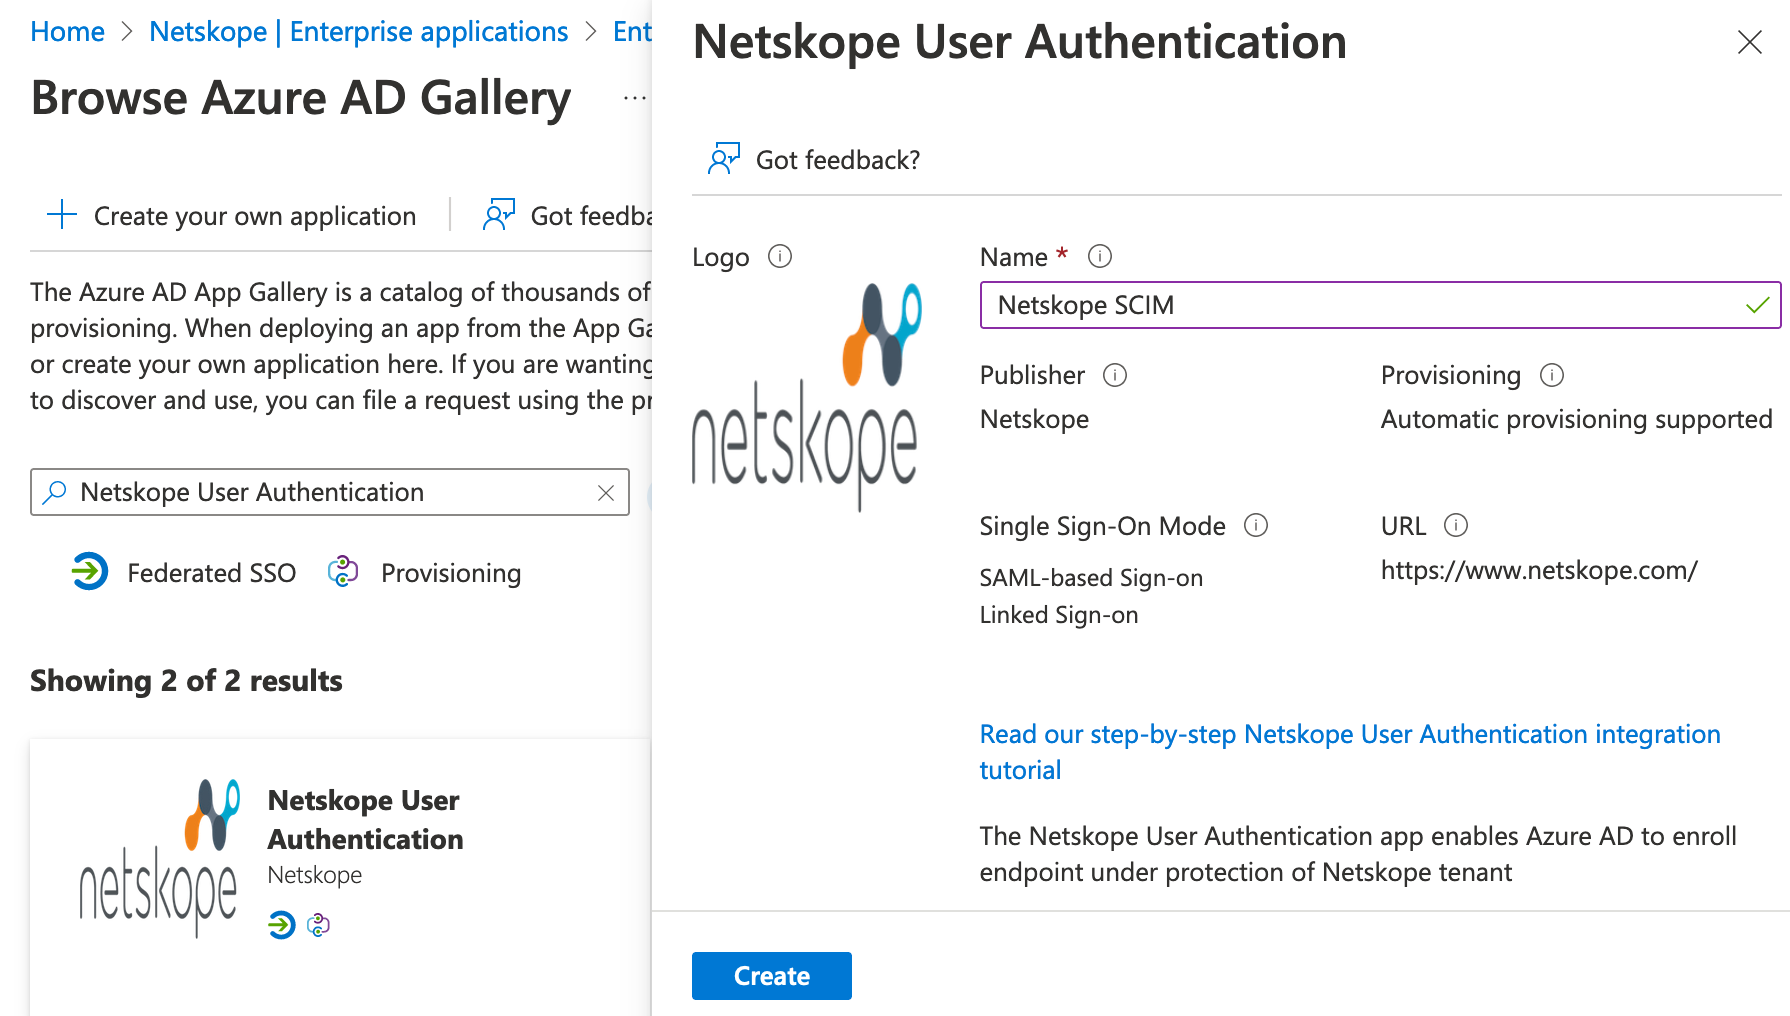
A message will be displayed that the application was added successfully.

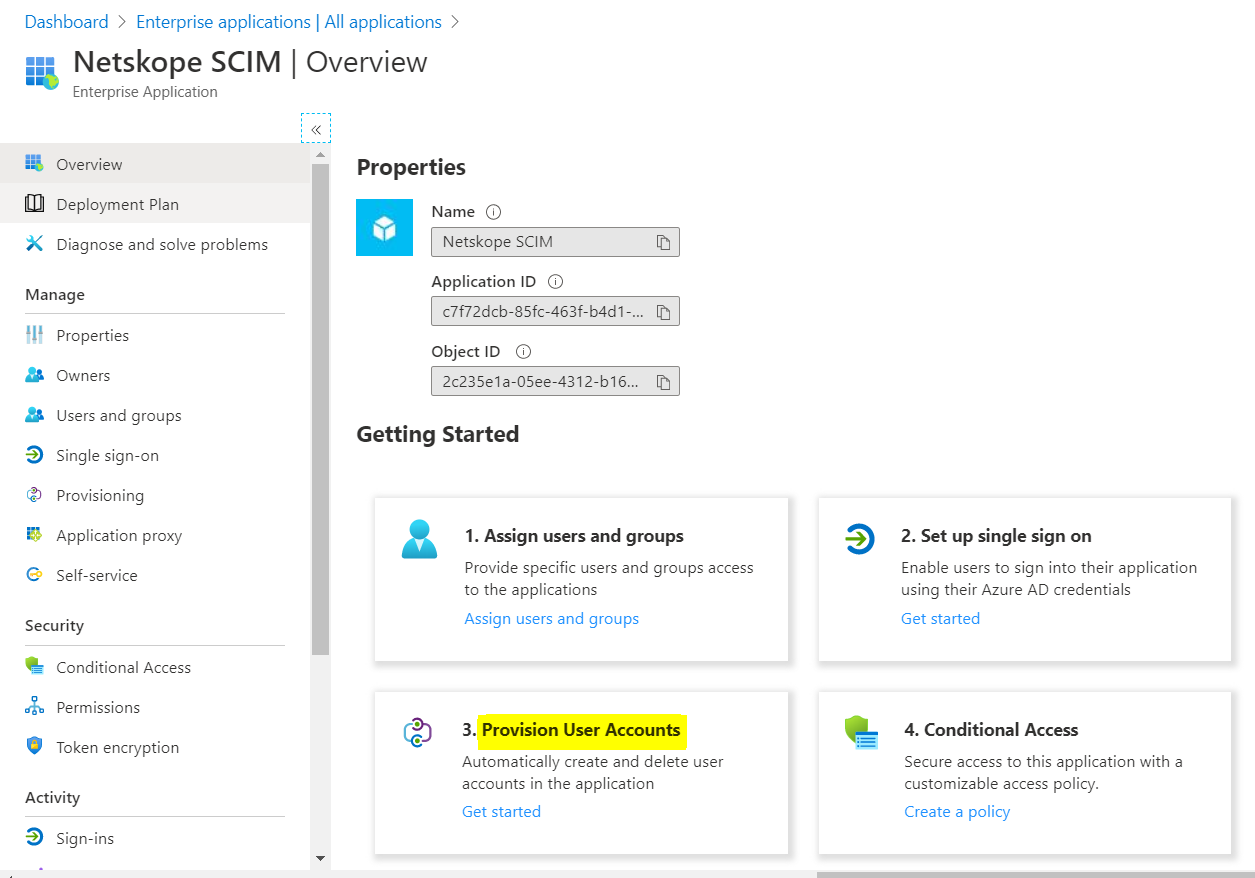
Click Provision User Accounts.
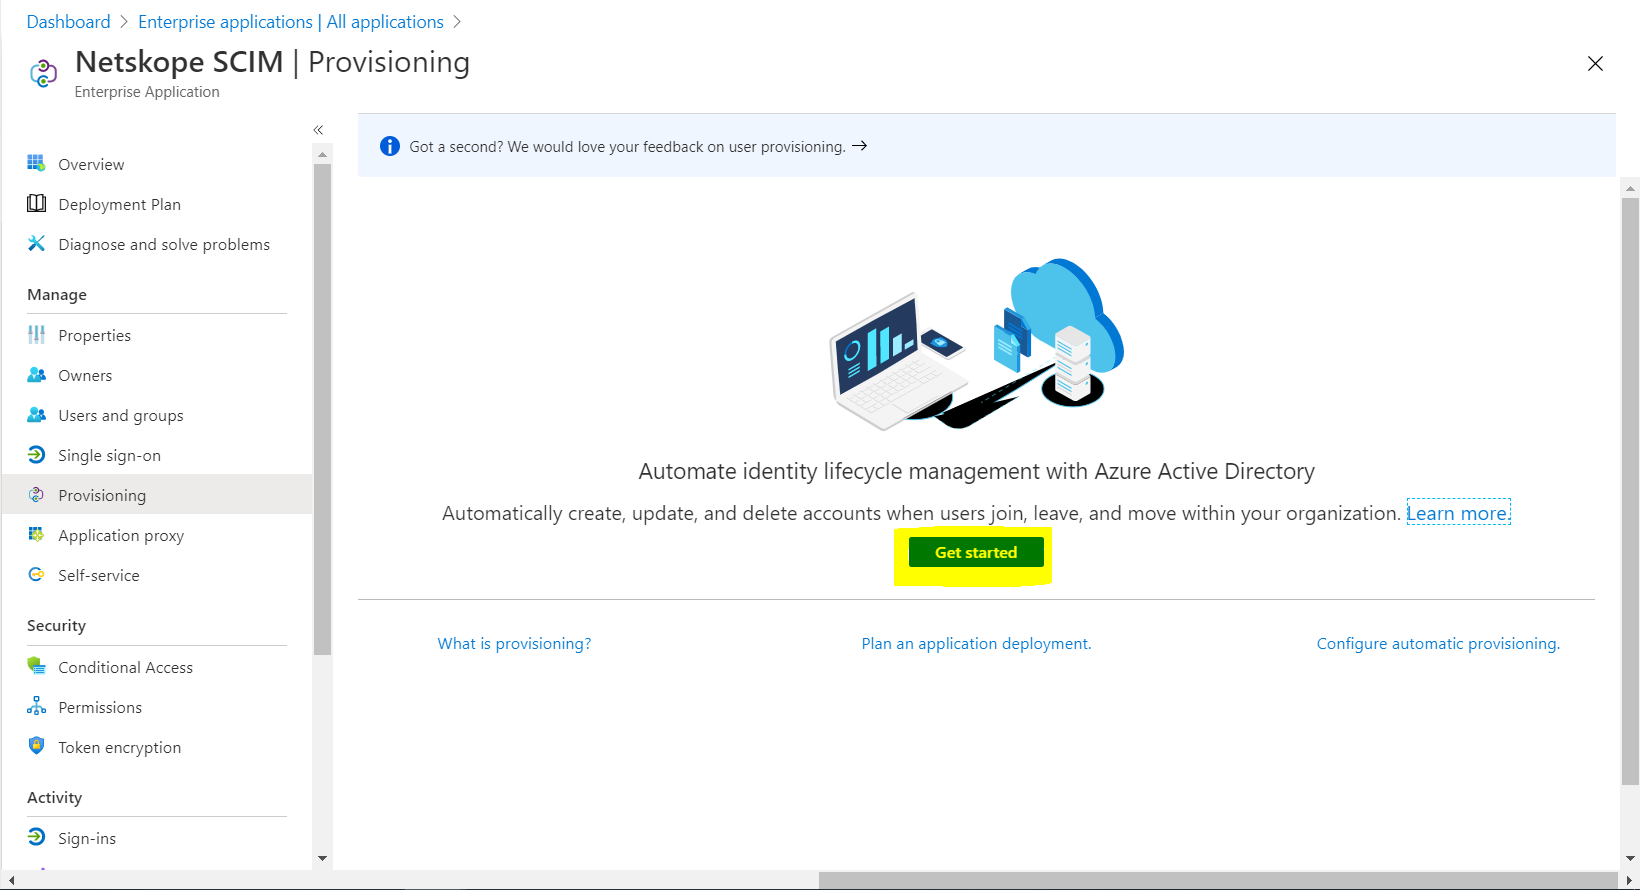
Click Get Started.
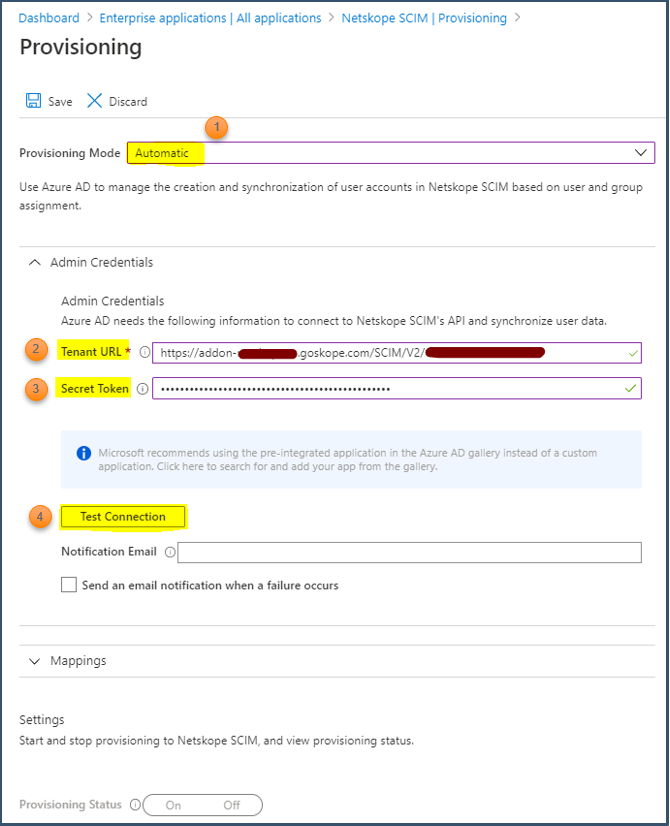
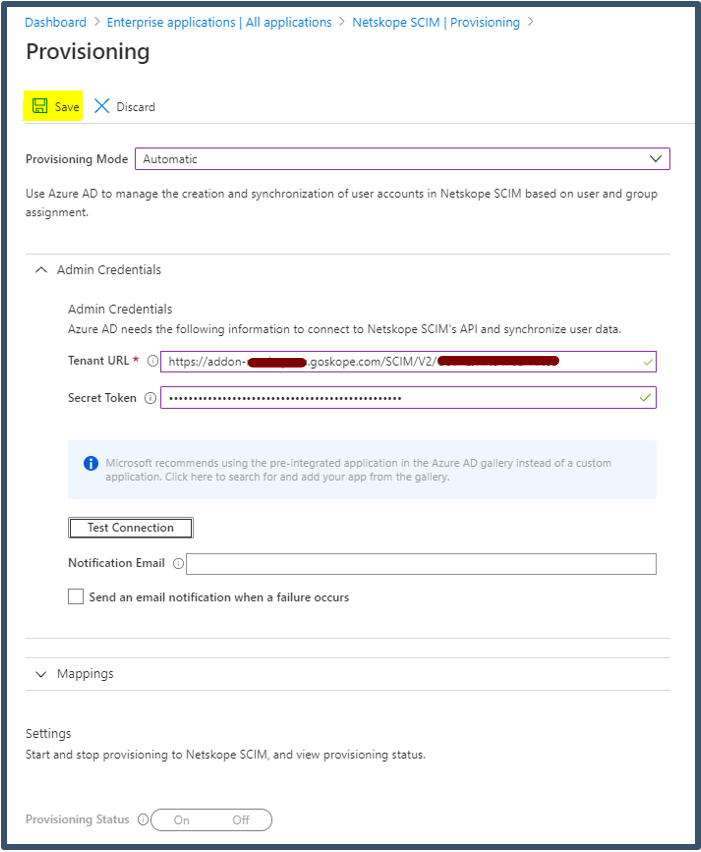
Select Provisioning Mode as Automatic.
Enter Netskope Tenant SCIM Server URL details.
Enter Netskope OAUTH Token for SCIM Client details.
Click Test Connection.
Note: You need to test the connection successfully before you save the configuration; otherwise, you will get an error during save


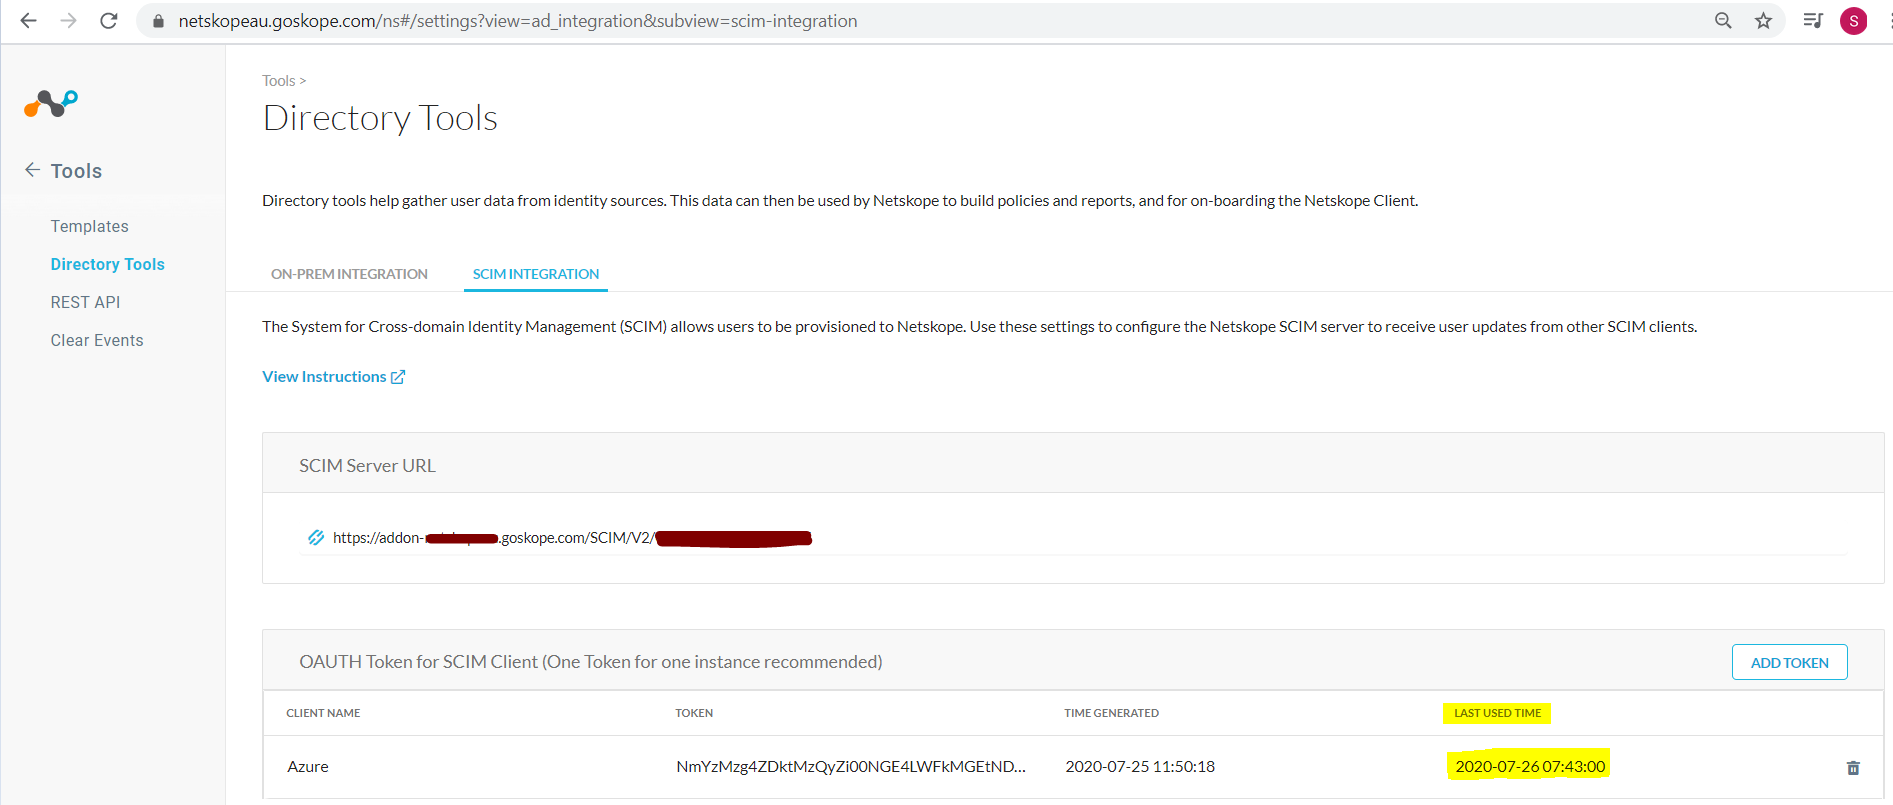
You can check In the Netskope tenant where the Last Used Time gets updated.
Click Save.


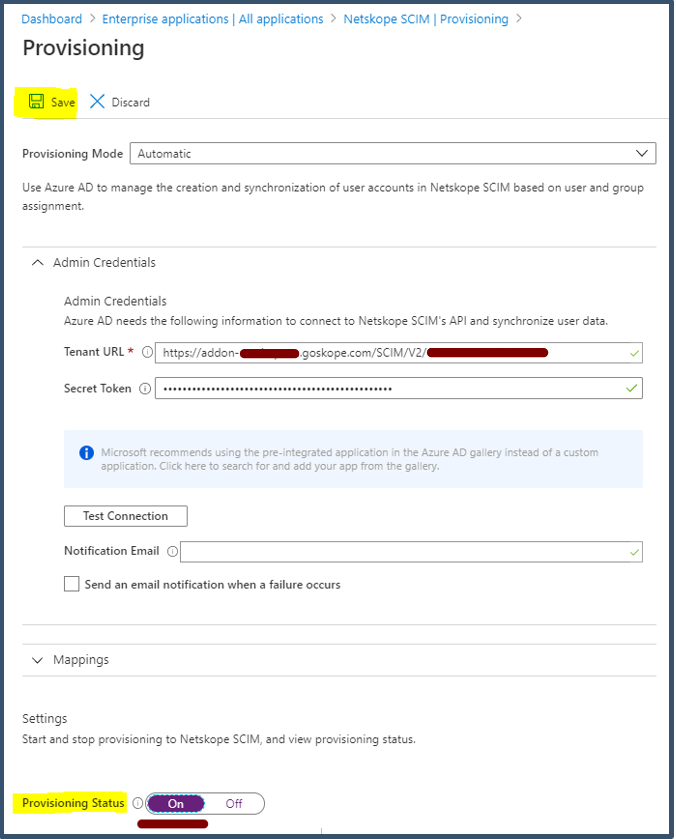
Next set Provisioning Status to ON.
Click Save.


Note
The Default SCIM Mappings and Provisioning Scopes are listed under Mappings; refresh the page to view it. The mappings attributes are fixed and should not be changed. You can click on the mappings to view details.
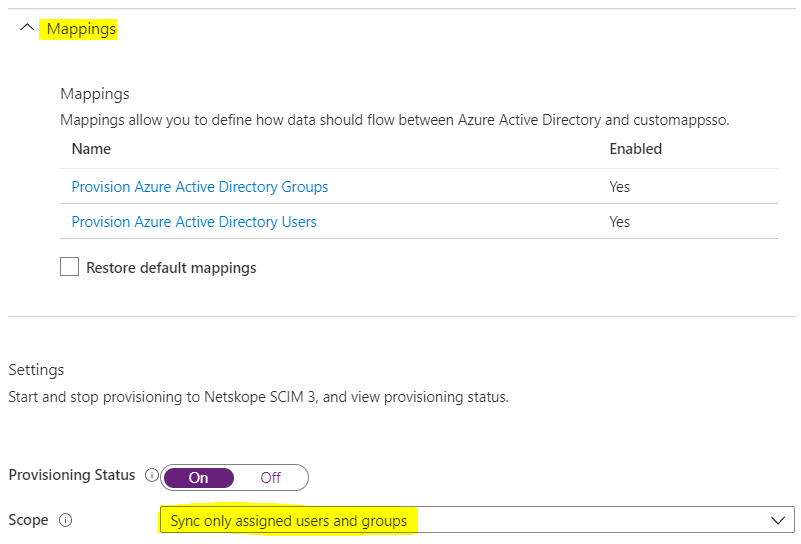
Add Azure users and groups to sync to the Netskope tenant.
Select Users and Groups and select Add user.
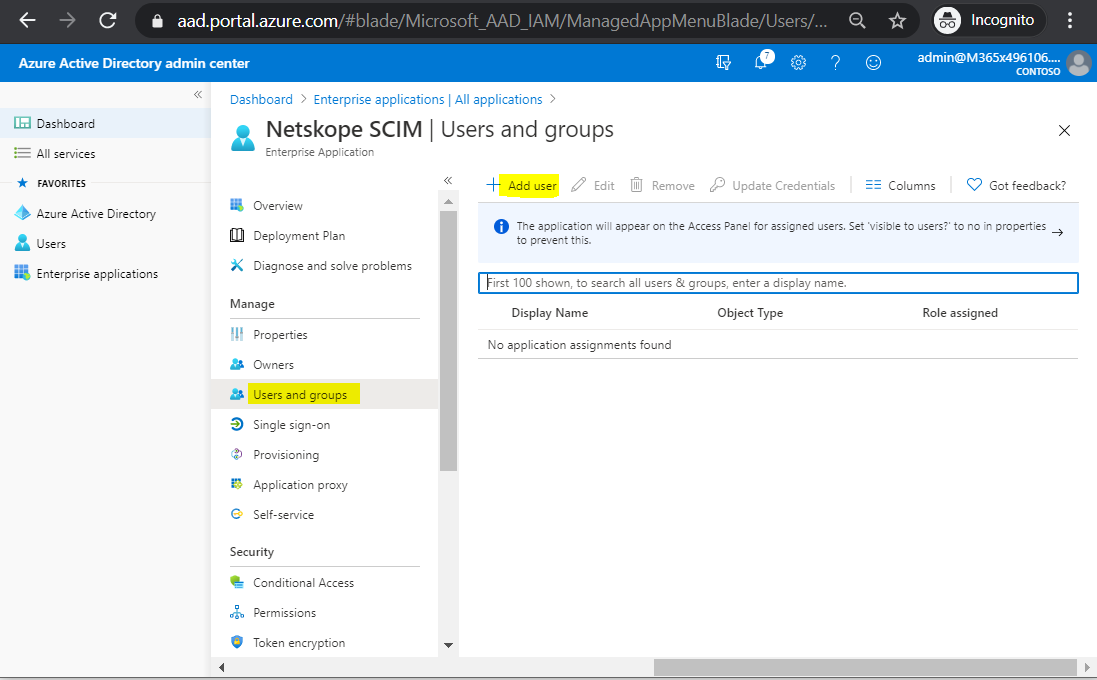
Select Users and Groups and then select the users and groups from the list.
Click Select.
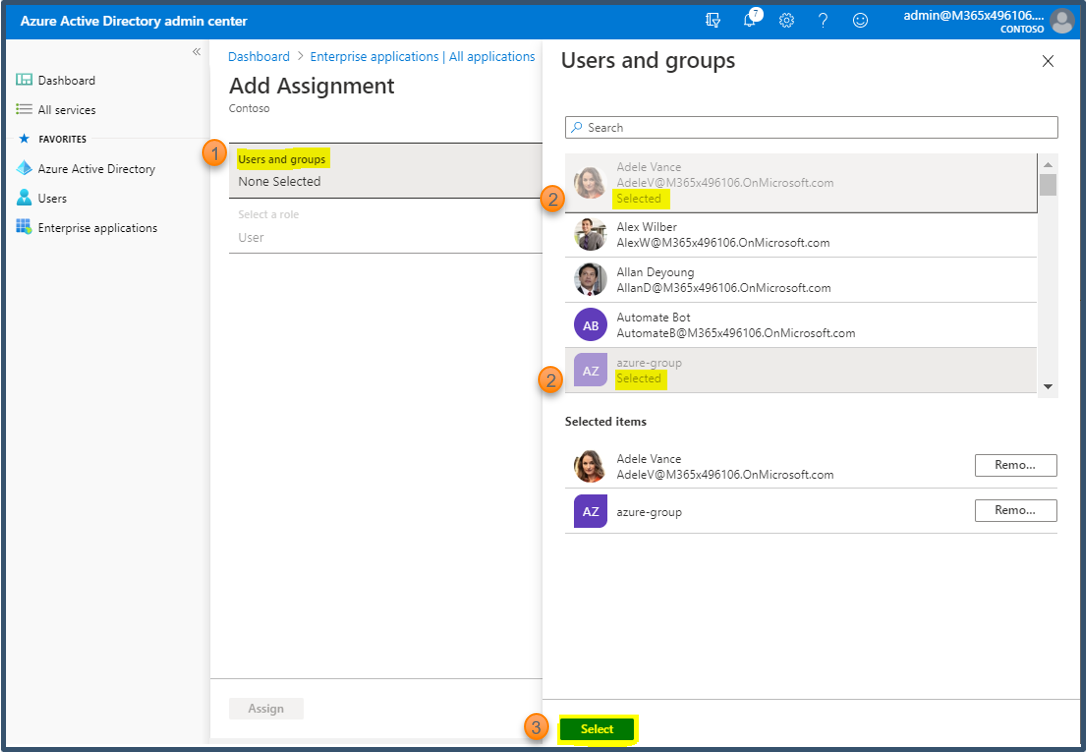
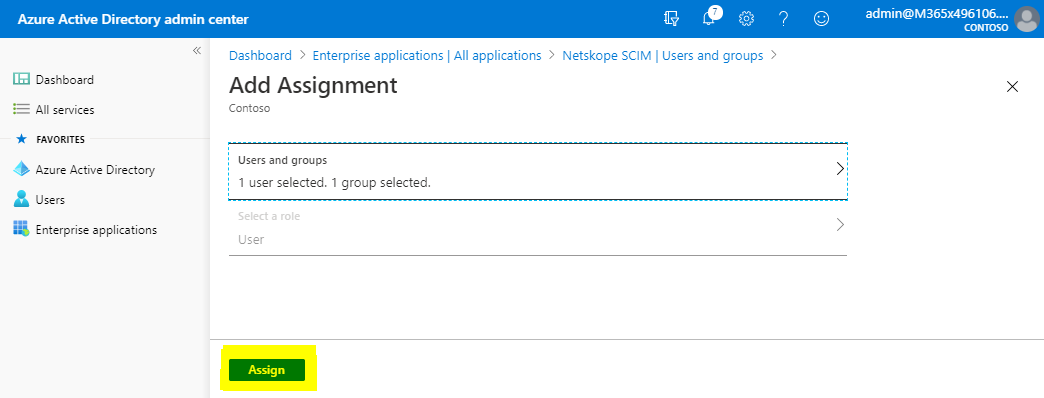

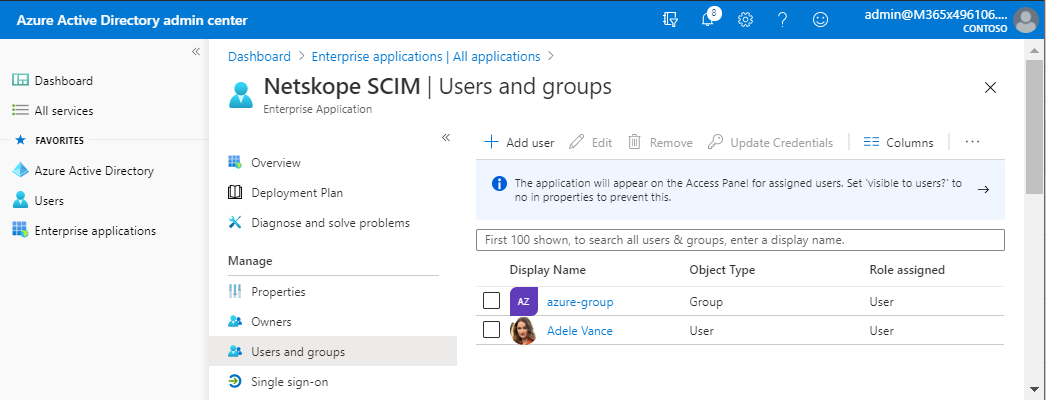
The selected user and group will be listed as shown.
Go back to the Provisioning section.
Important
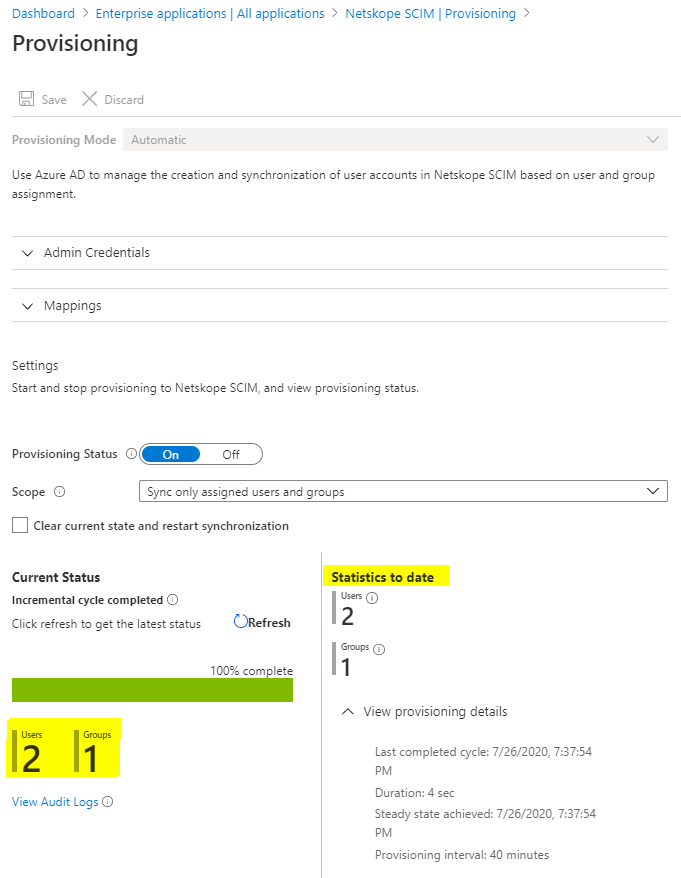
Azure SCIM Provisioning interval is 40 minutes.
Initial Sync
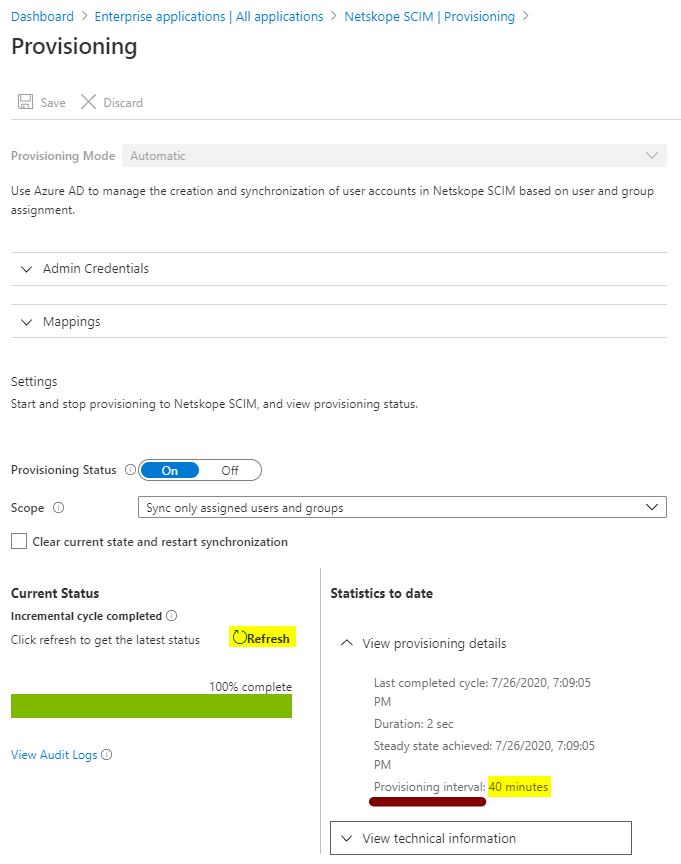
After 40 minutes
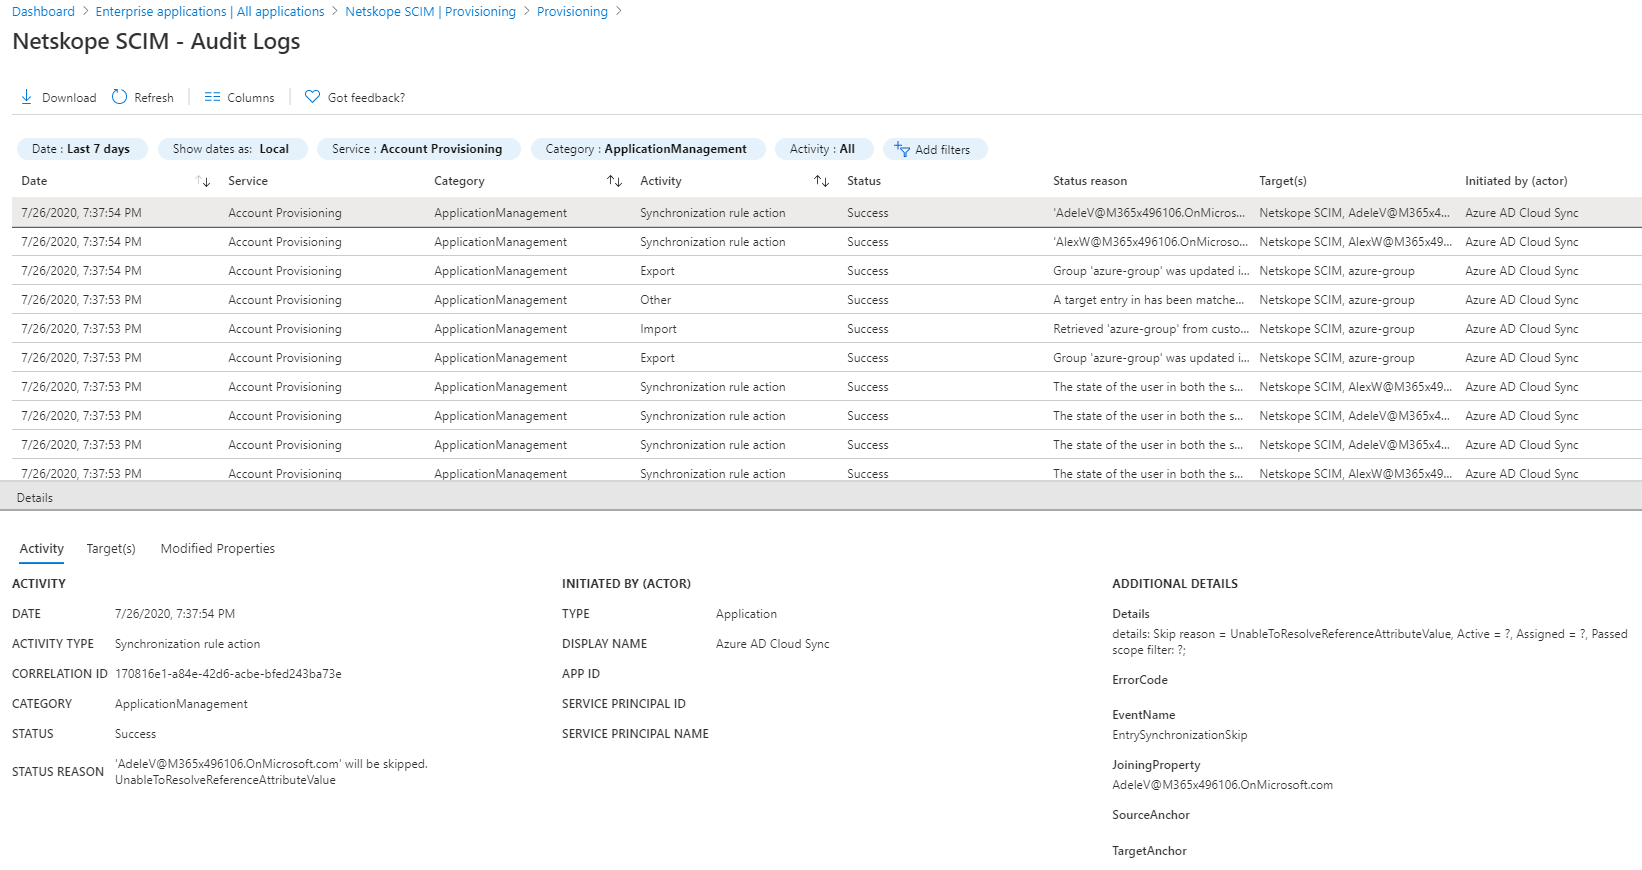
Click View Audit Logs to view synchronization events, which can be used for troubleshooting issues.
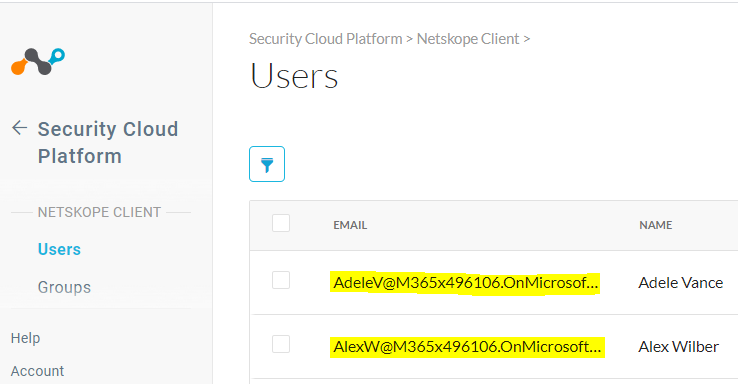
Check Azure users in the Netskope UI under Settings > Security Cloud Platform > Users.
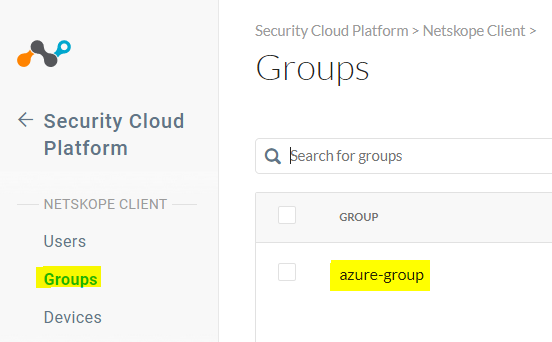
Check Azure groups in the Netskope UI under Settings > Security Cloud Platform > Groups.
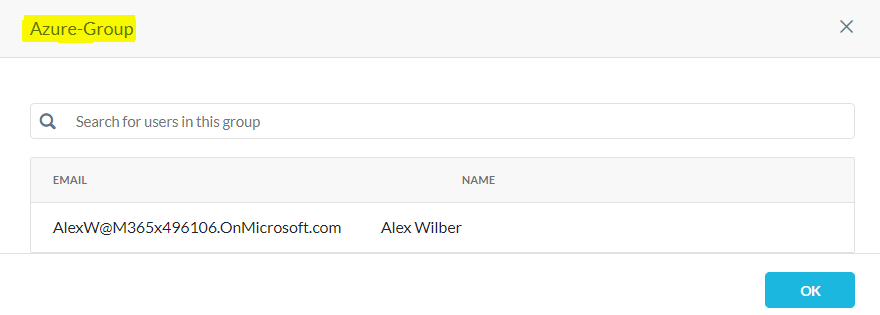
Azure SCIM can sync:
Users
Groups which also includes Users within the groups (nested groups not supported by Azure SCIM).
The Azure Users & Groups will also be available for selection in Real-time Protection Policies.
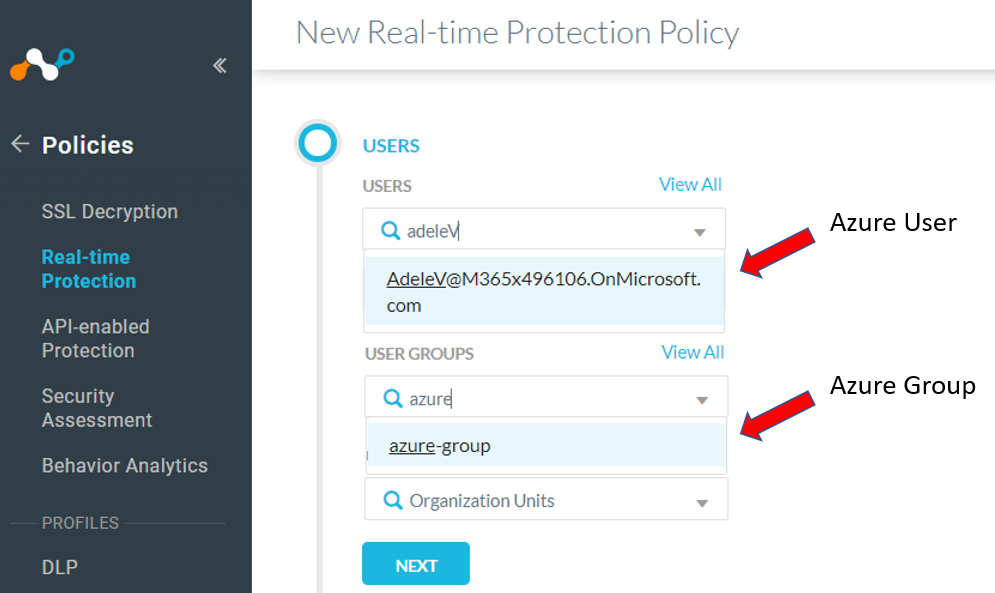
The SCIM configuration is completed