Deploy the Netskope Client
The Netskope Client is the primary method of steering traffic to the Netskope cloud for real-time inspection, and can be deployed using multiple methods:
Email Invite
Packaging the Application, like SCCM, Intune, JAMF (recommended).
Email Invite
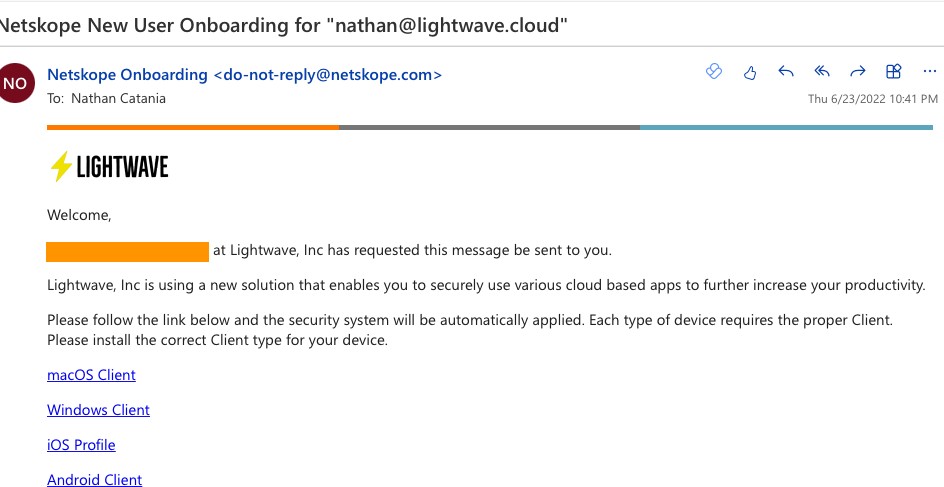
The user receives an email from your Netskope tenant containing a unique link (with embedded enrollment token) to download the Client.
On installation, the Client is automatically enrolled and authenticated.
Use this method for PoCs, initial testing, one-off users, or for certain small M and A scenarios.
Pros
This method is quick and easy.
No MDM or Software Push is required.
Cons
The user needs to initiate installation of the Client themselves.
The user needs local admin privileges to be able to install the Client. By default, users added via this method are not part of any group.
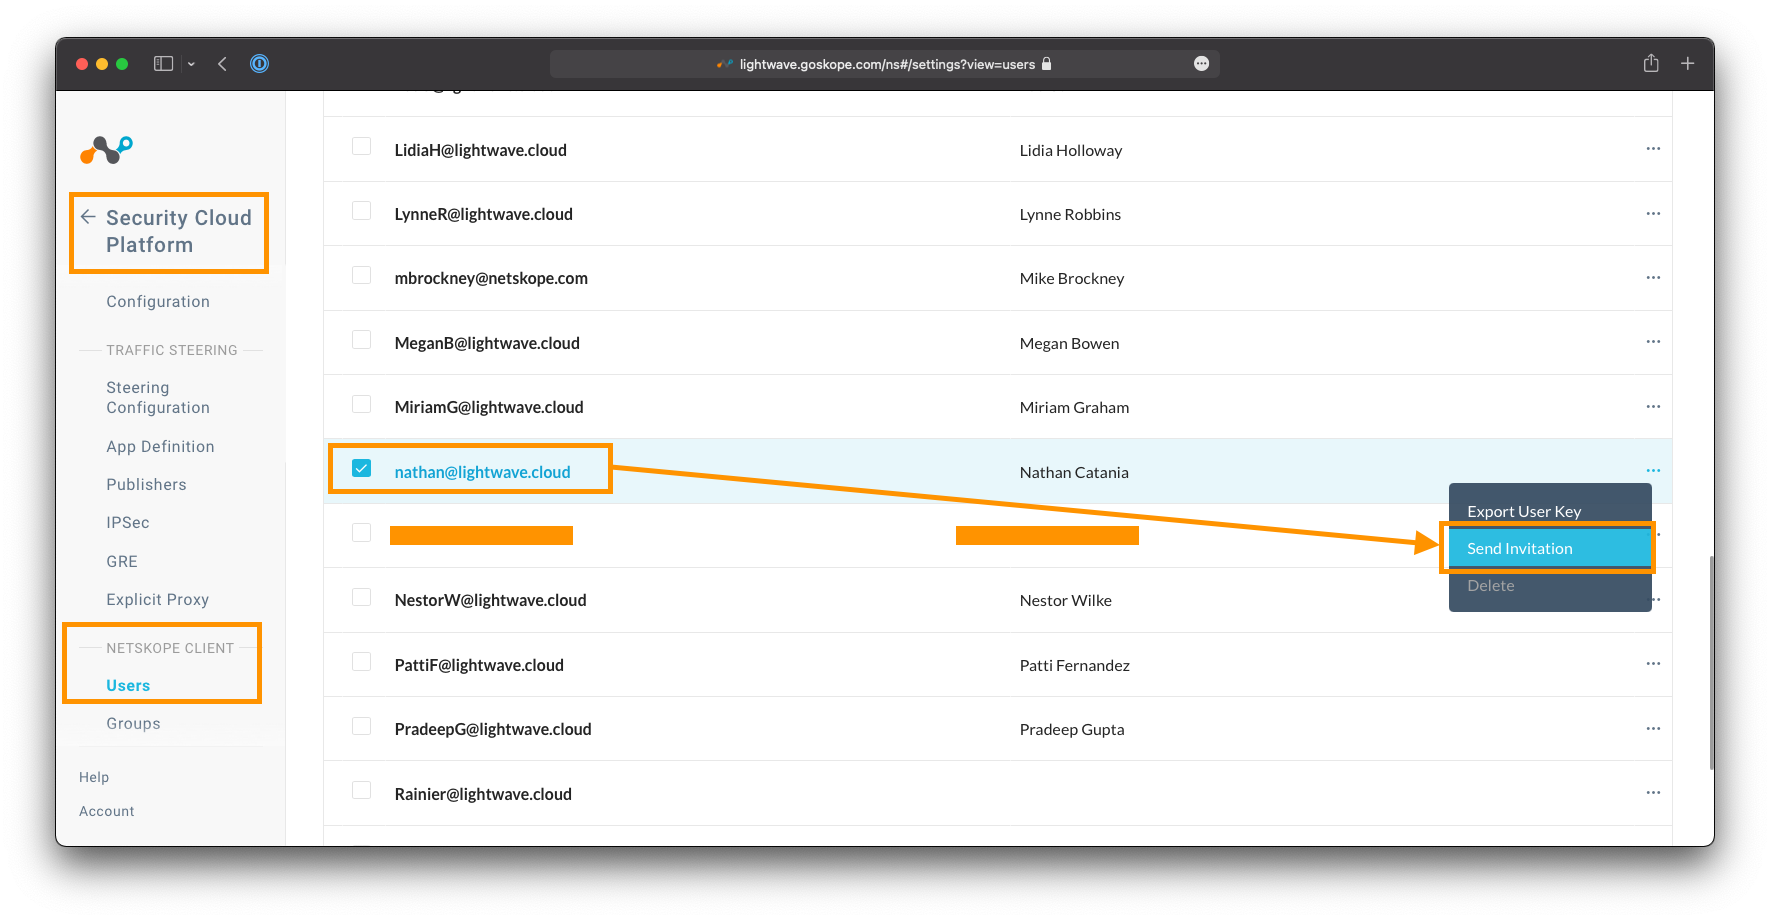
To send an email invite
Go to Settings > Security Cloud Platform > Users.
Select the desired user.
Click the "..." next to their name, and select Send Invitation.
 |
The email the user receives can be customized by going to Settings > Tools > Templates, and editing the Email Invitation template.
 |
Packaging the Application
This is the best method for production deployment and full-scale rollout.
Requires SCIM integration with a cloud identity provider (like Azure AD, Okta).
Relies on the UPN of the logged in user to authenticate. This must match the identity provider.
Pros
Installation is silent: Users do not know that an agent is pushed and no interaction from the user is required.
No requirement for a user to have local admin privileges.
Use of the client can be enforced through MDM, Group, or Company policy.
The client can be installed within multi-user environments (eg: Citrix) and is fully supported.
Cons
Company change control process typically needs to be followed before the Client can be pushed (and this can take time).
Some smaller companies may not have the software to push the Client or manage devices.
If the UPN of the logged in user does not match the directory, the Client can instead be rolled out to authenticate the user via SAML/SSO. See here for more information.
To package the client, follow the instructions in one of the links below:
Note
You do not need to use the Directory Importer tool if you have synchronized your users using SCIM in Integrate an Identity Provider (IdP) of this guide, despite what the linked documentation (in the bulleted list above) might say.
Sample CLI

msiexec /I C:\Netskope\InstallerPkg\nsclient-<ver>.msi token=<orgid> host=addon-<tenant- name>.goskope.com autoupdate=on mode=peruserconfig /l*v %PUBLIC%\nscinstall.log
<ver>is the version of the Netskope client package downloaded.<orgid>is your Organization ID. This is located at Settings > Security Cloud Platform > MDM Distribution. Under "Create VPN Configuration", copy the Organization ID string.<tenant-name>is the name of your tenant from Step 1. This is the subdomains proceeding the goskope.com in the URL used to access the Admin Control. For example, if you access the Admin Console at https://lightwave.goskope.com, then your tenant name would be lightwave. If you access the Admin Console at https://lightwave.au.goskope.com, then your tenant name would be lightwave.auFor a full list of command line parameters, see Table 15 here.