Configure Netskope SMTP Proxy with a Custom MSA
When you configure Netskope SMTP Proxy with a custom mail submission agent (MSA), all outgoing emails from the custom MSA are sent to Netskope SMTP Proxy for policy evaluation. You can create up to 3 custom MSAs.
To configure a custom MSA for Netskope SMTP Proxy:
In the Netskope UI, go to Settings > Security Cloud Platform > SMTP.
Click + and +Create a custom MSA.
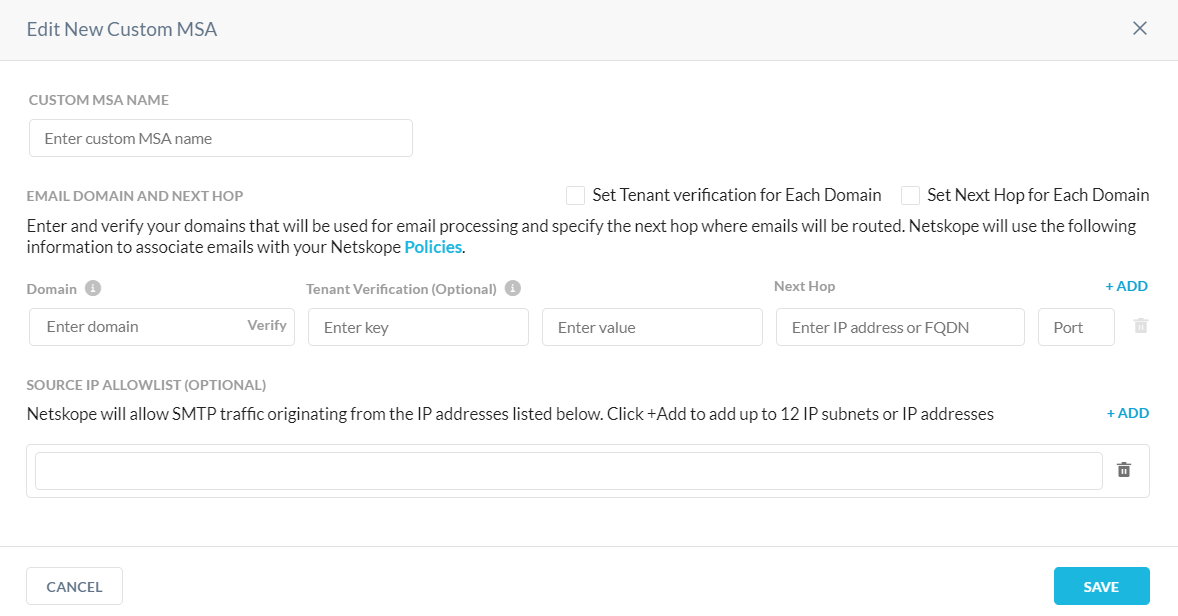
In the Edit New Custom MSA window:
Create MSA Name: Enter a name for the custom MSA. Policies, alerting, and incidents refer to this name when an event occurs.
Set Tenant Verification for Each Domain: (Optional) Select to set a unique tenant verification and key-value pair for each domain.
Set Next Hop for Each Domain: (Optional) Select to enter a unique next hop for each domain.
Domain: Enter and verify the domain you want to use for email processing. You can enter a domain, subdomain, or a wildcard domain (e.g., abc.com, cde.abc.com, and *.abc.com). Click +Add to add multiple domains.
Tenant Verification (Optional): Enter a key and value as a verification method for the email traffic if the emails have a mail server (MSA) specific key-value pair.
Next Hop: Enter the IP address/FQDN and port of the upstream MTA where you want the emails to be routed.
Source IP Allowlist (Optional): Enter the mail server egress IP addresses you want to allow and bypass Netskope. You can enter /24 CIDR subnets or smaller as well as individual IP addresses. Click +Add to add up to 12 IP subnets or IP addresses.

Click Save.
After creating a custom MSA, you can create Real-time Protection policies to secure your outbound emails with DLP.