File Type Detection
Note
If you do not see this option in your account, contact Support to enable this feature.
The File Type Detection capability allows admins to configure policies to allow or block files based on a specific category (e.g. binary or executable) or file type (e.g. Android Package Kit). Optionally, admins can send files for deep analysis using DLP or Threat Protection Profiles or create Real-time Protection policies to ensure the content of files are checked to avoid data exfiltration or malicious files.
Add a File Type Criteria and Constraint
Use the file type criteria and constraint in a policy to restrict upload or download of various types of files or category of files.
Note
The Real-time Protection policy supports up to 256 MB for restricting file types and file sizes by default. For extended file size support of up to 400 MB, reach out to your account team to enable this capability.
Create a Real-time Protection policy or edit an existing policy. To learn more: Real-time Protection Policies
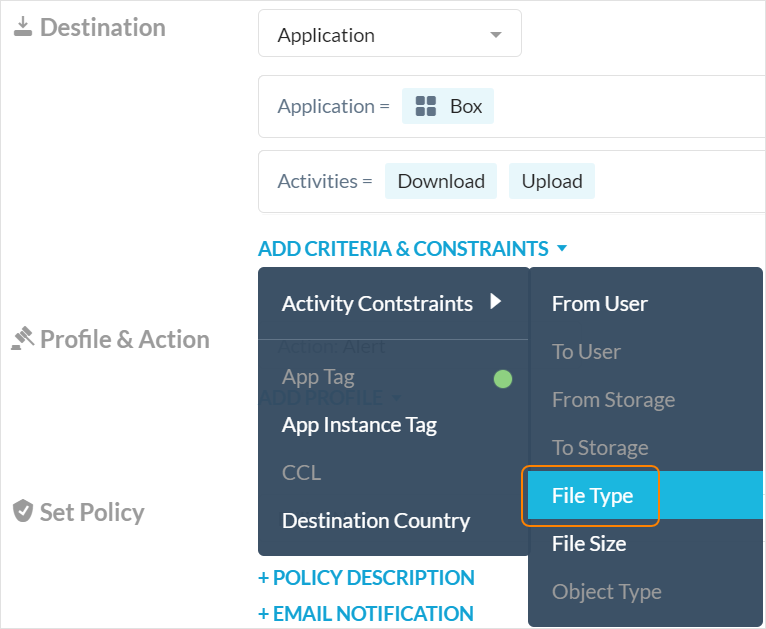
Click Add Criteria & Constraints and select Activity Constraints > File Type.
Select whether a file should match or does not match the conditions specified.

Click Select File Type to make file category or file type selections.

The Select File Type window displays. You can select a category or click the magnifier to view and select the file types within the category.
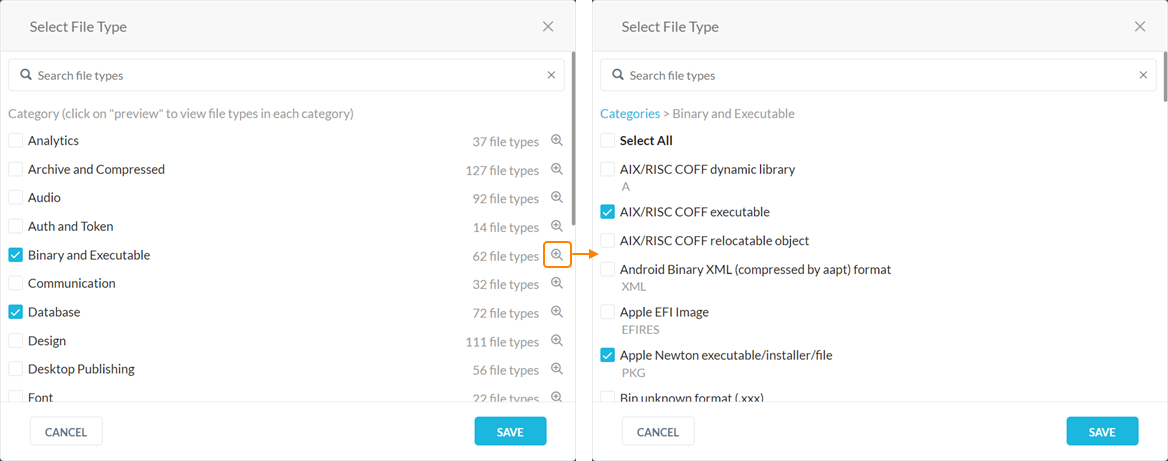
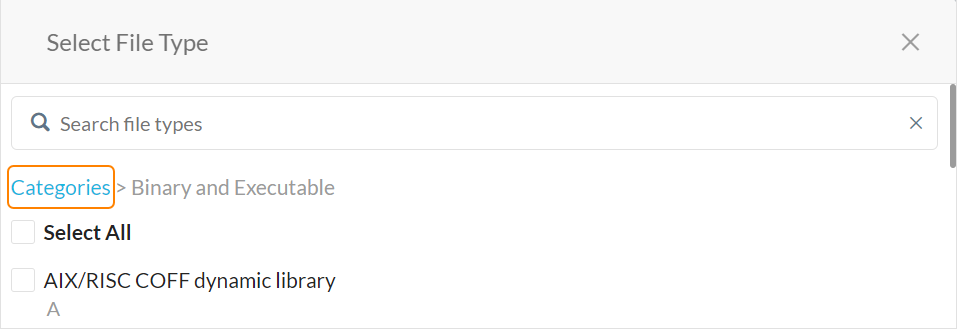
Optionally, click Categories to return to the Category list without making any changes.
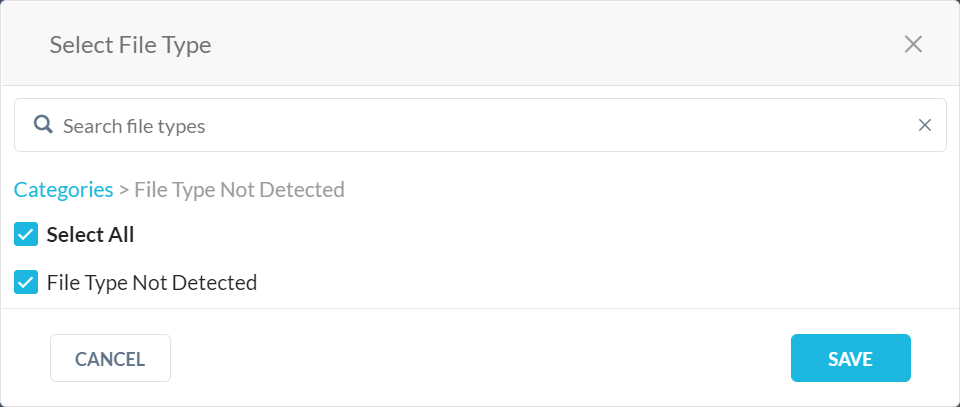
Optionally, select the File Type Not Detected category if your file category is an unknown file type or doesn’t fall into an existing categorization. Scroll to the bottom of the list to view this category.
Configure the Profile & Action.
Add a policy name.
Click Save.
Tip
You can view generated alerts in the Skope IT Application Event Details panel. To learn more, see About Application Events.
Add a File Size Criteria and Constraint
Use the file size criteria and constraint in a policy to restrict the size of various types of files or categories of files that users can upload or download.
Create a Real-time Protection policy or edit an existing policy. To learn more: Real-time Protection Policies
Click Add Criteria & Constraints and select Activity Constraints > File Size.
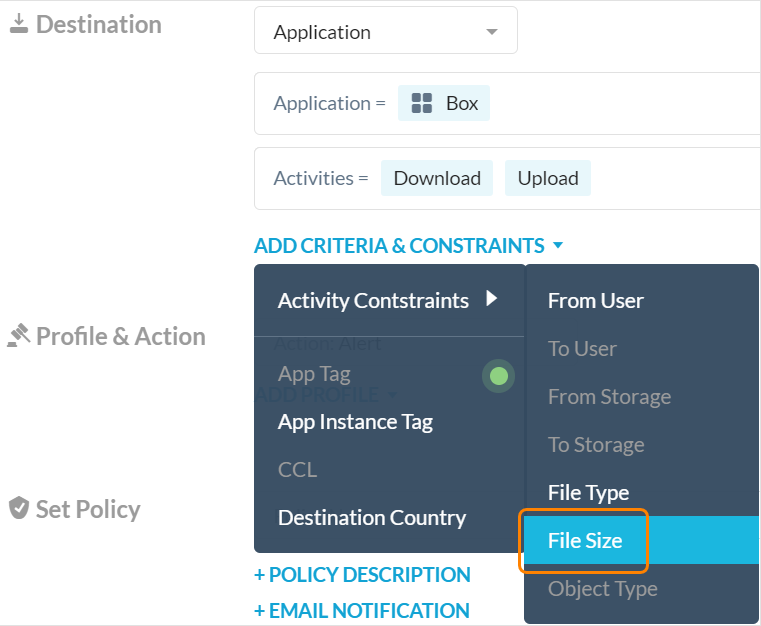
Select whether a file should match or does not match the conditions specified.

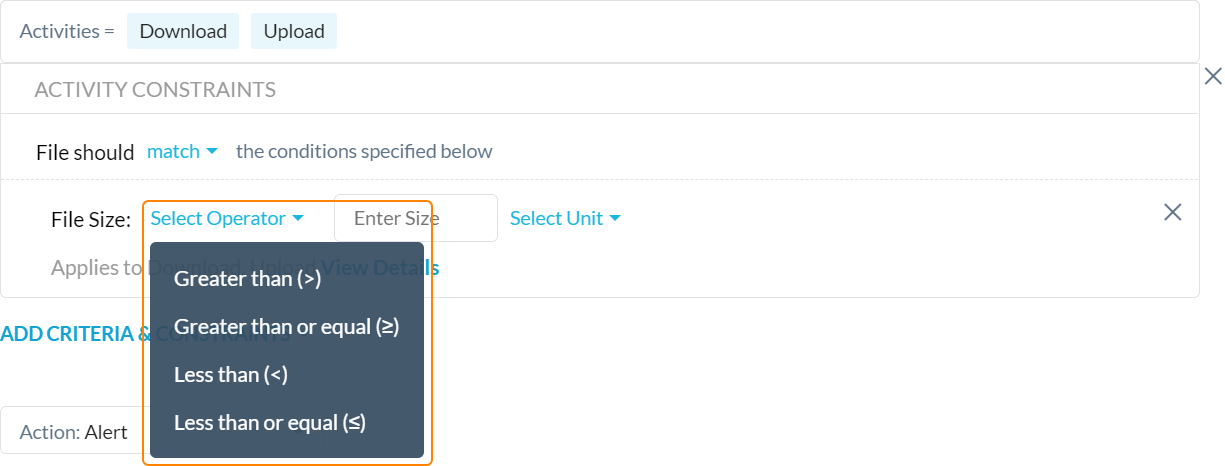
Select an operator for the File Size criteria.
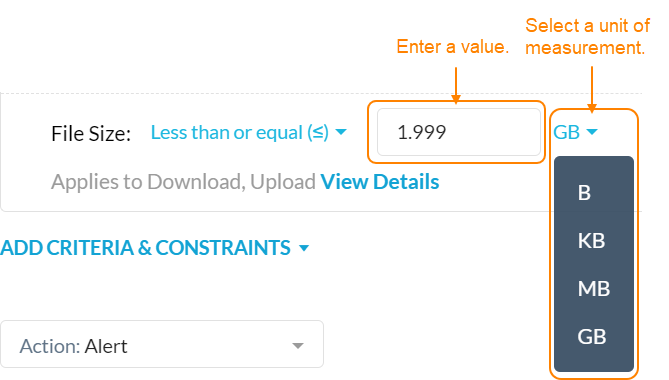
Enter a value and select the unit of measurement for the File Size criteria. You can enter up to 1.999 GB for the file size.
Note
The ability to enter up to 1024 GB for the file size is a Controlled General Availability feature. If you want to enable this feature in your tenant, contact your sales team.
Configure the Profile & Action.
Add a policy name.
Click Save.
Tip
Skope IT Application Event Details
Navigate to Skope IT > Application Events to view alert details.
Real-time Protection Policy Migration
Admins must migrate any existing policies to the new file type options, because the old file type options will be deprecated. The new options provide more comprehensive detection.
Warning
If you choose not to migrate your existing policies to the new file type options, then the policy will not work when the old file type feature available in Real-time Protection policy activity constraints is deprecated in January 2024.
Netskope has provided suggestions for updating all your existing policies that need to be migrated, including suggestions for new file types to replace your policies’ old file types. These suggestions are available for admins to review and take action on.
Note
Admins must verify the migration suggestions (wizard) before applying to ensure accuracy. Keep in mind that once the migration is complete, you can’t roll back the policies.
To do a migration, from old file type to new file type:
Navigate to Polices > Real-time Protection, and then click Review Suggestions.

A wizard will guide you through the migration suggestions.
The migration utility will show the policies that must be migrated.
You can accept the suggestions or make new file type choices.