AWS S3 Events, Alerts Plugin for Log Shipper
This plugin is used to deliver web transactions data to the AWS S3 platform. To access the plugin, you would need the credentials of the AWS S3 instance. The AWS S3 Events, Alerts plugin support is:
Event Support | Yes |
Alert Support | Yes |
WebTx Support | No |
A Netskope Tenant (or multiple, for example, production and development/test instances).
A Netskope Cloud Exchange tenant with the Log Shipper module already configured.
AWS S3 credentials with create/read/write buckets permissions. Obtain your AWS S3 Access key ID and Secret Access Key with permission to read/write on specific buckets or permission to create buckets before proceeding.
Note
Verify your bucket permissions are secure and not set up for open public access. Only allow access to your cloud storage instance from your Cloud Exchange Host and any other addresses that need access.
Create a bucket, an IAM policy and user, and get your credentials.
Configure the AWS S3 Events, Alerts plugin.
Configure Log Shipper Business Rules for AWS S3 Events, Alerts.
Configure Log Shipper SIEM mappings for AWS S3 Events, Alerts.
Validate the plugin.
Click play to watch a video.
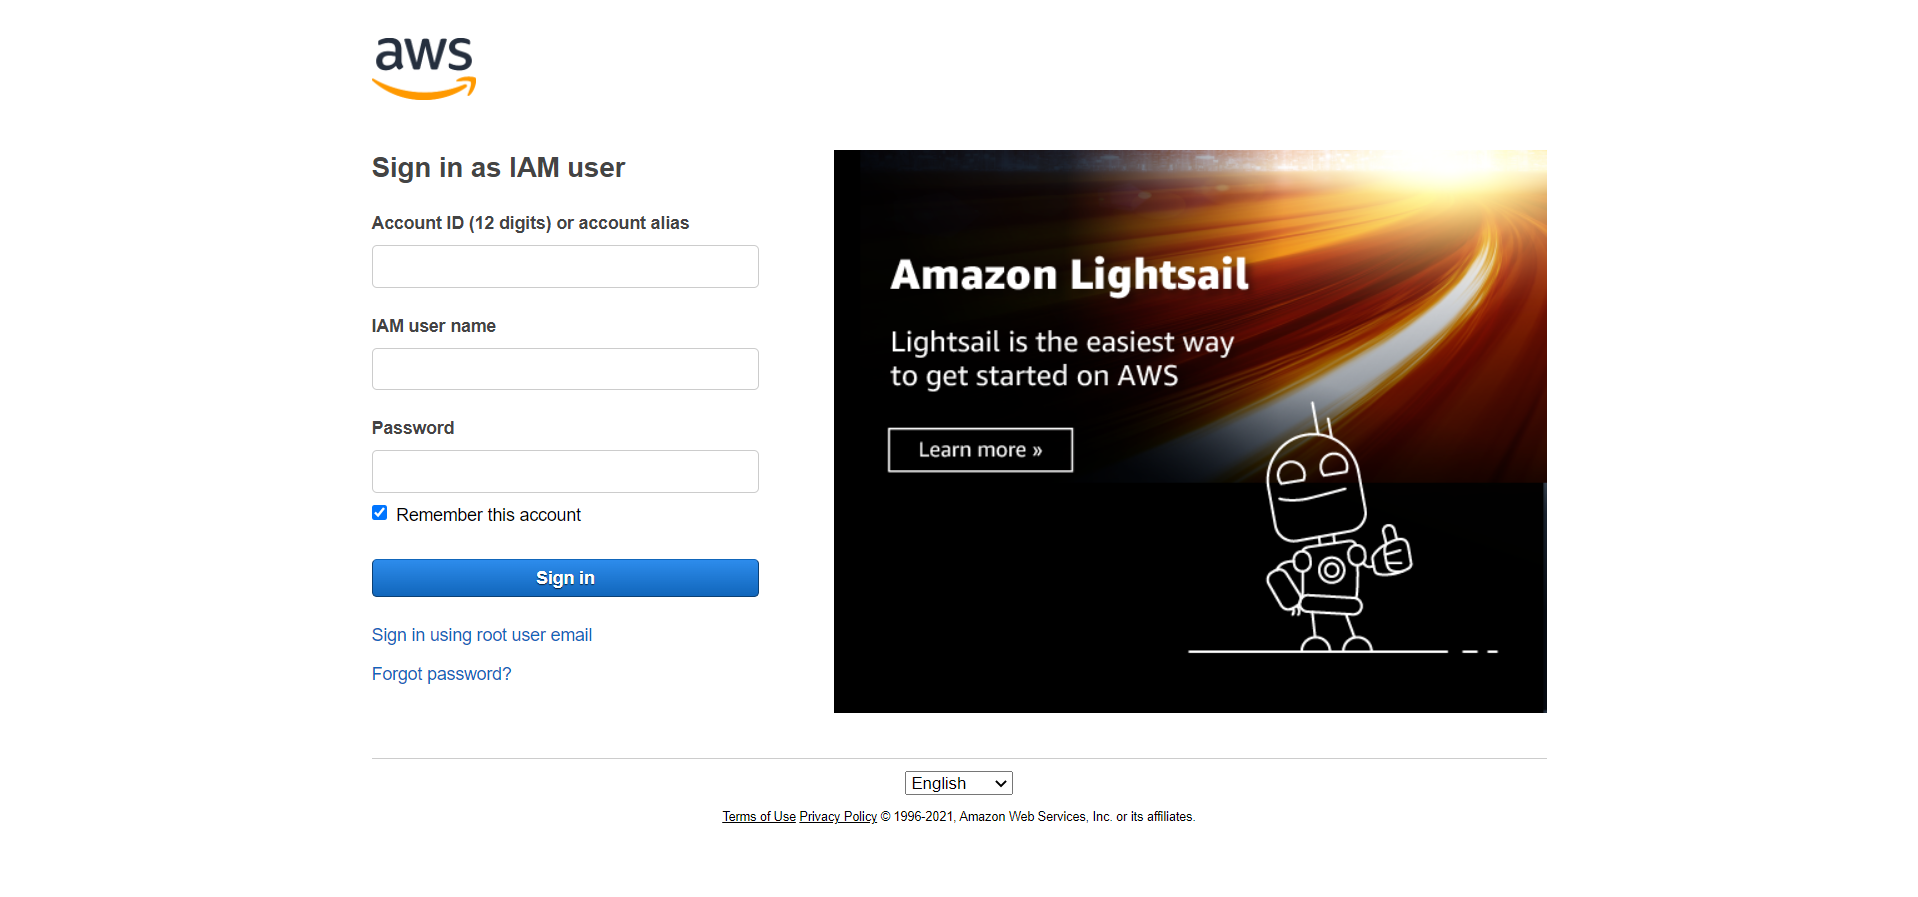
To create bucket and set required policies, go to your AWS console and log in.
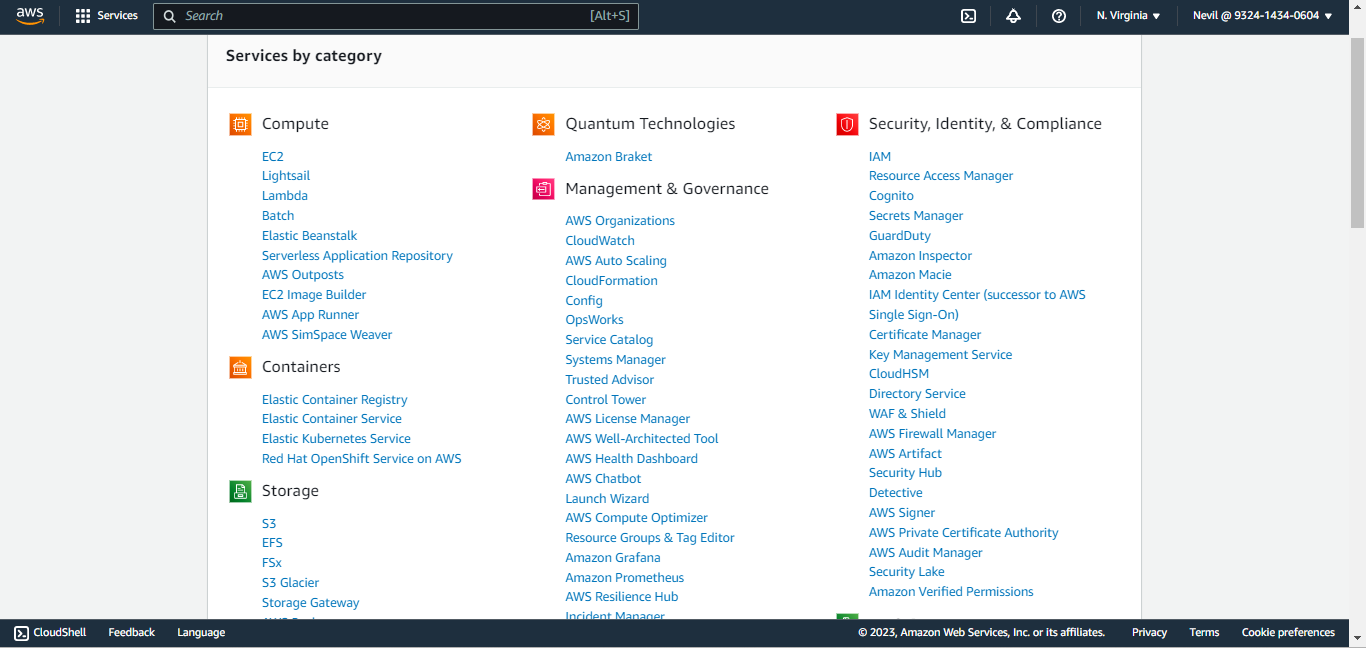
From All Services, select S3.
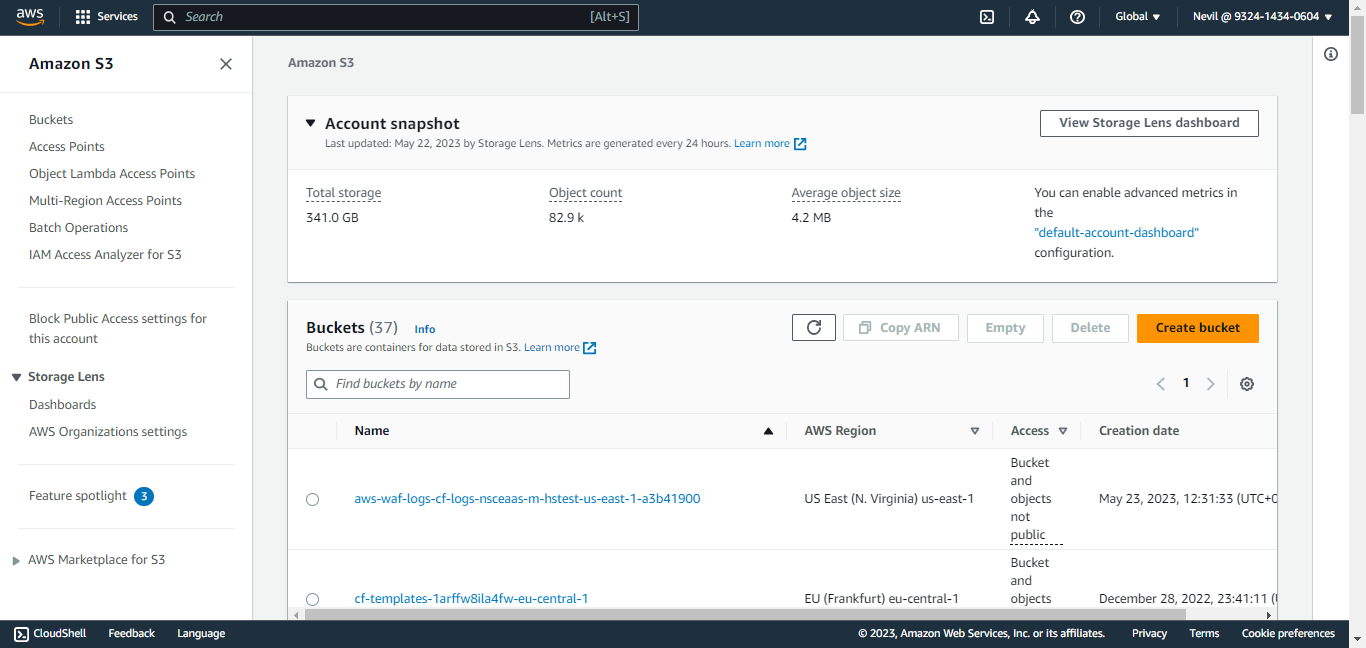
Click Create Bucket.
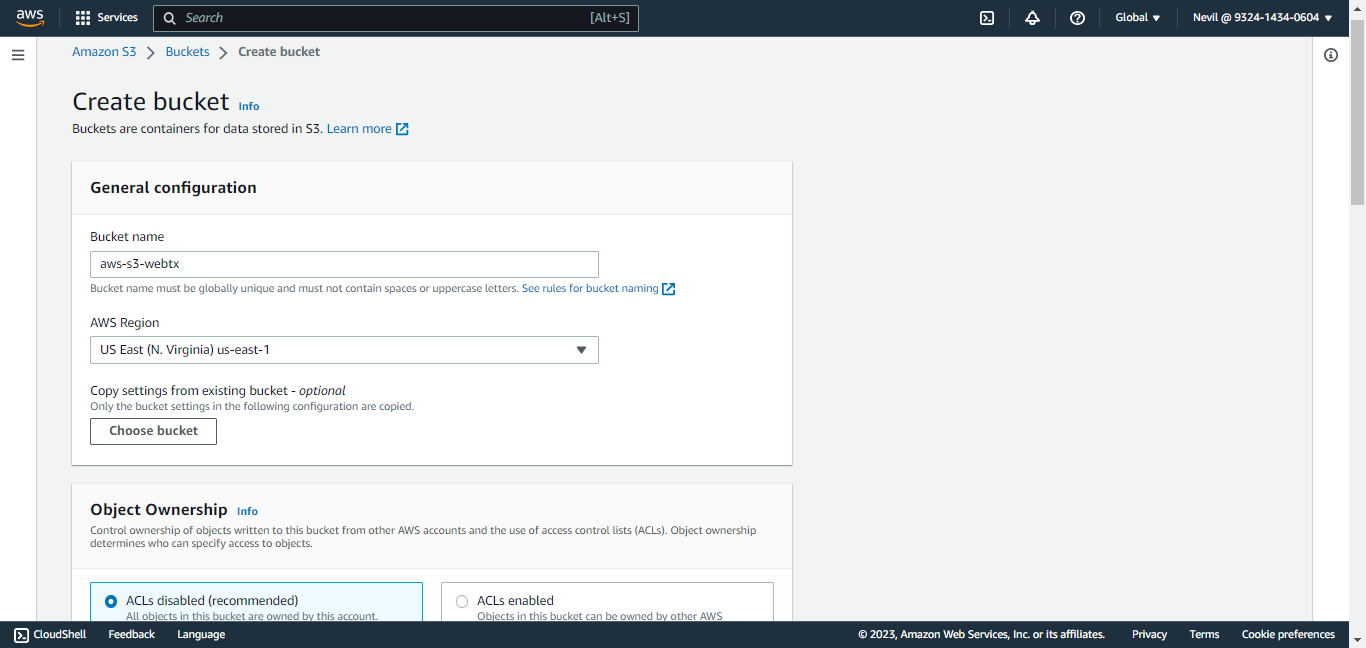
Enter a Bucket Name, scroll to the bottom, and click Create Bucket.
Search for your bucket and click on the bucket name to open it.
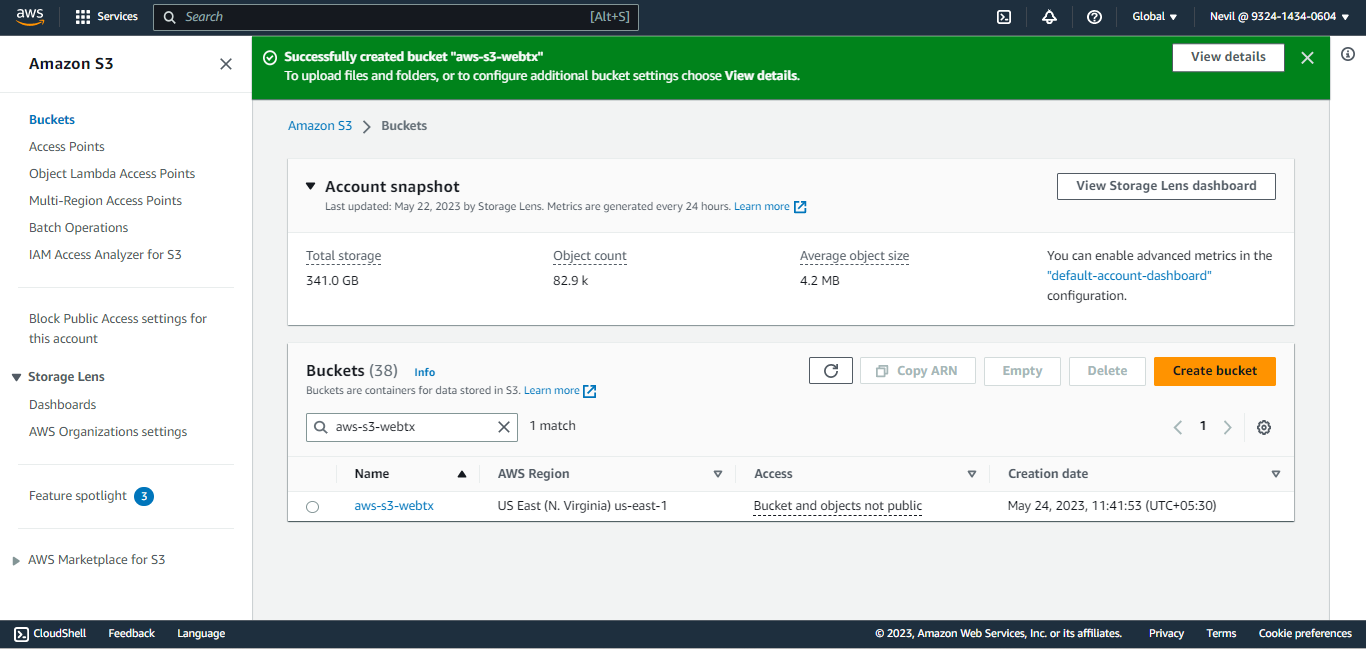
Click on Permission to open the permission tab and to set a policy.
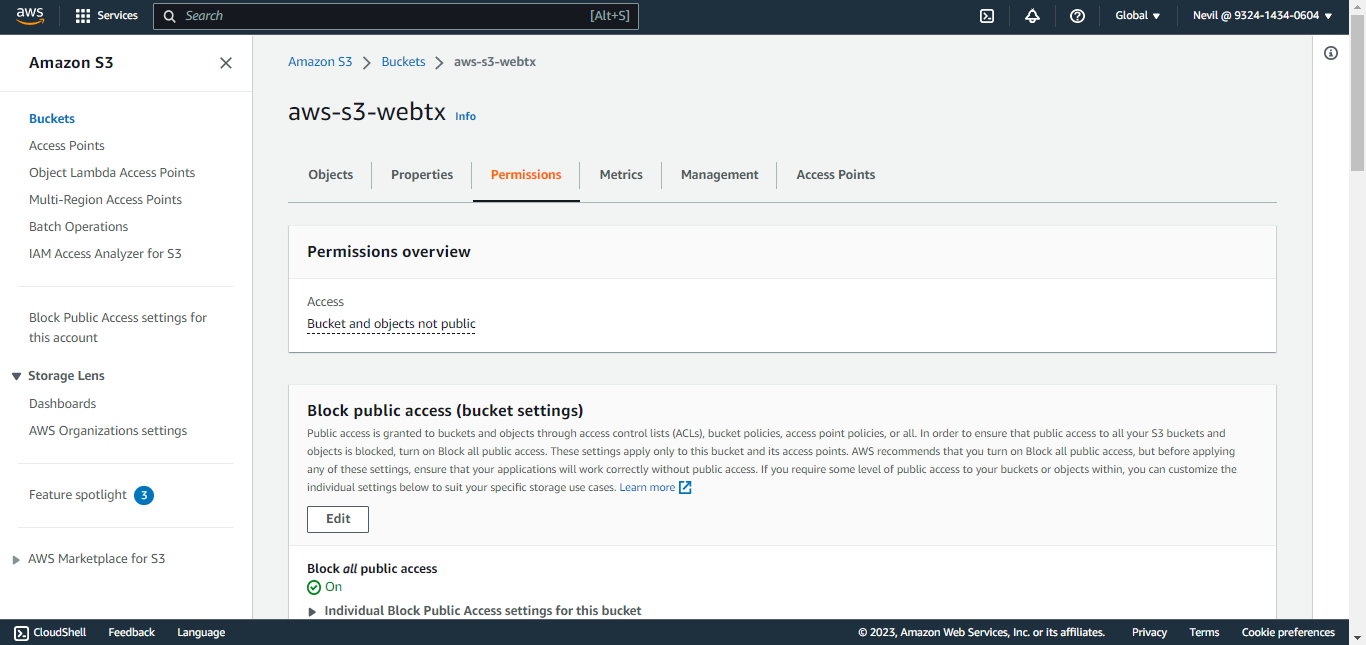
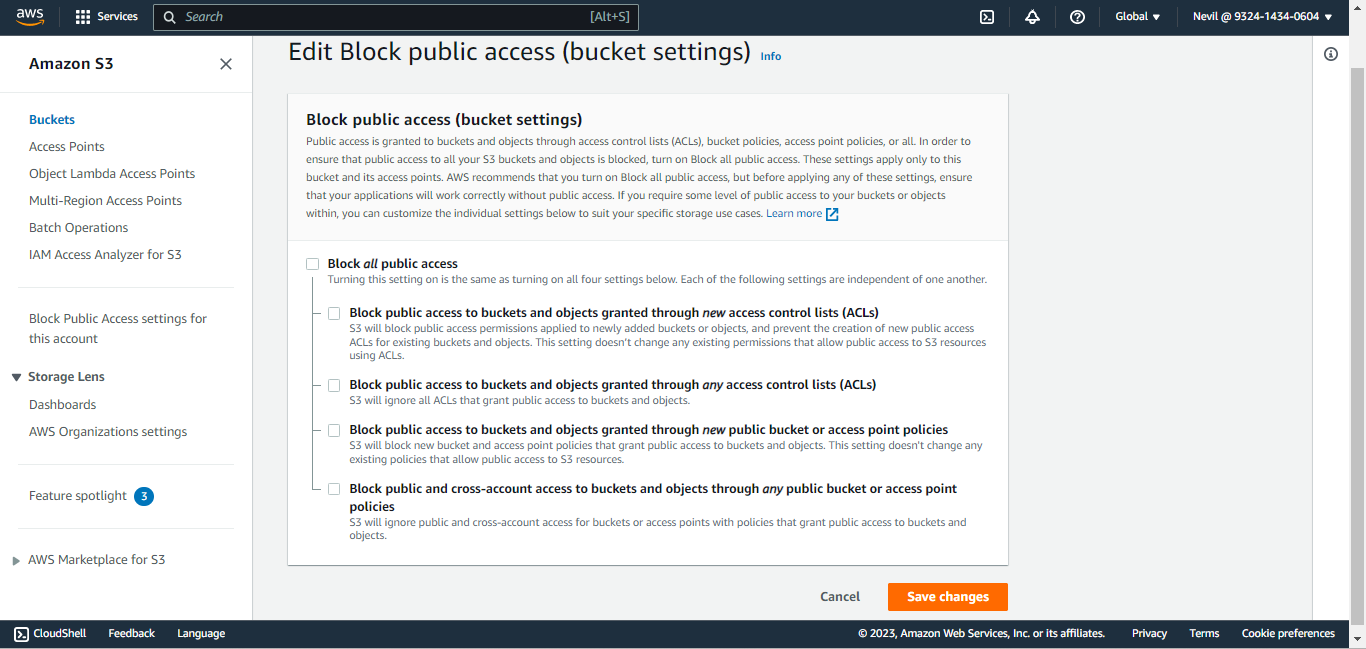
Click Edit. Under Block public access (bucket settings), uncheck all checkboxes and click Save Changes. When prompted for a confirmation, confirm it, and then click Confirm.
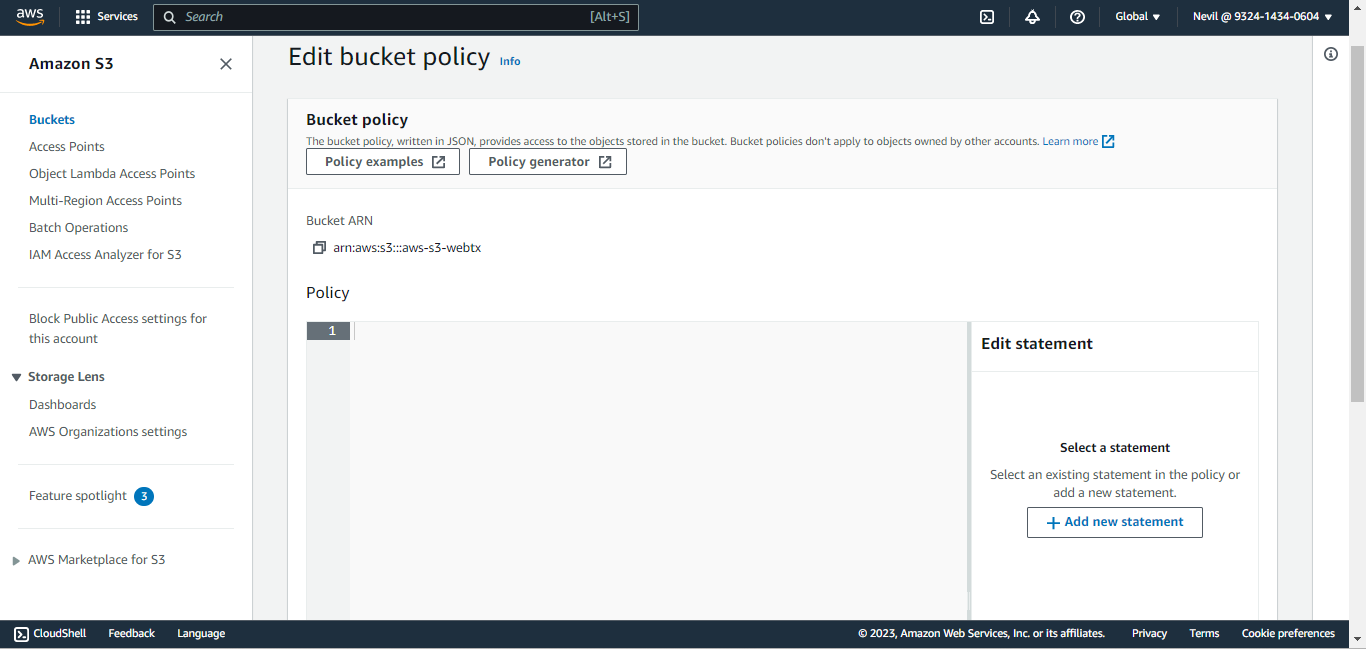
Under the Permissions tab, click Edit in the Bucket Policy section.
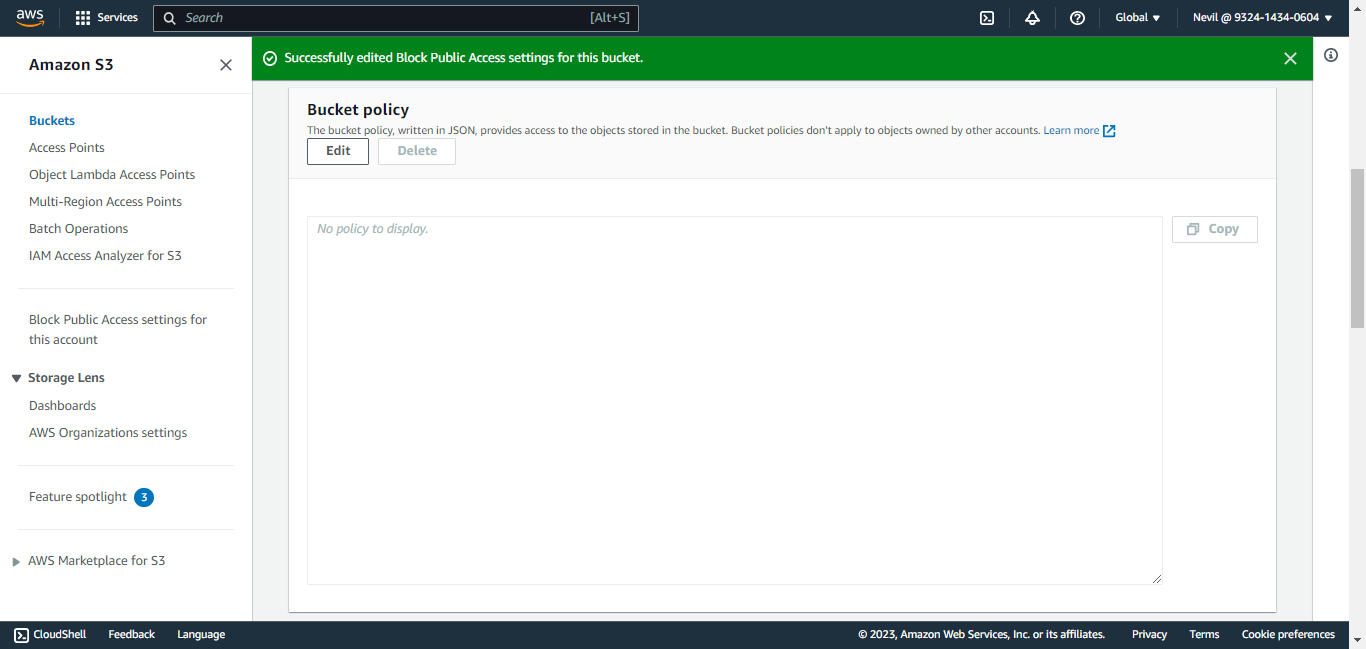
Click Policy Generator.
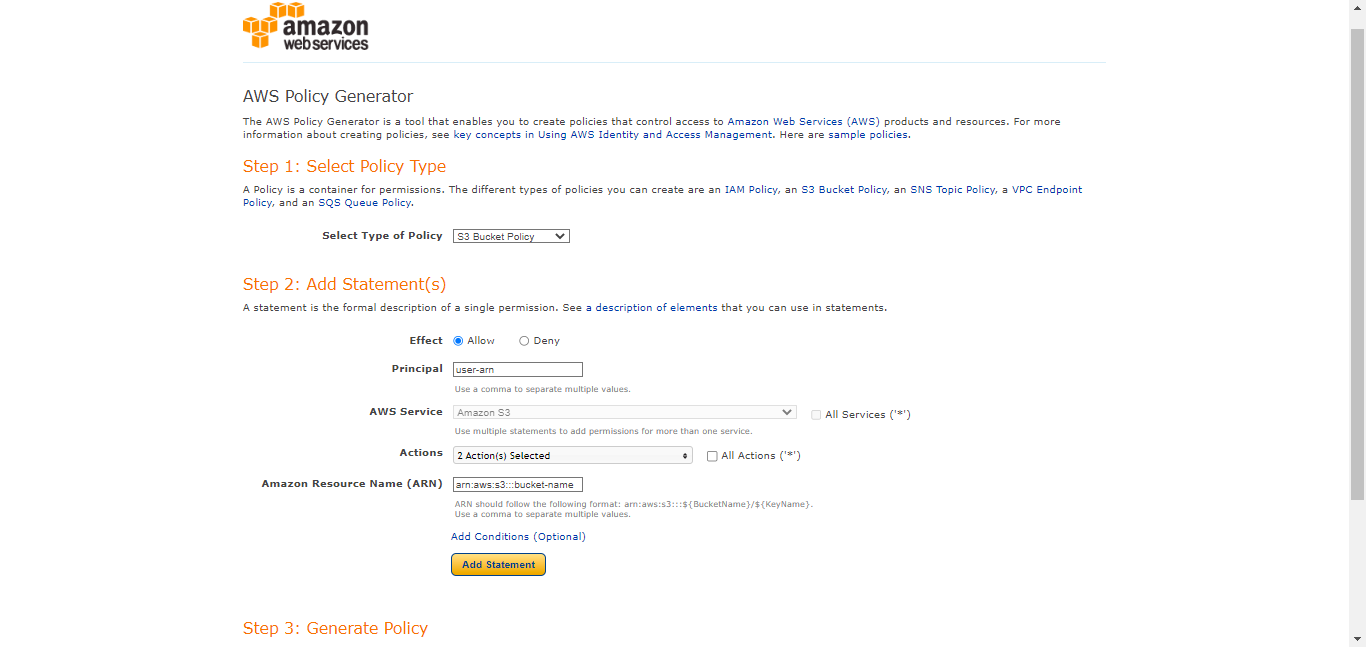
Select S3 Bucket Policy as policy type for Step 1, and Add Statement details for Step 2, and then click Generate Policy.
Select Type of Policy: S3 Bucket Policy
Effect: Allow
Principal:
<user-arn>Actions:
GetBucketAclGetBucketPolicy
ARN:
arn:aws:s3:::<bucket-name>Click Add Statement.
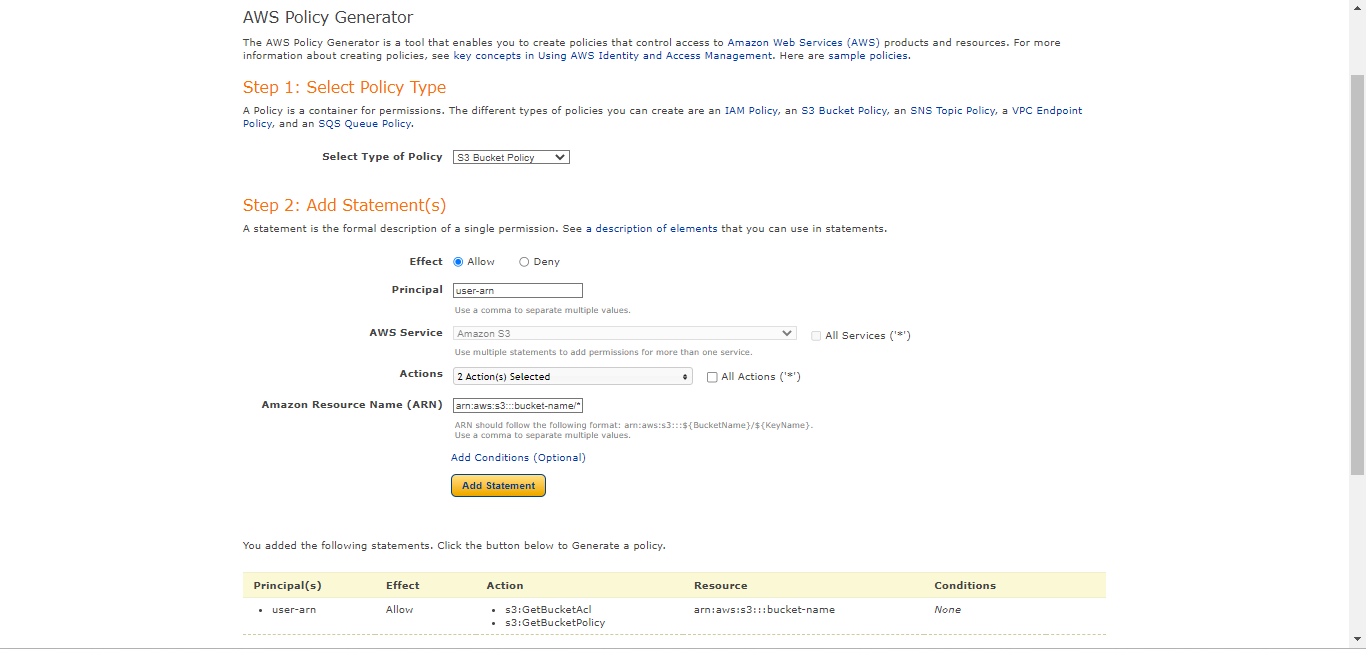
Select Type of Policy: S3 Bucket Policy
Effect: Allow
Principal:
<user-arn>Actions:
PutObjectPutObjectAcl
ARN:
arn:aws:s3:::<bucket-name>/*. Be sure to add/*after the second bucket name.Click Add Statement
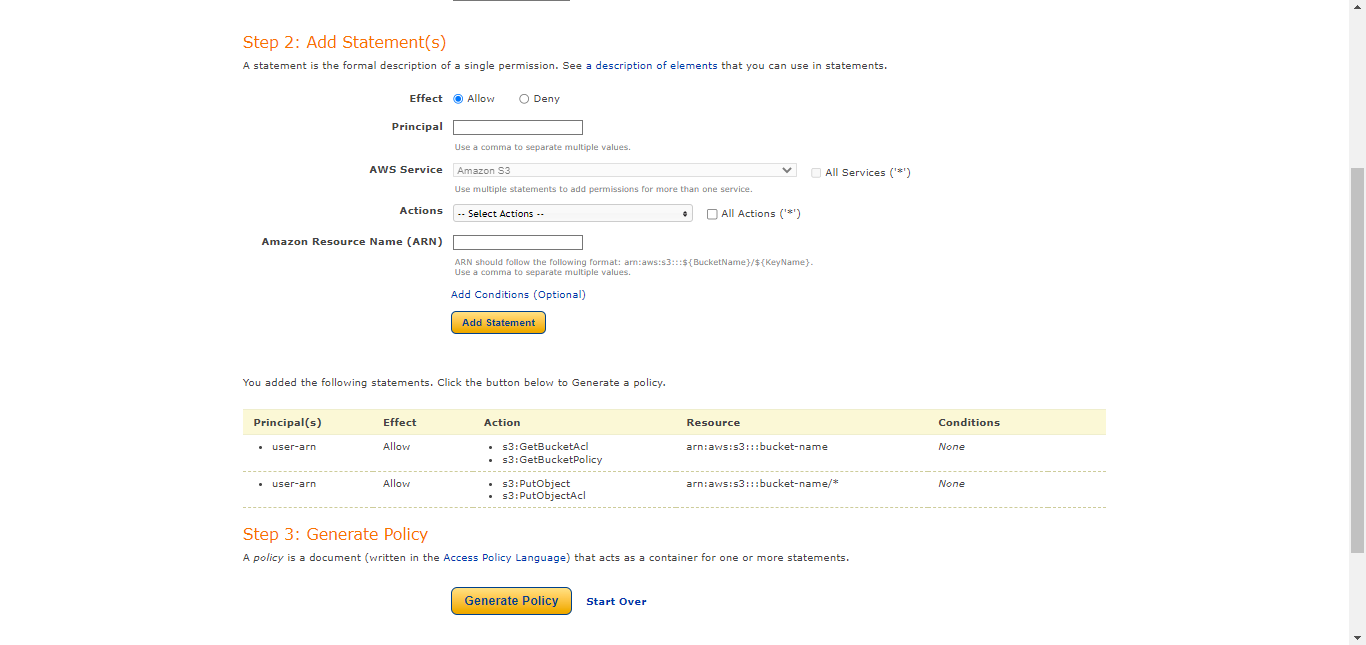
Click Generate Policy.
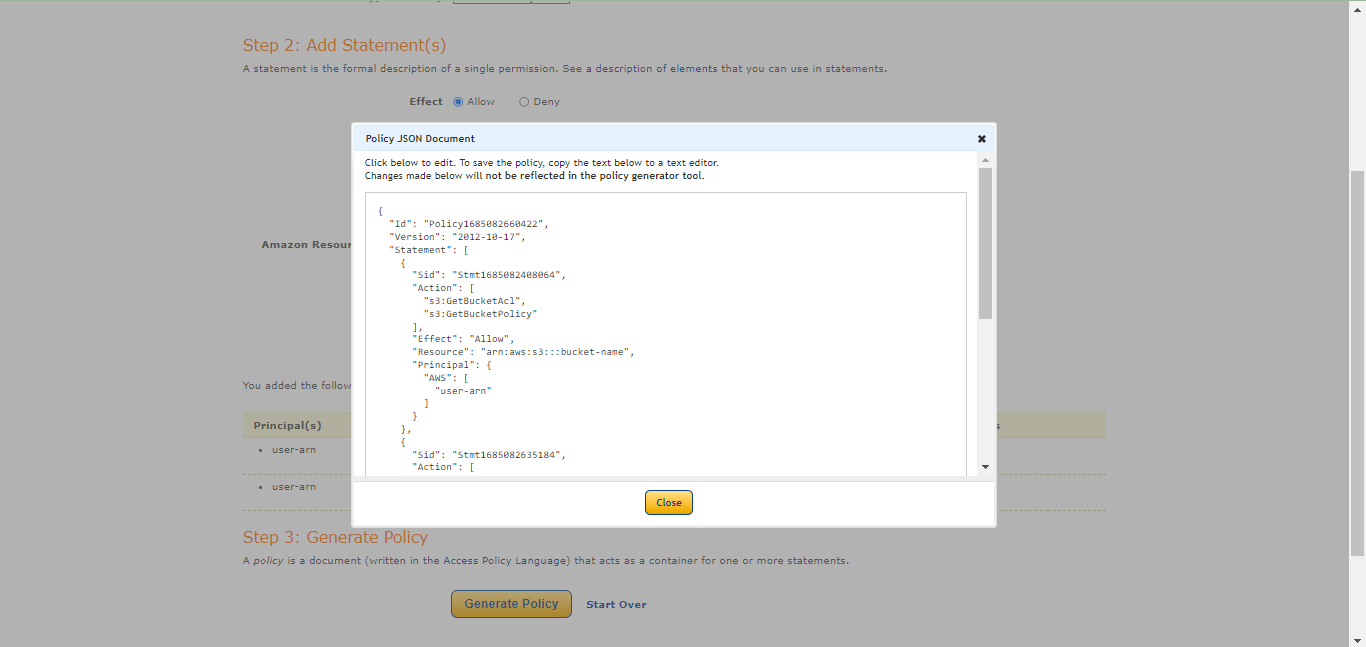
Add this policy to this textbox.
{
    "Id": "<policy ID>",
    "Version": "<version>",
    "Statement": [
        {
            "Sid": "<statement ID>",
            "Action": [
                "s3:GetBucketAcl",
                "s3:GetBucketPolicy"
            ],
            "Effect": "Allow",
            "Resource": "arn:aws:s3:::<bucket-name>",
            "Principal": {
                "AWS": [
                    "<user-arn>"
                ]
            }
        },
        {
            "Sid": "<statement ID>",
            "Action": [
                "s3:PutObject",
                "s3:PutObjectAcl"
            ],
            "Effect": "Allow",
            "Resource": "arn:aws:s3:::<bucket-name>/*",
            "Principal": {
                "AWS": [
                    "<user-arn>"
                ]
            }
        }
    ]
}
Scroll to the bottom and click Save Changes.
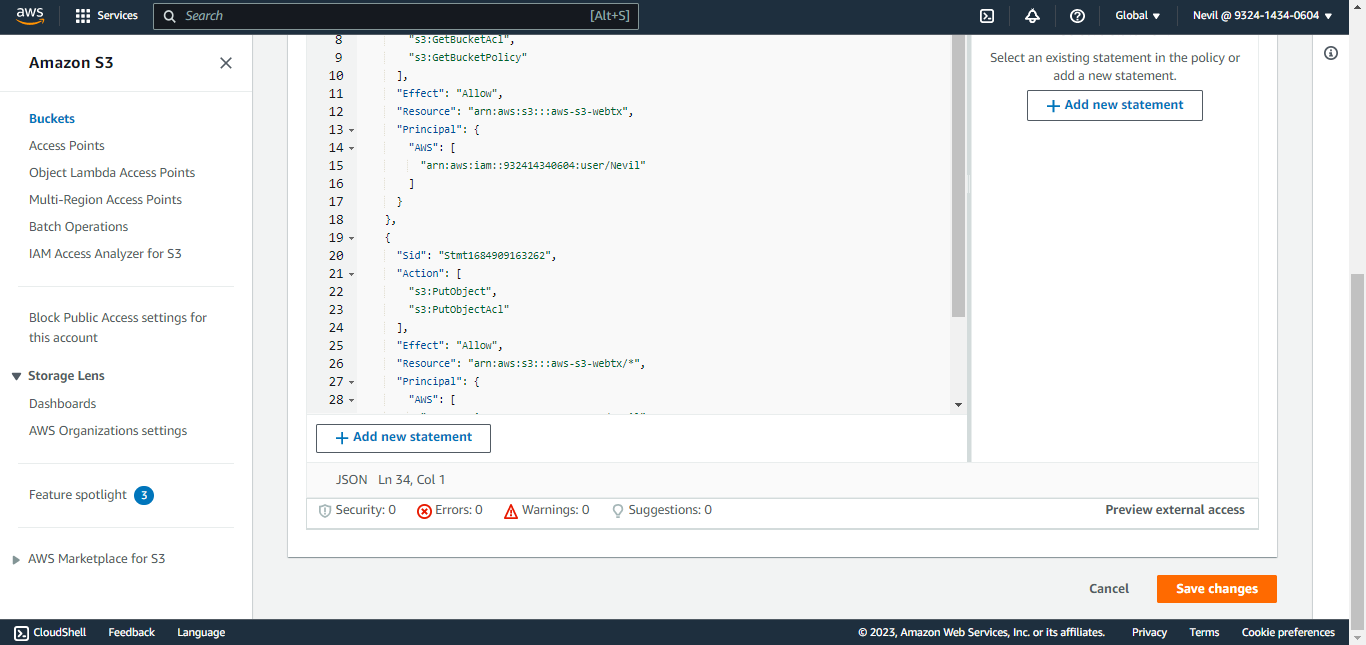
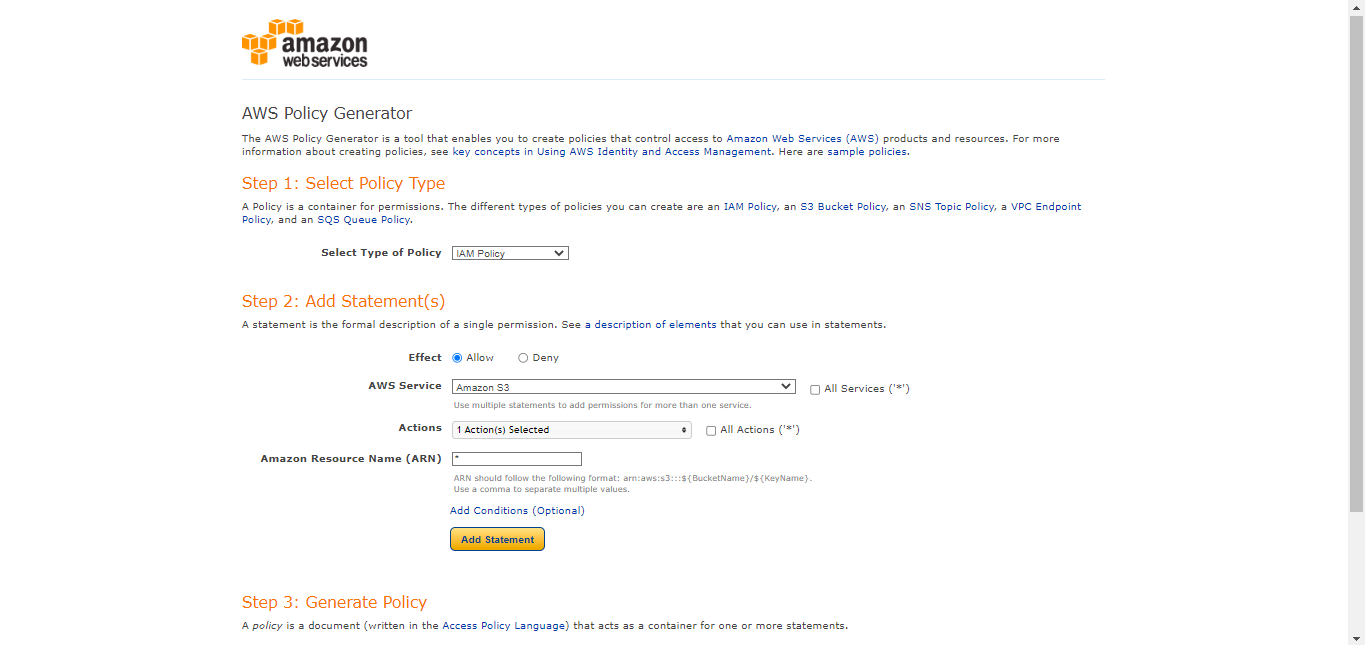
Go to Policy Generator , select IAM Policy as the policy type, and then click Generate Policy.
Select Type of Policy: IAM Policy
Effect: Allow
AWS Service: Amazon S3
Actions:
ListAllMyBuckets
ARN: *
Click Add Statement.
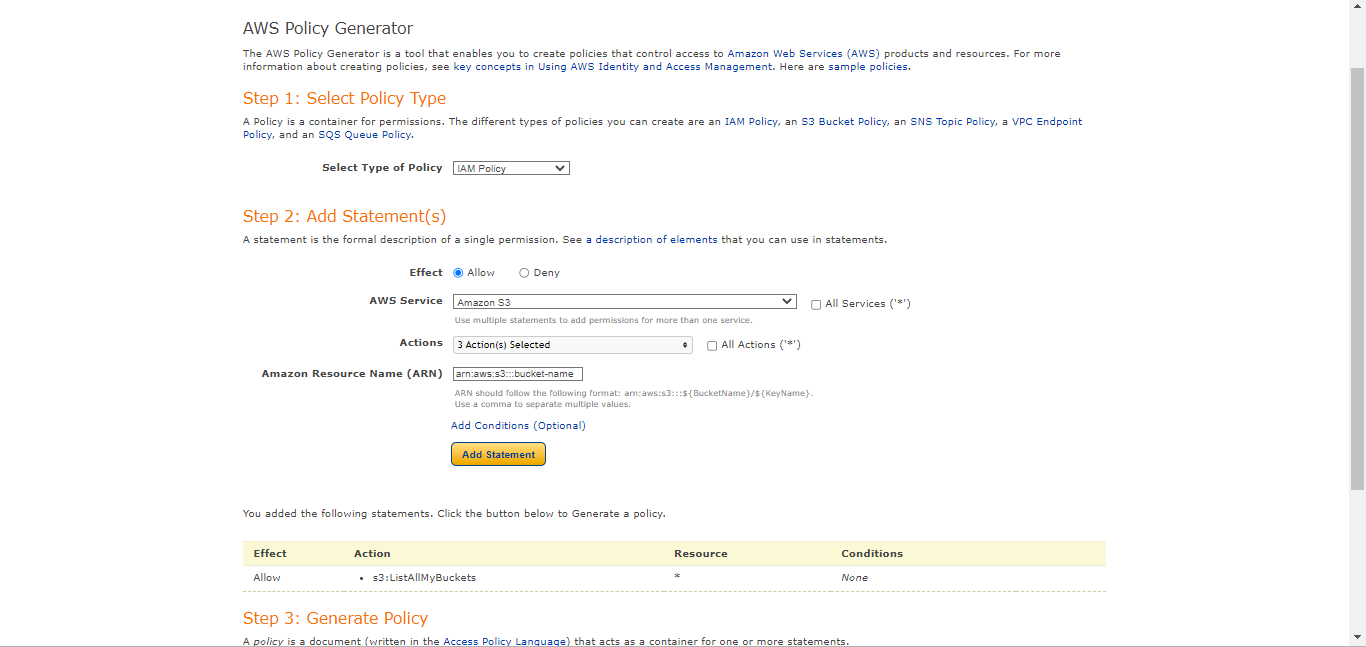
Select Type of Policy: IAM Policy
Effect: Allow
AWS Service: Amazon S3
Actions:
GetBucketAclGetBucketPolicyGetBucketLocation
ARN:
arn:aws:s3:::<bucket-name>Click Add Statement.
Select Type of Policy: IAM Policy
Effect: Allow
AWS Service: Amazon S3
Actions:
PutObjectPutObjectAcl
ARN:
arn:aws:s3:::<bucket-name>/*Click Add Statement.
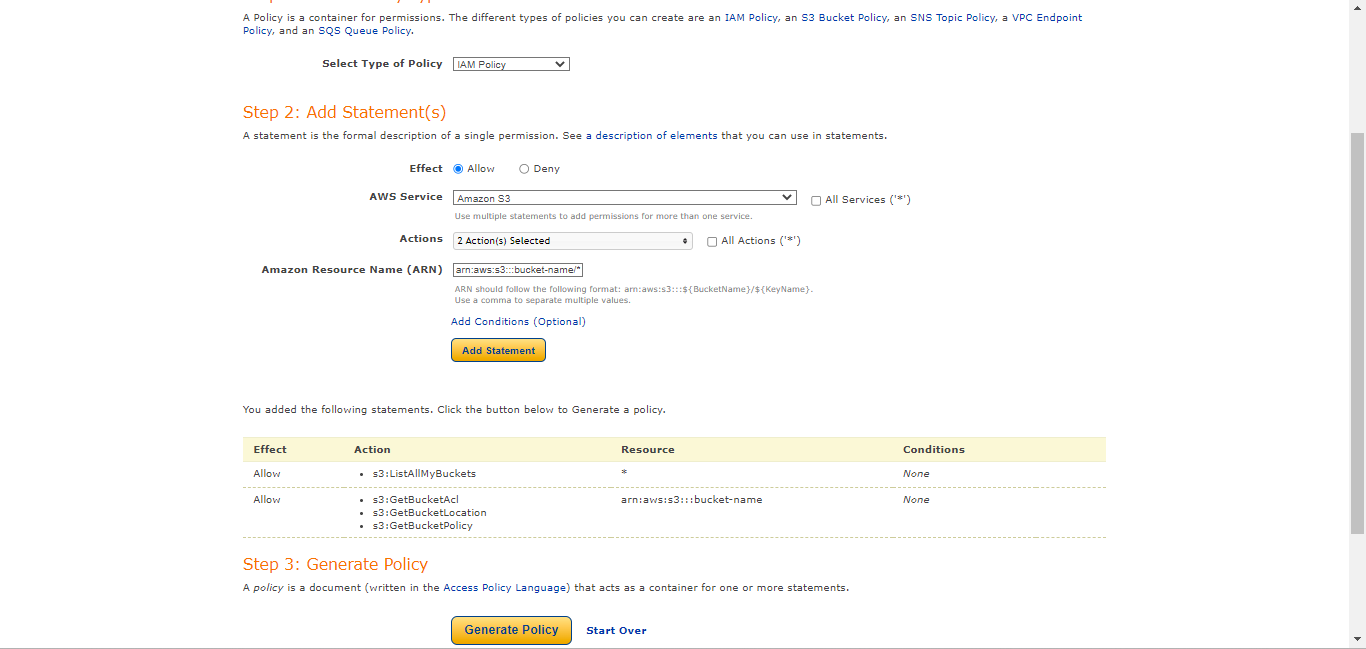
Click Generate Policy.
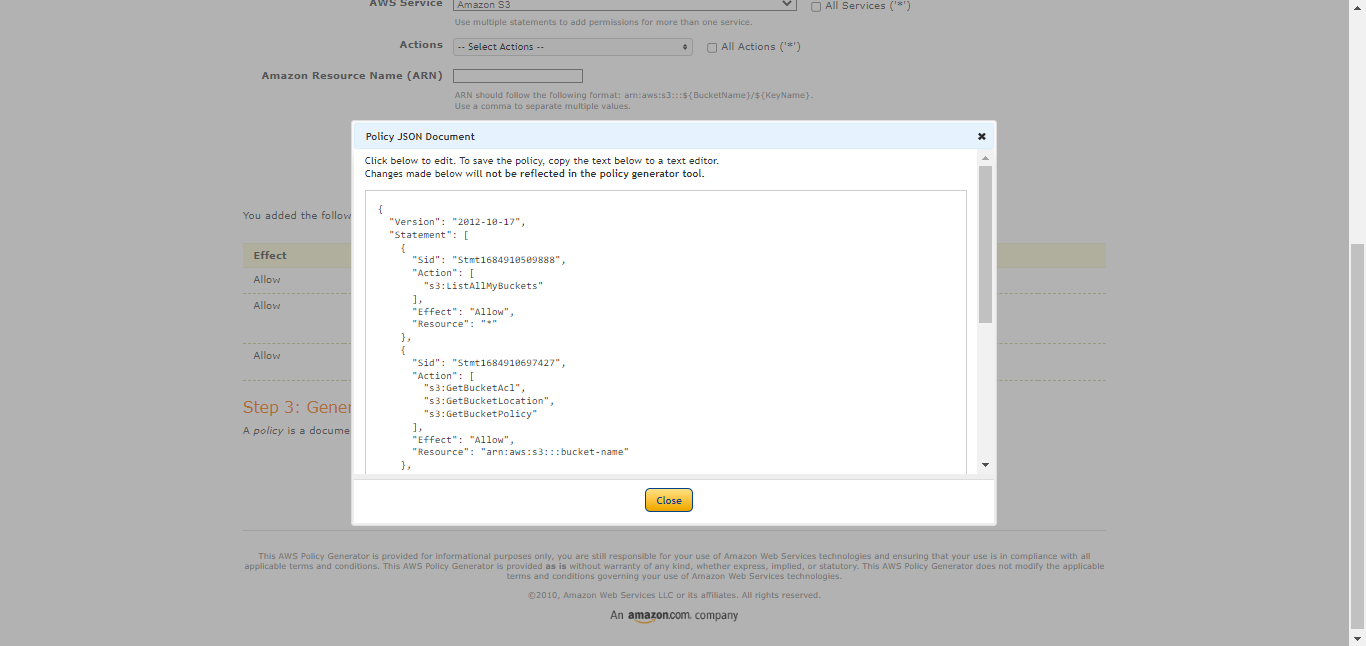
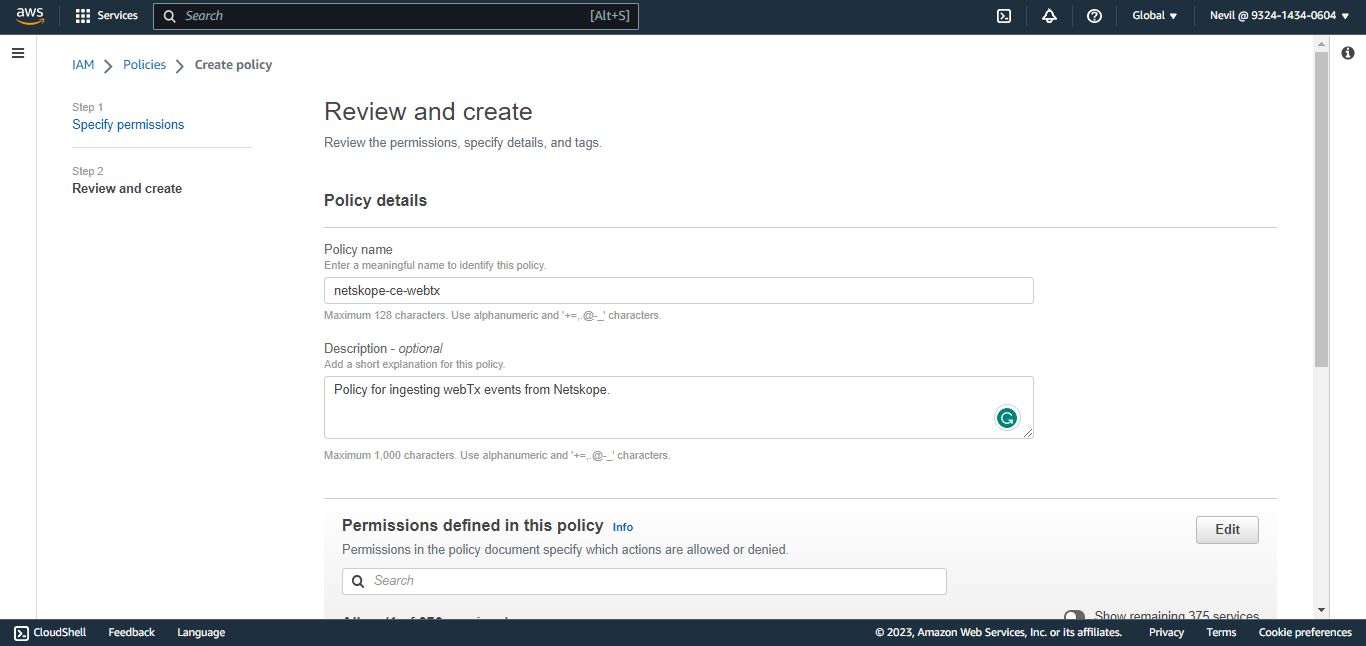
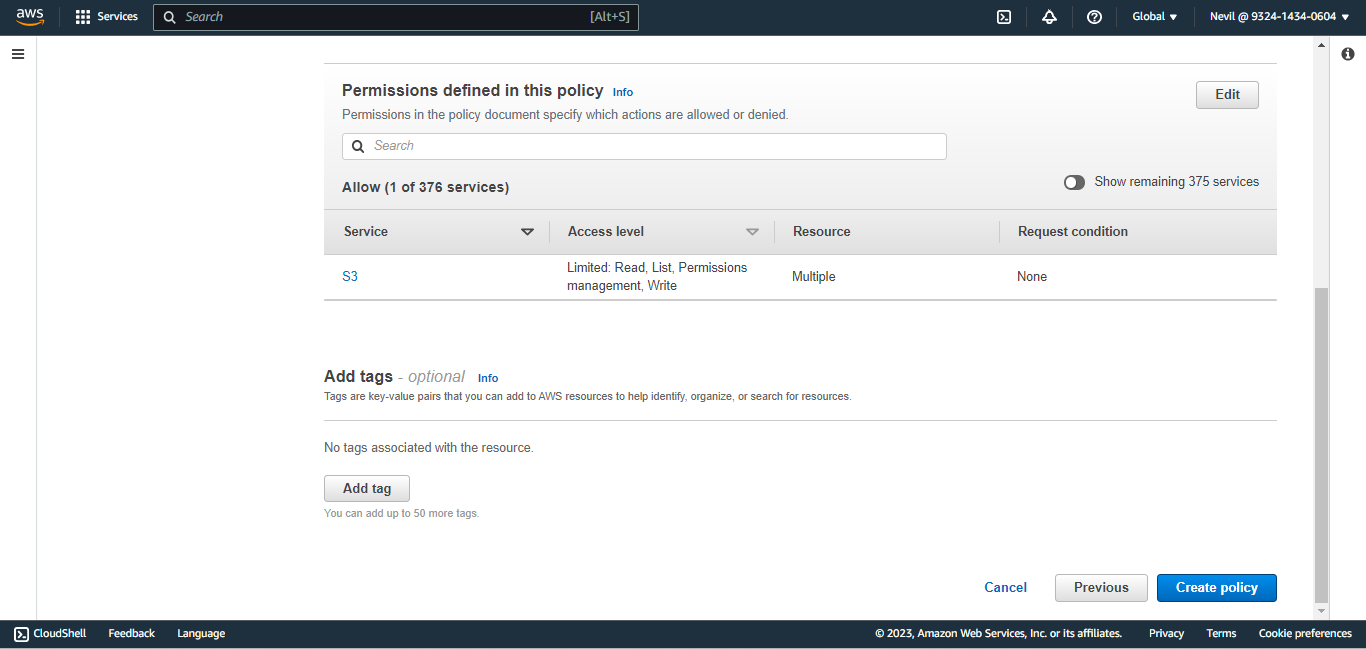
Create the policy required IAM, as shown below. Be sure to add
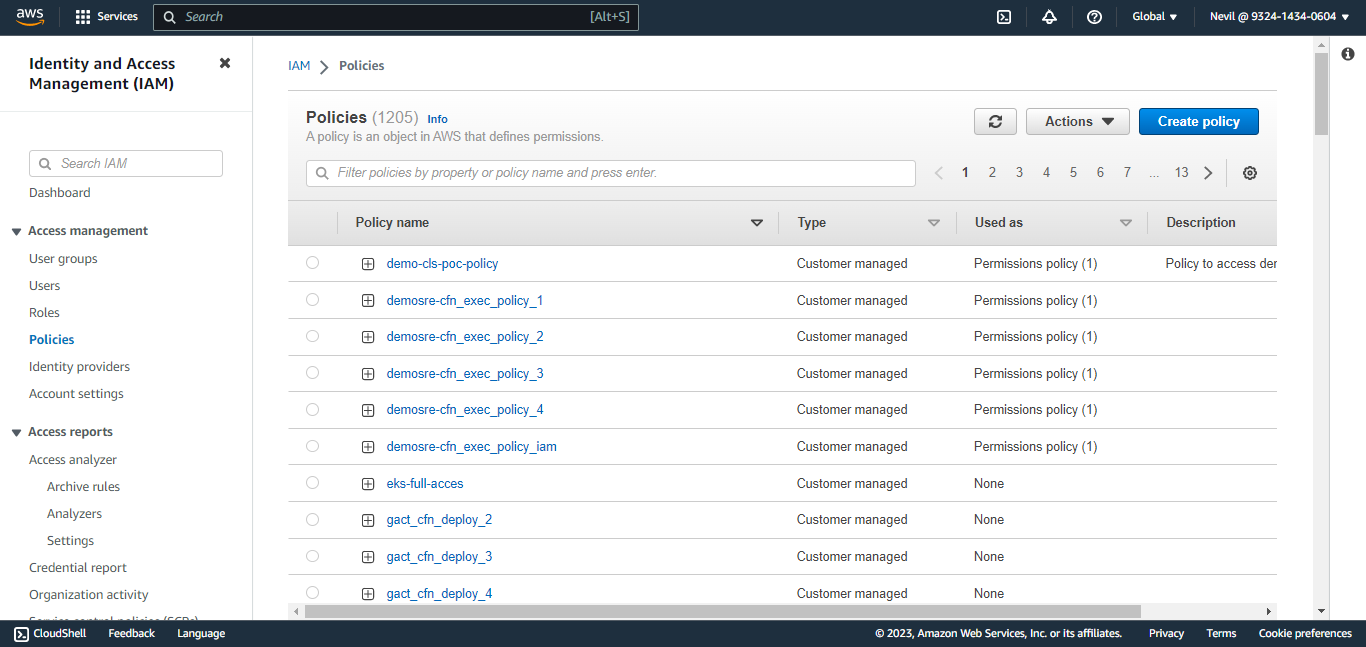
/*after the second bucket name.{ "Id": "<policy ID>", "Version": "<version>", "Statement": [ { "Sid": "<statement ID>", "Effect": "Allow", "Action": "s3:ListAllMyBuckets", "Resource": "*" }, { "Sid": "<statement ID>", "Effect": "Allow", "Action": [ "s3:GetBucketAcl", "s3:GetBucketPolicy", "S3:GetBucketLocation" ], "Resource": "arn:aws:s3:::<bucket-name>" }, { "Sid": "<statement ID>", "Effect": "Allow", "Action": [ "s3:PutObject", "s3:PutObjectAcl" ], "Resource": "arn:aws:s3:::<bucket-name>/*" } ] }Go to AWS Console and select IAM from All Services. Click Policies in the left panel, and then click Create Policy.

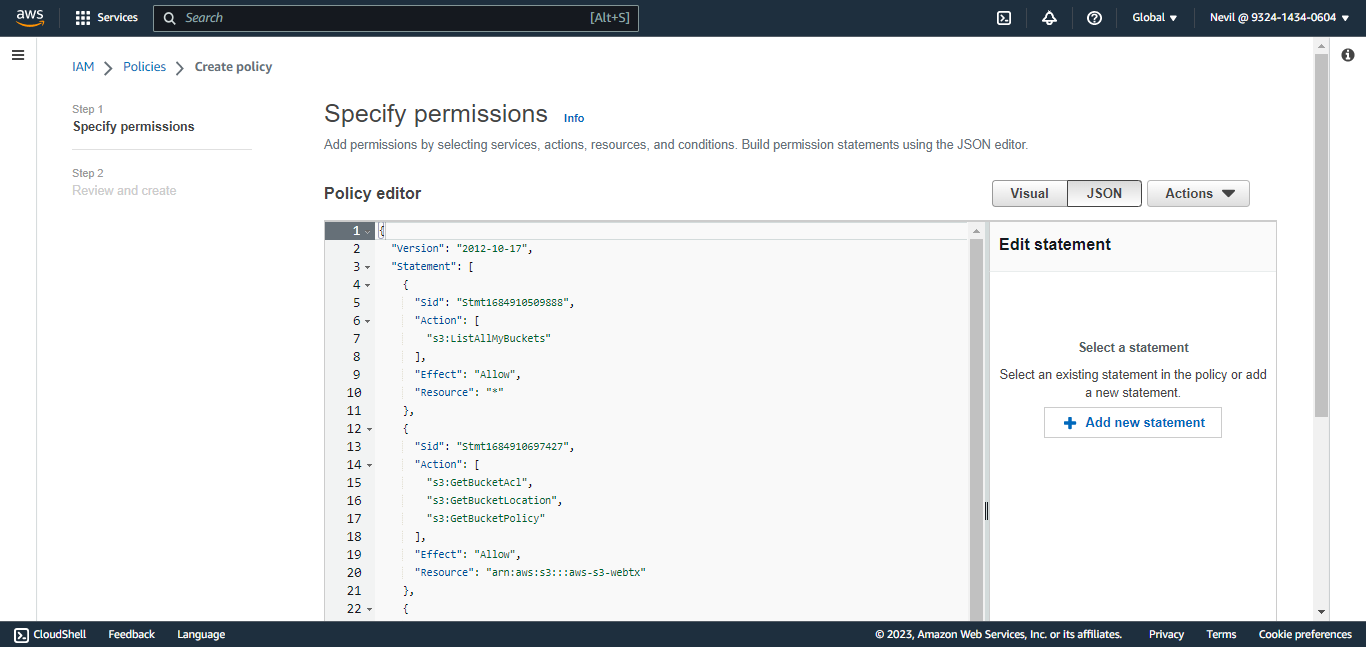
Copy that policy to the JSON tab. Click Next:Tags, and then click Next:Review.
Enter a name and click Create Policy.
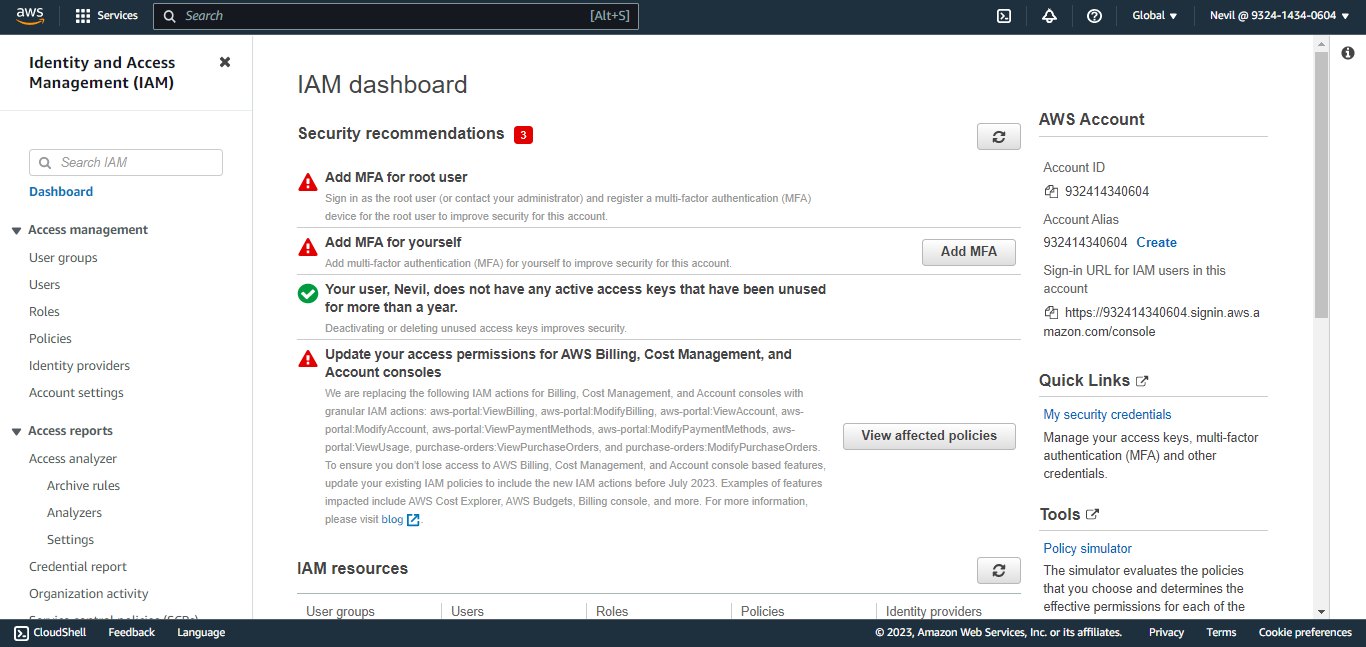
To create an IAM User, and get the Access ID and Secret Access Key, go to the AWS Console and select IAM from All Services.

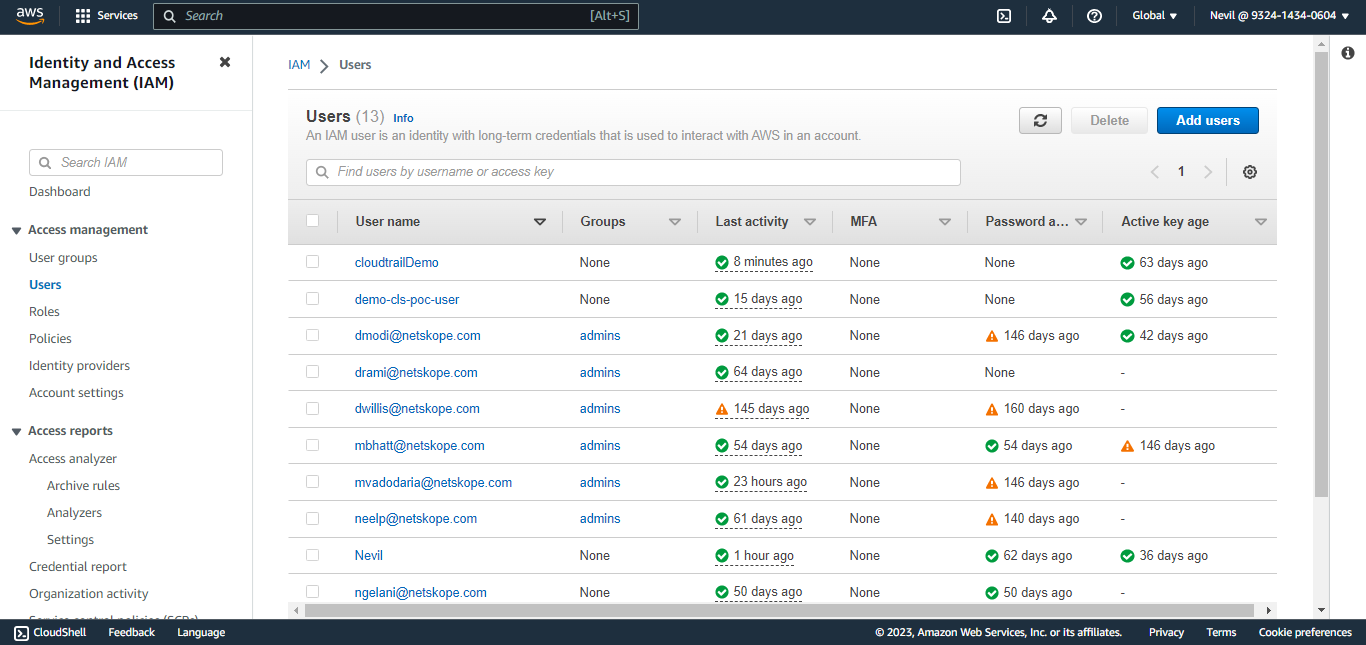
Click Users in the left panel.
Click Add Users.
Enter a user name and click Next:Permissions.
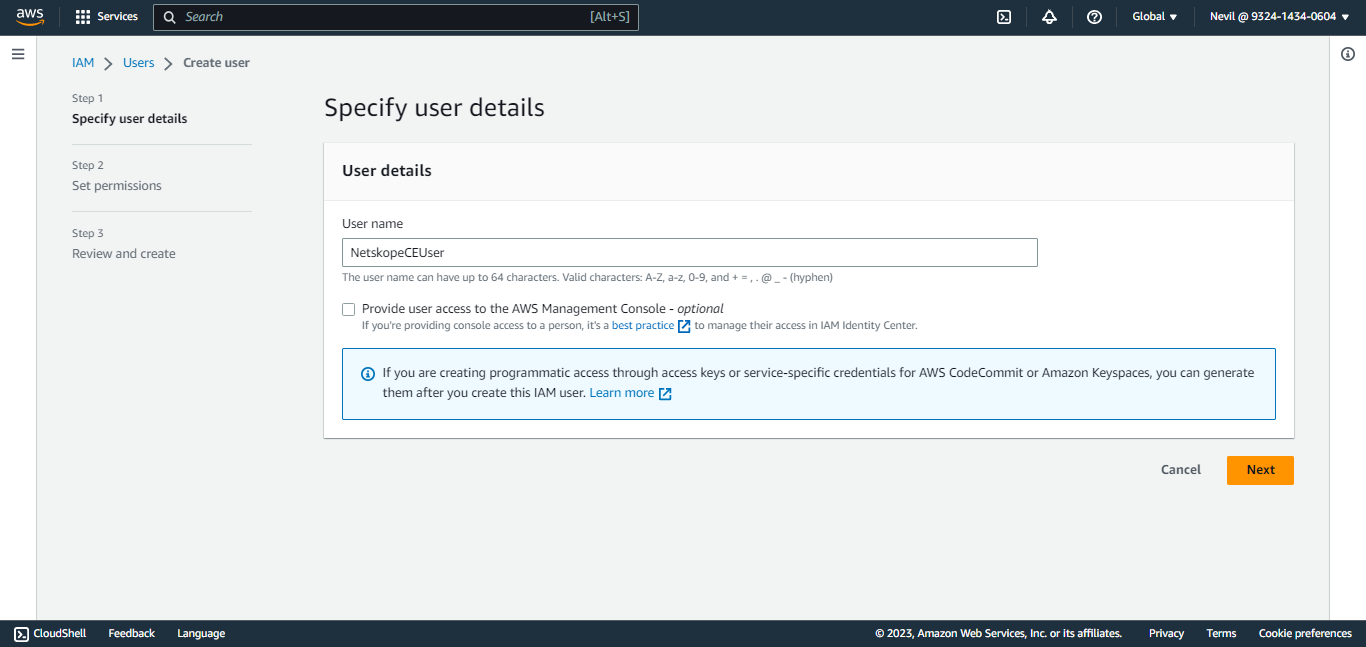
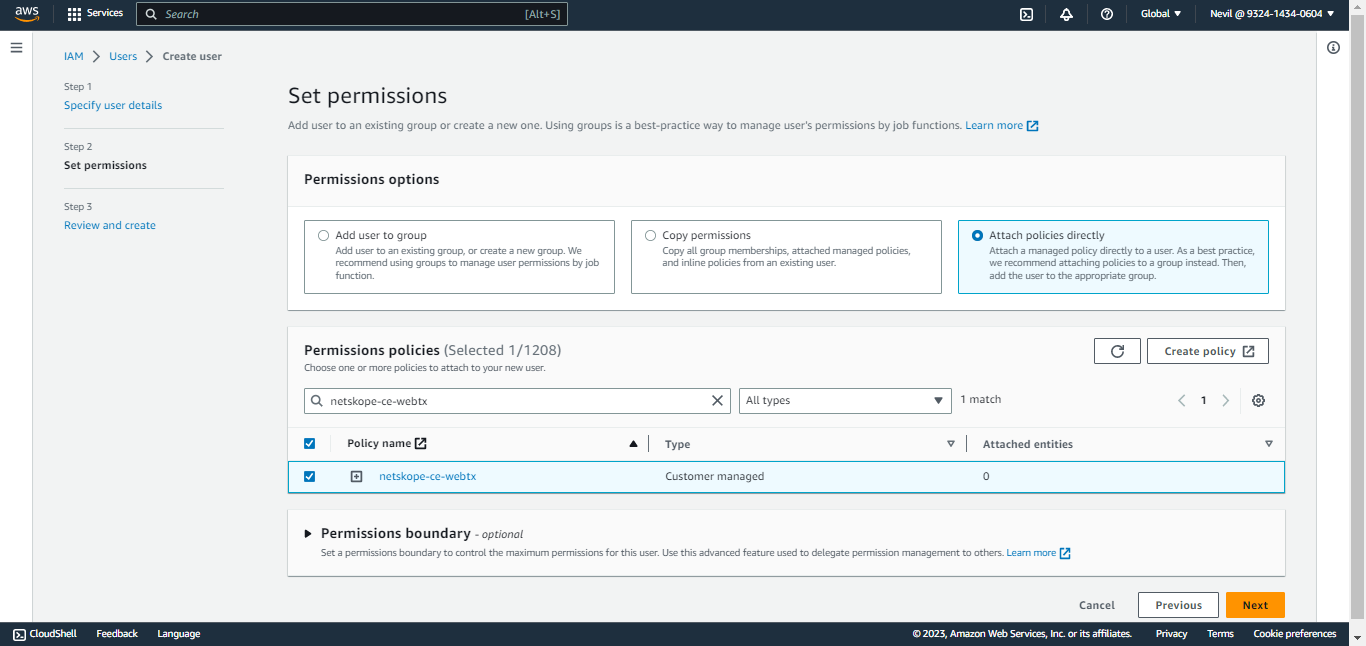
Click Attach existing policies directly (the policy created earlier) and click Next.
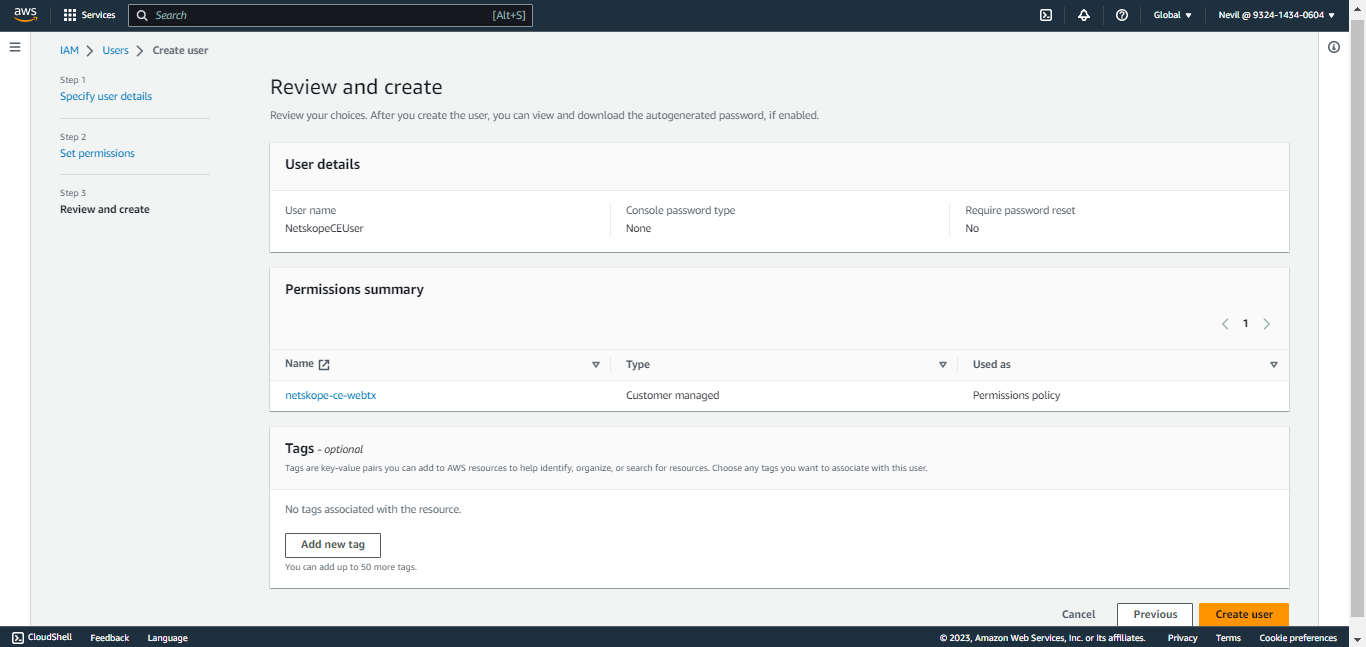
Review your choices and click Create User.

Search for a user and click on it.
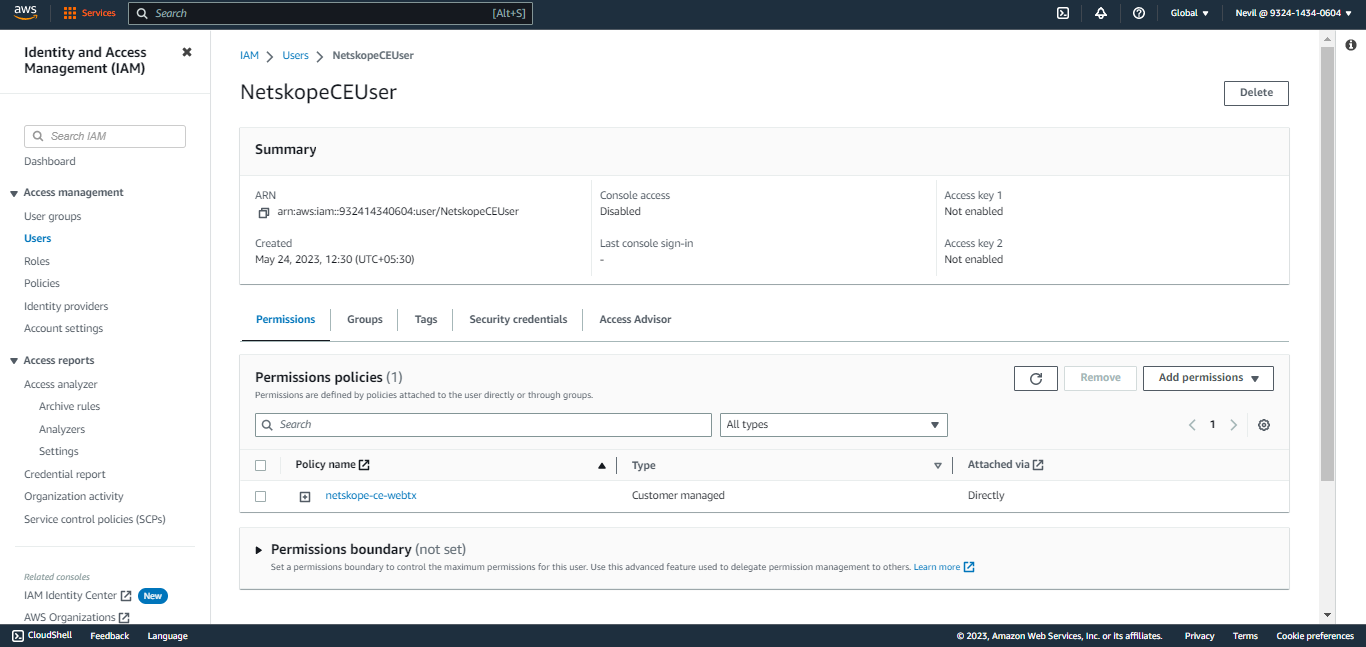
Click Security Credentials and scroll down to Access Keys.
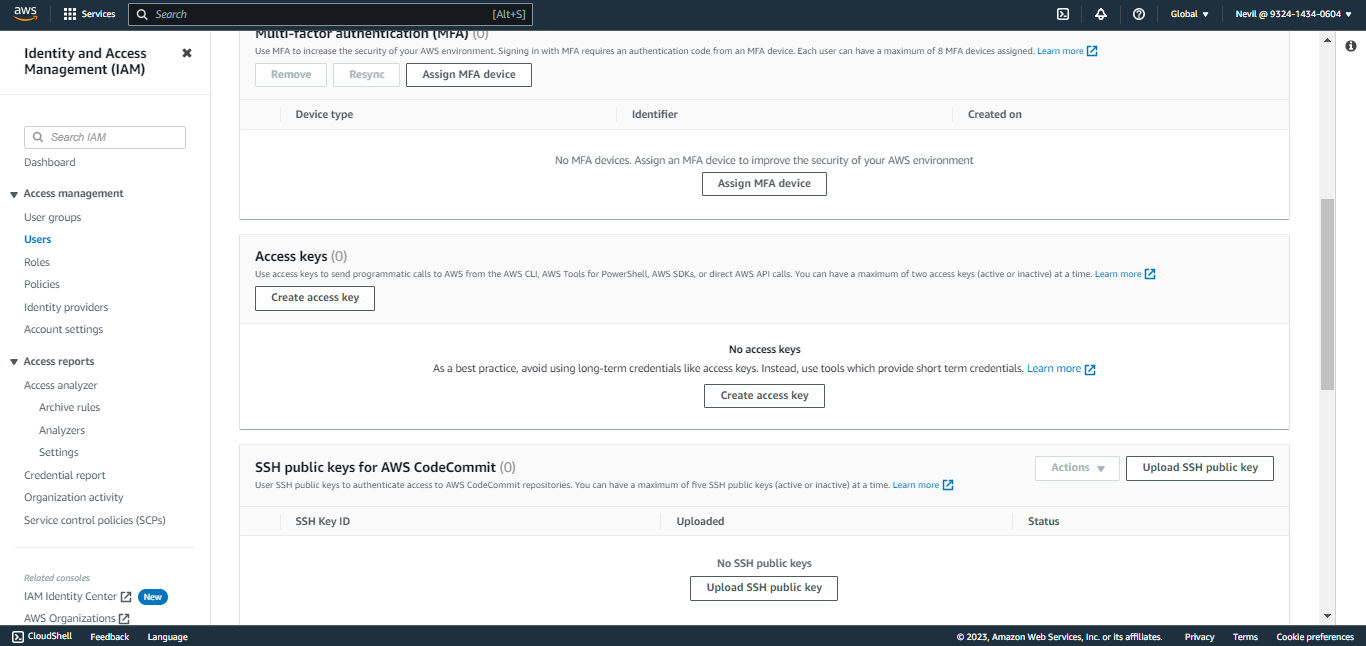
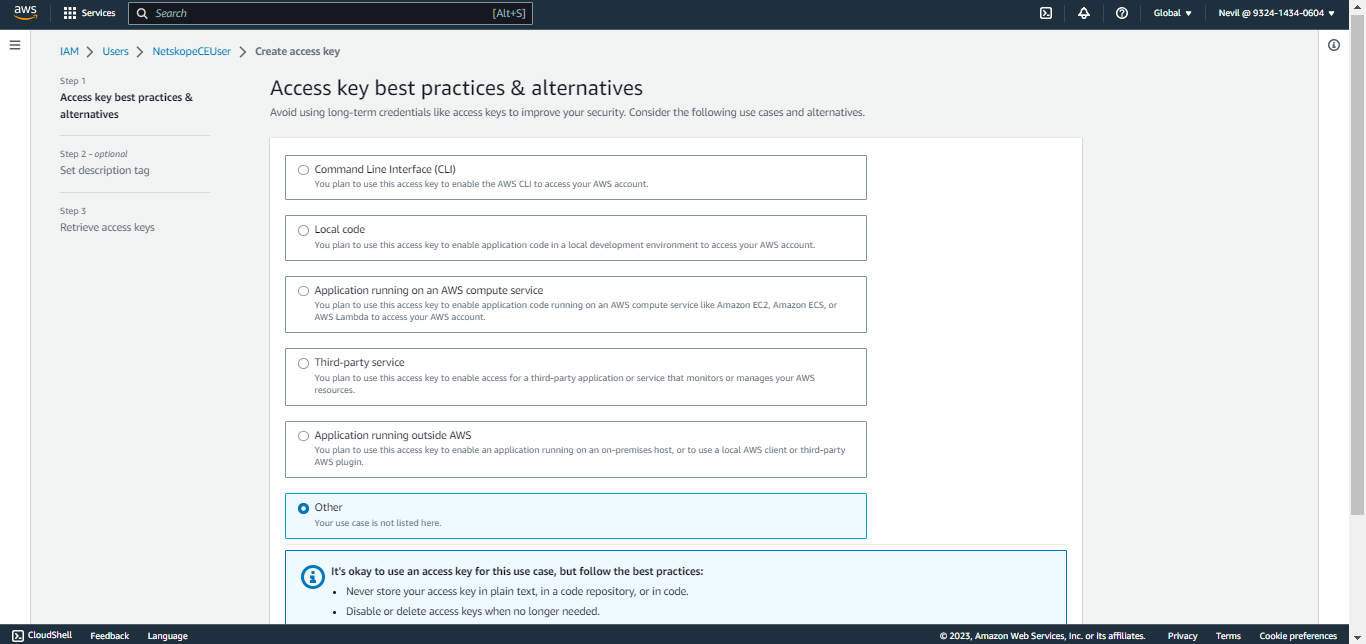
Click Create access key, select Other, and then click Next.
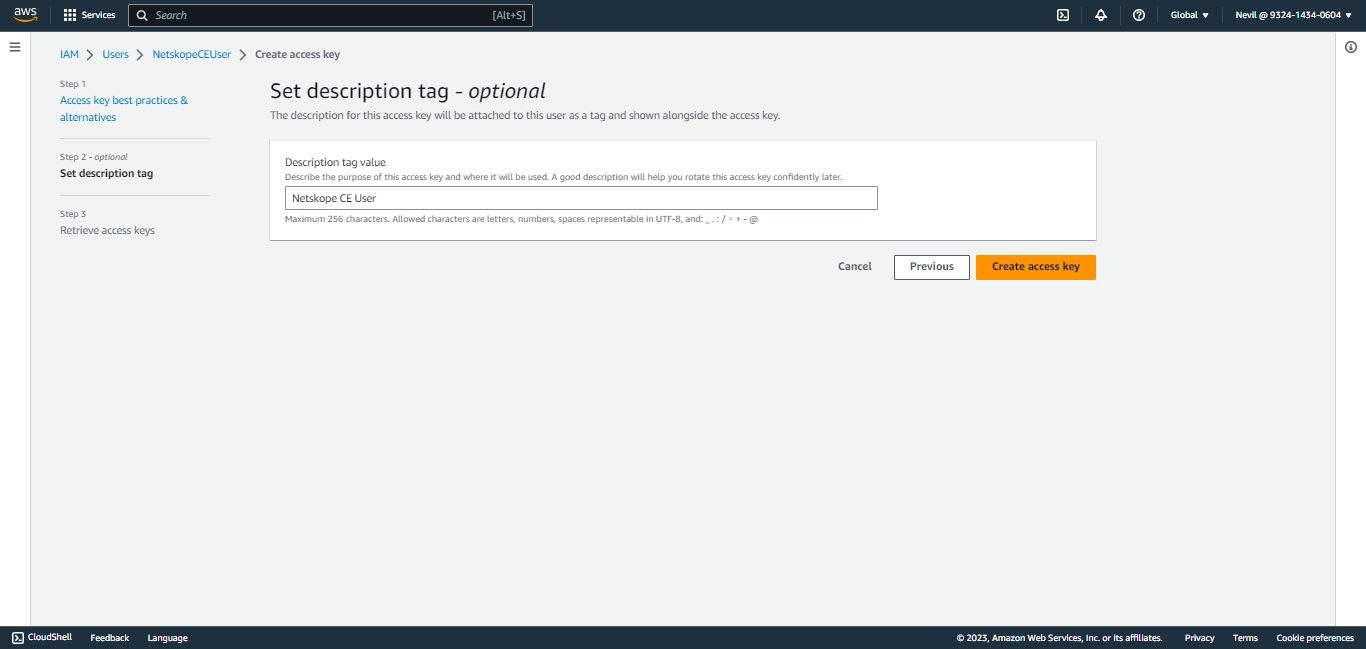
Add a description and click Create access key.
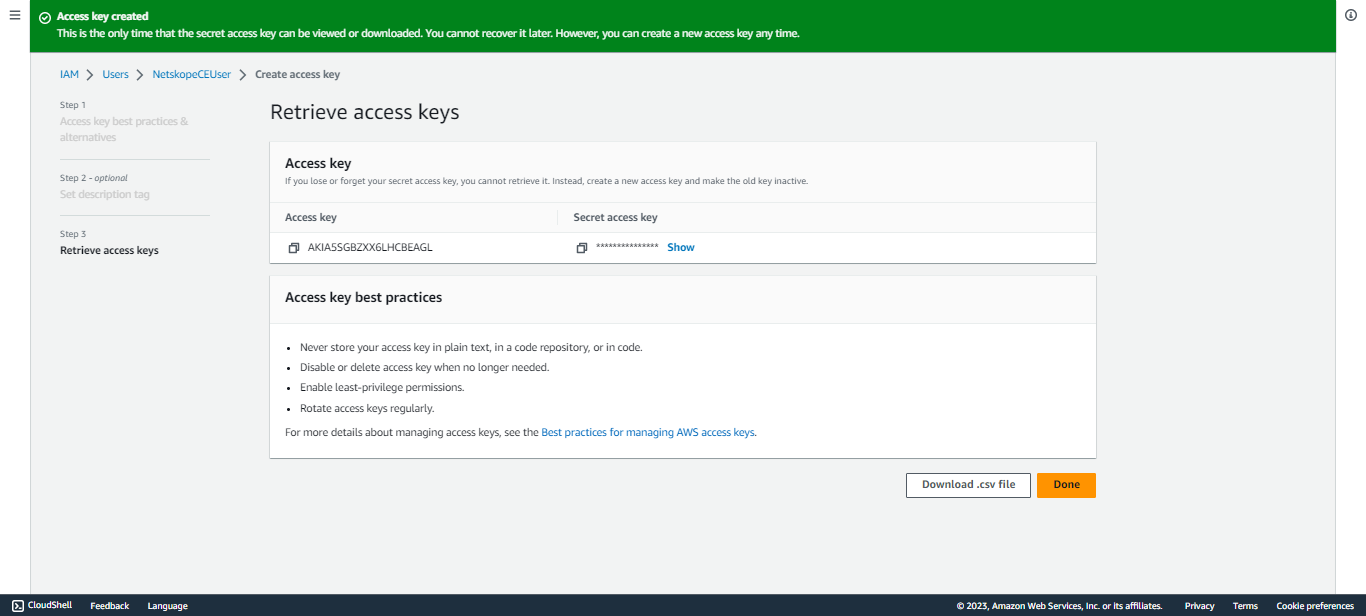
Copy the Access Key ID and Secret Access Key.
The account that owns the access keys should have the below policy.
aws s3api put-bucket-policy --bucket MyBucket --policy file://policy.json

policy.json:

{
    "Policy": {
        "Version": "<version>",
        "Statement": [
            {
                "Sid": "<statement ID>",
                "Effect": "Allow",
                "Principal": {
                    "AWS": "<user-arn>"
                },
                "Action": [
                    "s3:GetBucketAcl",
                    "s3:GetBucketPolicy"
                ],
                "Resource": "arn:aws:s3:::<bucket-name>"
            },
            {
                "Sid": "<statement ID>",
                "Effect": "Allow",
                "Principal": {
                    "AWS": "<user-arn>"
                },
                "Action": [
                    "s3:PutObject",
                    "s3:PutObjectAcl"
                ],
                "Resource": "arn:aws:s3:::<bucket-name>/*"
            }
        ]
    }
}
aws iam put-user-policy --user-name <username> --policy-name <policy_name> --policy-document file://iam_policy.json
iam_policy.json:

{
    "Policy": {
        "Version": "<version>",
        "Statement": [
            		     {
                "Sid": "<statement ID>",
                "Effect": "Allow",
                "Action": "s3:ListAllMyBuckets",
                "Resource": "*"
            },
            {
                "Sid": "<statement ID>",
                "Effect": "Allow",
                "Action": [
                    "s3:GetBucketAcl",
                    "s3:GetBucketLocation",
                    "s3:GetBucketPolicy"
                ],
                "Resource": "arn:aws:s3:::<bucket-name>"
            },
            {
                "Sid": "<statement ID>",
                "Effect": "Allow",
                "Action": [
                    "s3:PutObject",
                    "s3:PutObjectAcl"
                ],
                "Resource": "arn:aws:s3:::<bucket-name>/*"
            }
        ]
    }
}
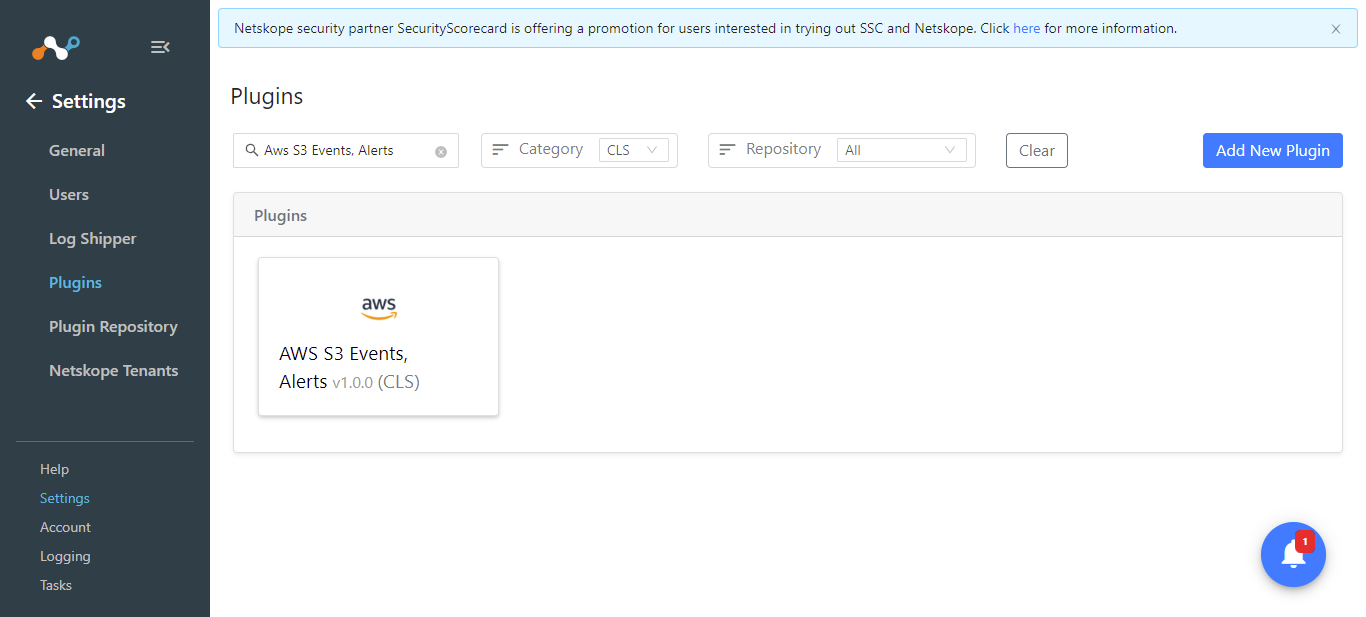
Click on the Settings button from the Navigation Panel then Plugins.
Search for and select the AWS S3 Events, Alerts box to open the plugin creation dialog.
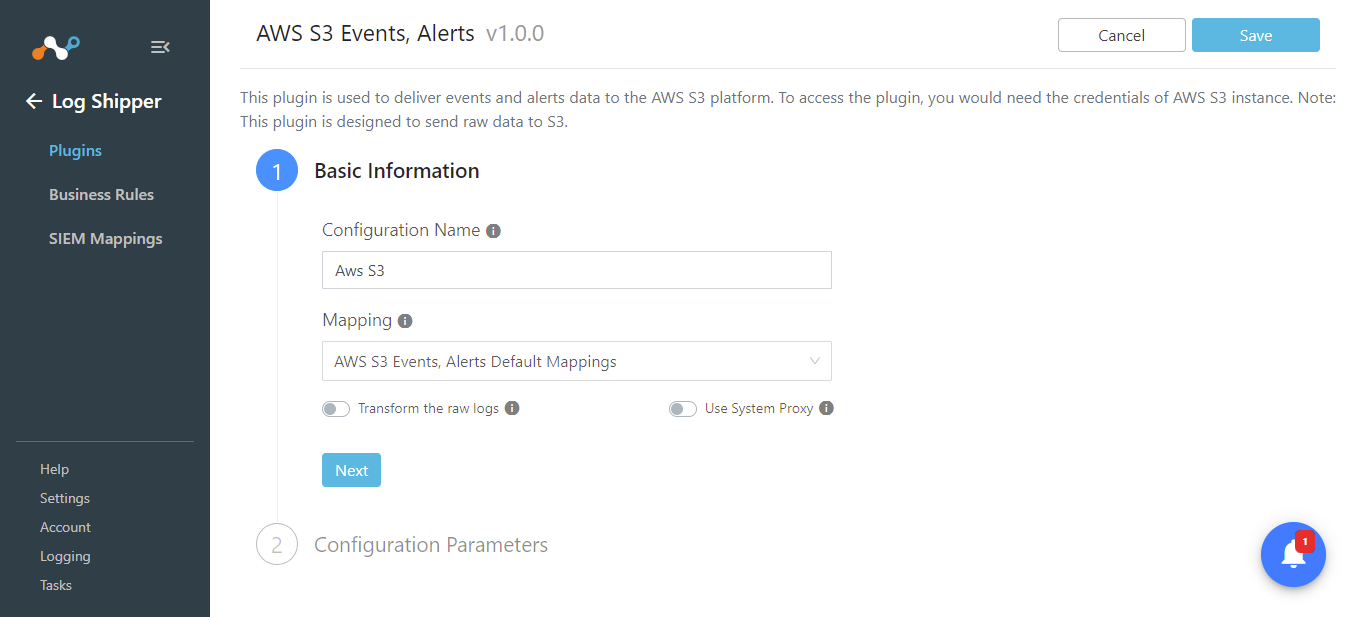
Enter a Configuration Name.
Note
Keep the Transform the raw logs toggle disabled because we will only filter the fields added in the Json block inside the user provided mapping file.
Click Next.
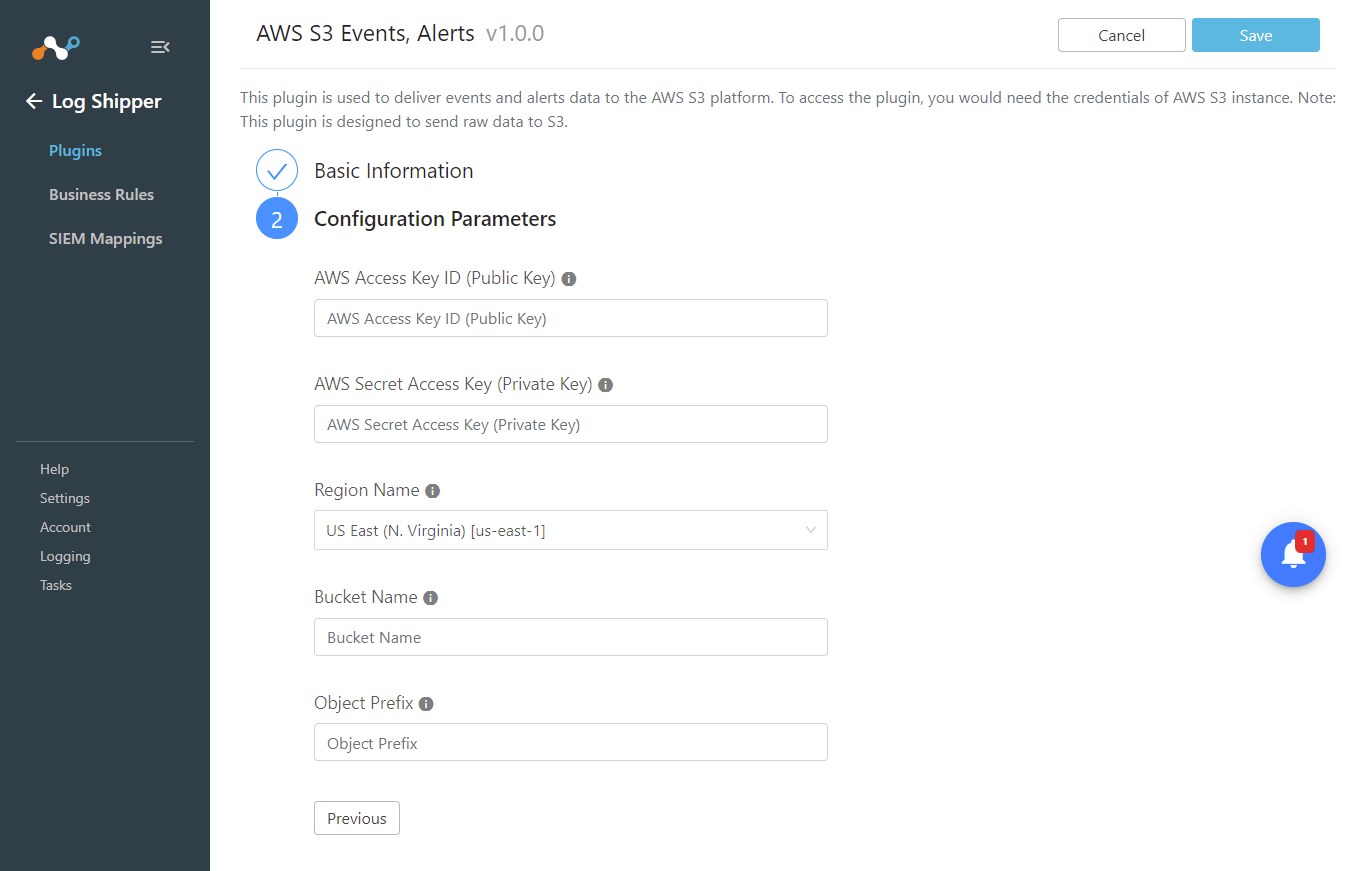
Enter these parameters:
AWS Access Key ID: Your AWS S3 access key ID for AWS S3 authentication.
AWS Secret Access Key: Your AWS S3 secret access key for AWS S3 authentication.
Region Name: The region name to get your AWS S3 Bucket from.
Bucket Name: The Bucket Name in which the data object will be stored.
Object prefix: This will be added to the Object key name while ingesting web transactions to the AWS S3 bucket.
Click on Save
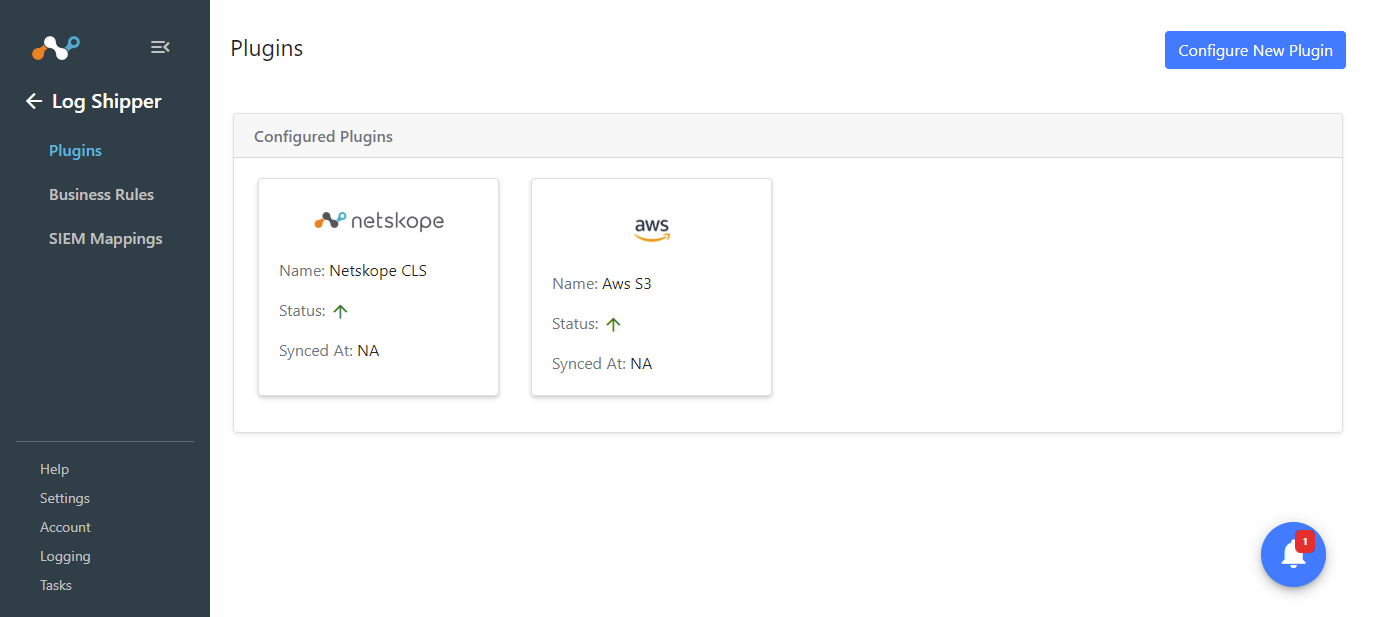
Go to Log Shipper > Business Rules.
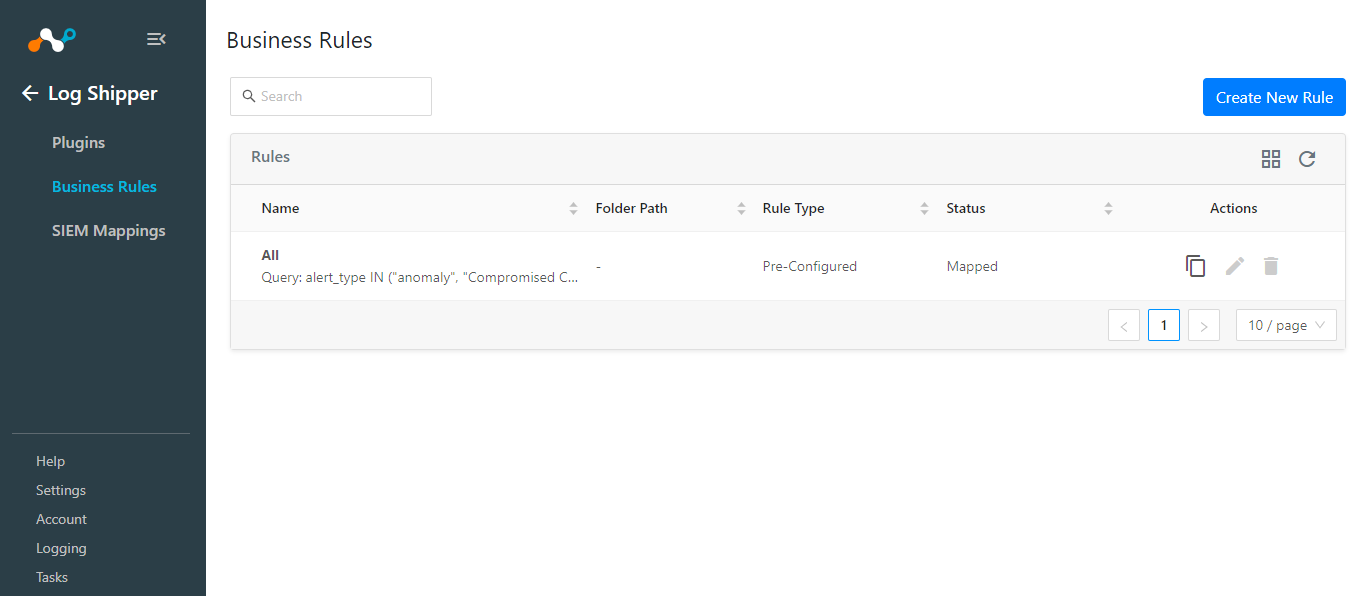
Click Create New Rule.
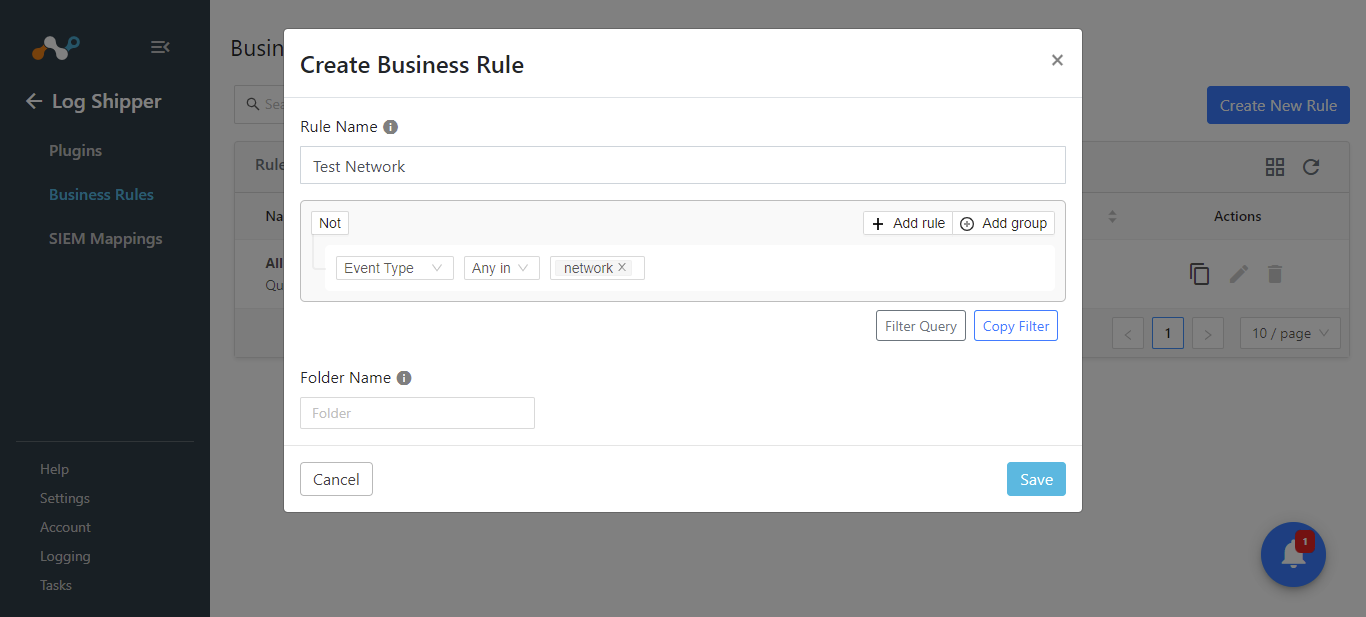
Enter a Rule Name, configure the filter, and enter a Folder Name (if any).
Click Save.
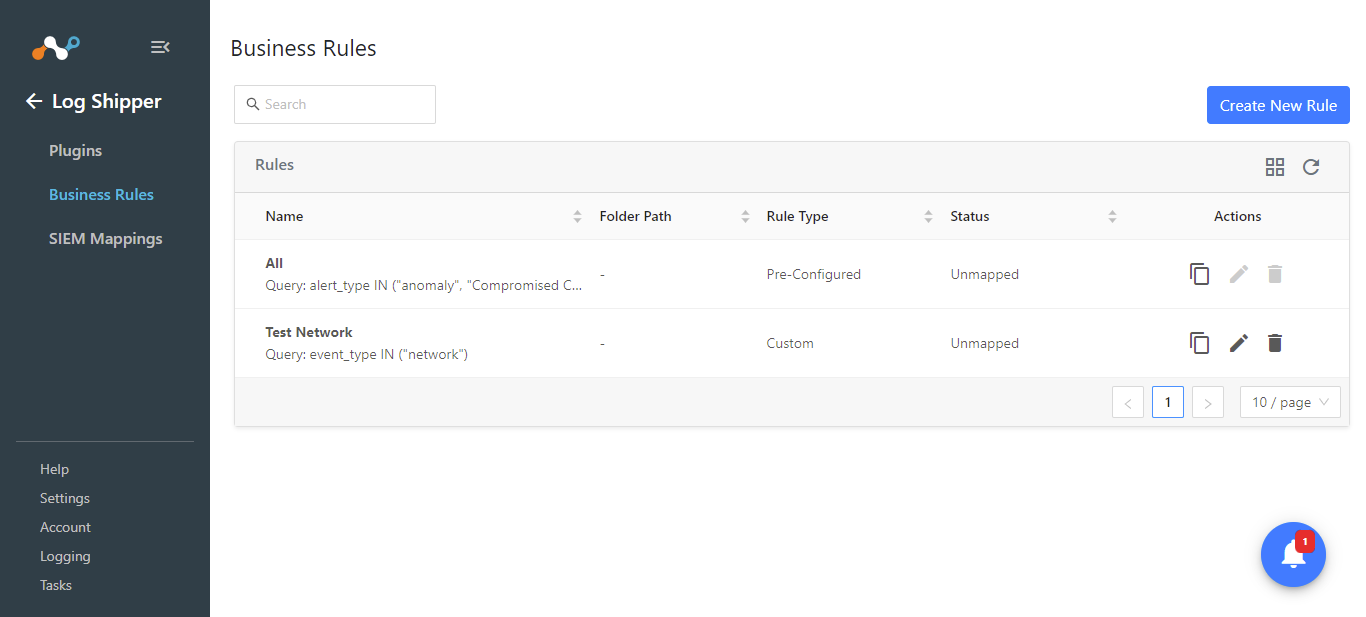
Go to Log Shipper > SIEM Mappings.
Click Add SIEM Mapping.
For Source, select the Netskope CLS configuration.
For Destination, select the AWS S3 Events, Alerts configuration.
Select the Business Rule you created previously.
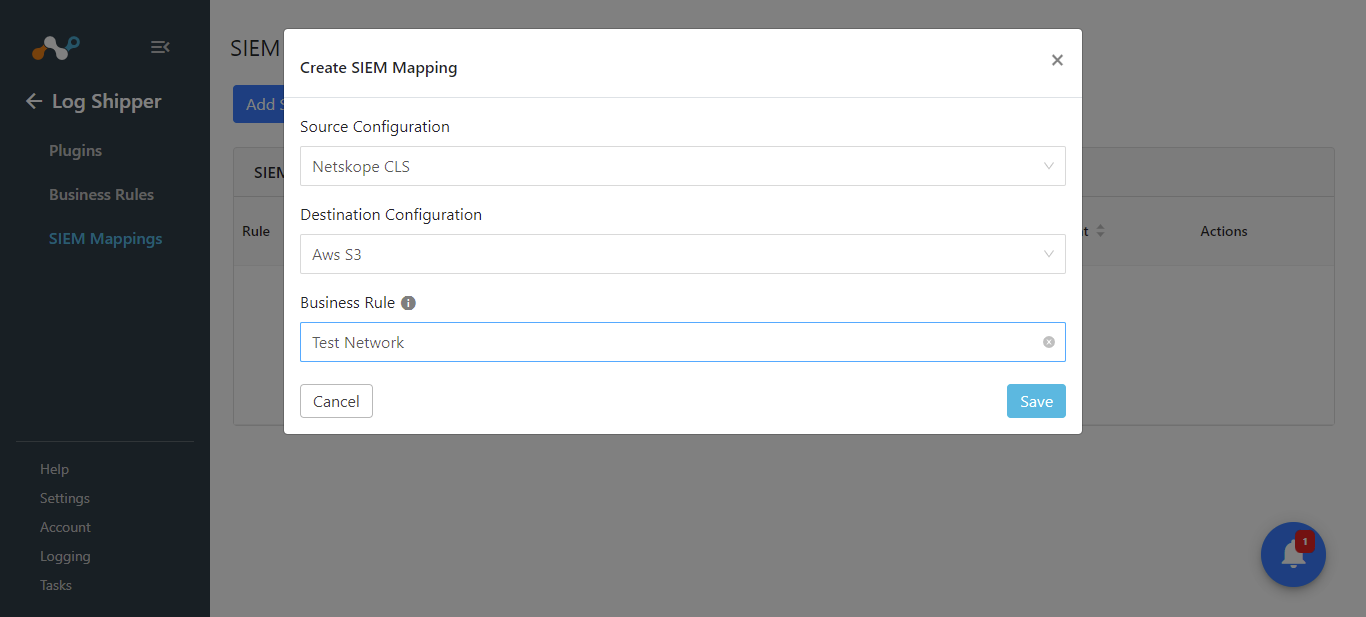
Click Save
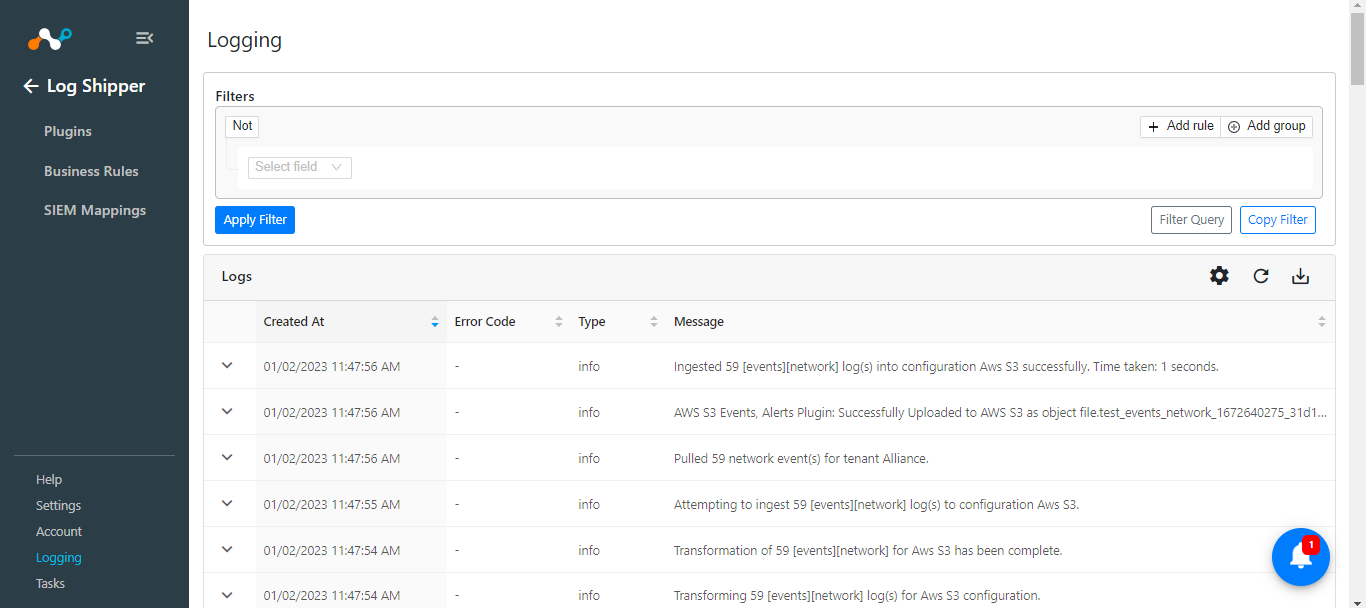
Validate from Cloud Exchange
From the Logging section, check to see if the Logs are getting ingested.
 |
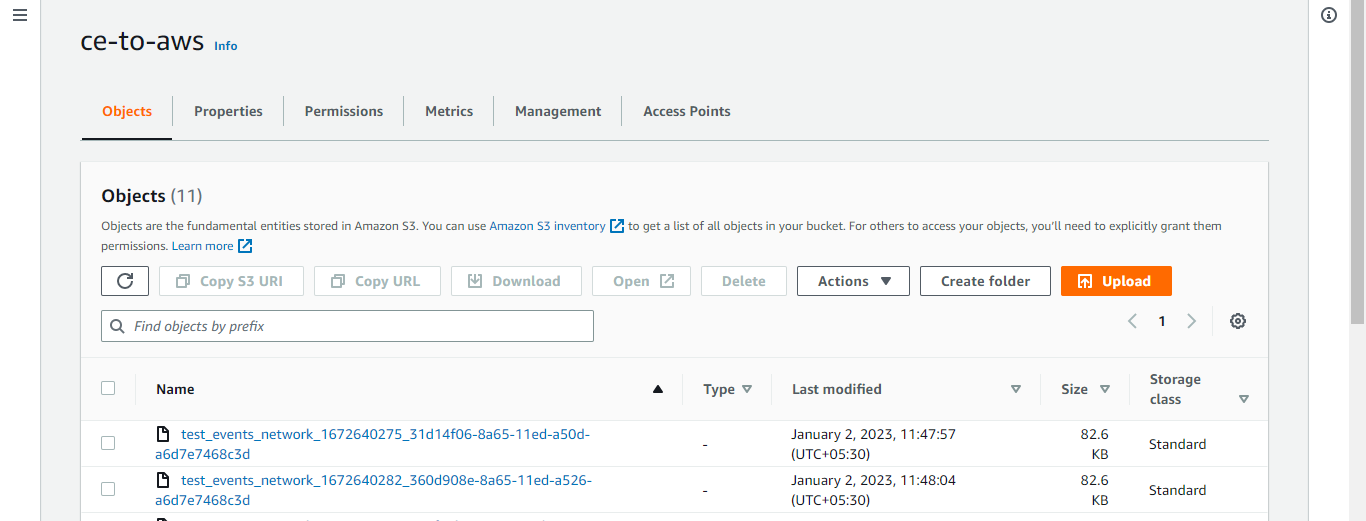
Validate from AWS
Using the AWS UI
Log in to AWS console.
Search for AWS S3 bucket.
Search for configured bucket.
Using the AWS CLI
Install AWS CLI in your machine.
(Reference: https://docs.aws.amazon.com/cli/latest/userguide/install-cliv2.html)
Configure AWS CLI in your machine.
(Reference: https://docs.aws.amazon.com/cli/latest/userguide/cli-configure-quickstart.html)
Useful commands to view buckets and objects.
To list all the buckets:
aws s3 lsTo list all the objects in a bucket:
aws s3 ls s3://<bucket_name>To download an object from bucket to local machine.
aws s3 cp s3://<bucket_name>/<object_path> <local_path>