App Instance Profile
Note
This is a Controlled General Availability feature. If you want to enable this feature, contact your sales team.
Some cloud applications have multiple instances of an app active at the same time. For example, an enterprise Google Drive instance for an organization versus a personal Google Drive instance.
App Instance profiles allow you to manage these app instances with Real-time Protection policies. You can create an App Instance profile by specifying the instance identifier (ID), instance name, and instance tag.
Instance IDs are used to uniquely identify the tenant or instance of an app. The Netskope analytics engine tracks the instance ID for cloud apps. For examples of various computed instance IDs, see the Netskope Support portal.
In scenarios where an instance ID can’t be captured, they are labeled as public_link and unauthenticated:
public-link: This represents publicly shared download links (URLs) from cloud storage apps. These links allow recipients to download files without authentication.
unauthenticated: This represents links shared from a collaboration tool or app. These links allow recipients to participate or join into an event without authentication.
Creating an App Instance Profile in Policies
You can manually create an App Instance profile from the Policies page, or create an App Instance profile for discovered apps in Skope IT.
To create an App Instance profile from Policies:
Navigate to Policies > App Instance.
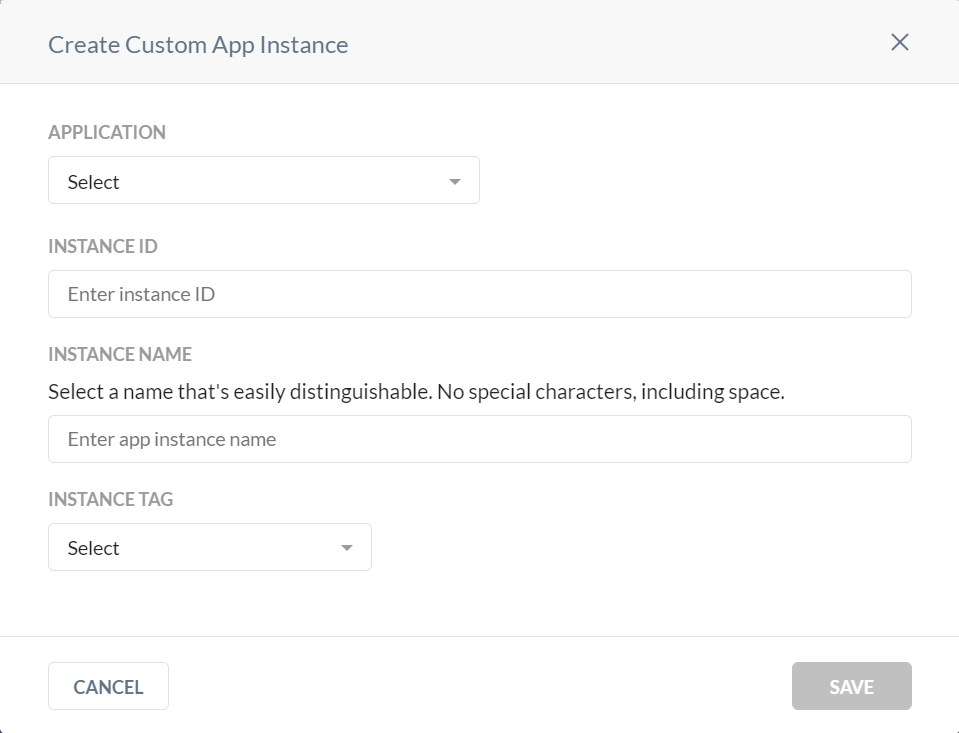
Click New Custom App Instance, and then click New App Instance. The Create Custom App Instance window appears.
In the Create Custom App Instance window:
Application: Select the application for the app instance.
Instance ID: Enter the instance ID for the app instance.
Instance Name: Enter a name for the app instance. The name must be unique and can’t include special characters or spaces.
Instance Tag: Select the instance tag for the app instance. You can select Sanctioned, Unsanctioned, or None.

Click Save.
Creating an App Instance profile in Skope IT
To create an App Instance profile from Skope IT:
Navigate to Skope IT > Application Events or Skope IT > Alerts.
From the table, locate the application you want to create an app instance for.
Click the
 icon for that entry. The Application Event Details or Alert Details panel appears.
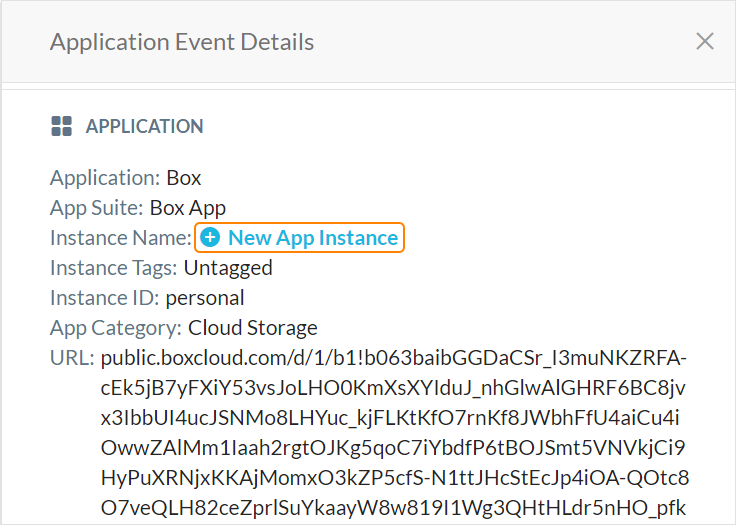
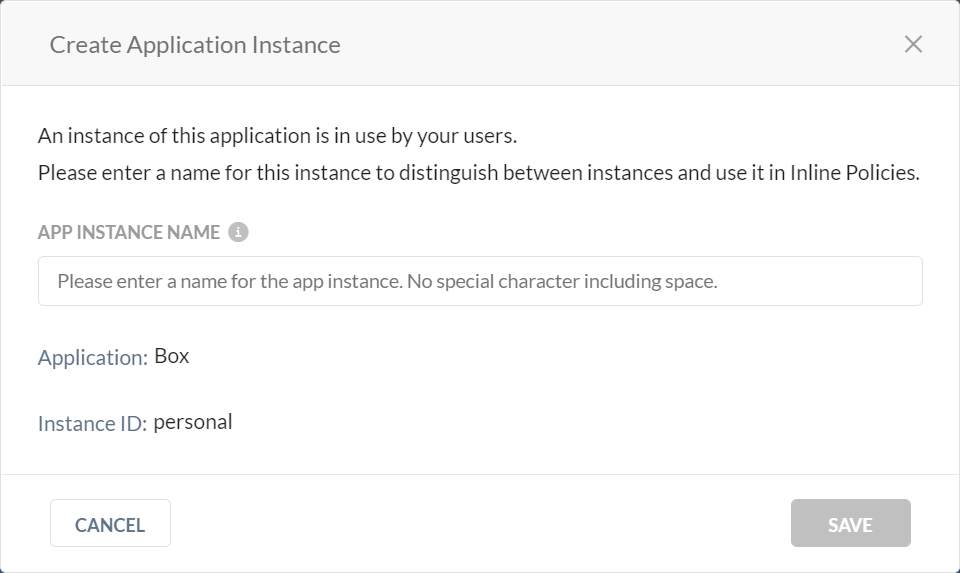
From the panel, go to the Application section. Click the New App Instance icon next to the Instance Name field. The Create Application Instance window appears.

For App Instance Name, enter a name to distinguish the app instance. The label must be unique and can’t include special characters or spaces.

Click Save.
Once you create an App Instance profile, you can select it when configuring a Real-time Protection policy. To learn more: Real-time Protection Policies.