Notifier Plugin for Ticket Orchestrator
This document explains how to configure the Notifier integration with the Cloud Ticket Orchestrator module of the Netskope Cloud Exchange platform.
To complete this configuration, you need:
A Netskope Tenant (or multiple, for example, production and development/test instances)
A Netskope Cloud Exchange tenant with the Ticket Orchestrator module already configured.
An account in the appropriate Notifier platform(s), like Slack, PagerDuty, etc., and for Gmail, you need access to smtp.gmail.com and its port 465.
Configure the Notifier plugin.
Configure Ticket Orchestrator Business Rules for Notifier.
Configure Ticket Orchestrator Queues for Notifier.
Validate the Notifier Plugin.
Click play to watch a video.
If you already have a slack application, jump to step 3.
To get a slack webhook URL, first sign in to your Slack account and then navigate to https://api.slack.com/messaging/webhooks and click on Create your Slack app button.

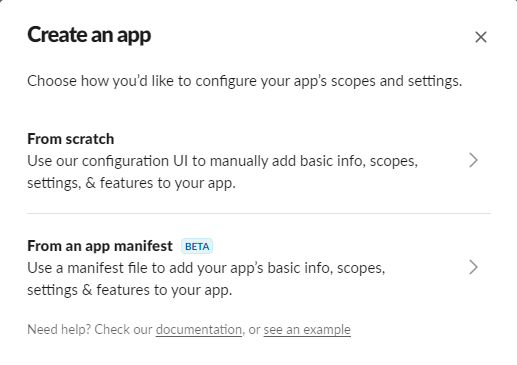
Select From Scratch.
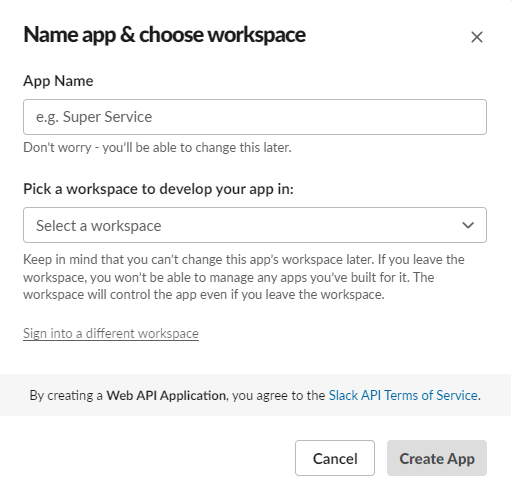
Enter the name of your application for App Name, and select the workspace in which you want to create the application. Click Create App.
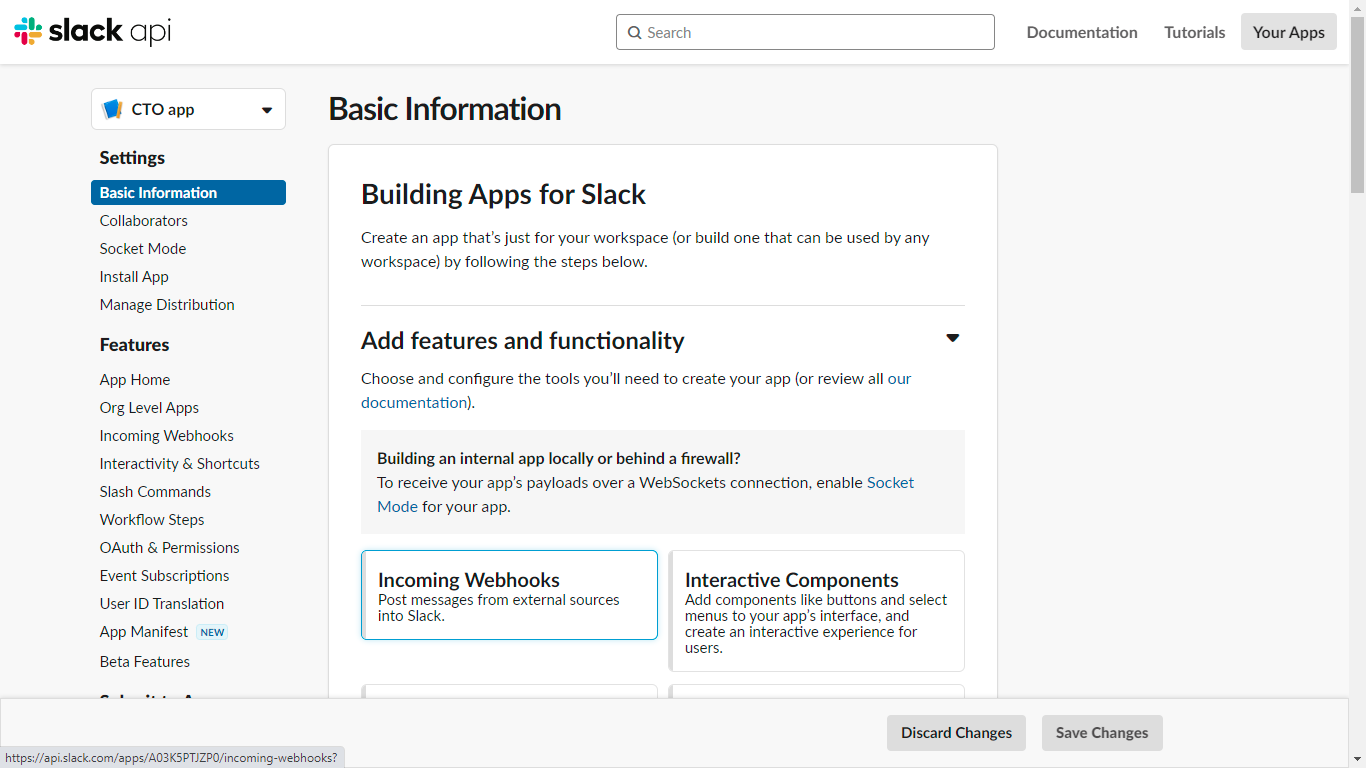
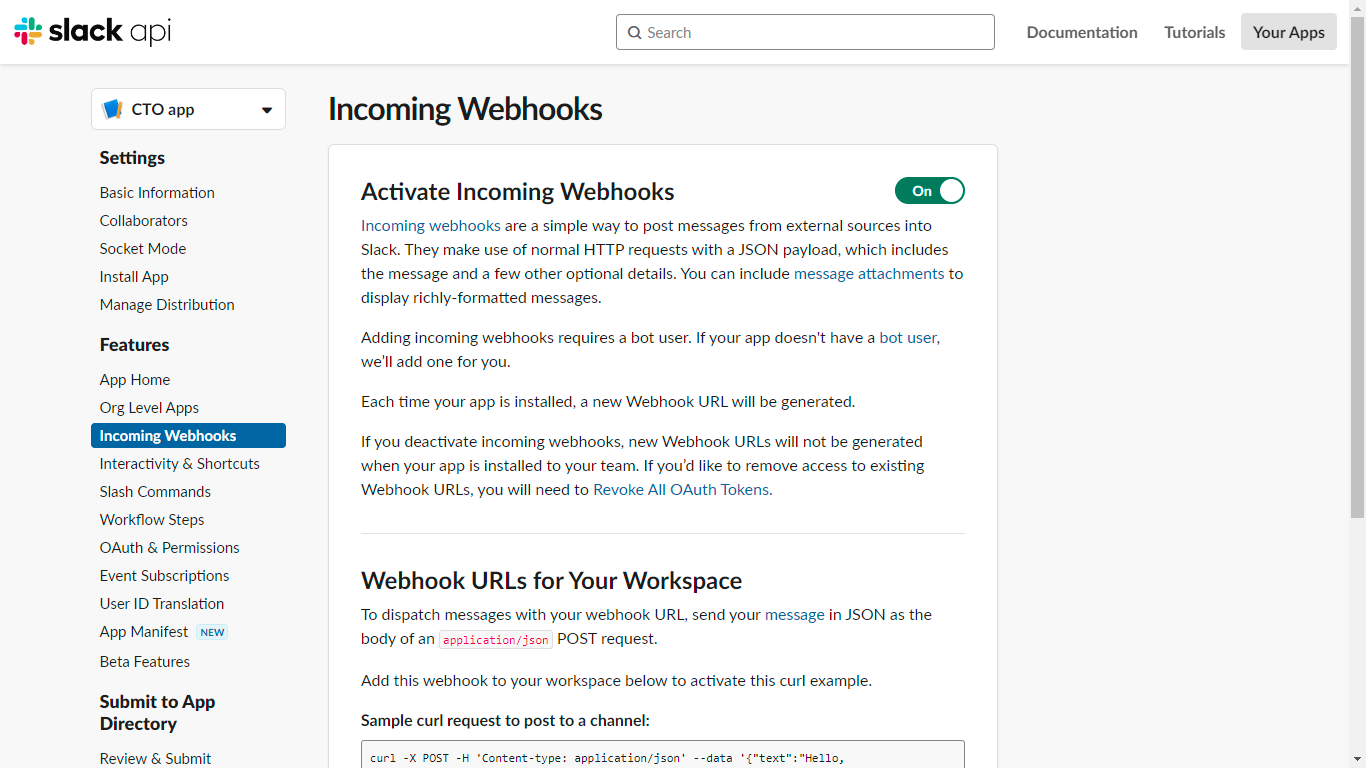
Under Add Features and Functionality, click the Incoming Webhooks tile.
Toggle the switch on top right corner (if not already On) to activate incoming webhooks in your application.
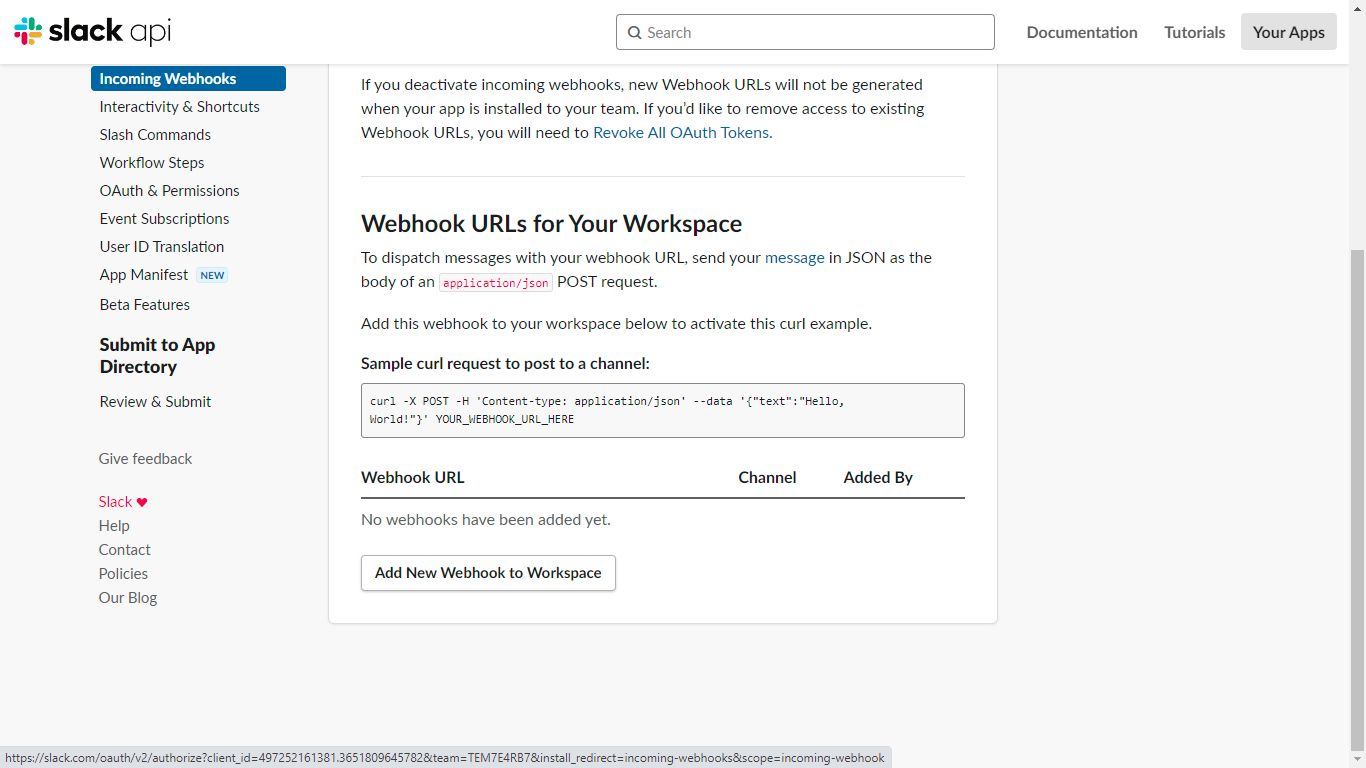
Click Add New Webhook to Workspace.
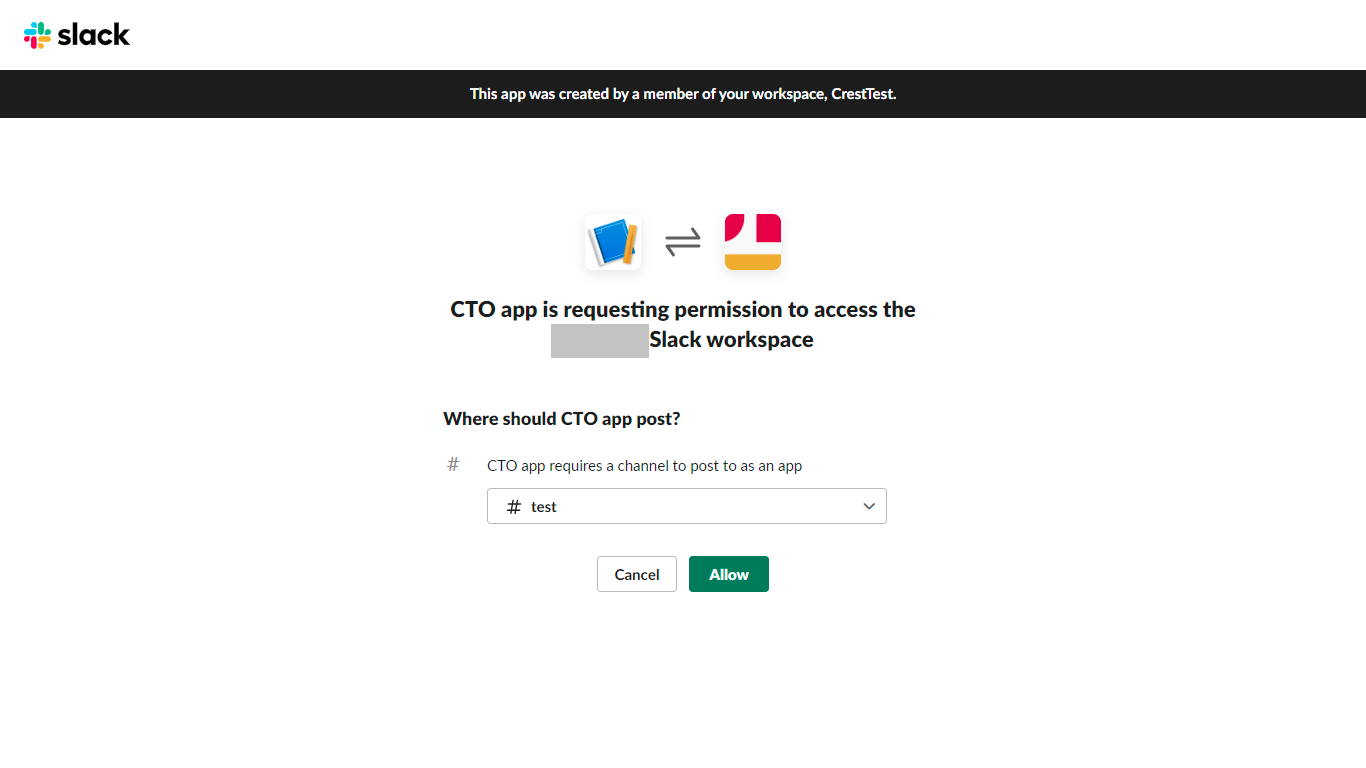
Select the channel in which you want your application to post the notifications, and then click Allow.
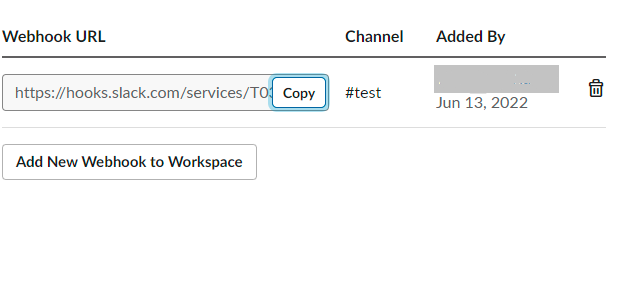
Click Copy to copy the newly generated webhook URL. This will be used while creating the Notifier plugin.
Log in to Cloud Exchange
Go to Settings > Plugins.
Search for and click on the Notifier plugin tile.
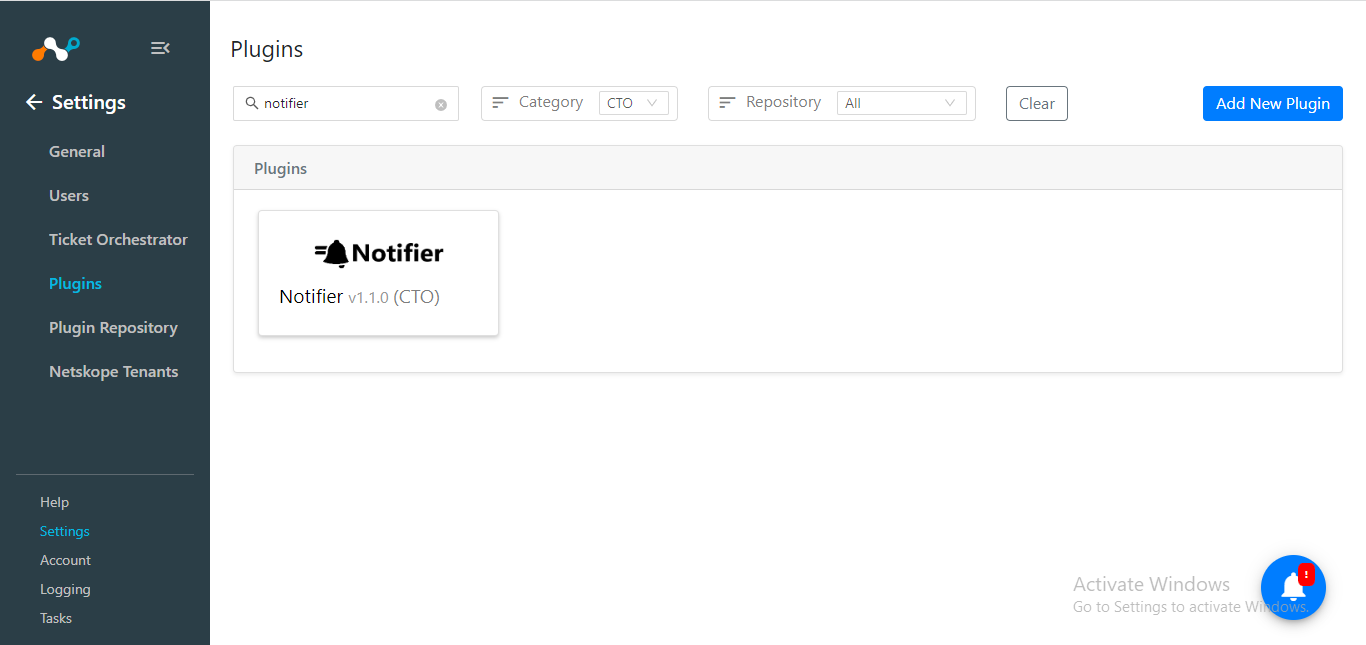
Enter and select the Basic Information on the first page:
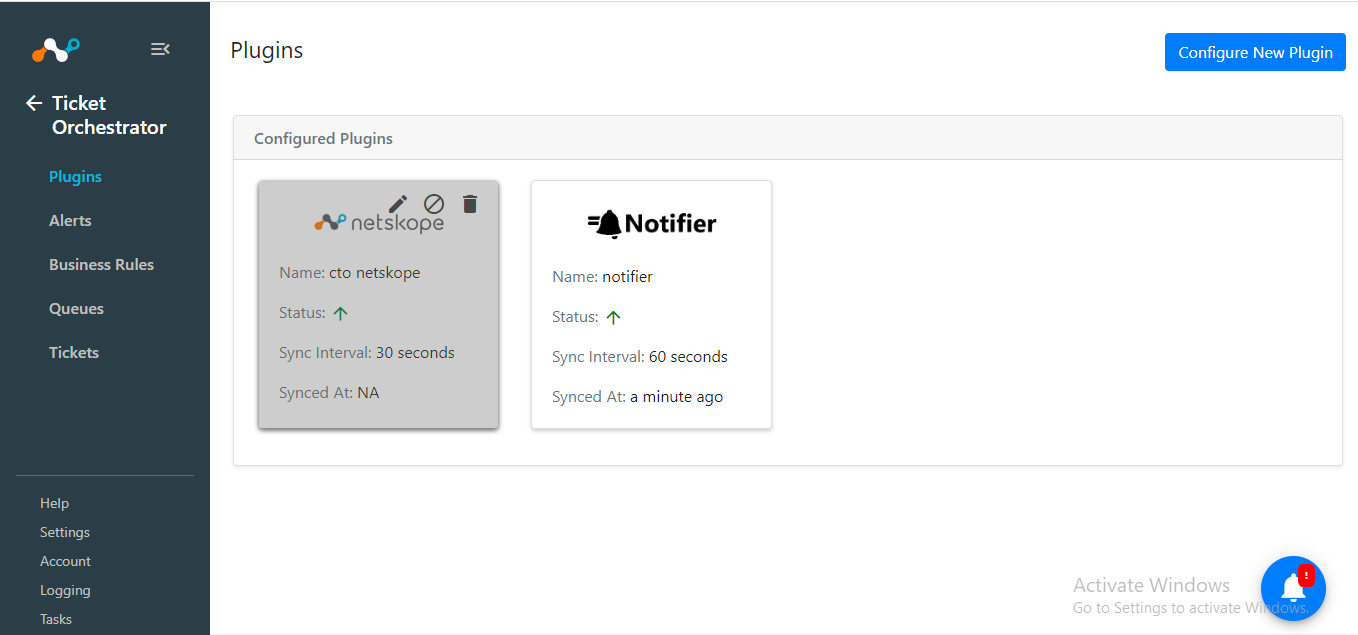
Configuration Name: Unique name for the configuration.
Sync Interval: Leave Default.
Use System Proxy: Enable if proxy is required for communication.
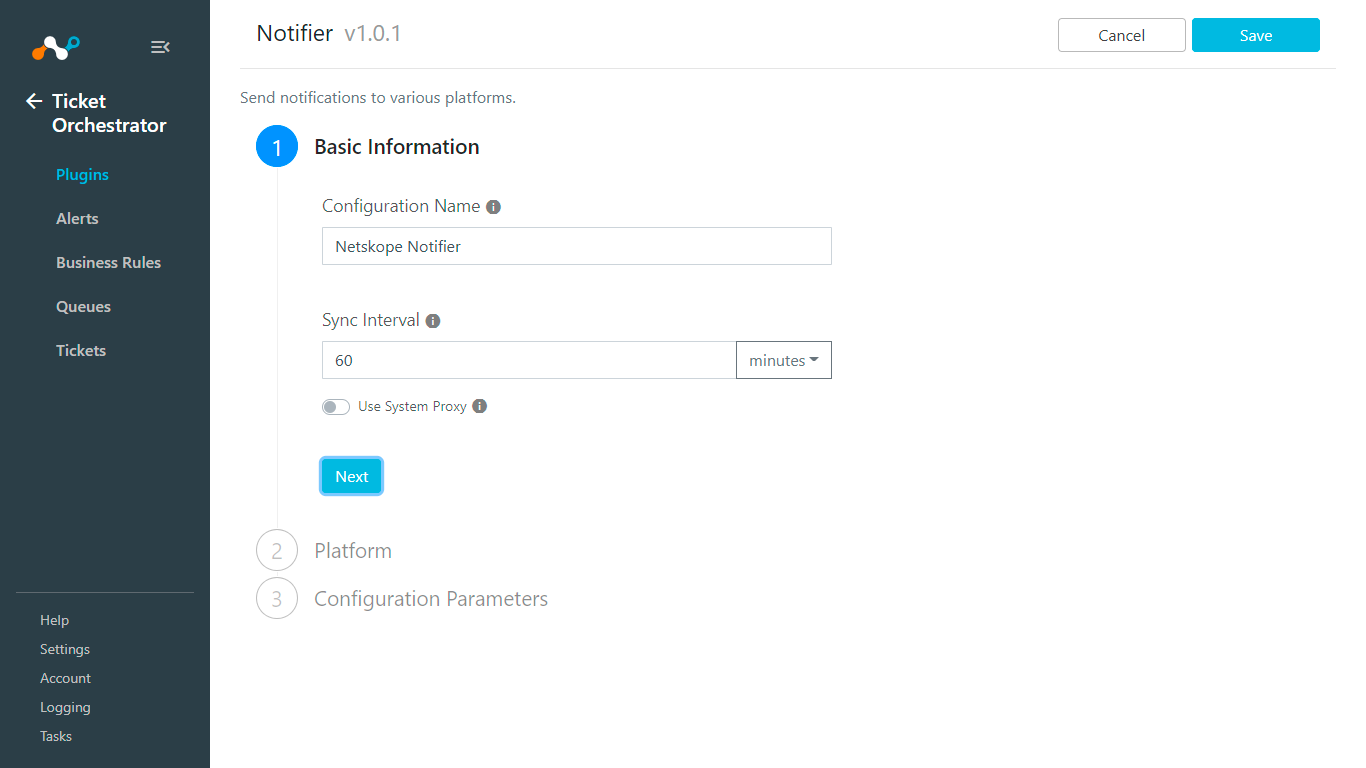
Click Next.
For Platform Name, select Slack (Webhooks) from the dropdown list.
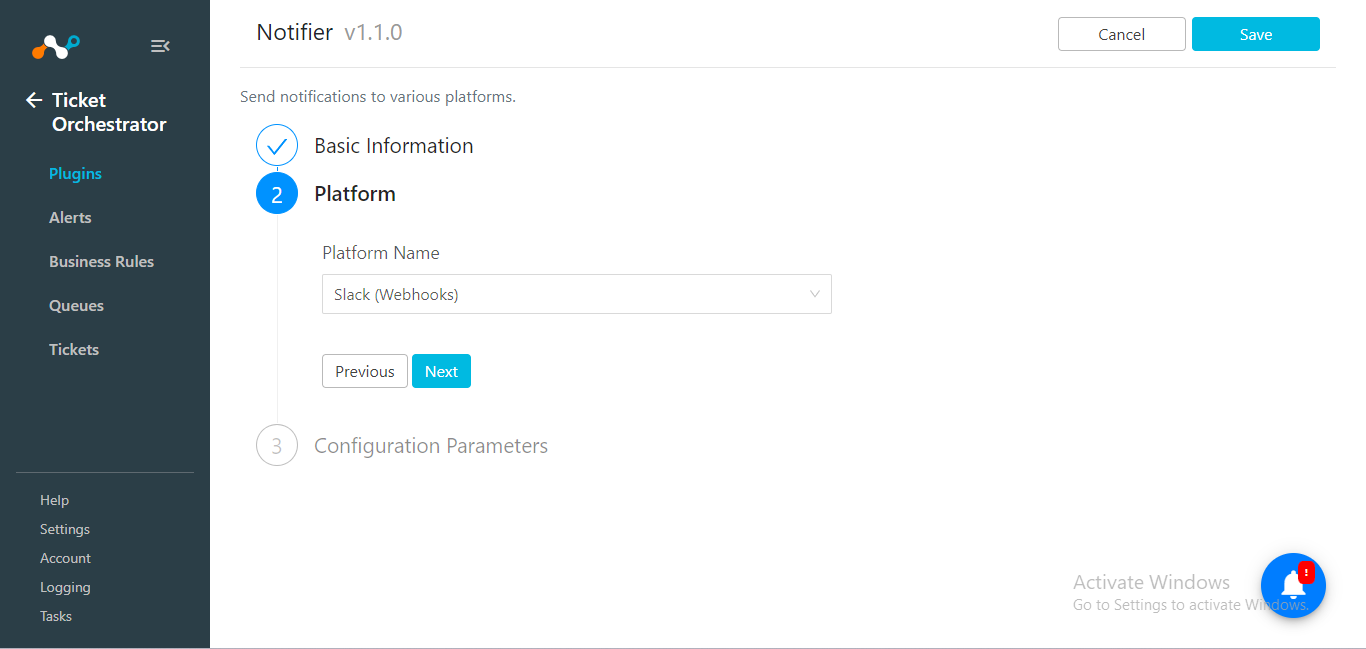
Click Next.
Enter the Configuration Parameters on the third page:
Webhook URL: Webhook URL obtained previously.
Icon URLURL: Leave Default
Icon Emoji: Leave Default
Username: Leave Default
Channel: Leave Default
Unfurl Links: Leave Default
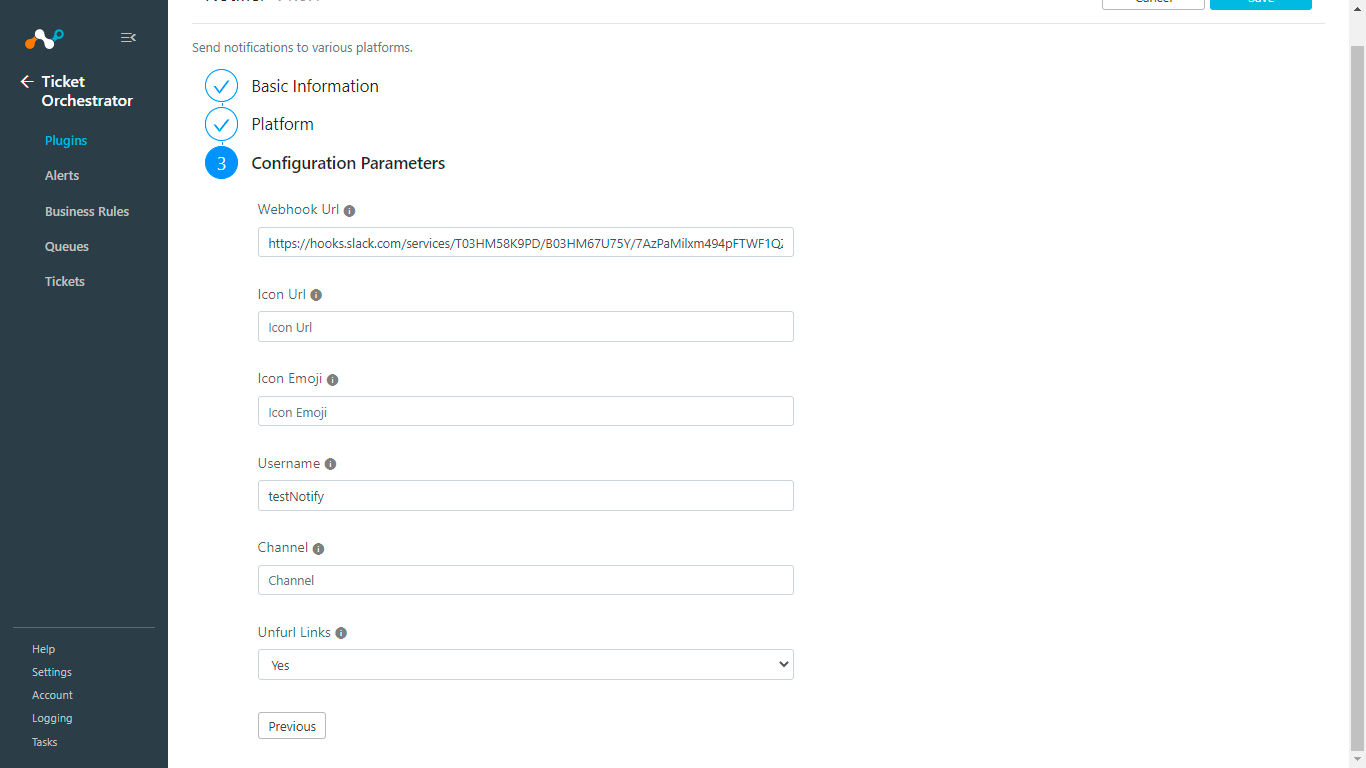
Click Save.
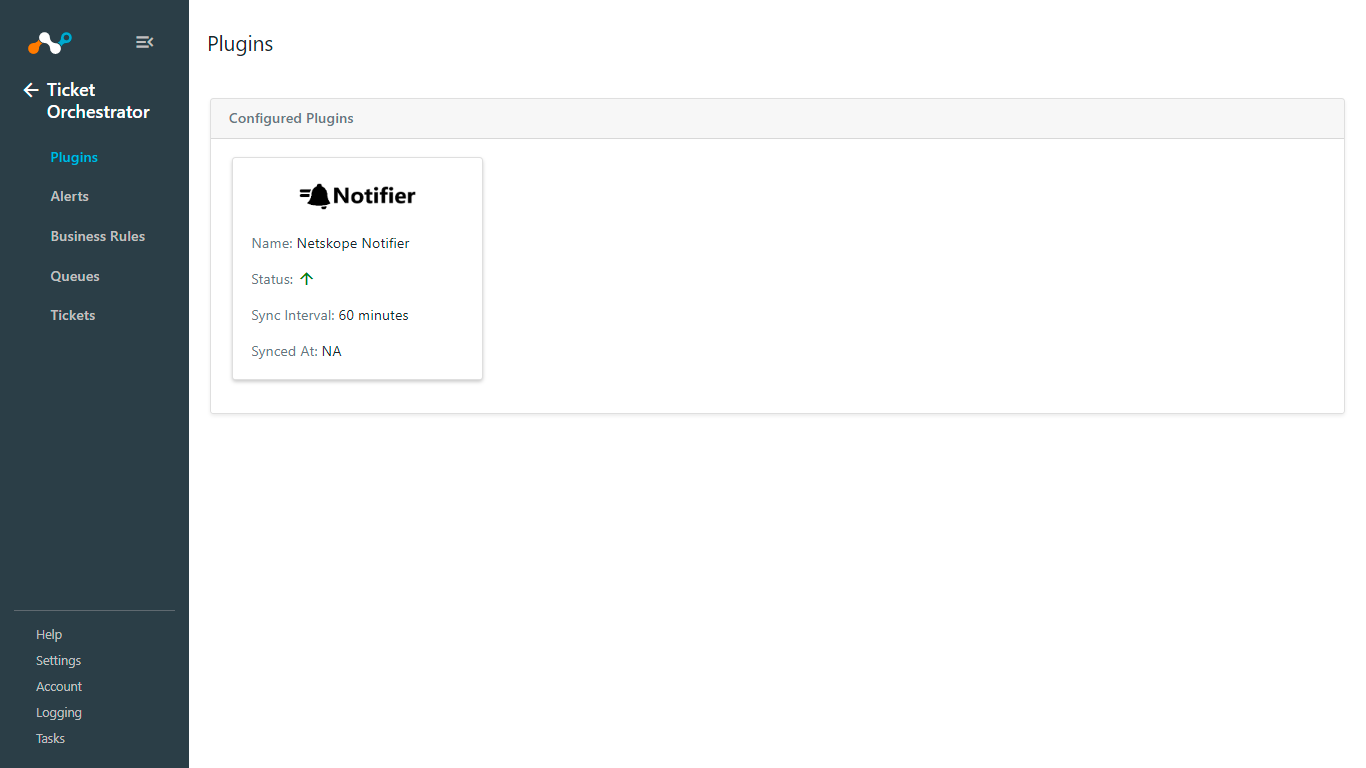
Go to Ticket Orchestrator > Business Rule and click Create New Rule.
Add the rule name, and select your query for the business rule.
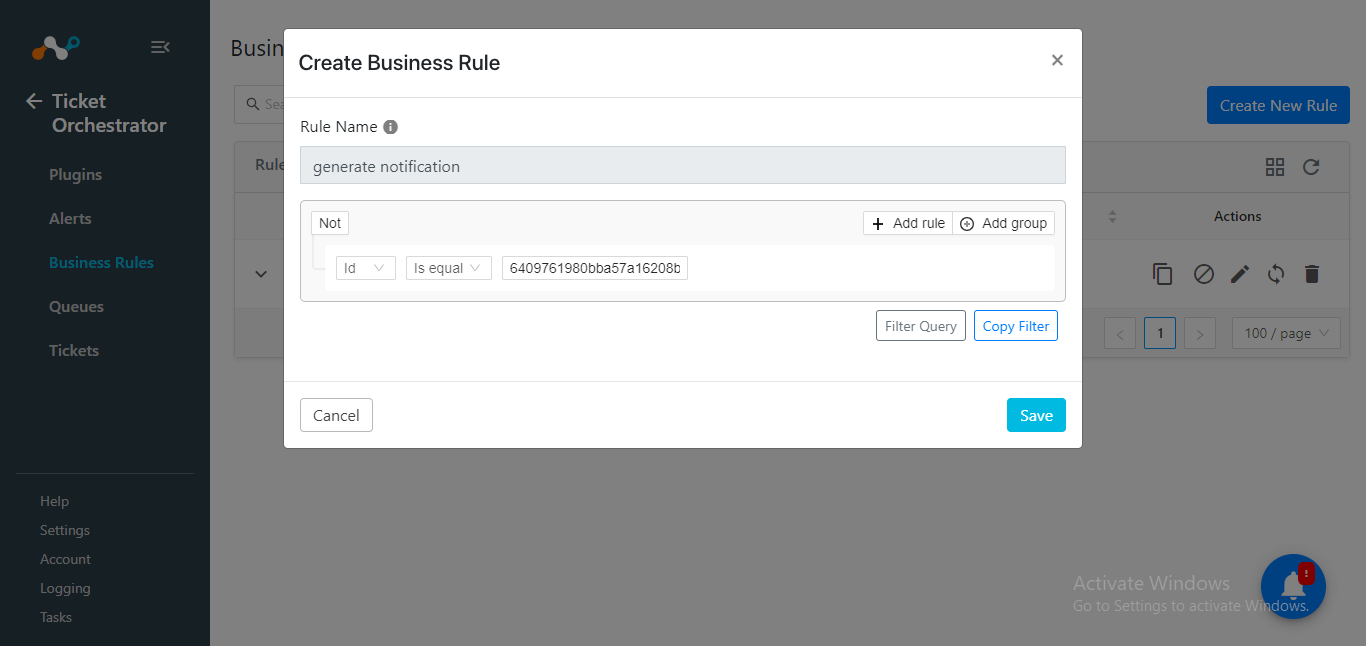
Click Save.
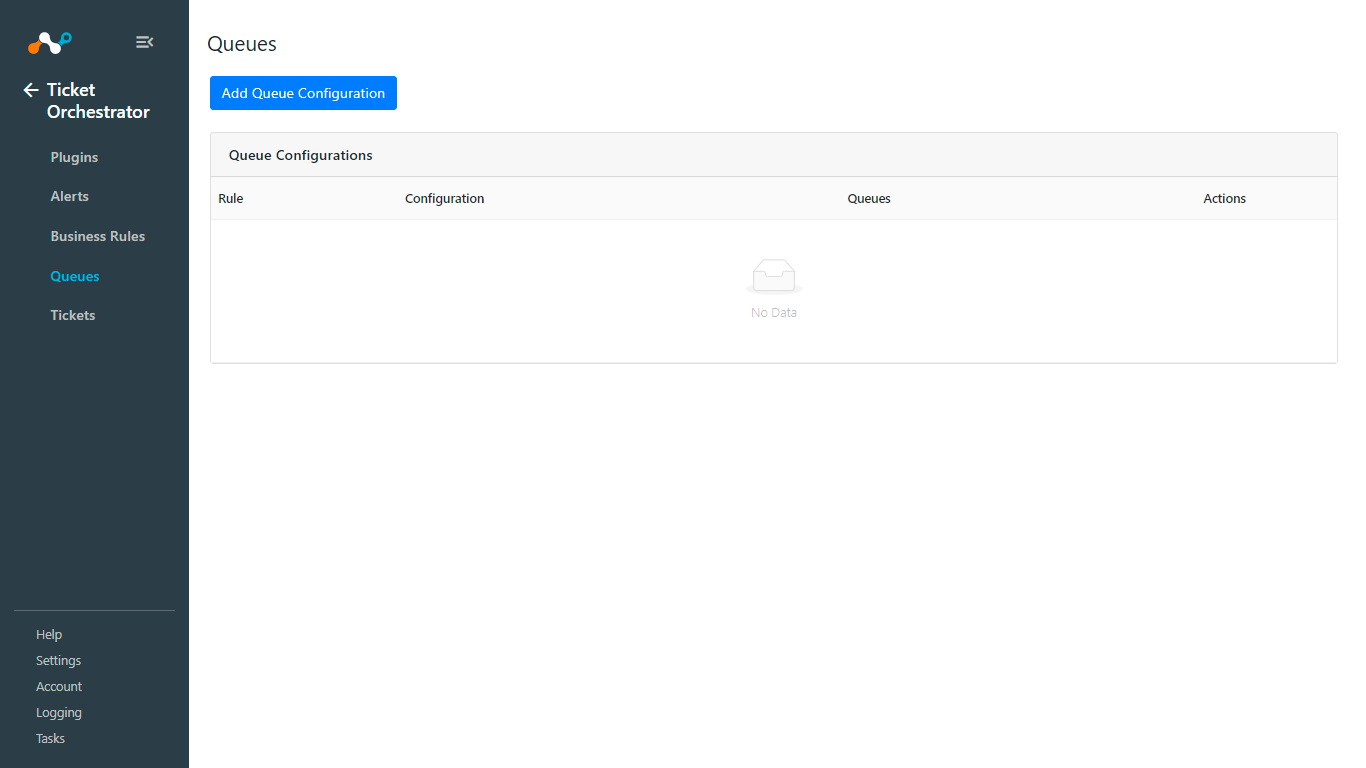
Go to Ticket Orchestrator > Queues and click Add Queue Configuration.
Enter and select these values:
Business Rule: Select the Business Rule created previously.
Configuration: Select the Notifier Configuration created previously.
Queues: For the Slack Notifier plugin, it should be a Notification queue.
Map Fields: Add/Map appropriate values between alerts and notifications under the Map Field section. Alert’s attributes can be accessed via “$” in the custom message field.
Click on the Add button to add more field mappings.
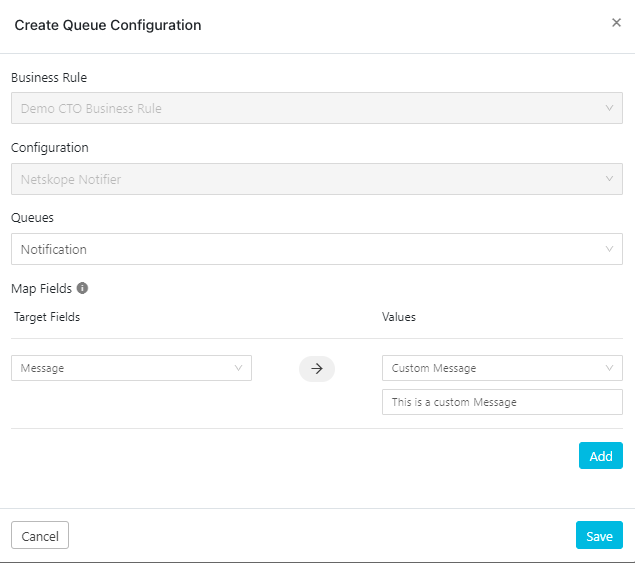
Click Save.
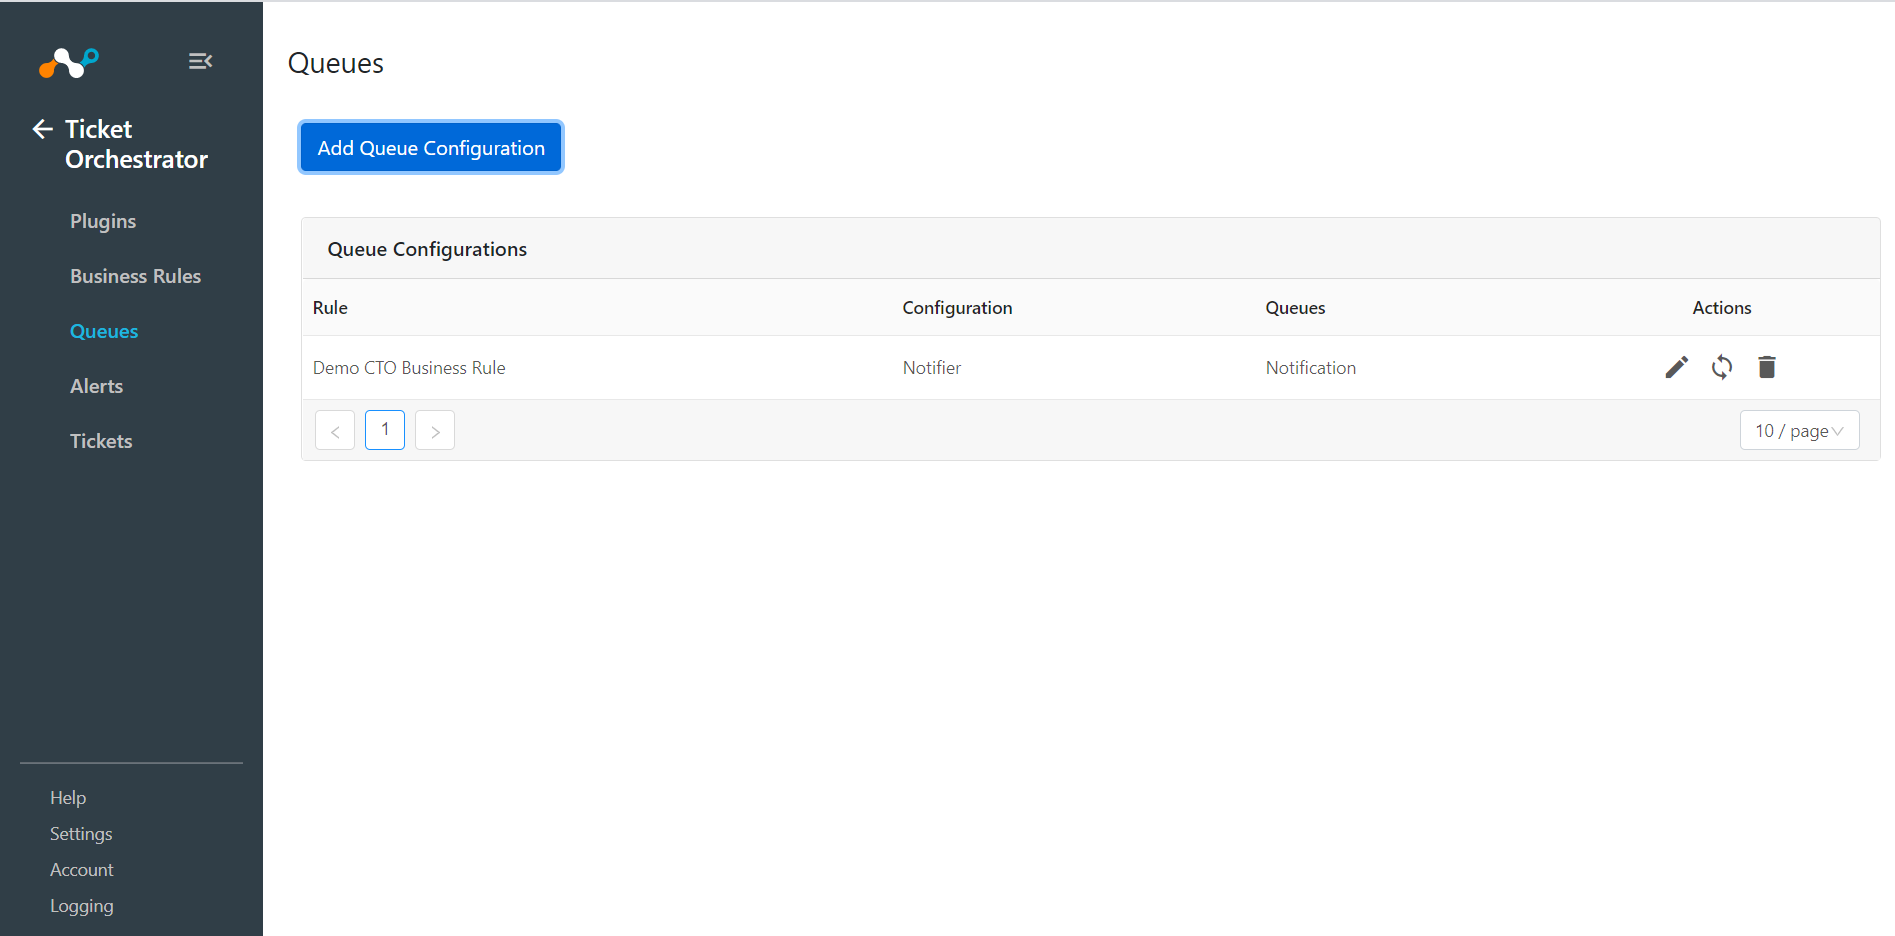
Based on the business rule(s), notifications for incoming alerts will be sent automatically to the configured Slack channel.
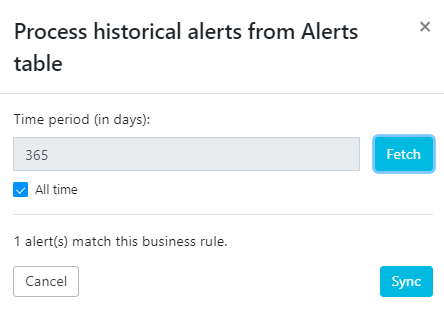
To create notifications for historical alerts, click Sync on the configured queue and enter the Time period (in days), and then click Fetch. It’ll show the number of alerts that are eligible for sending notifications.
Click on the Sync button to send the notification(s).
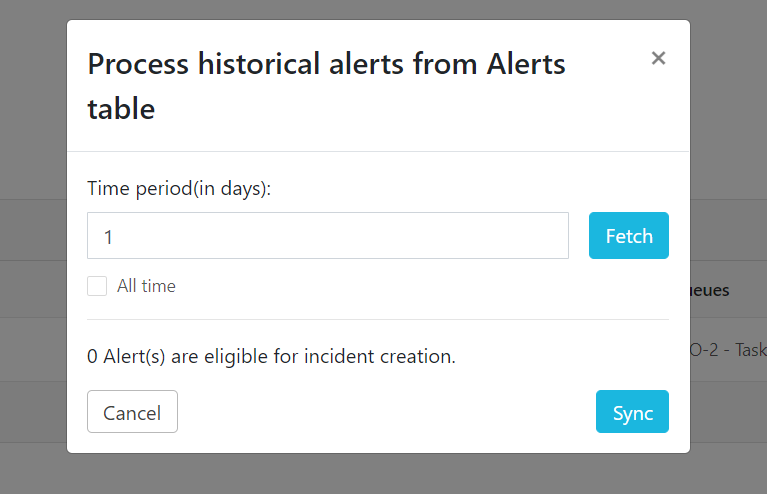
Log in to Cloud Exchange.
Go to Settings > Plugins.
Search for and click on the Notifier plugin tile.
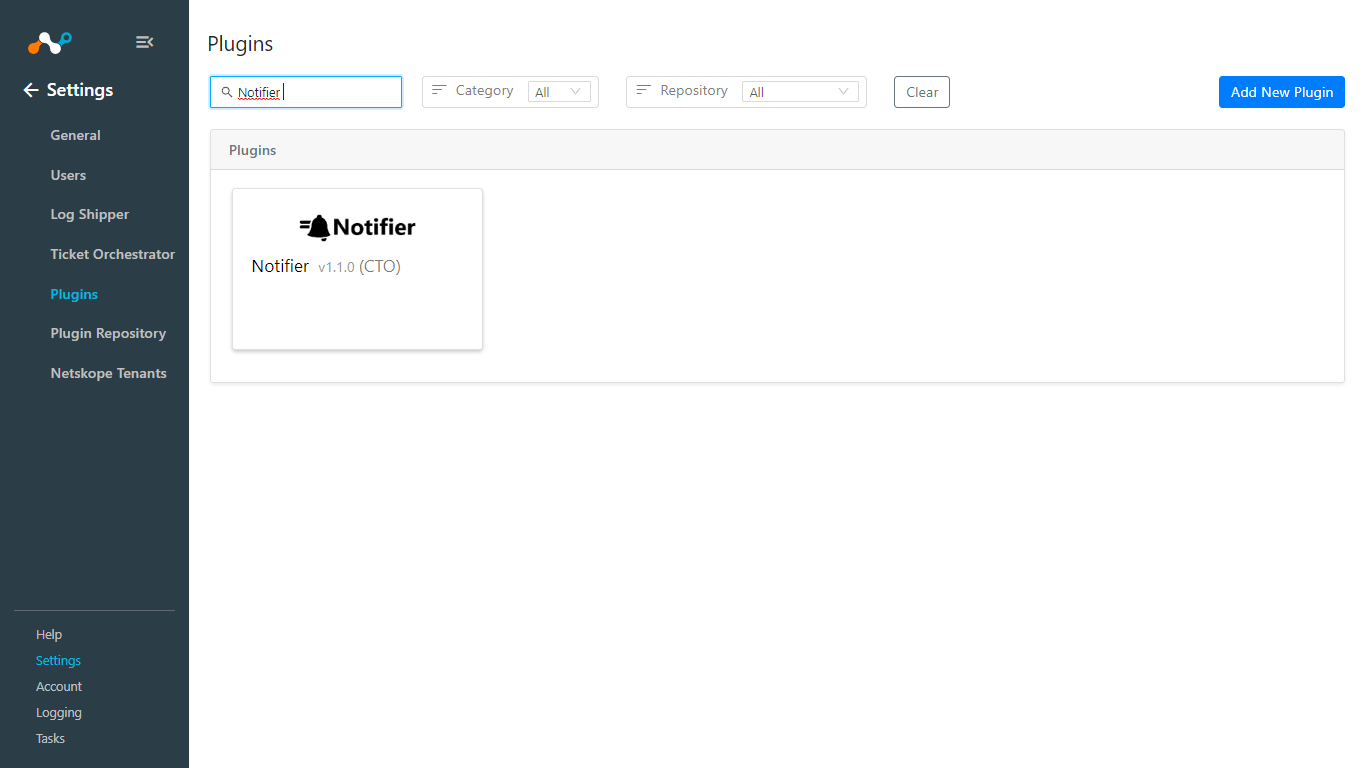
Fill out the form with these values:
Configuration Name: Unique name for the configuration.
Sync Interval: Leave Default.
Use System Proxy: Enable if proxy is required for communication.
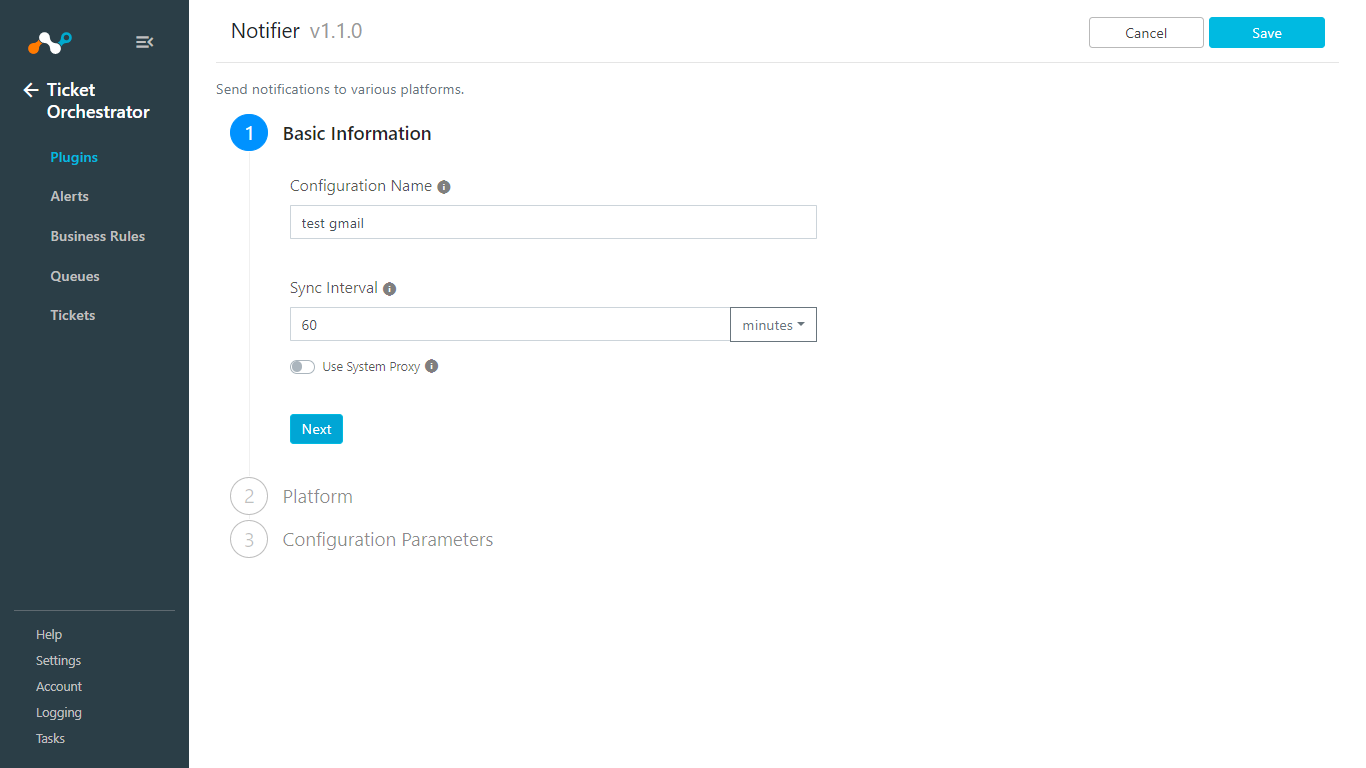
Click Next.
For Platform Name, select Gmail from the dropdown list.
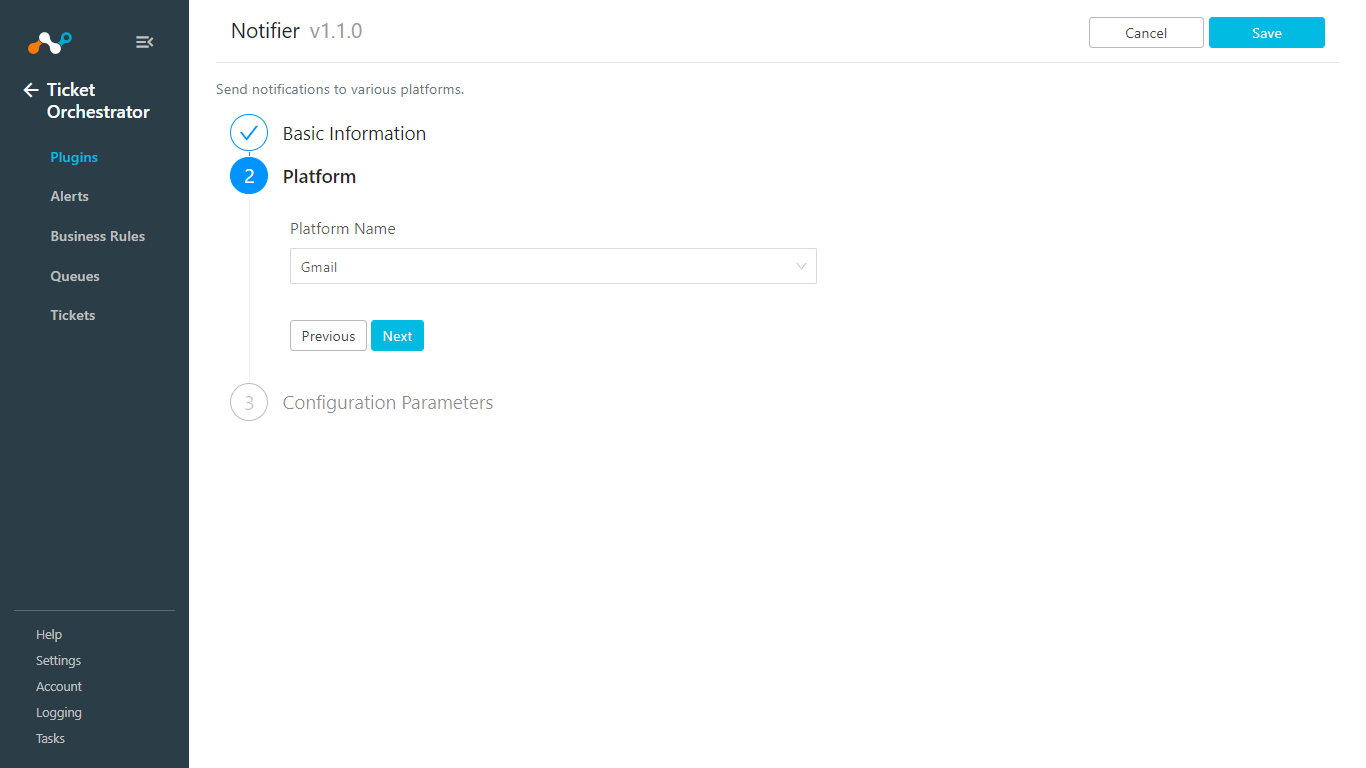
Click Next.
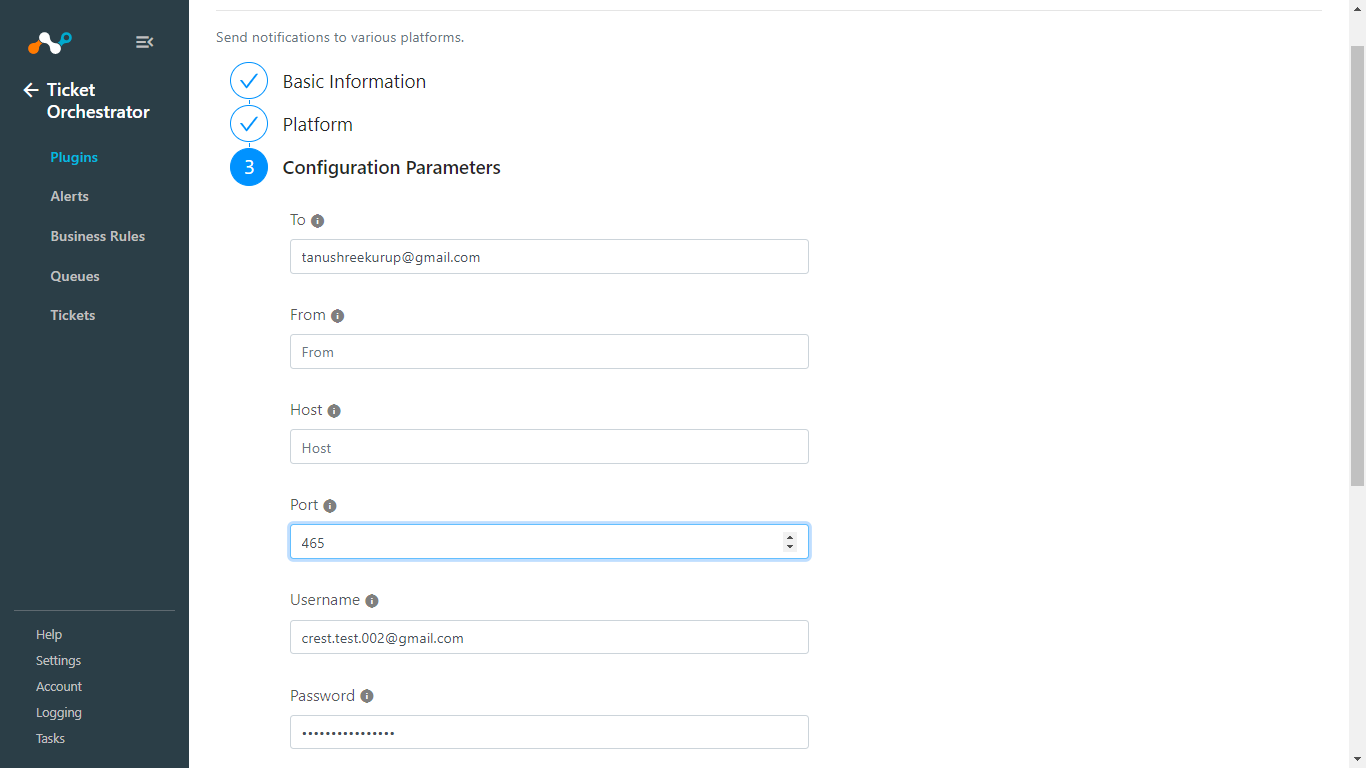
Enter the Configuration Parameters on the third page:
To: One or more comma-separated email addresses.
From: The from address to use in email.
Host: Host of the SMTP server.
Port: Select port number to use.
Username: Type username if relevant.
Password: Type password if relevant.
Tls: Select if TLS is required.
Ssl: Select if SSL is required.
Html: Select if email should be parsed as an HTML file.
Login: Select to Trigger login to server.
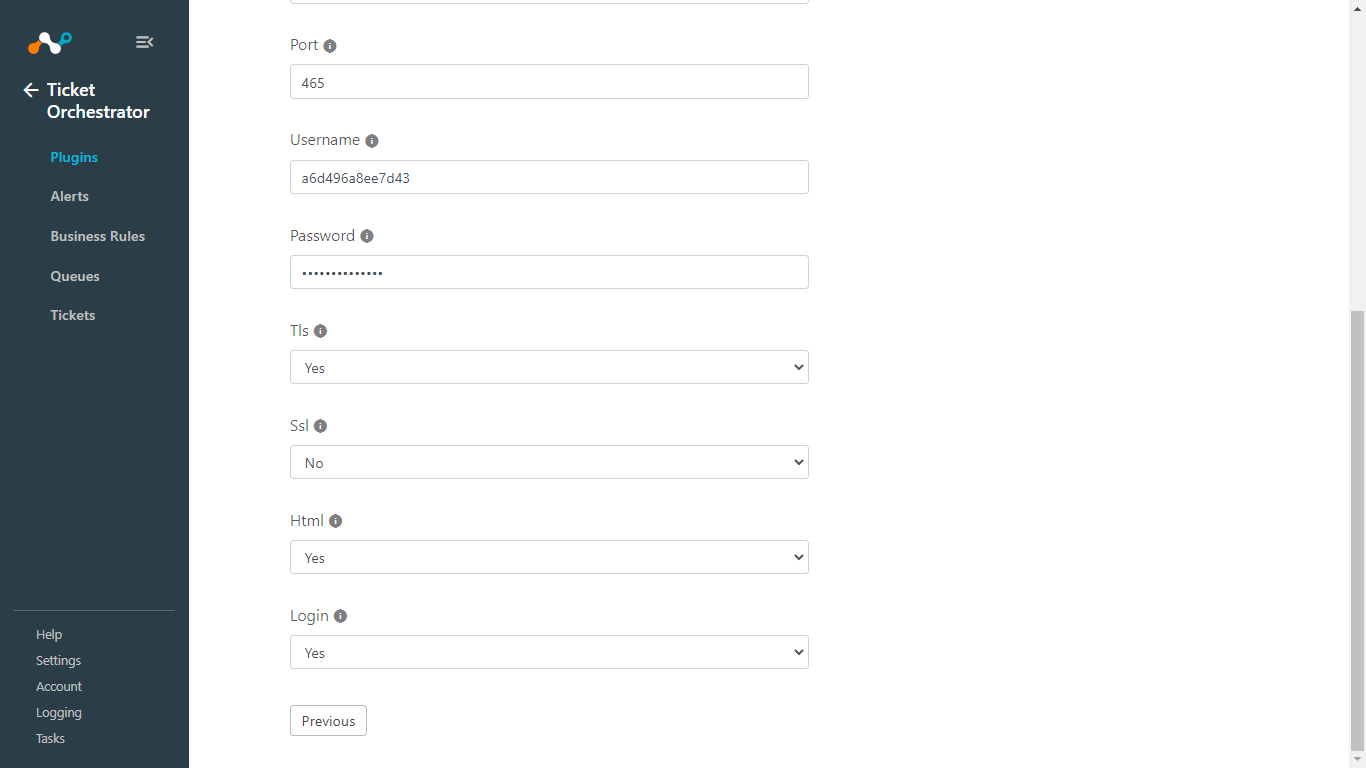
Click Save.
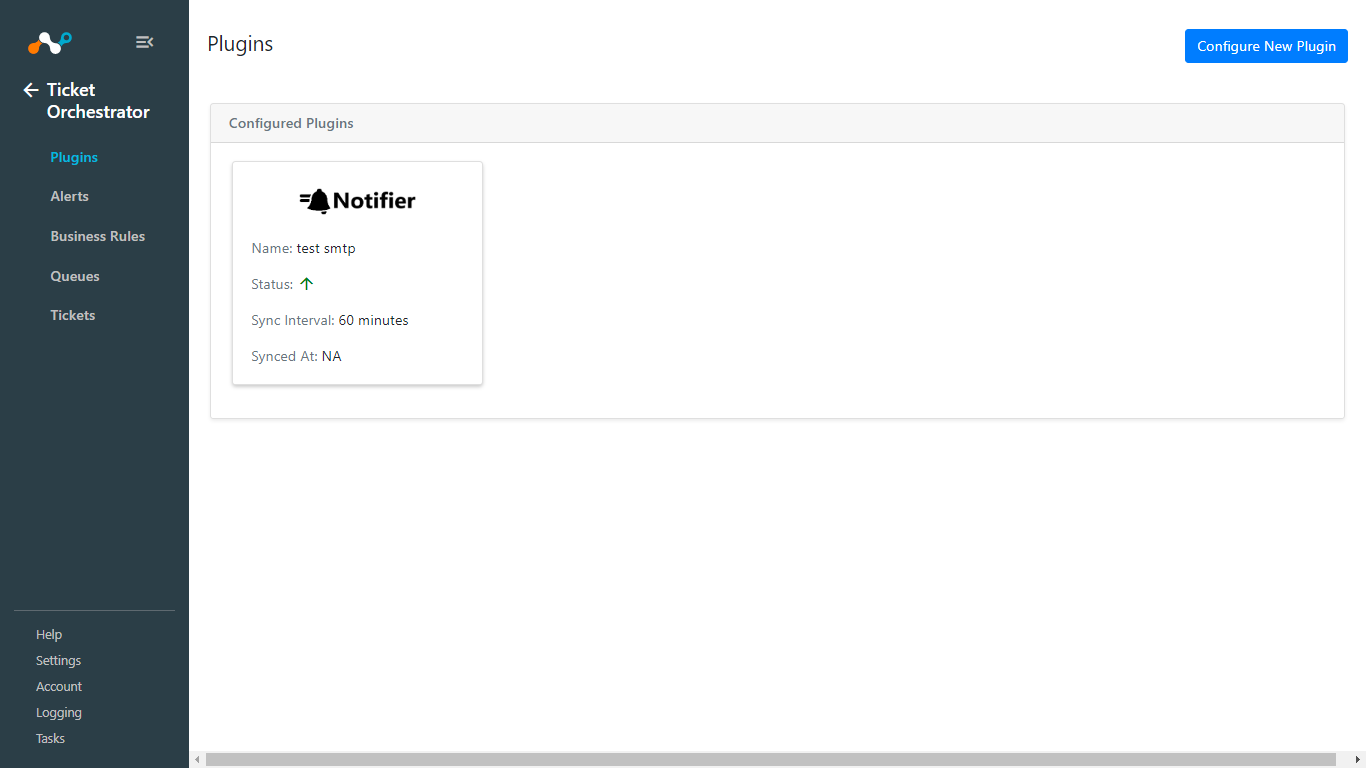
Go to Ticket Orchestrator > Business Rule and click Create New Rule.
Add the rule name, and select your query for the business rule.

Click Save.
Go to Ticket Orchestrator > Queues and click Add Queue Configuration.
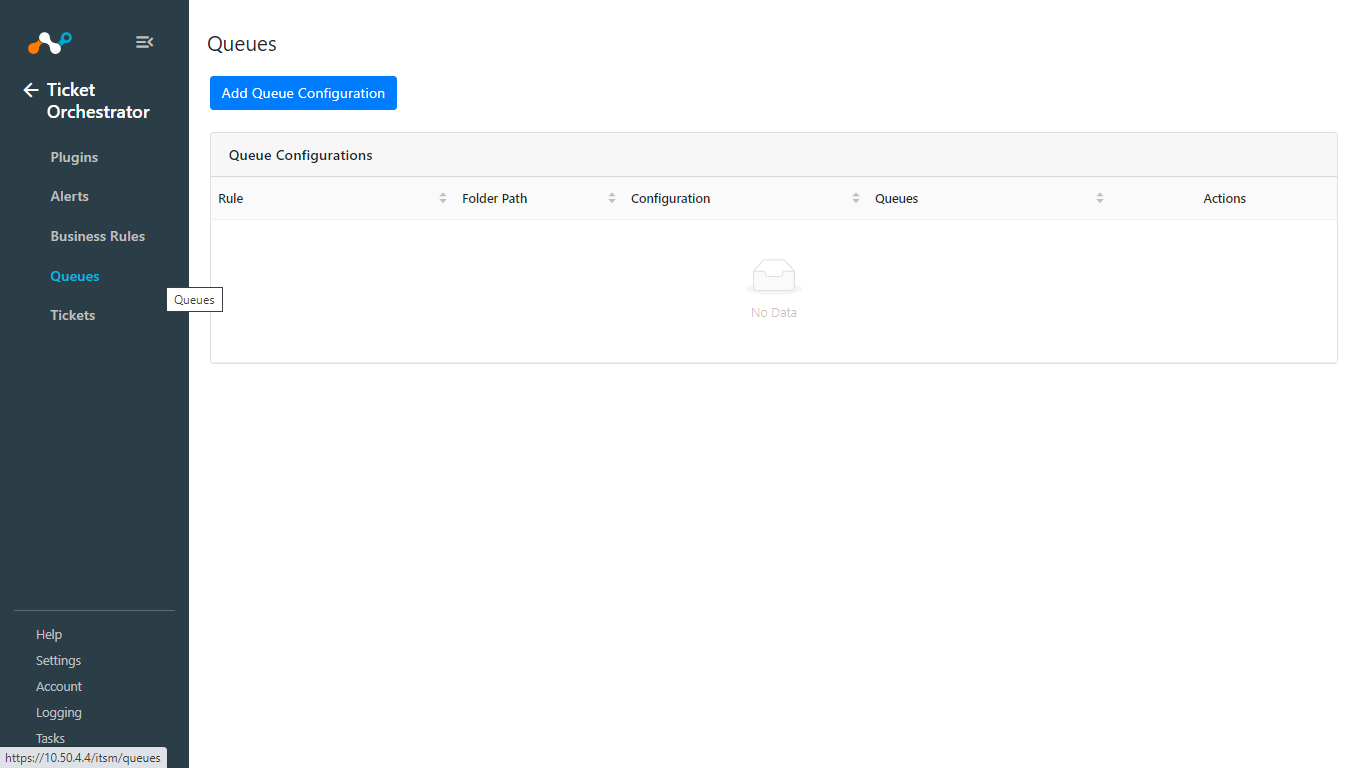
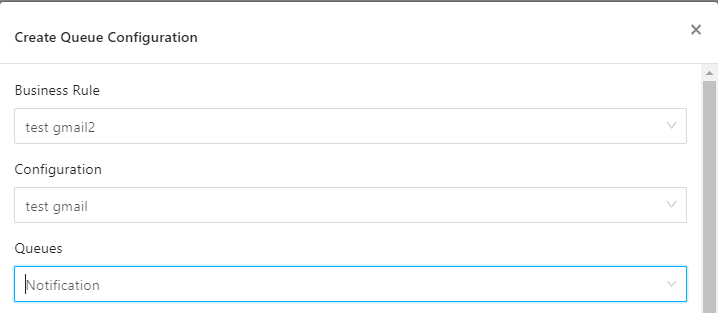
Enter and select these values:
Business Rule: Select the Business Rule created previously.
Configuration: Select the Notifier Configuration created previously.
Queues: For the Gmail Notifier plugin, it should be a “Notification” queue.
Map Fields: Add/Map appropriate values between alerts and notification under the Map Field section. Alert’s attributes can be accessed via “$” in the custom message field. For the Gmail Notifier Plugin, these options are available:
Message: Message of the email.
Subject: Subject of the email.
To: Comma separated email addresses, a default set to $user field from alerts.
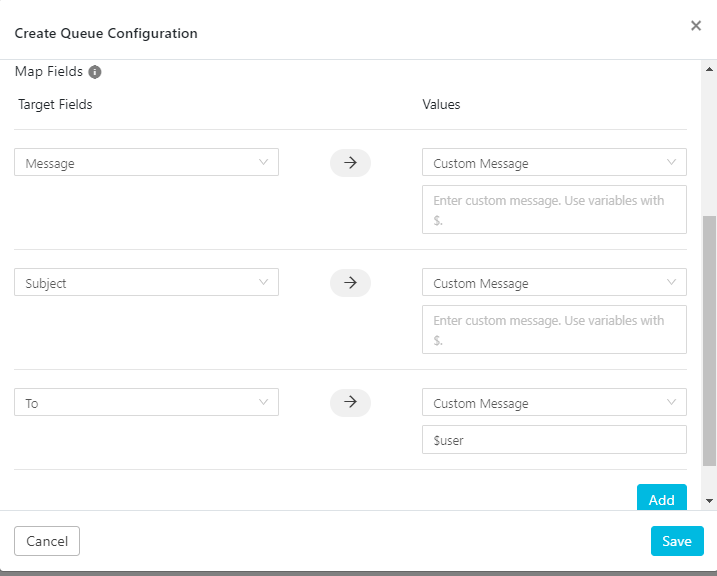
Click Save.
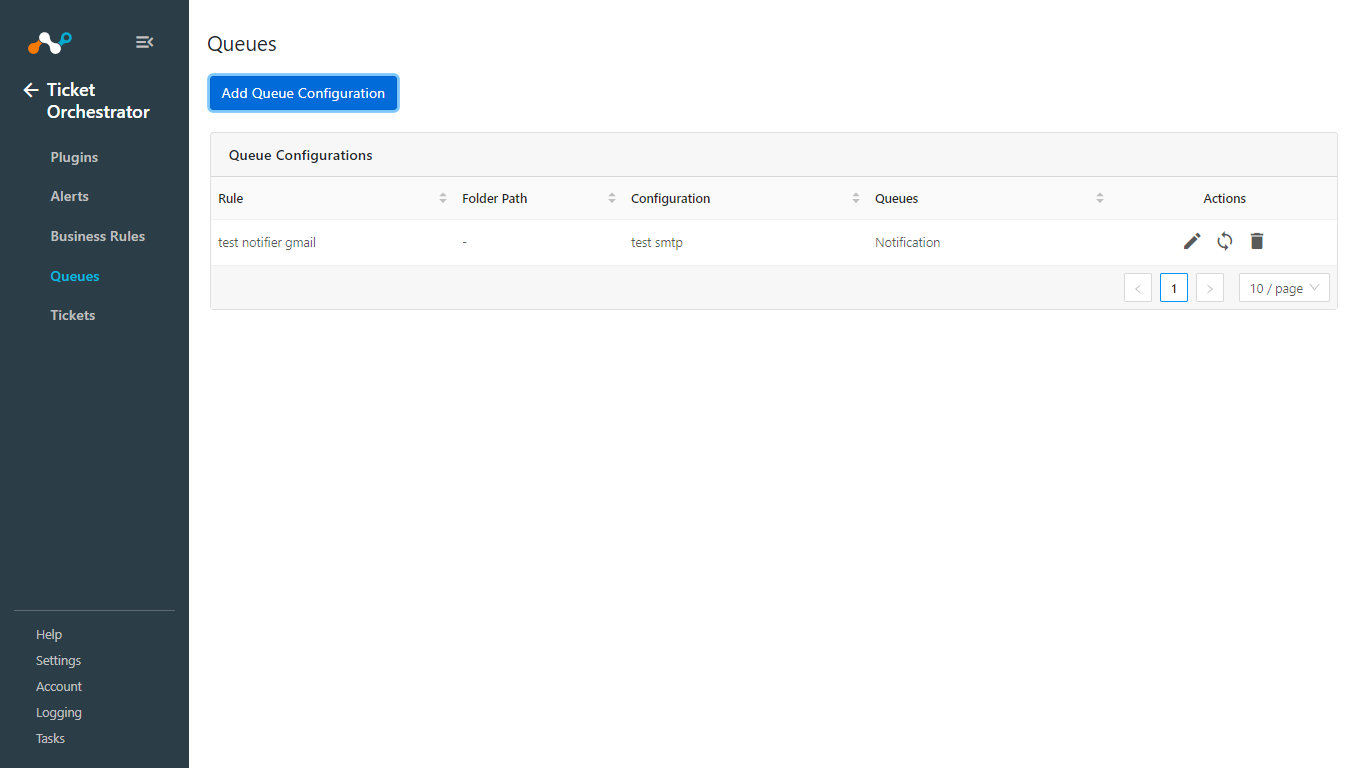
Based on the business rule(s), Notifications for incoming alerts will be sent automatically to the Gmail address.
To create notifications for historical alerts, click Sync on the configured queue and enter the Time period (in days), and then click Fetch. It’ll show the number of alerts that are eligible for sending notifications.
Click on the Sync button to send the notification(s).
Configure the Notifier Plugin with Email (SMTP) for Ticket Orchestrator
Log in to Cloud Exchange.
Go to Settings > Plugins.
Search for and click on the Notifier plugin tile.

Enter and select the Basic Information on the first page:
Configuration Name: Unique name for the configuration.
Sync Interval: Leave Default.
Use System Proxy: Enable if the proxy is required for communication.
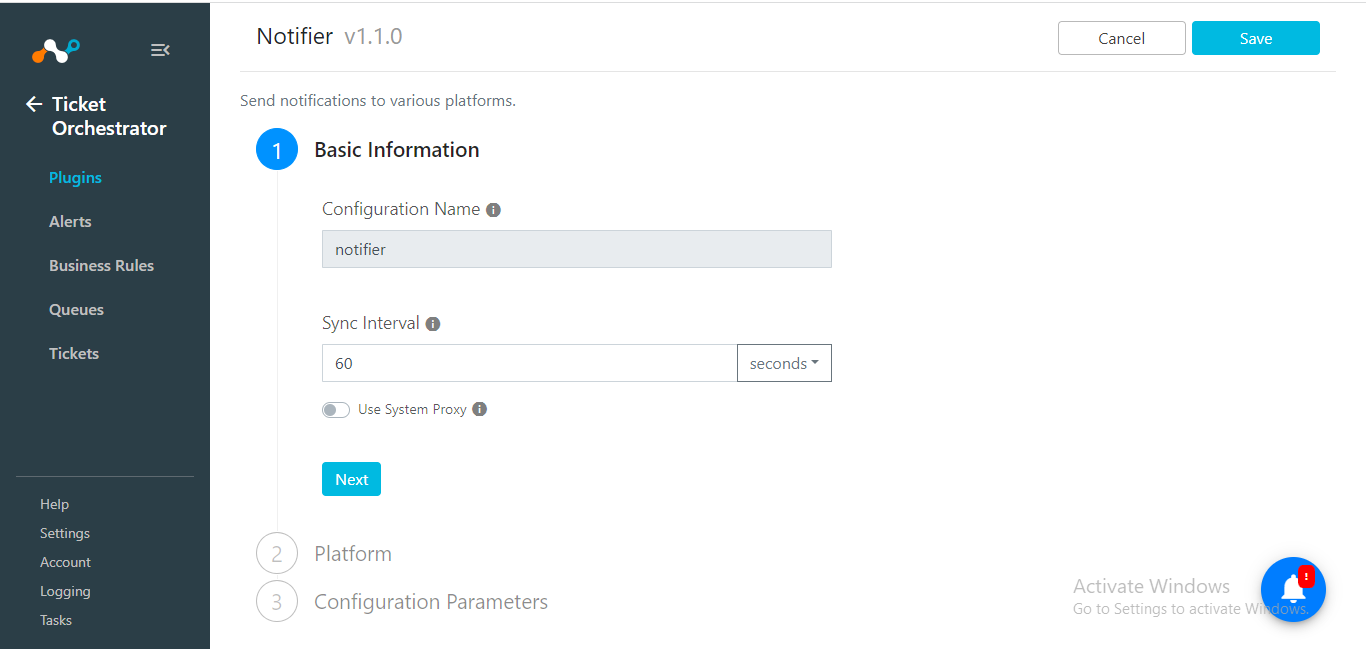
Click Next.
For Platform Name, select Email (SMTP) from the dropdown list.
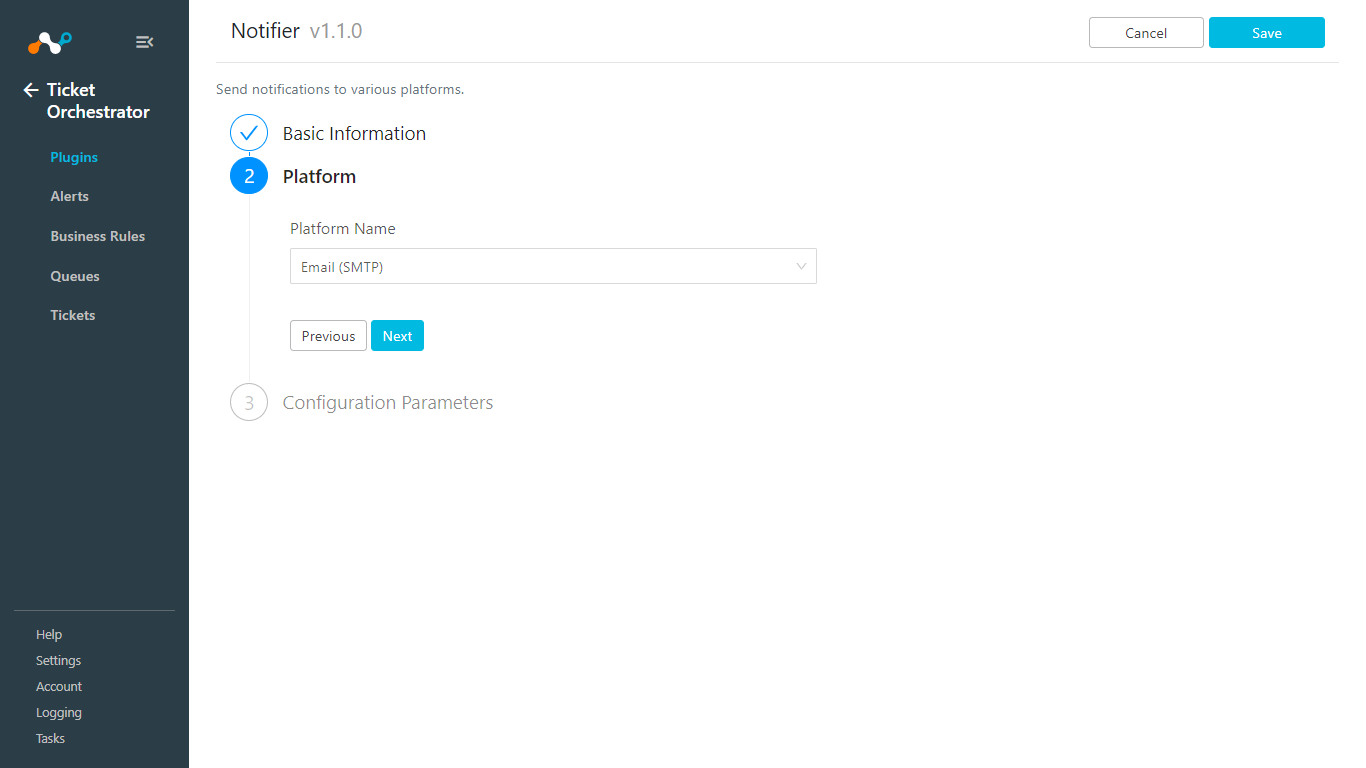
Click Next.
Enter the Configuration Parameters on the third page:
To: One or more comma-separated email addresses.
From: The from address to use in the email.
Host: Host of the SMTP server.
Port: Select the port number to use.
Username: Type the username of the SMTP server if relevant.
Password: Type the password of the SMTP server if relevant. Follow the steps provided in this document to get the password. (application specific password required).
Tls: Select if TLS is required.
SSL: Select if SSL is required.
Html: Select if the email should be parsed as an HTML file.
Login: Select to trigger the login to the server.
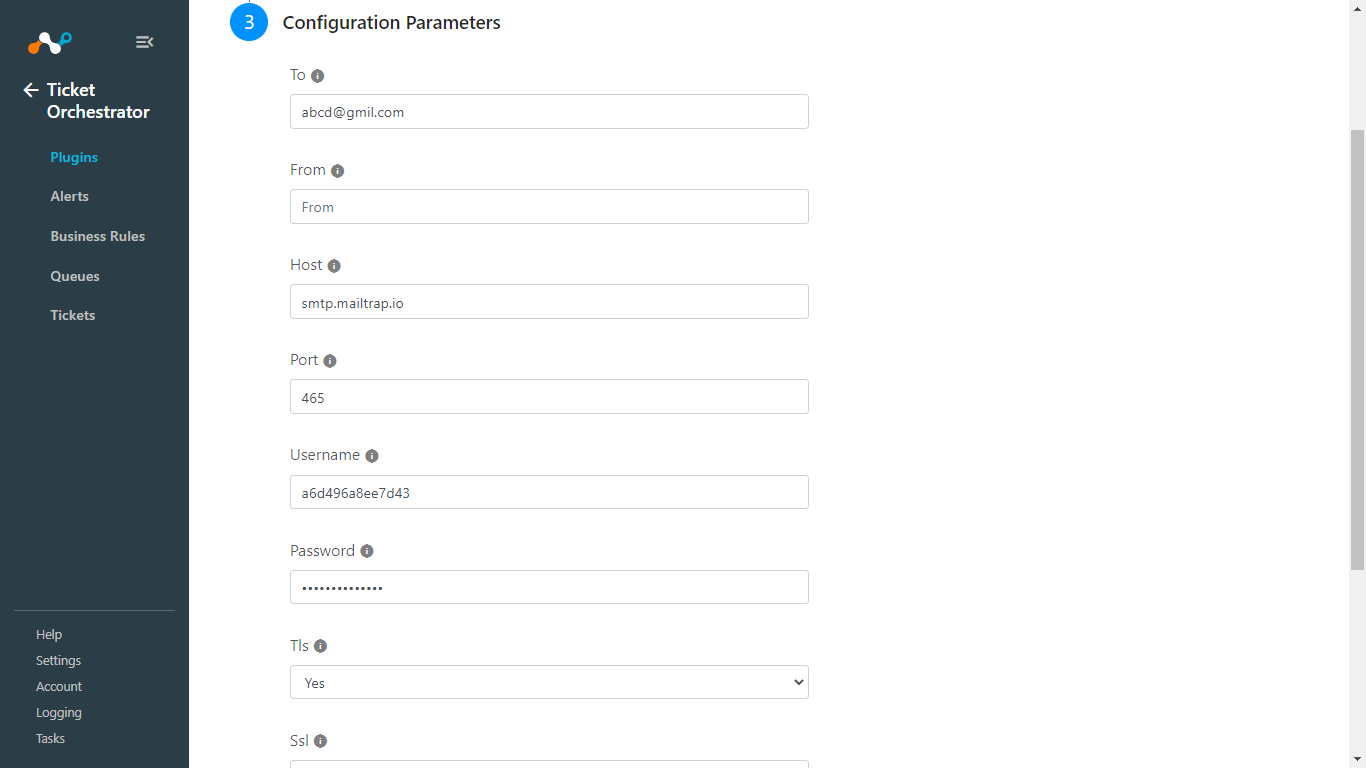

Click on Save
Configure Ticket Orchestrator Business Rules for Notifier with Email (SMTP)
Go to Ticket Orchestrator > Business Rule and click Create New Rule.
Add the rule name, and select your query for the business rule.

Click Save.
Queues Configuration
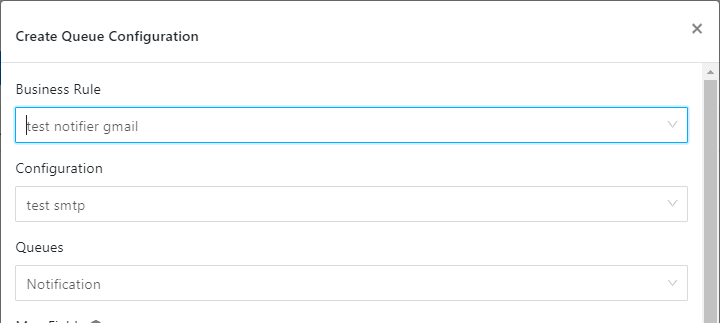
Go to Ticket Orchestrator > Queues and click Add Queue Configuration.
Enter and select these values:
Business Rule: Select the Business Rule created previously.
Configuration: Select the Notifier Configuration created previously
Queues: For the Email Notifier plugin, it should be a “Notification” queue.
Map Fields: Add/Map appropriate values between alerts and notifications under the Map Field section. Alert’s attributes can be accessed via “$” in the custom message field. For the Email Notifier Plugin, The following three options are available:
Message: Message of the email
Subject: Subject of the email
To comma-separated email addresses, a default set to $user field from alerts

Click Save.

Based on the business rule(s), Notifications for incoming alerts will be sent automatically to the email address.
To create notifications for historical alerts, click Sync on the configured queue and enter the Time period (in days), and then click Fetch. It’ll show the number of alerts that are eligible for sending notifications.
Click on the Sync button to send the notification(s).

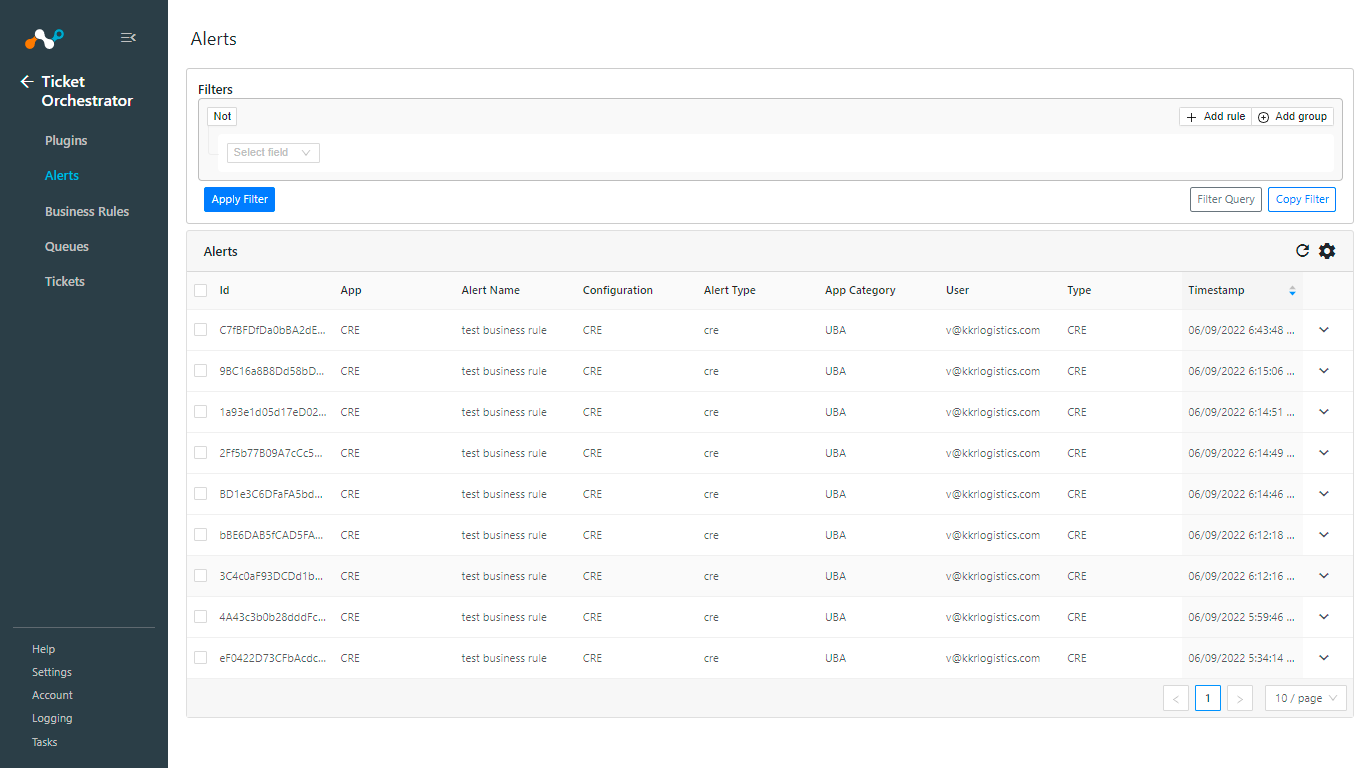
In order to validate the workflow you must have Netskope Alerts.
Go to Ticket Orchestrator > Alerts.
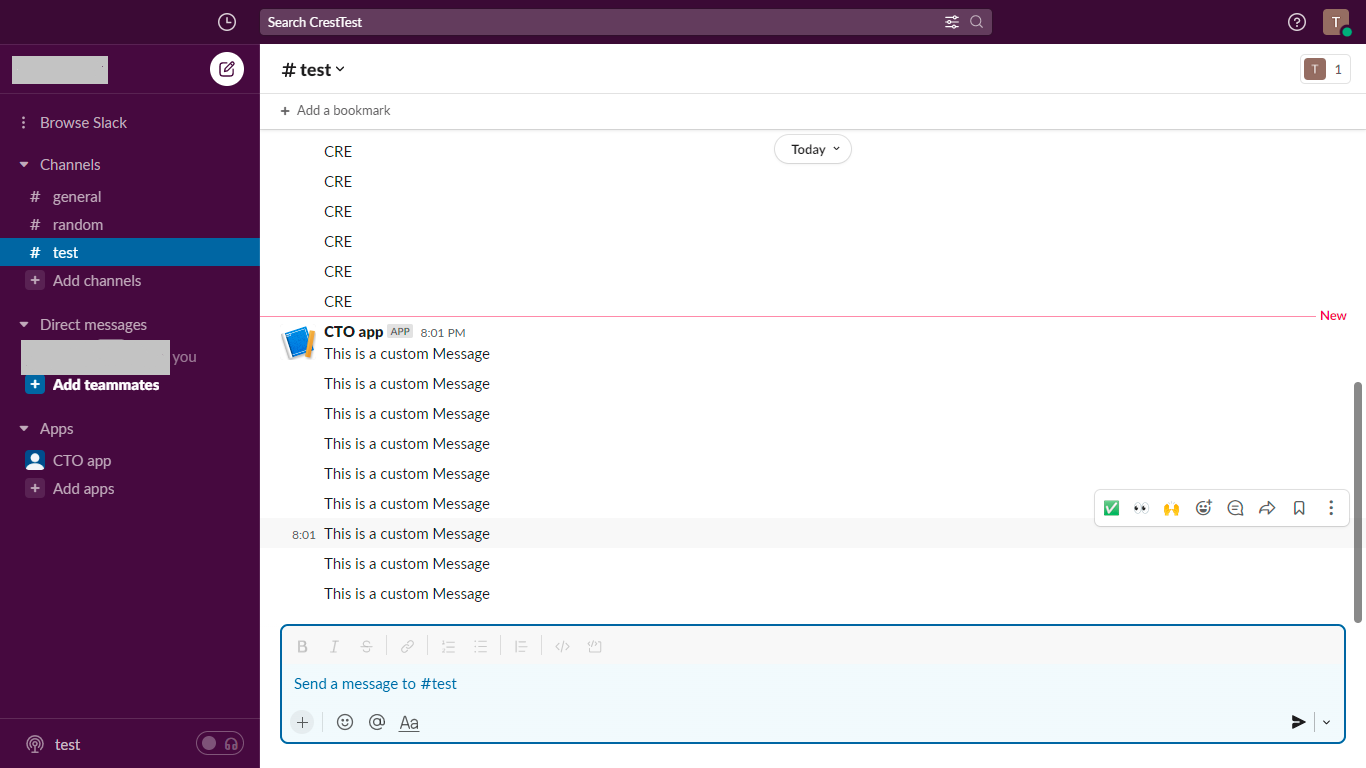
To view the message(s) sent to Slack, navigate to your configured Slack channel.
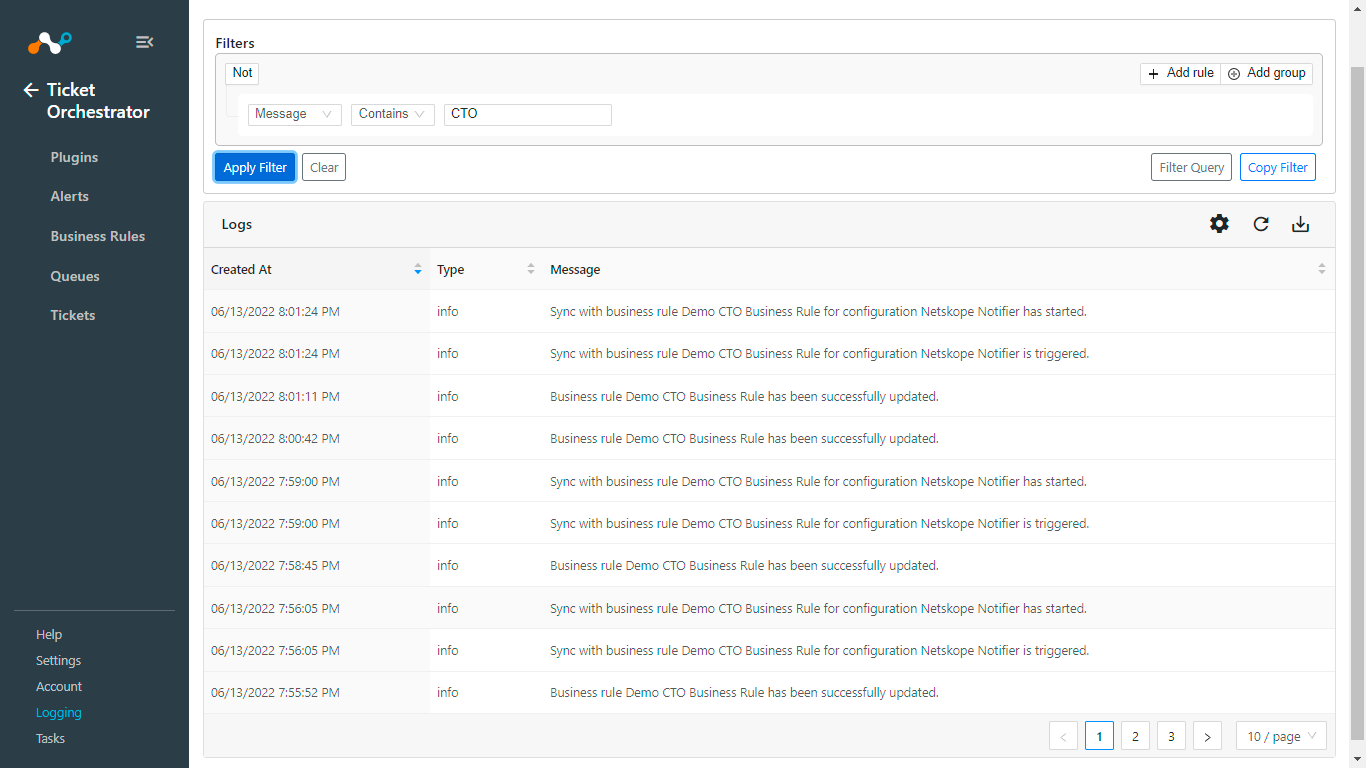
If notifications are not being sent to Slack, Gmail, or Email, you can look at the audit logs in Cloud Exchange In Cloud Exchange. Select Logging and look through the logs for errors.
