Tags and Groups
Users can create manual tags and groups in Netskope IoT Security to well organize the devices. You can create tags manually or it can be imported from third party integrations. If you assign a tag to none of the devices, it represents a cross sign and if you assign tag to at least one device; it represents a check sign in the Manage > Tags and Groups menu > Tags list.
Create a New Tag
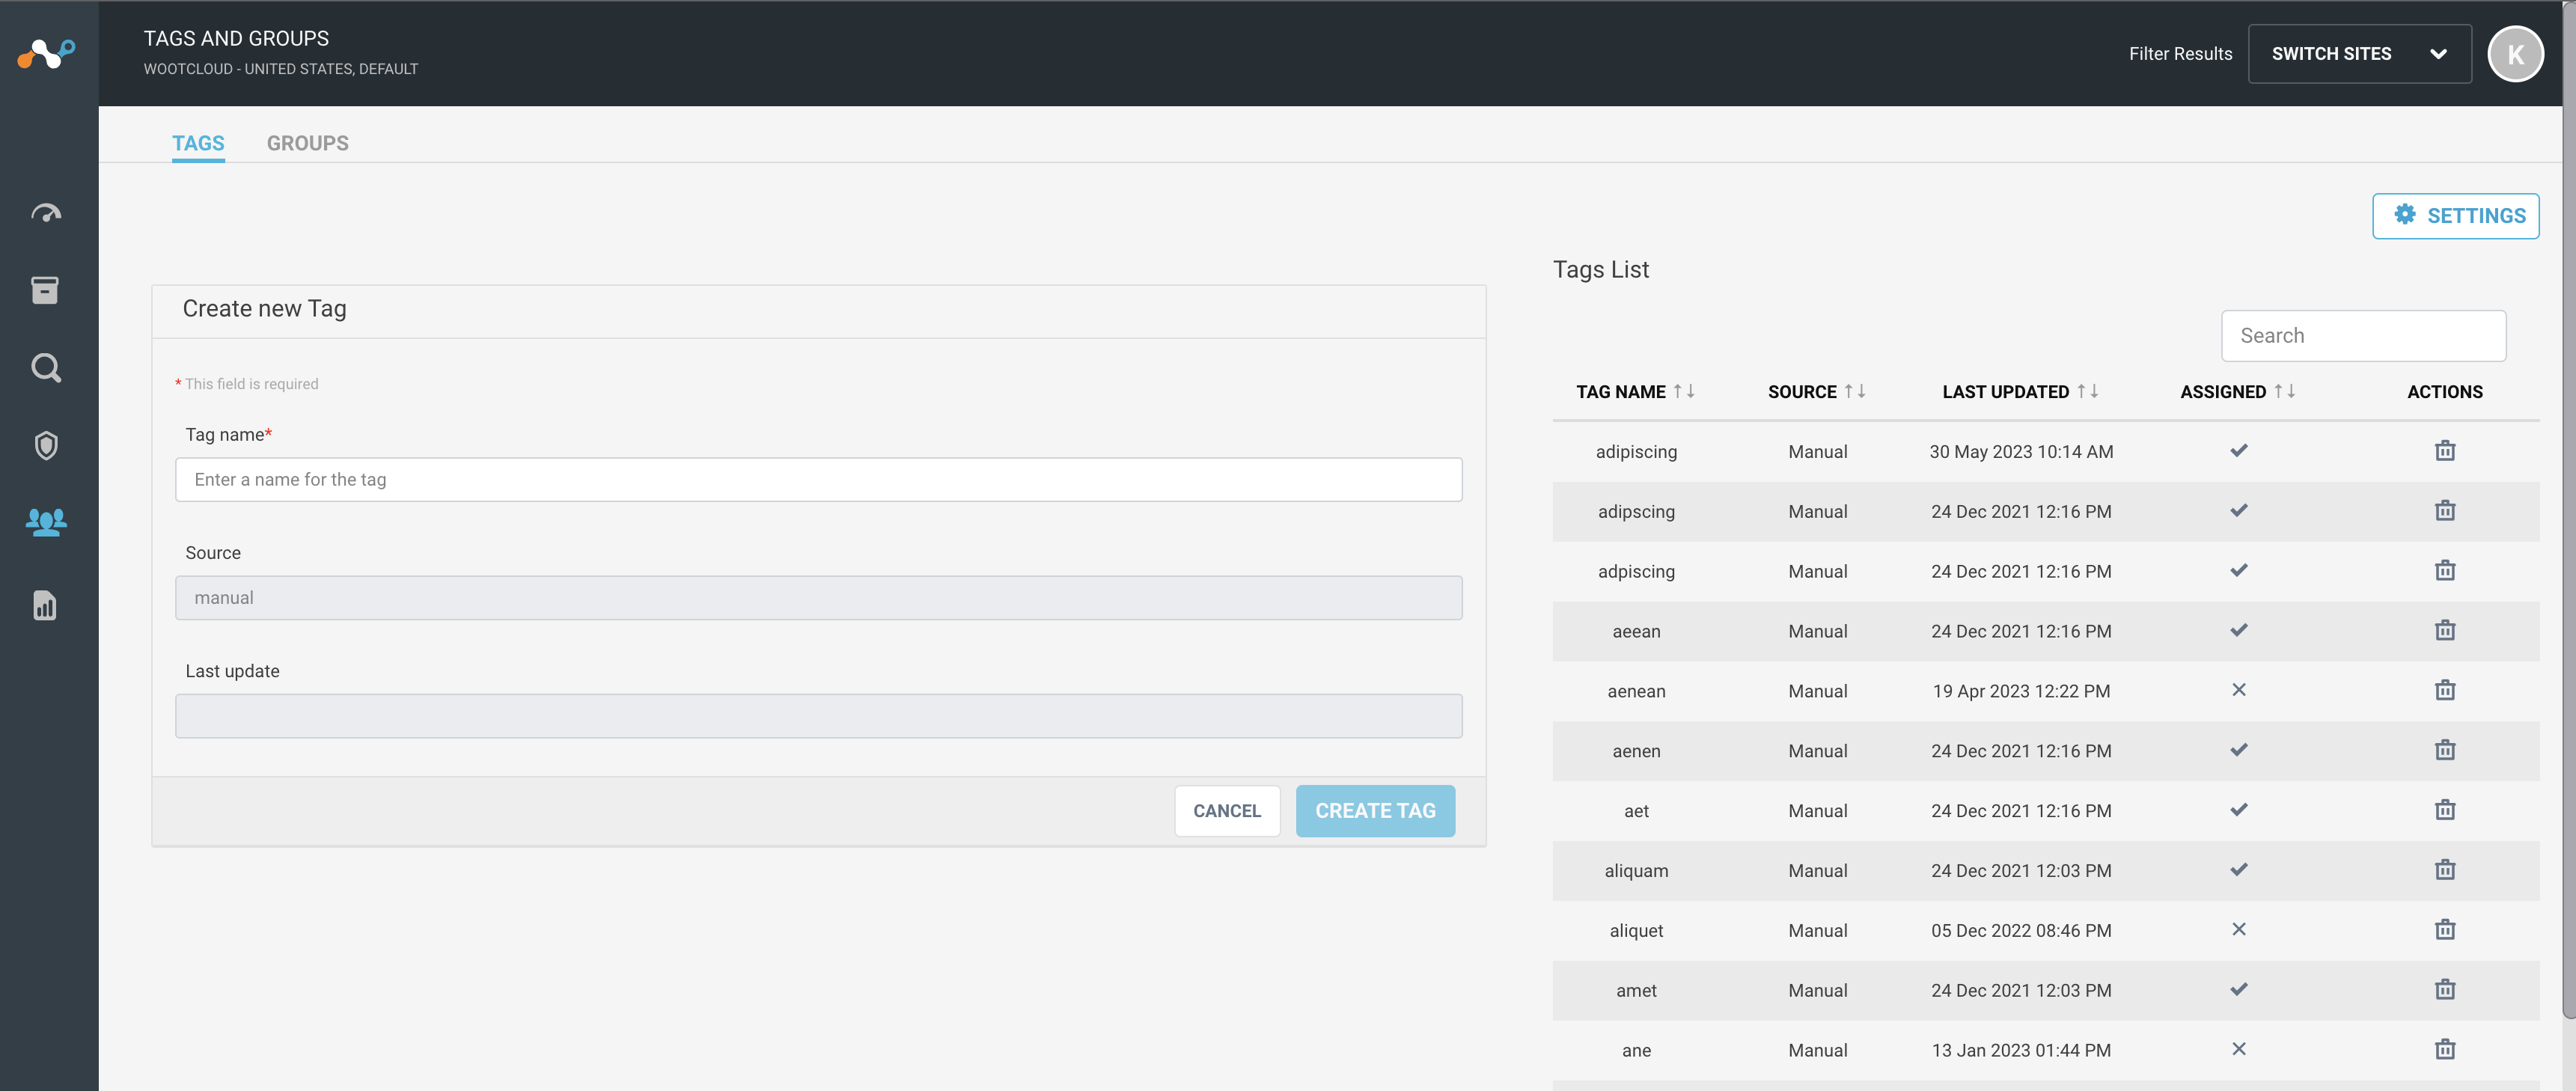
You can create a new tag manually in Netskope IoT Security. You can attach tags to the devices for better findability. Follow the procedure to create a new manual tag:
Navigate to the Manage > Tags and Groups menu. You will see a Create new Tag window.
Give a unique name to the tag.
The source will be manual as it is user created.
Click Create Tag button.
Note
Click the Cancel button to forbid the action.
Modify Existing Tag
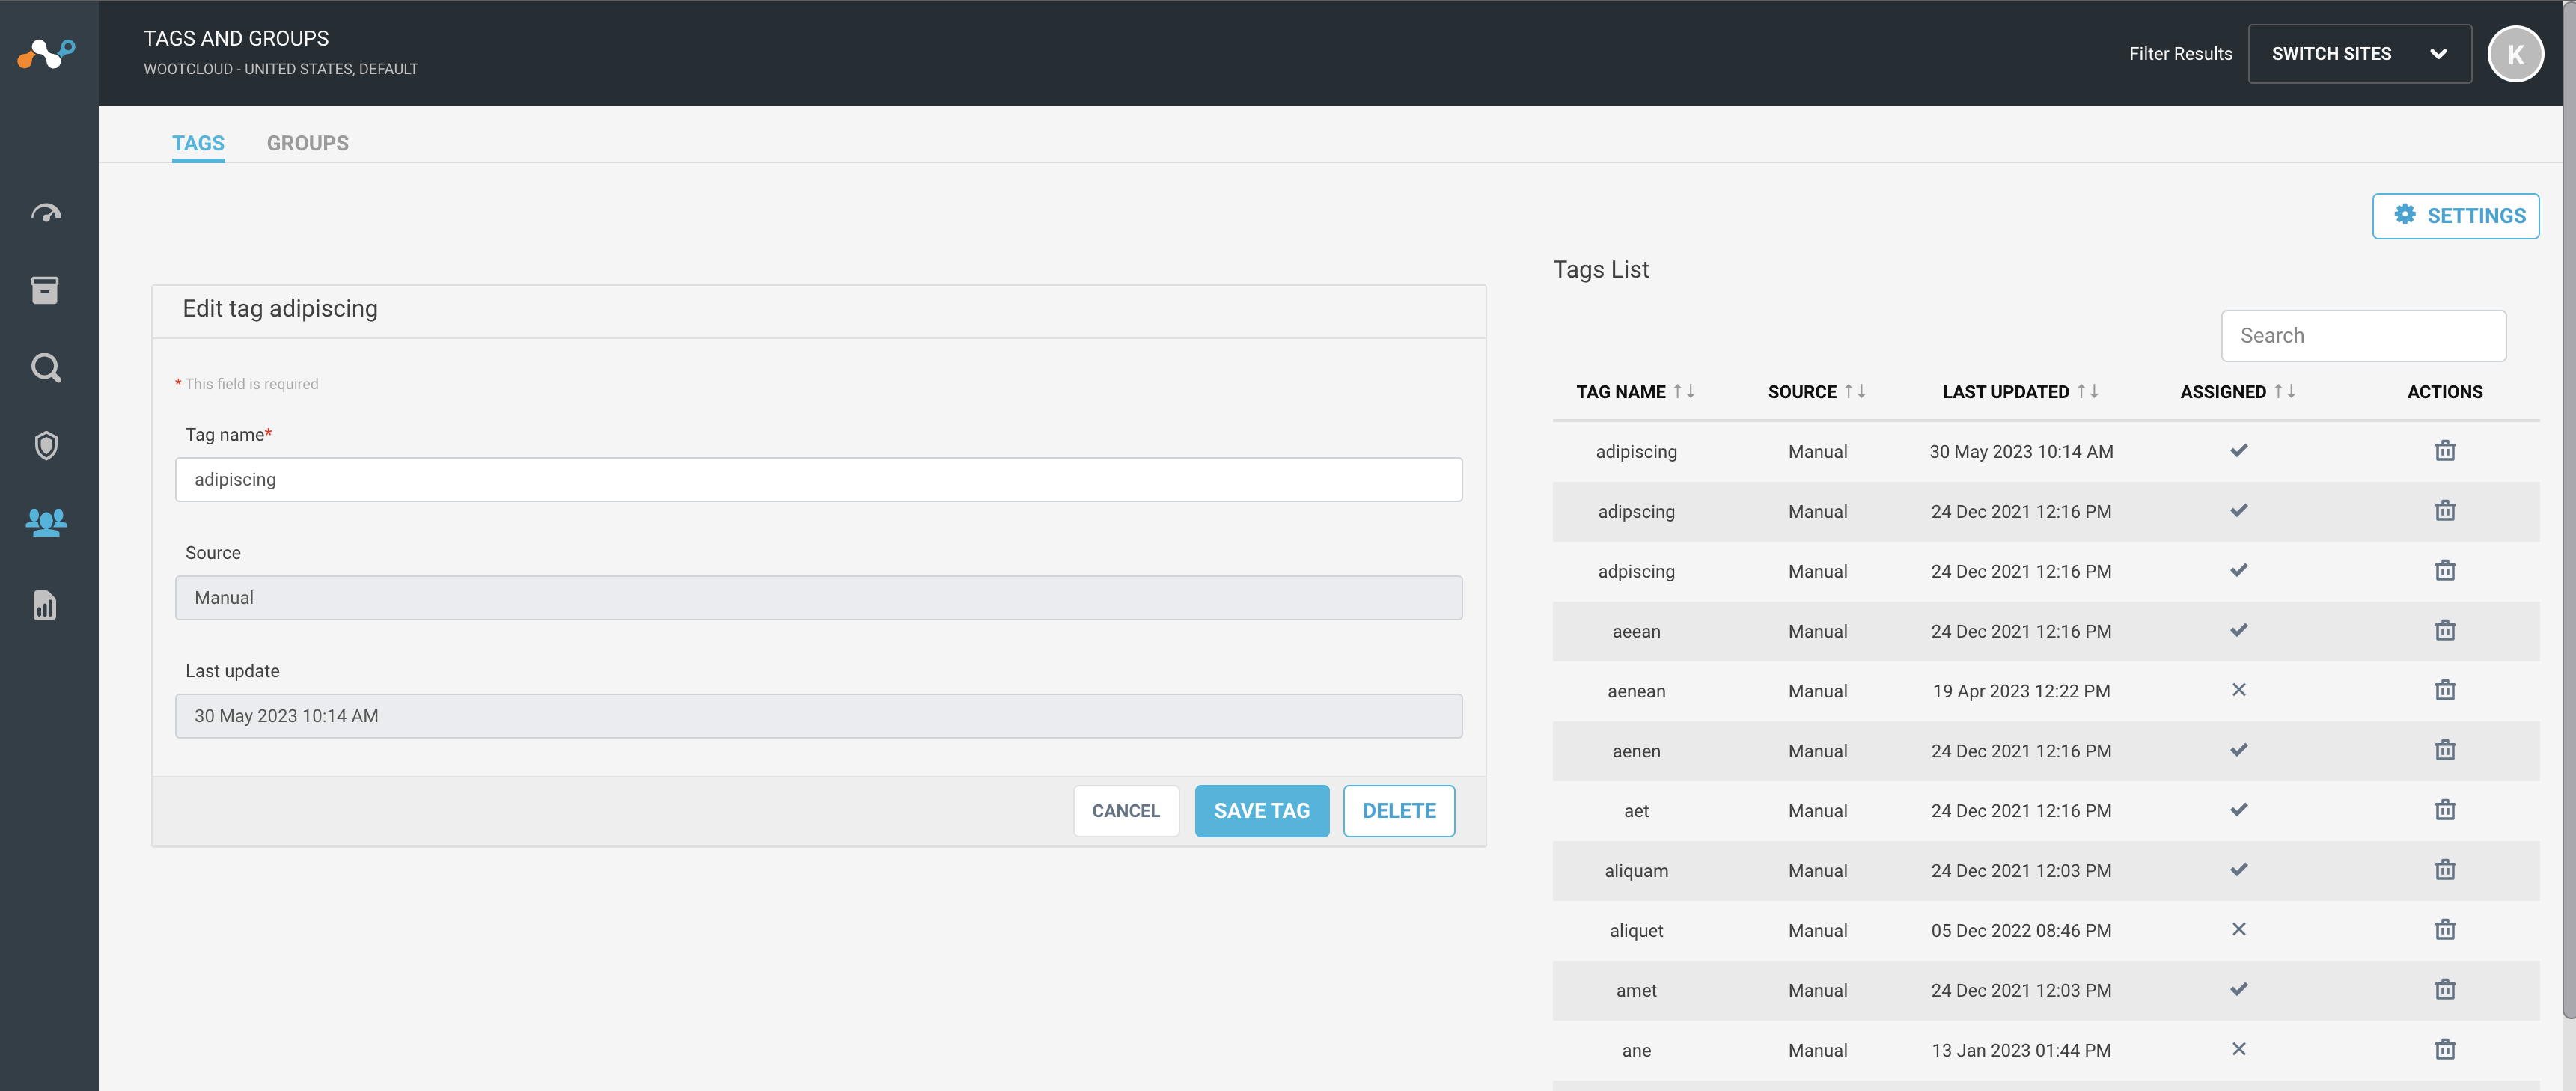
You can edit and delete any existing tag. Follow the procedure to edit any existing tag:
Navigate to the Manage > Tags and Groups menu. You will see a Create new Tag window.
Select an existing tag from the list of tags on the right side pane.
You can edit the tag name field.
Click Save Tag.
Note
Click the Cancel button to forbid the action. Click the Delete button to delete the selected tag. You can not delete imported or external tags.
Create a New Group
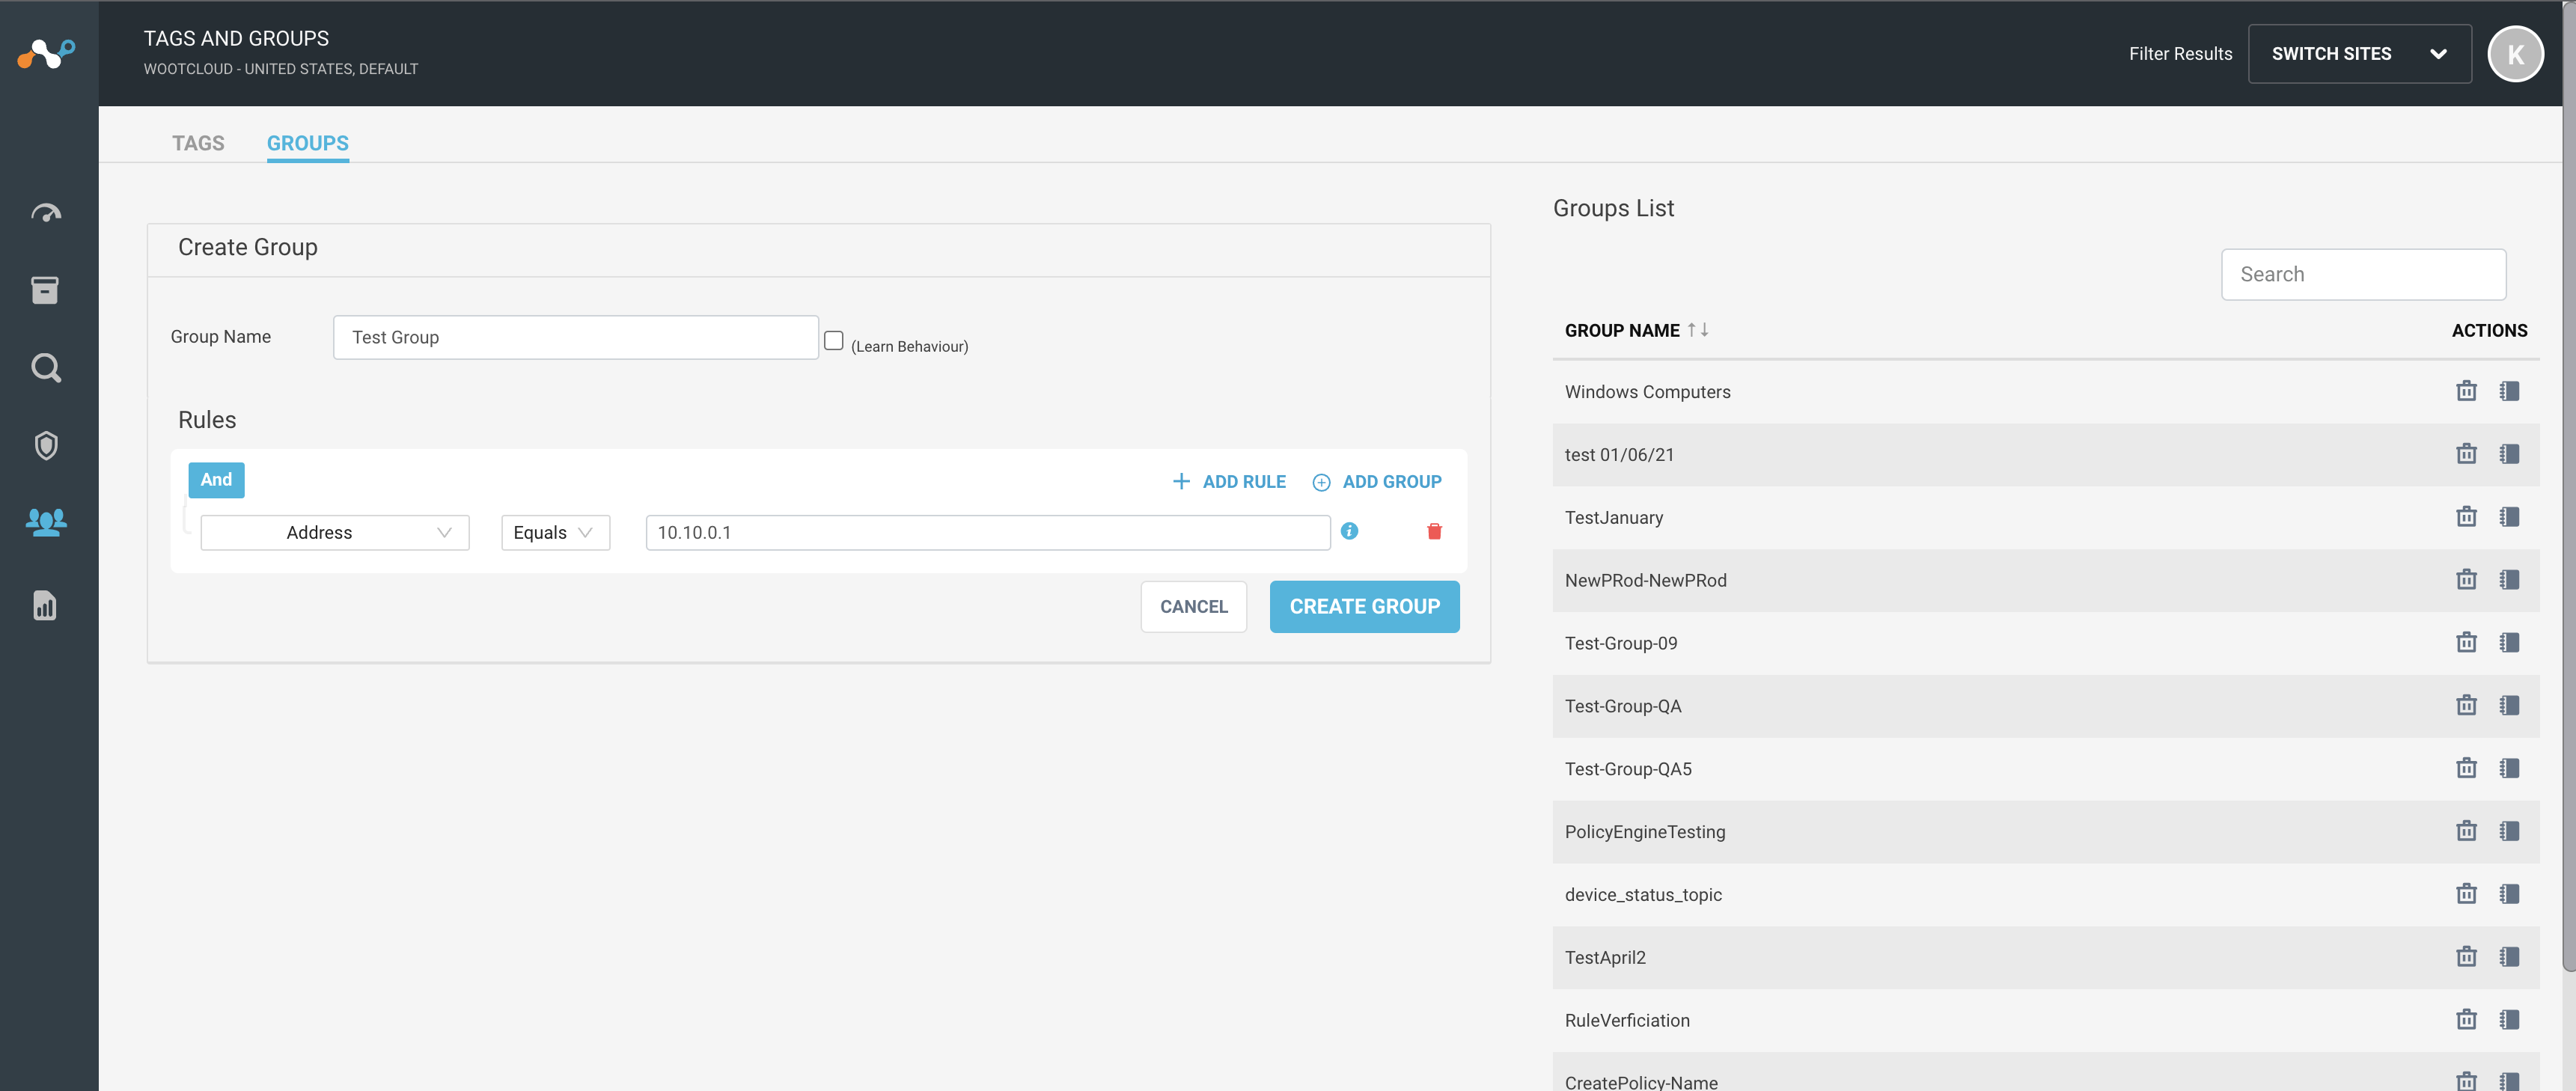
You can create a new group manually in the appliance. You can attach groups to the devices. Follow the procedure to create a new group:
Navigate to the Manage > Tags and Groups menu.
Select the Groups tab. You will see the Create Group window.
Give a unique name to the group.
Add rules for the group to follow using the “and” and “or” combinations.
Click Save Group button.
Note
Click the Cancel button to forbid the action.
Modify Existing Group
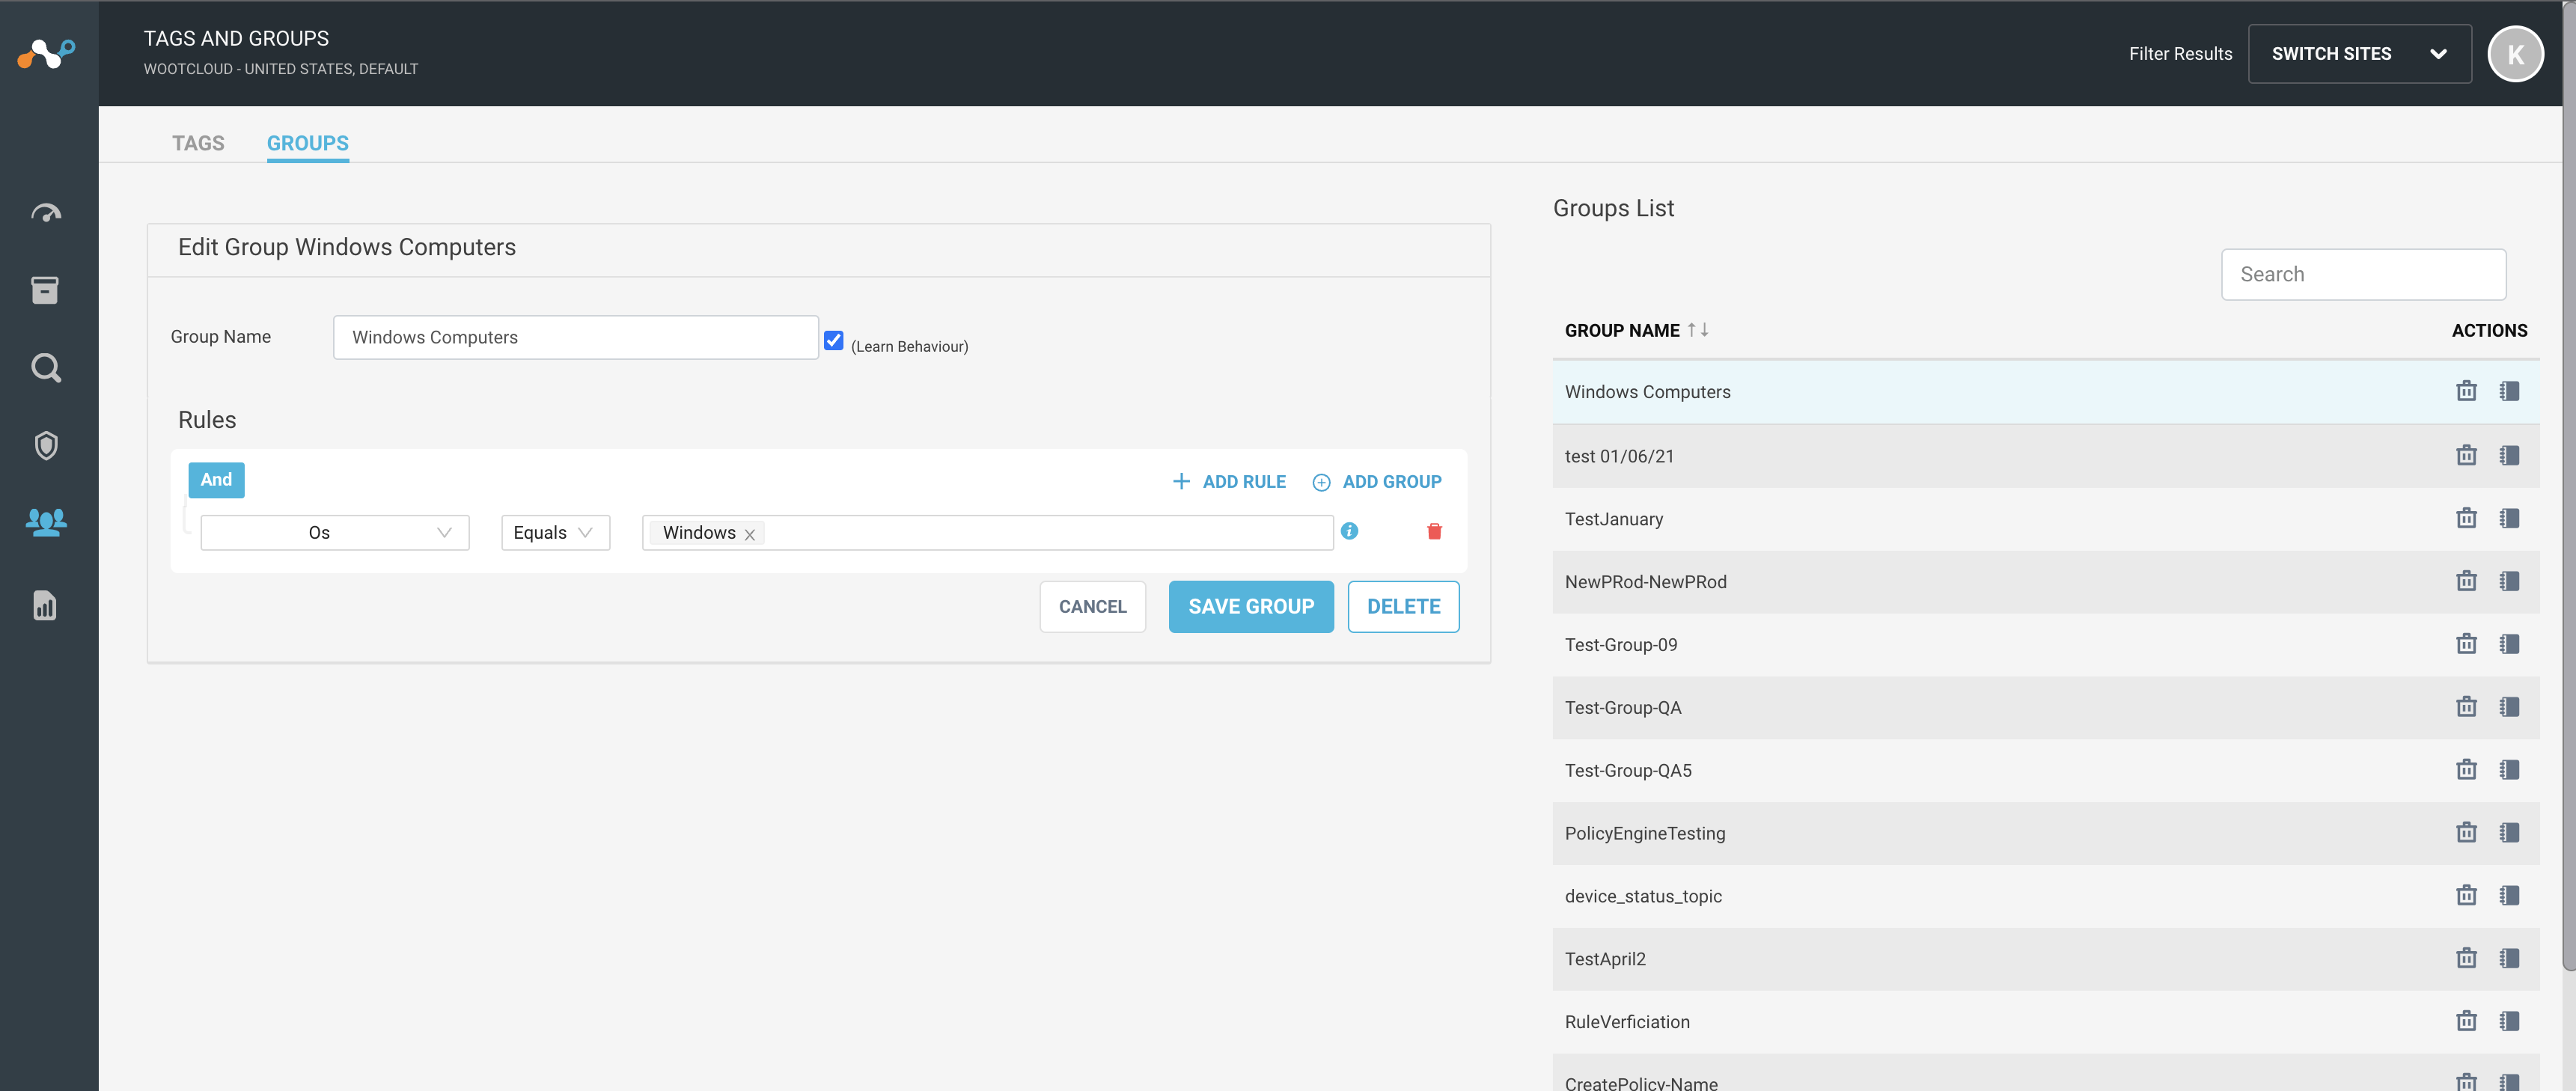
You can edit and delete any existing group. Follow the procedure to edit any existing group:
Navigate to the Manage > Tags and Groups menu.
Select Groups tab.
Select an existing group from the list of groups on the right side pane.
Note
To see the devices satisfying the rule of a group, click on the notebook icon to show the devices.
You can edit the group name and rules.
Click Save Group to keep the changes.
Note
Click the Cancel button to forbid the action. Click the Delete button to delete the selected group.
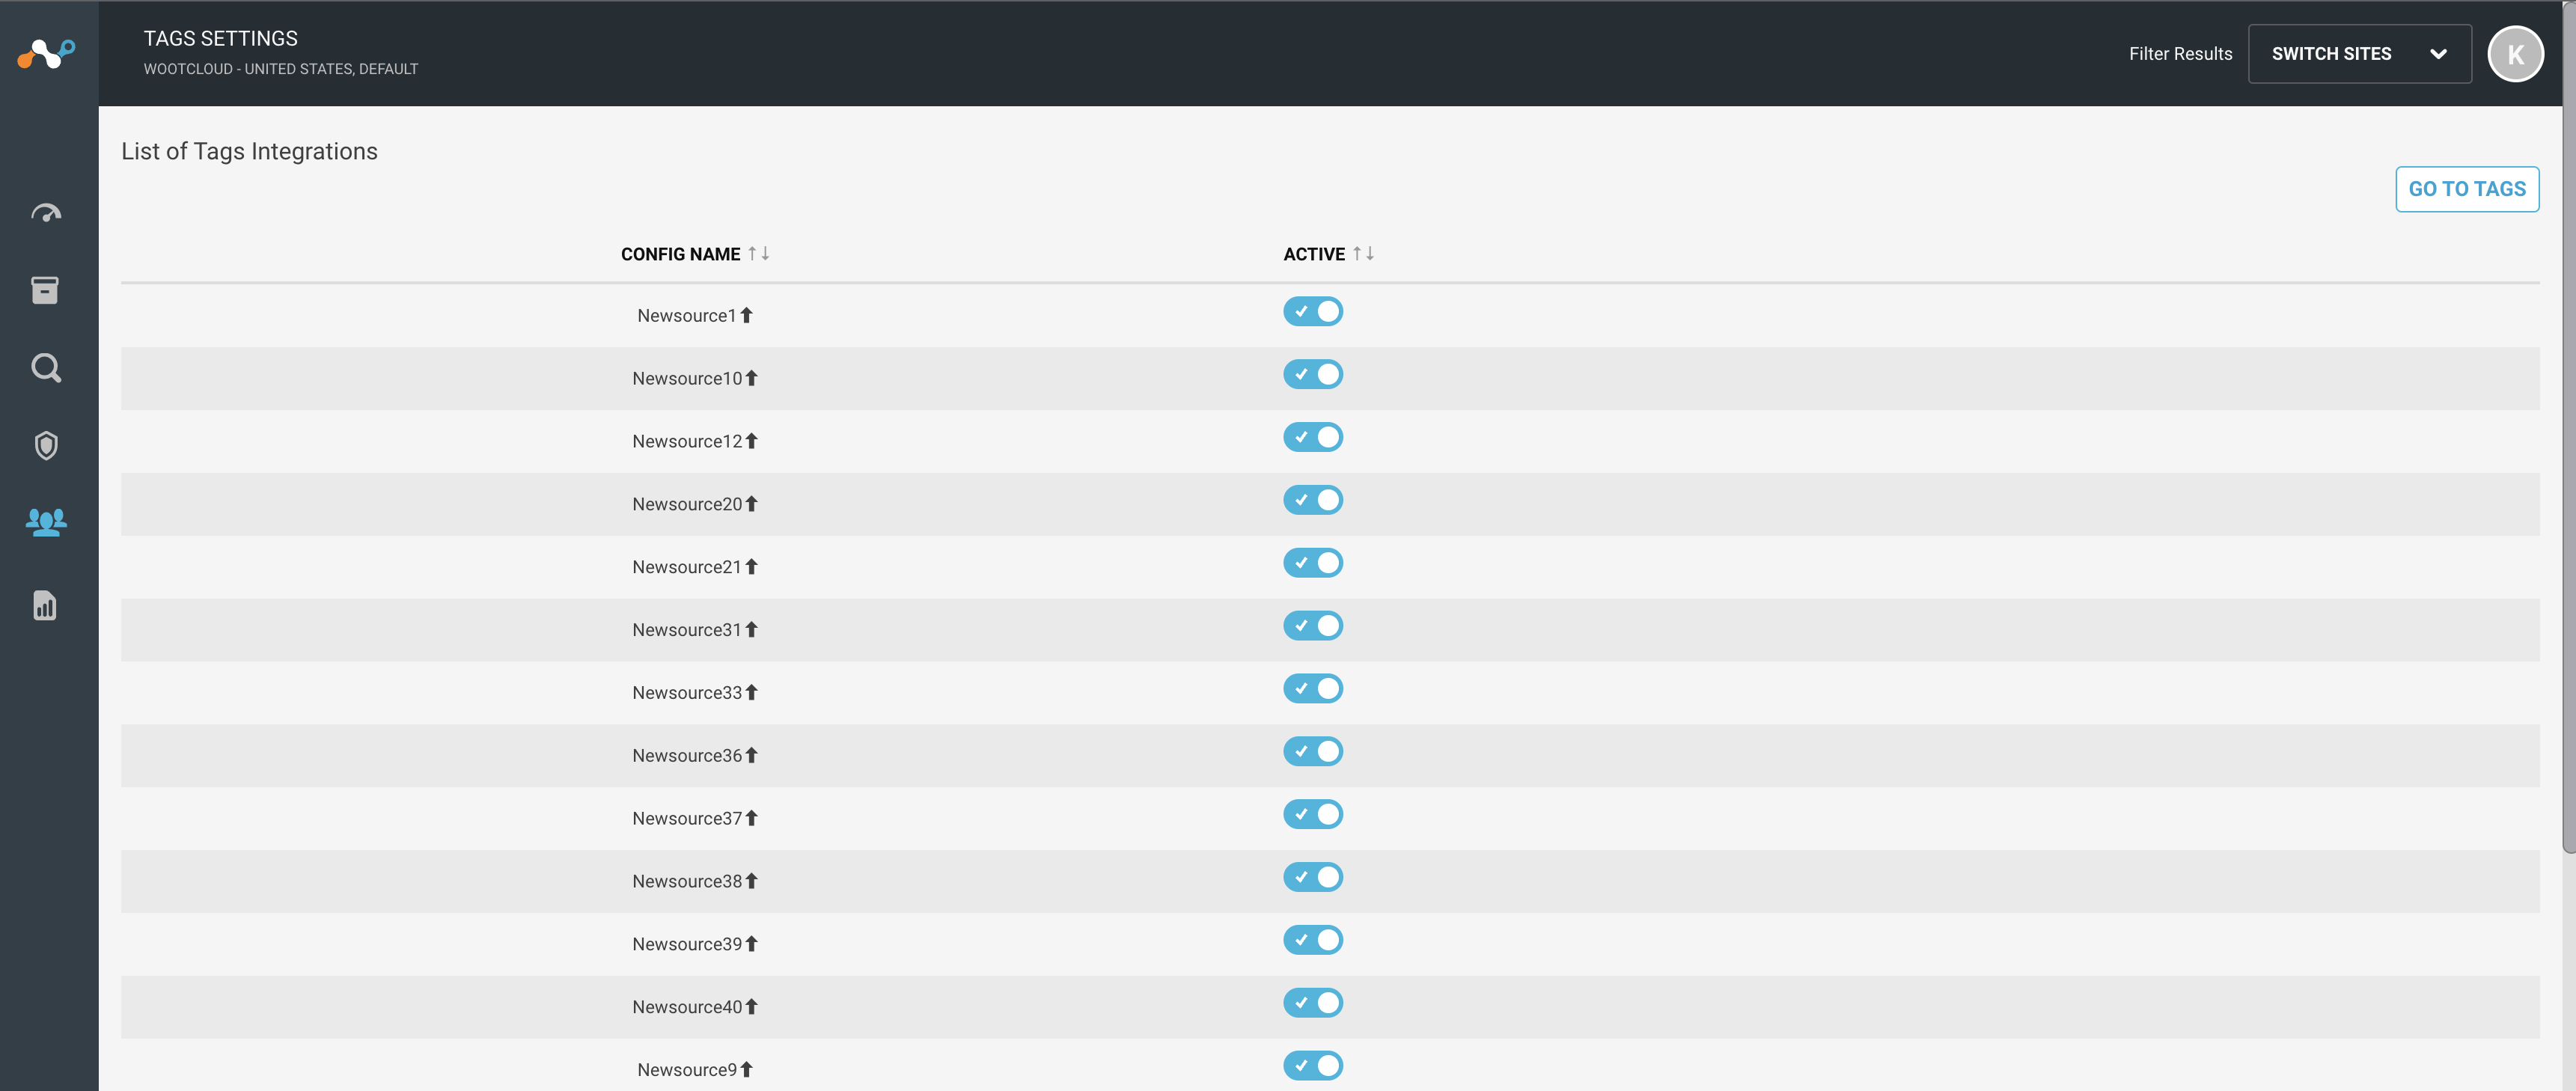
Tag Integration
You can configure third party integrations to pull tags that can be used to tag devices. Tags pulled from third party integrations can not be modified.
 |