Configure Threat Exchange Business Rules
Go to Threat Exchange > Business Rules. A page appears showing previously configured business rules (if applicable), with a minimum of the default rule “All”, which matches on all indicator types.
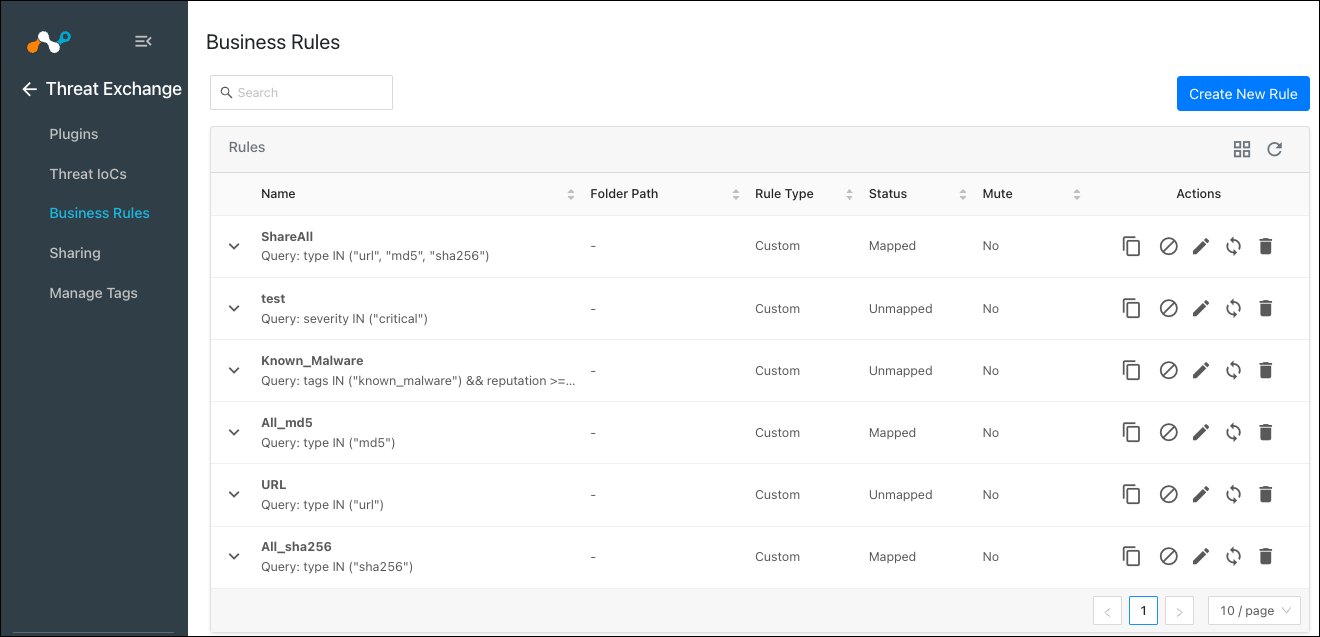
Click Create New Rule button. This opens a window where the rule can be given a descriptive name and a set of matching conditions selected. The boolean logic allows for
not,and, andorfunctions for more than one rule to match on metadata provided about the IoC, including source, reputation, tag, severity, extended information, and many more.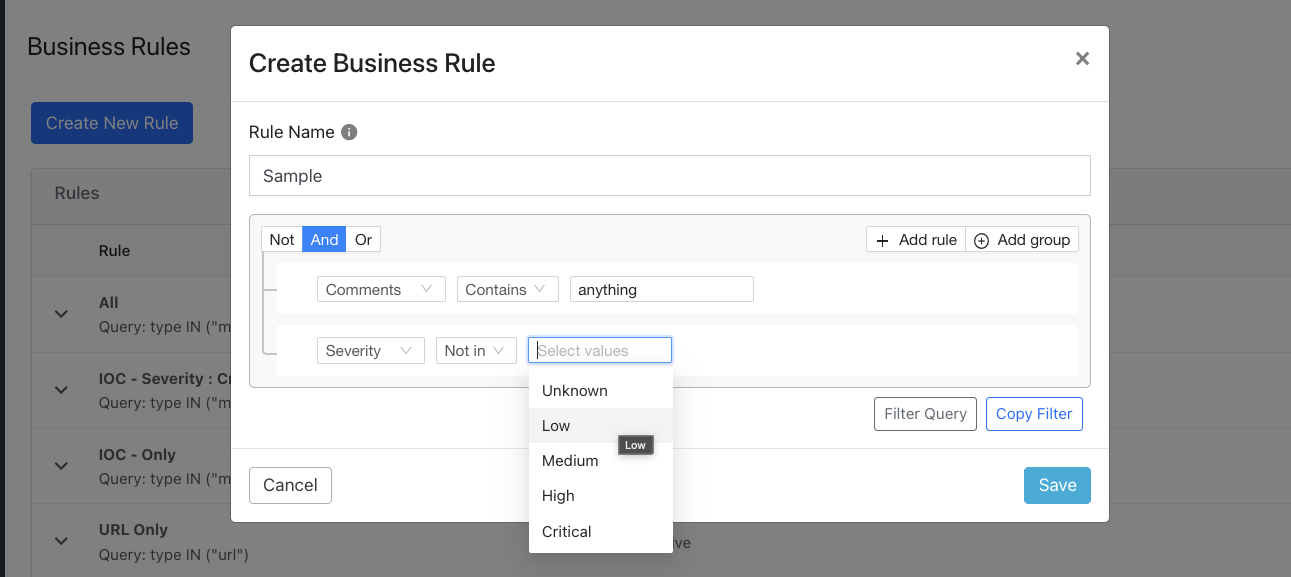
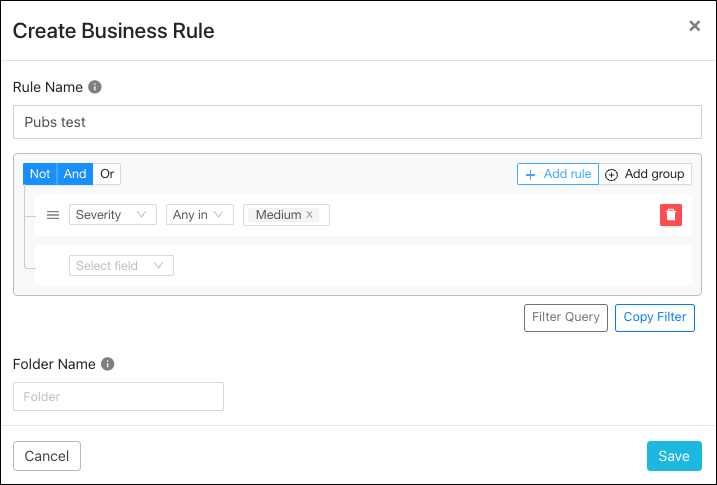
You can add more rules and create groups of rules that can be additive or alternative. Rules can also be deleted by clicking on the rule and selecting the red garbage can.
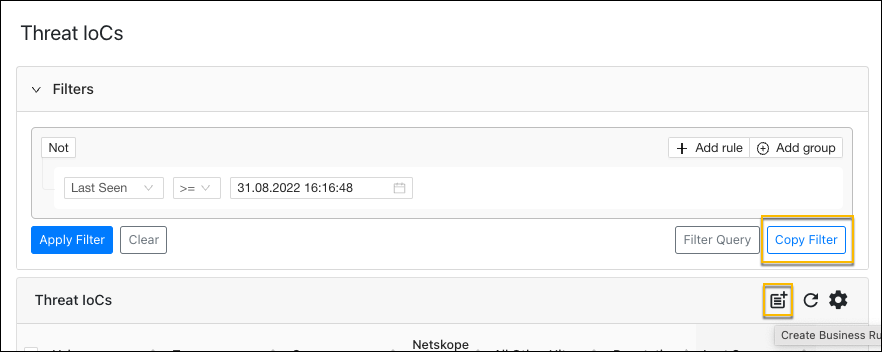
Finally, rules can also be copied from the IoC page for use in a business rule by clicking on the Copy Filter button, or created from the IoC page by clicking on the document icon.
Enter the folder name that you want to add the rule(s) to or select an existing folders. At max Cloud Exchange supports a business folder hierarchy 3 levels deep.
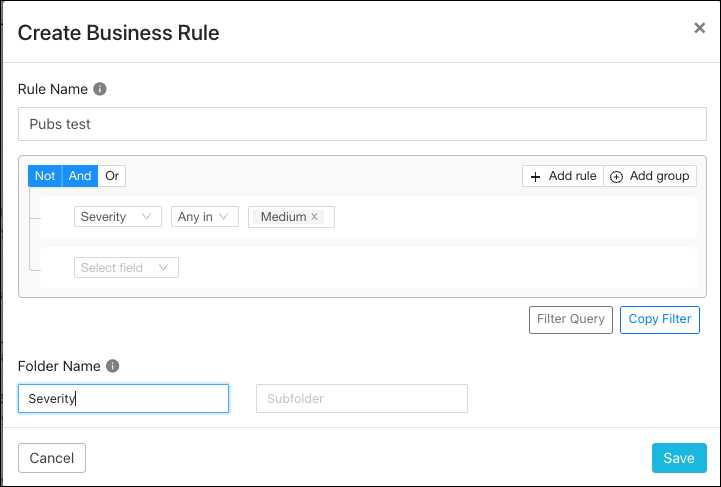
When finished, click Save. Whenever a rule is saved or deleted, a green pop-up box will appear in the upper right corner reporting successful completion of the command.
Perform Actions on Business Rules
You can manage all the business rules from the Business Rules page. Write-access users can mute one or multiple business rules, clone an entire business rule, edit the query for business rules, or delete the business rules from this page. The number of rules shown on the page can be modified if there are more than 10 to show.
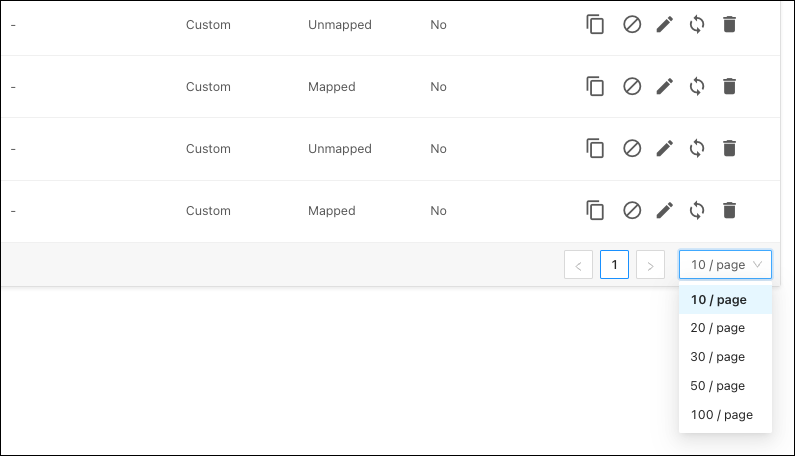 |
To clone a business rule, click the document icon on the rule and confirm the action.
 |
Muting can be used to temporarily ignore any new IoCs that would normally trigger sharing.
 |
To edit a business rule, click the pencil icon on the rule and make your changes. When finished, click Save.
 |
To test a business rule to see its matching the number of IoCs from a given period of time, select the sync icon on the rule and confirm the action. This will display the total number of IoCs matching this Business Rule.
 |
Enter the Time Period (in days). Only the IoCs fetched during this period will be considered while evaluating the business rule. Checking the All Time button will evaluate all active IoCs for the past 365 days.
Click Fetch. This will invoke the test; it will not result in the IoC being shared. Actually sharing IoC requires configuring a sharing rule.
This will show the qualified number of URL(s) with size and qualified number of Filehash(es) with size.
To delete a business rule, click the trash icon on the rule and confirm the action.
 |
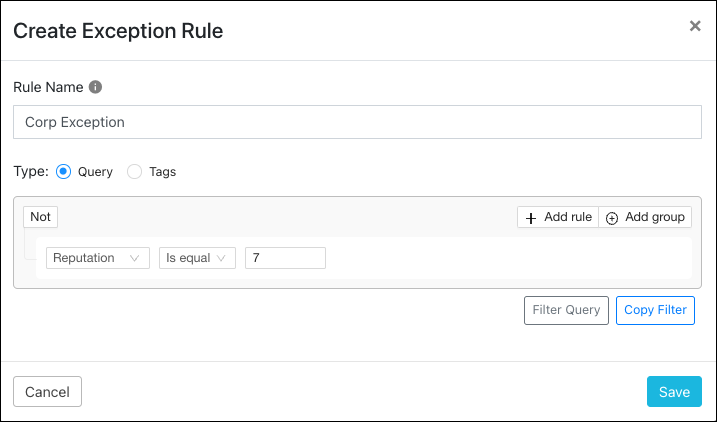
Exception rules are used to exclude specific indicators based on some criteria. For example, you can exclude indicators with low severity or specific value, as well as create exception rules with query or tags.
Exceptions work like the business rules, and can use query language, or particular tags, making it easier to remove certain kinds of data from the primary matching rule. For example, the IoCs that have been tagged as benign by the SecOps team.
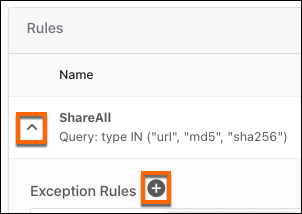
To create an Exception Rule, expand the rule and click the Exception Rules + icon.
 |
Enter an exception rule name and add queries or tags. When finished, click Save.
 |
Other actions that can be taken on exception rules include:
Editing existing rules by clicking on the pencil icon.
Deleting rules by clicking on the garbage can icon.