Configure Microsoft 365 Instance for Next Generation SaaS Security Posture Management
Important
When you configure Microsoft 365 app instance on the Netskope tenant, it bundles Microsoft Azure AD, Exchange, and SharePoint apps along with it. In a nutshell, on configuring Microsoft 365 app, Netskope can scan through your Azure AD, Exchange, and SharePoint site for security posture management.
Note
Netskope requires a minimum set of Microsoft 365 licenses to scan through your Microsoft 365 environment. They following licenses are supported:
Microsoft 365 A3, A5
Microsoft 365 E3, E5
Microsoft 365 F1, F3
Netskope can support other Microsoft 365 licenses too as long as additional licenses are obtained for Microsoft Intune and Azure Active Directory Premium P1 edition.
The installation instructions describe how to integrate your Microsoft 365 account with Netskope. There are 4 broad procedures involved:
Step 1: Configure SharePoint Tenant to Allow Custom App Authentication
Step 2: Grant Access to Microsoft 365 Account
Step 3: Add Azure AD Roles
Step 4: Add SharePoint Admin Permissions for the SharePoint Client-side Object Model (CSOM) API
Step 1: Configure SharePoint Tenant to Allow Custom App Authentication
Note
You can skip this step if either of the conditions is true:
your Microsoft 365 account was created before August, 2020.
To find the creation date of your Microsoft 365 tenant, log in to the SharePoint admin center by visiting https://admin.microsoft.com. Then, navigate to Admin centers > SharePoint. Within the SharePoint admin center, navigate to Sites > Active sites and sort the sites by Date Created. Then, identify the default (root) site. The date of the default (root) site is the creation date of your Microsoft 365 tenant.
you do not intend Netskope to evaluate custom and predefined rules related to the SharePoint tenant configuration data.
If your Microsoft 365 tenant was created on or after August 2020, custom app authentication on your SharePoint tenant needs to be enabled if this has not already been done. Microsoft has recently disabled apps using an Azure Access Control (ACS) app-only access token by default. If so, follow the steps below to enable custom app authentication.
You can change the behavior by running set-SPOTenant -DisableCustomAppAuthentication $false (needs the latest SharePoint admin PowerShell). To do so, follow the steps below:
Note
The following steps are performed on a Windows device.
Install the latest version of PowerShell on Windows. Follow the instructions here.
Start PowerShell as an administrator on the Windows device, and run the following commands:
Install-Module -Name Microsoft.Online.Sharepoint.PowerShell
Import-Module Microsoft.Online.Sharepoint.PowerShell
$adminUPN="<the full email address of the global administrator account, example: admin@sumoskope.onmicrosoft.com>"
Note
Fill in the value for the $adminUPN variable (replacing all the text between the quotes, including the < and > characters).
$orgName="<name of your Microsoft 365 organization, example: sumoskope>"
Note
Fill in the value for the $orgName variable (replacing all the text between the quotes, including the < and > characters).
$userCredential = Get-Credential -UserName $adminUPN -Message "<type the password>"
Note
When prompted with the Windows PowerShell credential request dialog box, type the password for the global administrator account.
To check the value of DisableCustomAppAuthentication, run the following commands:
Connect-SPOService -Url https://$orgName-admin.sharepoint.com
Get-SPOTenant
Look for the DisableCustomAppAuthentication parameter. It should be set to True.
Note
If you do not see the DisableCustomAppAuthentication parameter, execute the Install-Module -Name Microsoft.Online.Sharepoint.PowerShell -Force command and follow the steps from 2b.
Run the following command to set the DisableCustomAppAuthentication value to false:
Set-SPOTenant -DisableCustomAppAuthentication $false
Verify that the parameter is set to false. To do so, run the following command:
Get-SPOTenant
Look for the DisableCustomAppAuthentication parameter. It should be set to False.
Step 2: Grant Access to Microsoft 365 Account
To authorize Netskope to access your Microsoft 365 account, follow the steps below:
Log in to the Netskope tenant UI:
https://<tenant hostname>.goskope.comand go to Settings > API-enabled Protection > SaaS.Select the Microsoft 365 icon, and then click Setup Instance.
The Setup Instances window opens. Enter the following details:
For instance name, enter the fully qualified domain name (FQDN) of your Microsoft 365 account. Enter the default onmicrosoft.com domain assigned to your Microsoft 365 account. For example, if you sign in with admin@<domain>.onmicrosoft.com, specify <domain>.onmicrosoft.com in the app instance field.
Note
To find the default onmicrosoft.com domain of your Microsoft 365 account, follow the steps below:
Log in to https://admin.microsoft.com/.
On the left navigation bar, click ... Show all, and then navigate to Settings > Domains.
Note down the FQDN of the Microsoft 365 account in the format <domain>.onmicrosoft.com.
Instance Type: Select the Security Posture checkbox. Select this option to allow Netskope to continuously scan through your SaaS app to identify and remediate risky SaaS app misconfigurations and align security posture with best practices and compliance standards.
Also, you have the option to run the policy at intervals (15 minutes, 30 minutes, 45 minutes, and 60 minutes).
Click Save, then click Grant Access for the app instance you just created.
Note
Microsoft 365 tenants whose admin SharePoint site uses a custom domain instead of
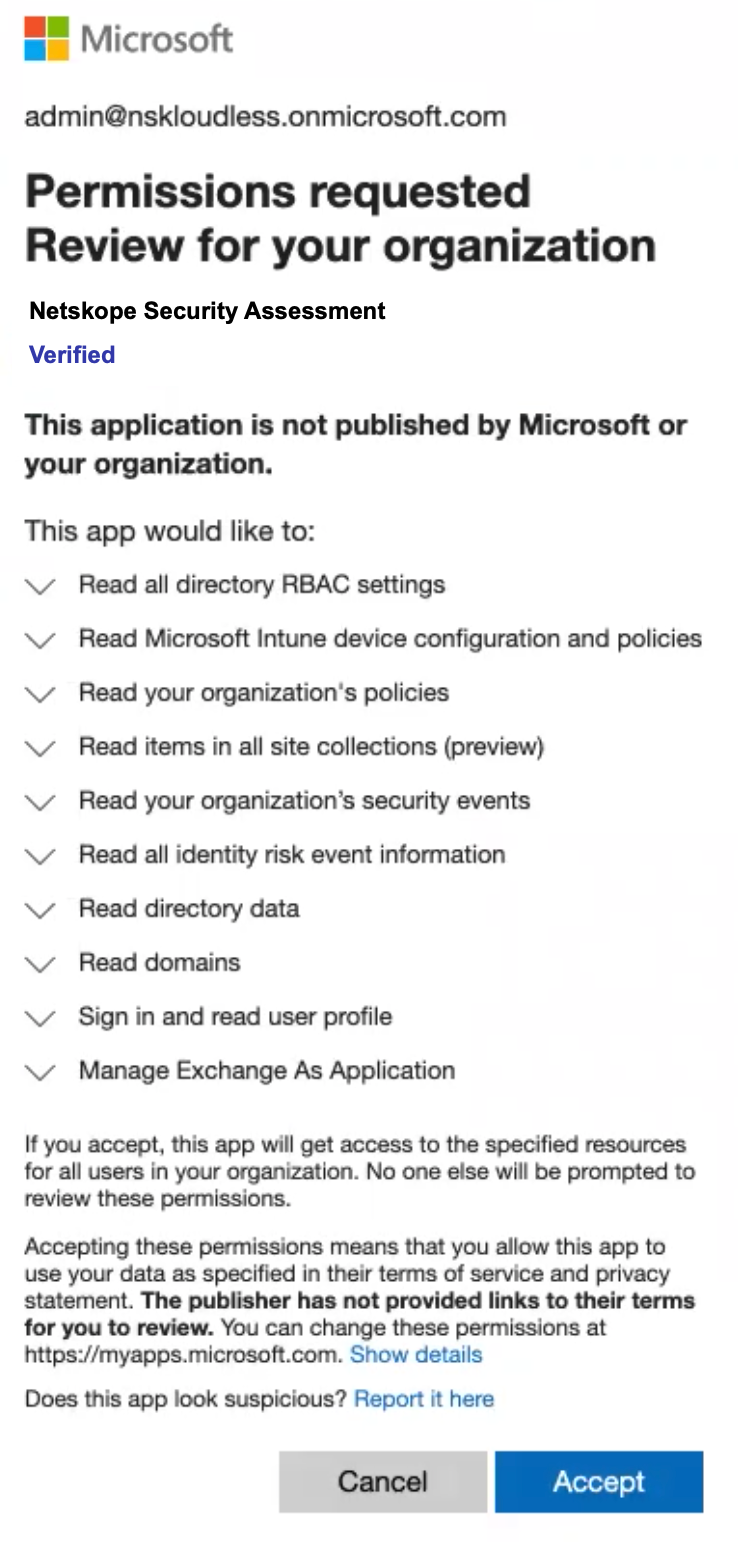
<tenant>-admin.sharepoint.comcurrently require manual configuration. Contact Netskope support for more information.After clicking Grant Access, you will be prompted to log in with your global administrator username and password, and then Accept the permissions and click Close.

The Netskope Security Assessment app is installed in Azure AD with additional permissions once you grant access to the Microsoft 365 app. Going forward, the Microsoft 365 app instance will utilize the new Graph APIs from Microsoft. To know more about the permissions, see Permissions Required for Microsoft 365.
Refresh your browser, and you should see a green check icon next to the instance name.
Important
If you have newly set up your Microsoft 365 account, it can take 2 to 4 days to generate the Microsoft Secure Score report for your Microsoft 365 account. Next Generation SSPM incorporates data from Microsoft Secure Score and therefore requires the secure score report to be generated. If you do not see any data populated in the Netskope UI dashboard (API Data Protection > Security Posture (Next Gen) > COMPLIANCE), wait till the Microsoft Secure Score report is generated. You can view the completion of Microsoft Secure Score on your Azure portal under Azure AD Identity Secure Score.
Step 3: Add Azure AD Roles
Once you have granted access to the Microsoft 365 app, you should assign the Netskope application client ID to the Global Reader role. To do so, follow the steps below:
Log in to portal.azure.com as a global administrator.
Click View under Manage Azure Active Directory.
On the left navigation, click Roles & administrators.
Search for the role Global Reader, and click on the Global Reader role.
Click + Add assignments.
In the search bar, enter the Netskope application client ID 2038fb3d-092b-4c35-9ae6-3f10adb04a6a. Select the Netskope Security Assessment app and click Add.
Step 4: Add SharePoint Admin Permissions for the SharePoint Client-side Object Model (CSOM) API
The following procedure allows Netskope Security Assessment app to access your SharePoint tenants' configuration settings.
Note
SharePoint requires the Netskope Security Assessment app to receive the 'Full Control' permission in order to read SharePoint tenant configuration data. Skipping this step will cause rules that check the SharePointTenant resource to fail since that data would not be possible to obtain.
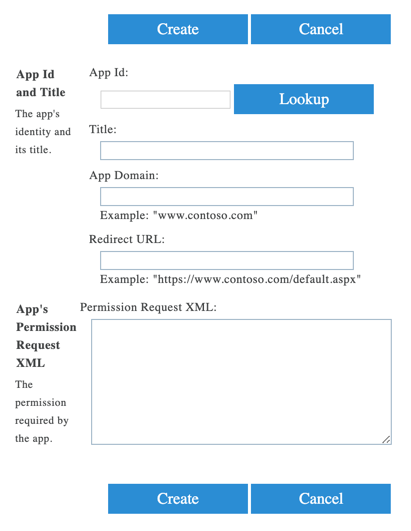
Log in to https://<tenant_name>-admin.sharepoint.com/_layouts/15/appinv.aspx. Replace the <tenant-name> with your company's SharePoint domain name. For example, if your SharePoint admin page URL is https://sumoskope-admin.sharepoint.com/, enter https://sumoskope-admin.sharepoint.com/_layouts/15/appinv.aspx. The following page opens:

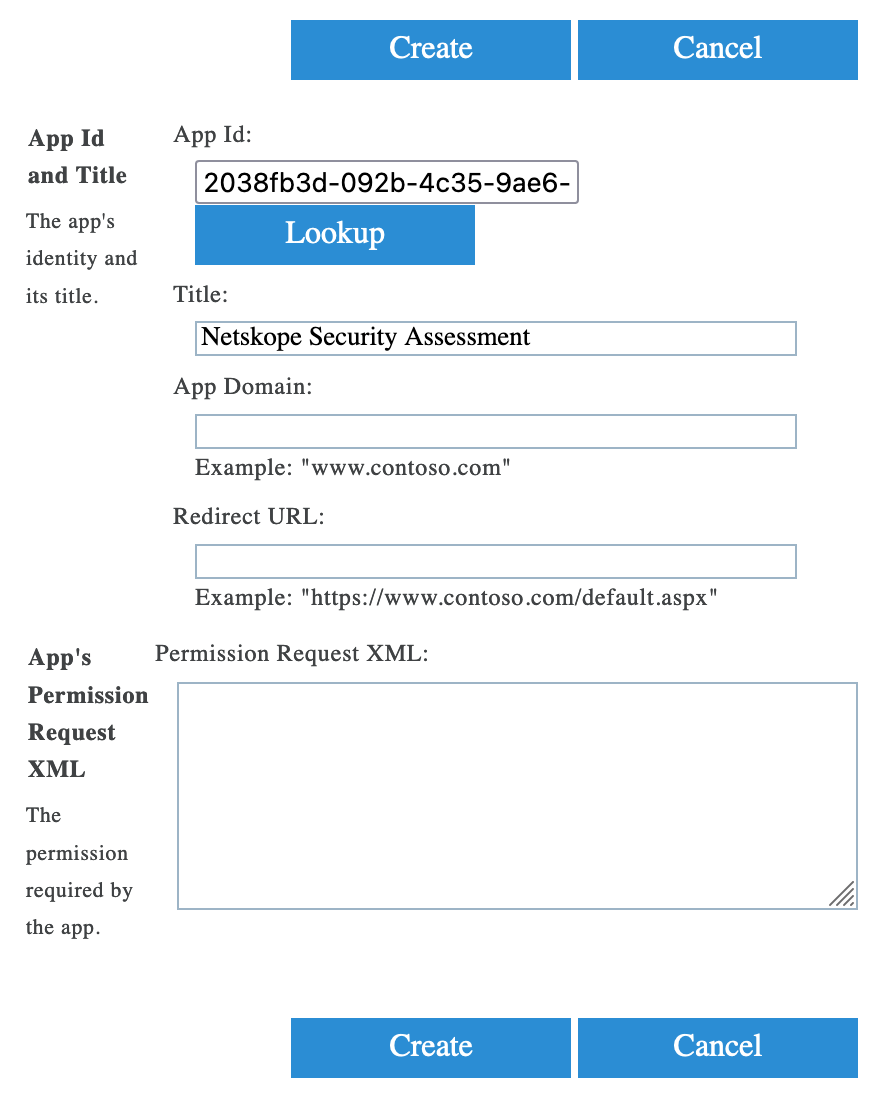
Under App Id, enter 2038fb3d-092b-4c35-9ae6-3f10adb04a6a and click Lookup. The page gets populated with the following information:

Under App Domain, enter netskope.com.
Keep the Redirect URL field empty.
Under Permission Request XML, enter the following XML code:
<AppPermissionRequests
AllowAppOnlyPolicy="true"><AppPermissionRequest
Scope="http://sharepoint/content/tenant"
Right="FullControl" /></AppPermissionRequests>
Click Create.
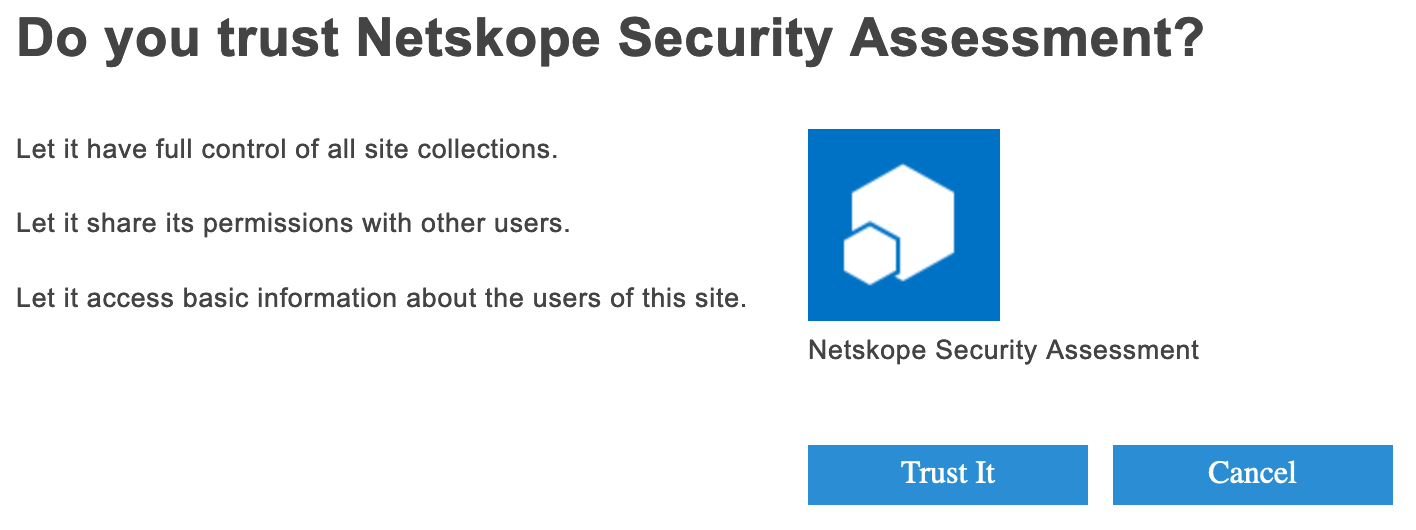
On the next page, review the permissions and click Trust It.

This will create the app permissions necessary for the Netskope Security Assessment app to access the SharePoint CSOM APIs.
Next, you should configure a security posture policy. To do so, see Next Generation SaaS Security Posture Management Policy Wizard.