Deploy Client on iOS Using Intune
Netskope supports Intune on-demand and per-app VPN for iOS devices, so you can provide users with access to corporate applications, data, and resources while keeping your sensitive information secure.
Prerequisites
Before you configure Intune:
In the Netskope UI, go to Settings > Security Cloud Platform > Netskope Client > MDM Distribution. Download the Netskope Root Certificate. These are needed to configure Intune certificate profiles.
User accounts must be created within Azure AD in synchronization with the Netskope tenant.
Create Apple MDM Push Certificate to link the Apple ID and your Intune tenant. To learn more, view Apple MDM Push Certificate.
You need to download the Netskope Root certificate from the Netskope UI to complete these steps. To get the certificate, go to Settings > Security Cloud Platform > Netskope Client > MDM Distribution .
Important
The Netskope Root certificate is in .pem format. You will need to convert it to .cer or .crt format before importing it. Rename the file to convert from .pem to .cer format.
To create a trusted Netskope certificate profile:
In the Intune UI proceed to Devices > iOS/iPadOS > Configuration profiles
Click Profile > Create Profile. Enter and select these parameters:
Name: Enter a unique name.
Platform:
iOS.Profile type:
Trusted certificate.
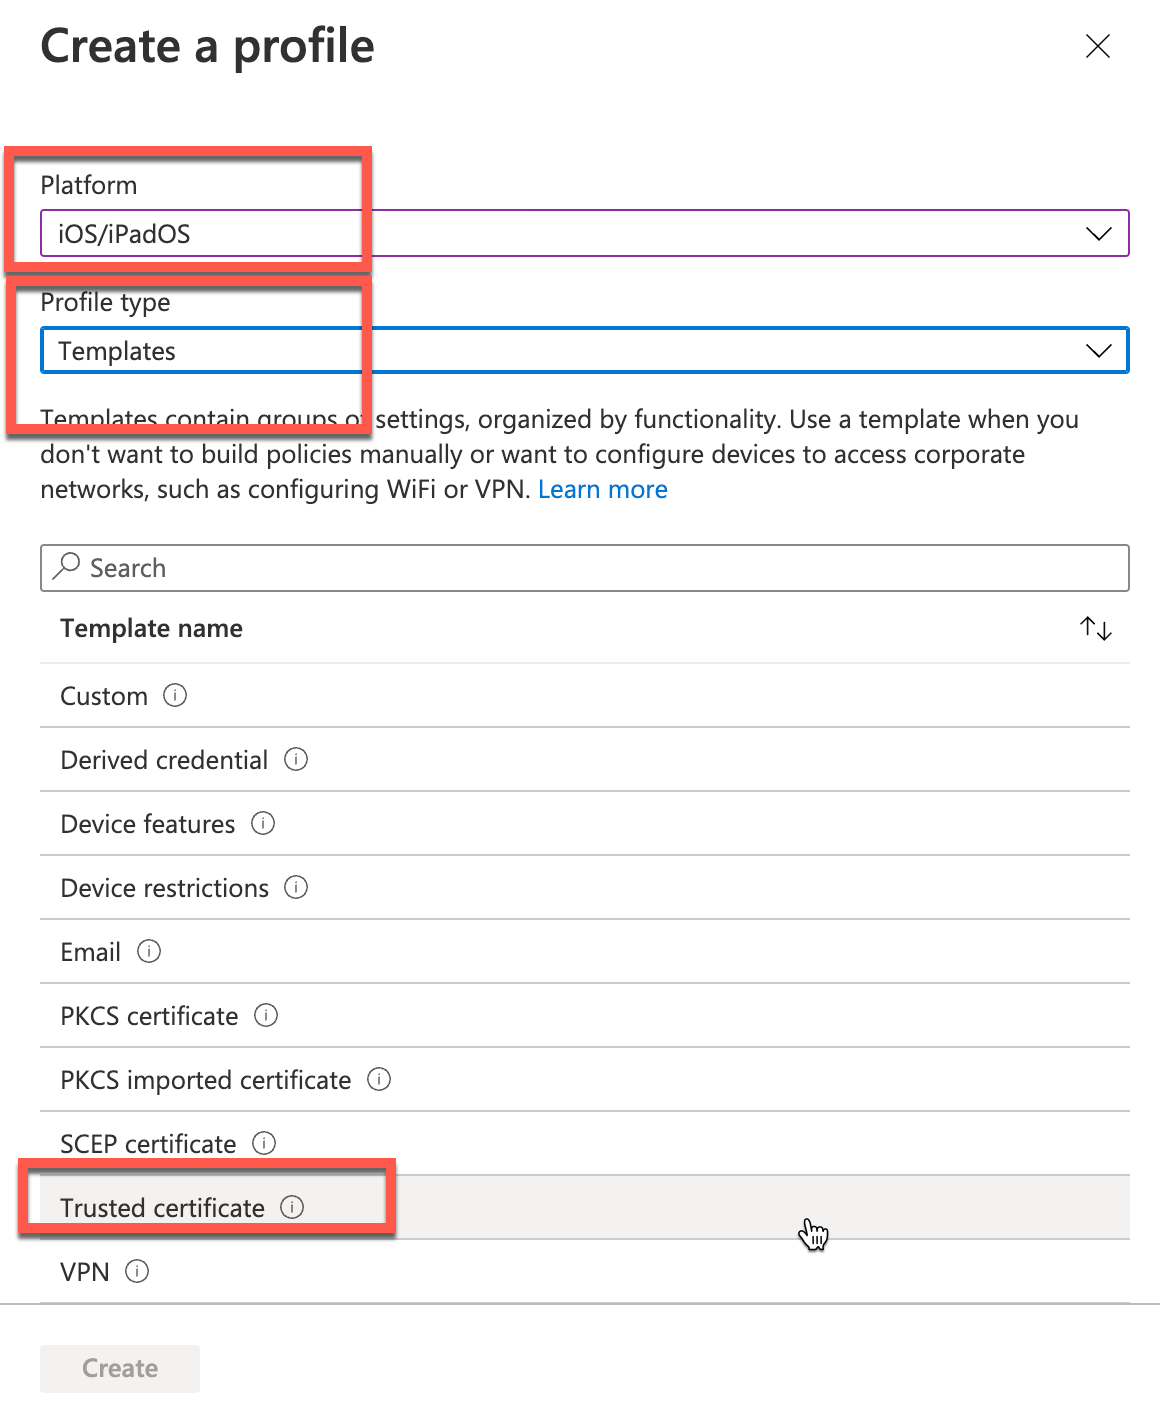
In the Trusted Certificate panel, provide a name in the Basics tab and click Next.
In the Configurations settings tab, upload the Netskope Root certificate.
Review your settings, and click Create.
Perform the following steps to deploy Netskope client using Intune:
Enroll Netskope Client in MS Intune
Go to Apps > iOS/iPadOS apps.
Click + Add.
Select iOS store app from the App type drop-down menu.

Click Select.
From App Information, click Search the App Store and select Netskope Client app to add the application.
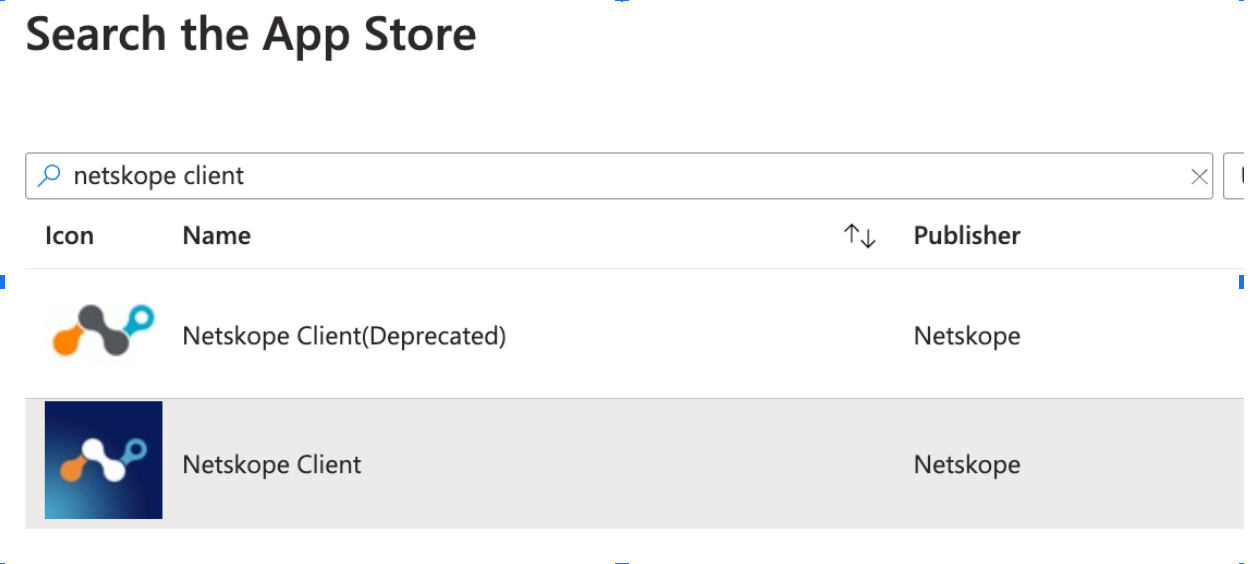
Click Select. The App Information section displays more information on the UI. No additional configuration is required here.
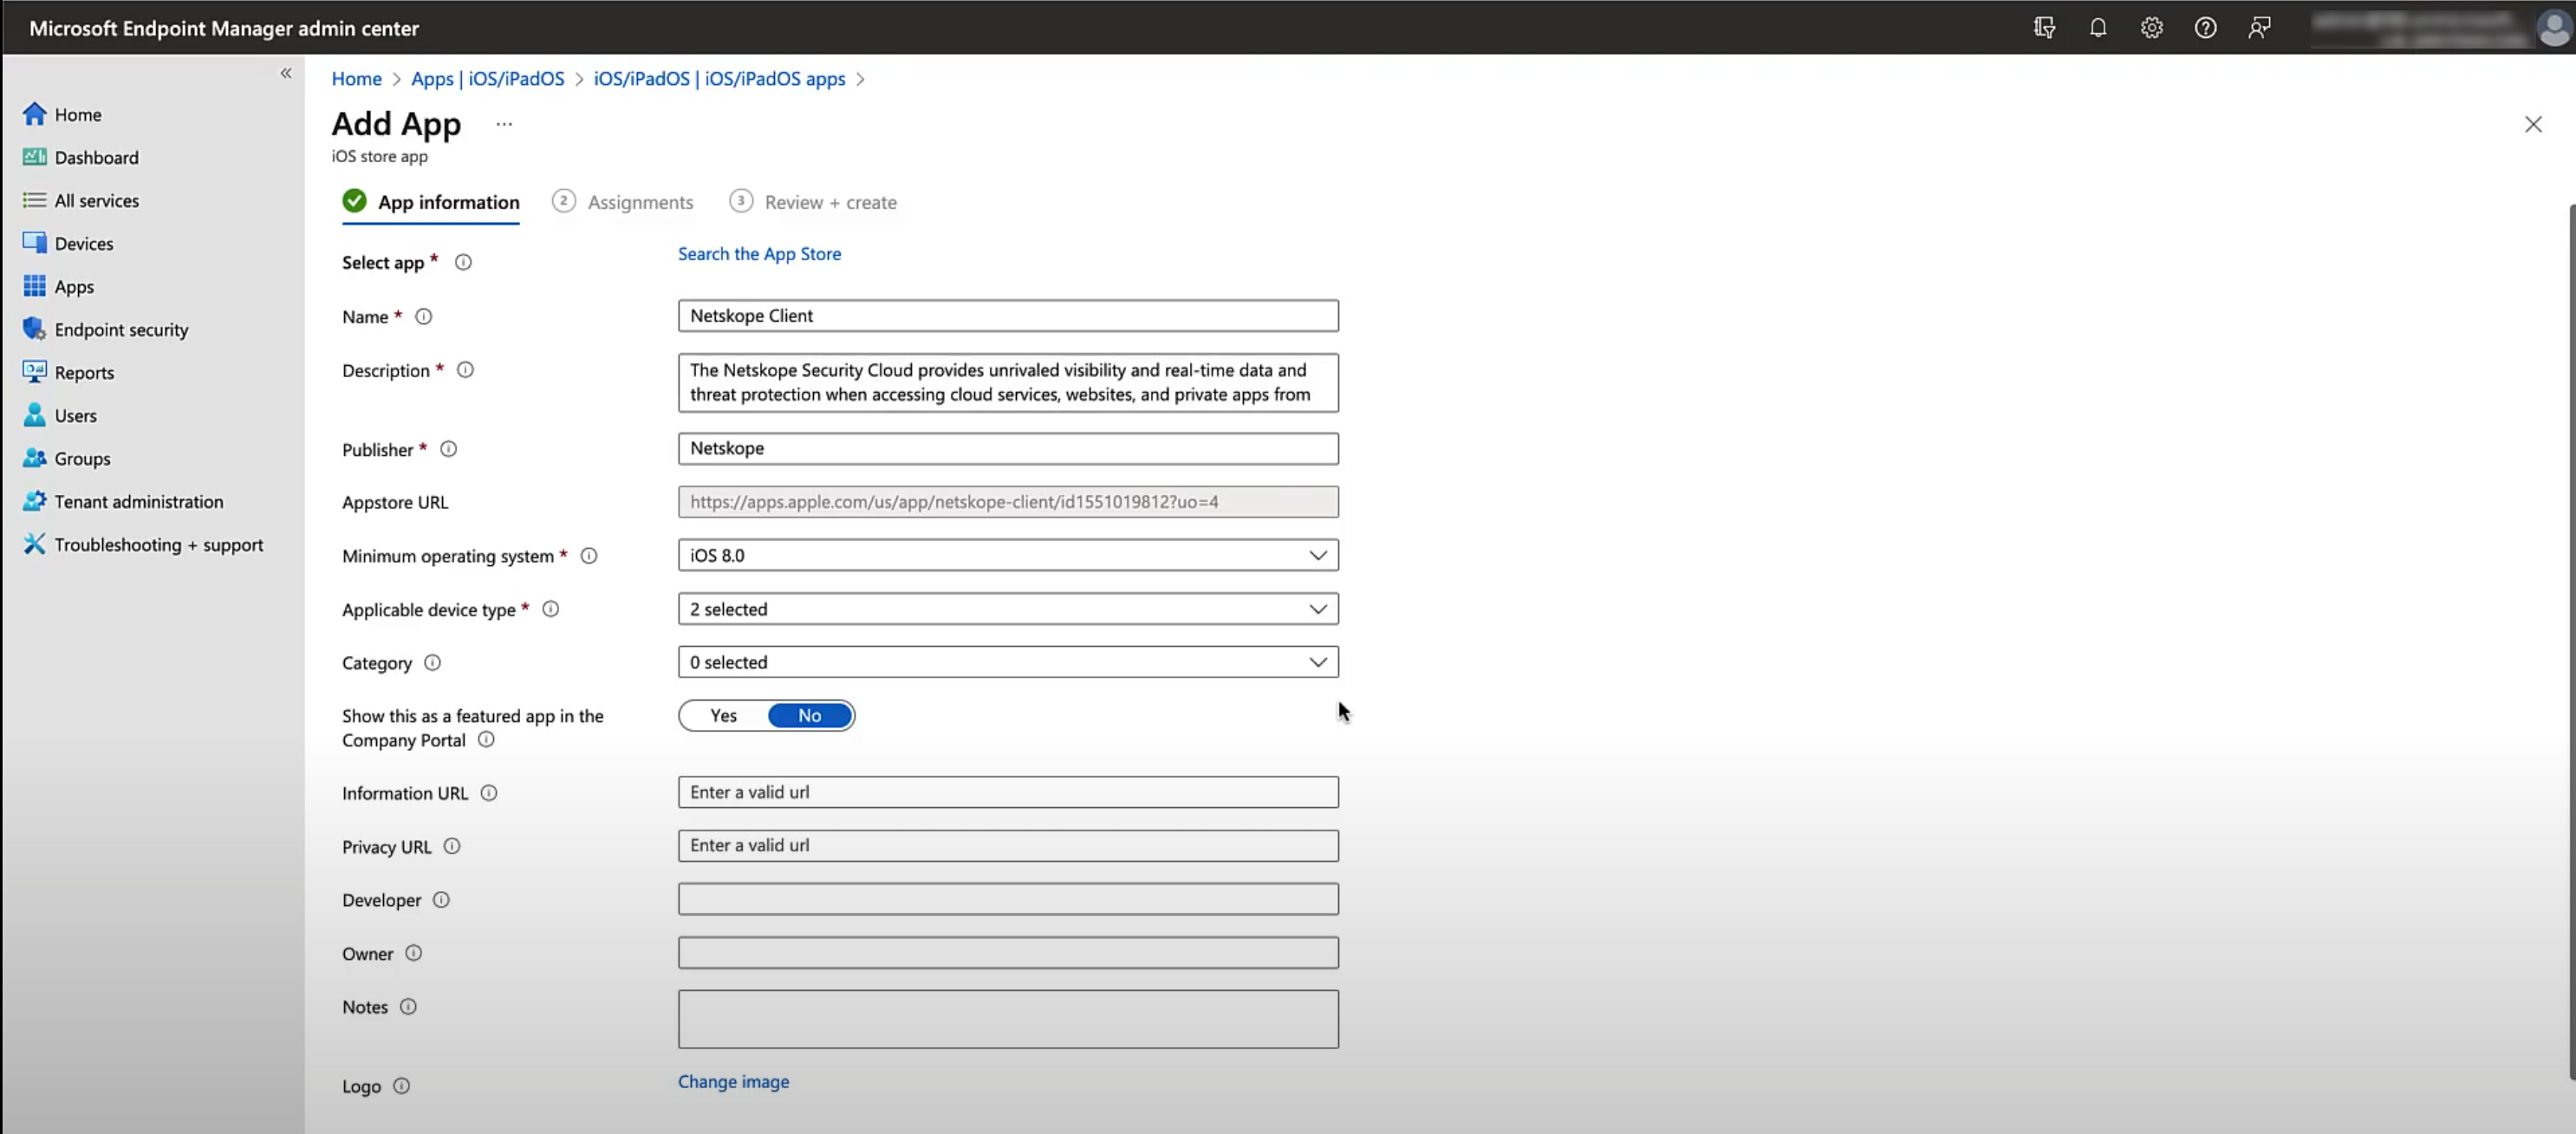
Click Next.
Assign the application to devices or users. Click Next to continue.
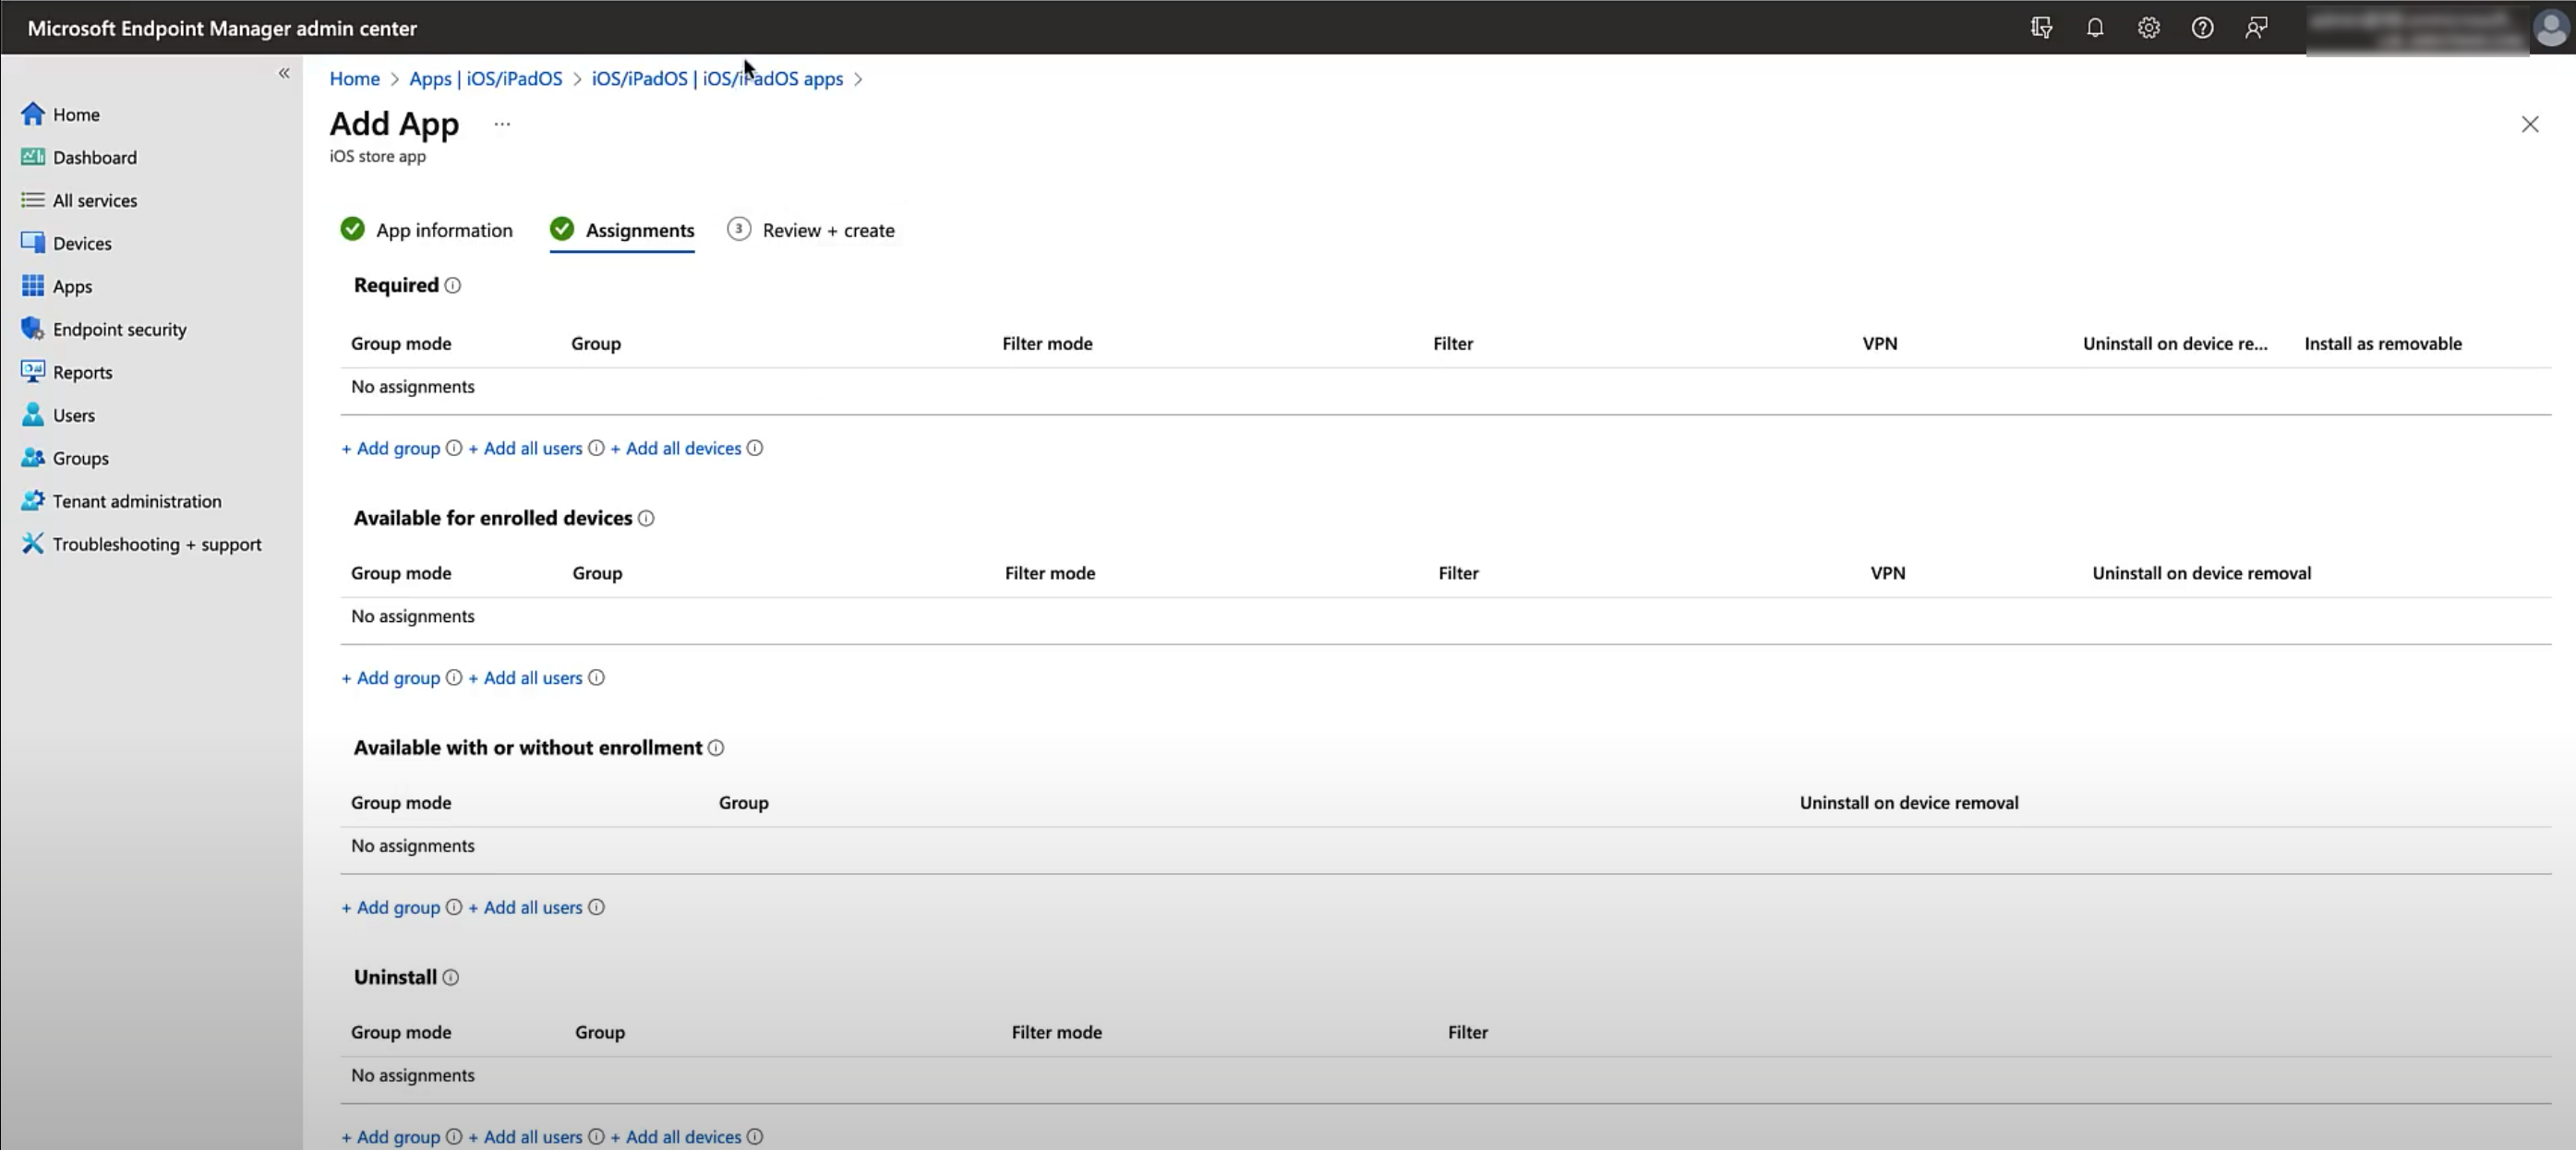
Click Create to complete creating the application.
Create App Configuration Policy
Go to Apps > App Configuration Policies to add the required policies to Netskope Client.
Click +Add and select Managed Devices.
In the Basics section of the Create app configuration policy page, enter the following details and click Next:
Name: Provide a name to the policy.
Platform: Select iOS/iPadOS.
Targeted App: Select Netskope Client
In the Settings section of the Create app configuration policy page, select the Use configuration designer option from the Configuration settings format dropdown menu.
Provide the required Key-Value pairs to complete the Netskope Client enrollment process:
UserEmail: {{mail}}
AddonHost: <addon-hostname>
OrgKey: <Organization Key>

Note
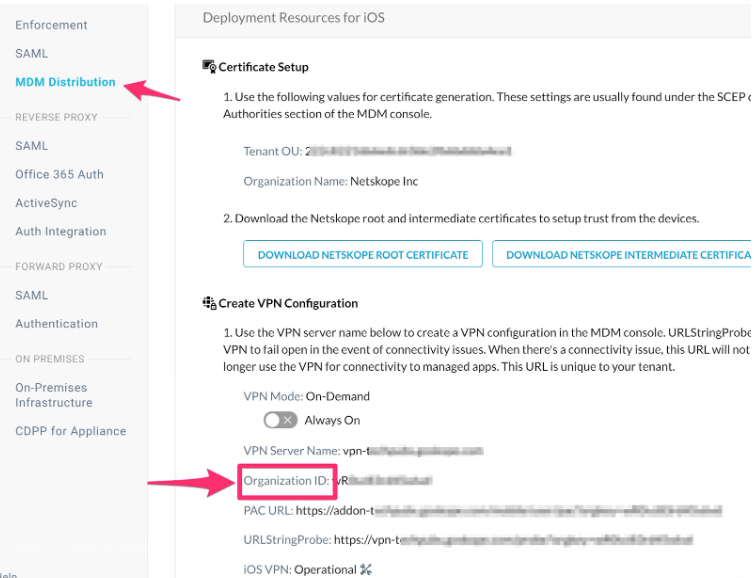
The Organization ID is case-sensitive. To know theOrganization ID, perform the following steps:
Login to your tenant with admin credentials.
Click Settings > Security Cloud Platform > MDM Distribution.
In the MDM Distribution page, scroll down to Create VPN Configuration section to find your Organization ID.
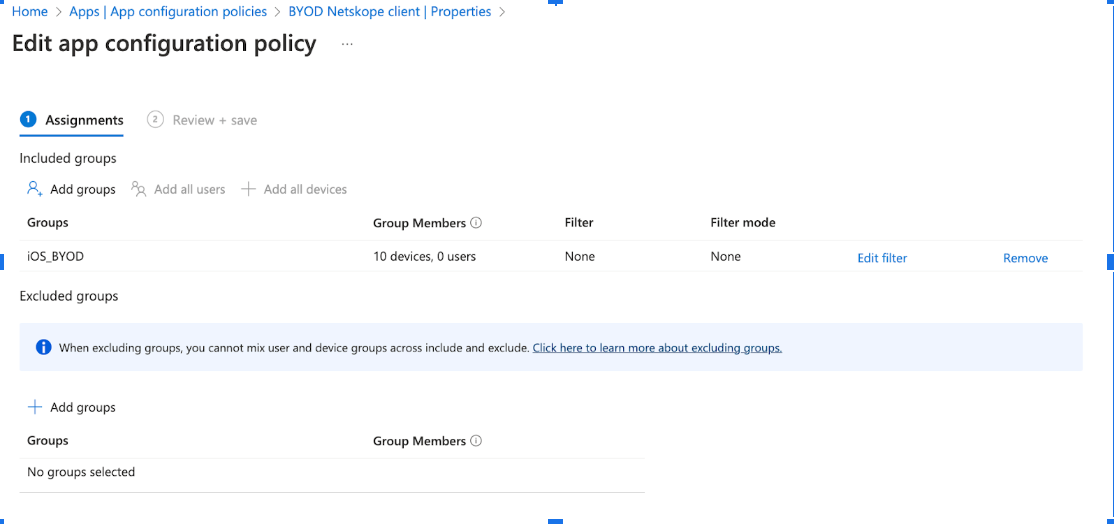
In the Assignments section of the Create app configuration policy page, select groups from the Assign to dropdown menu to which the policy is applied and click Next.
In the Review + create section of the Create app configuration policy page, review the configuration and click Create.
Create Configuration Profile
Once the Netskope is installed, it will take the VPN profile of the mobile device which will result in the additional user prompt. Here, we will add the VPN profile in Intune instead of making Netskope Client assess it. To learn more, view Create Profile.
Go to Devices > iOS/iPadOS policies > Configuration Profiles > Create Profile.
Select Profile Type as Templates and Template name as VPN.
Click Create.
In Basics, enter a descriptive name for the profile and click Next.
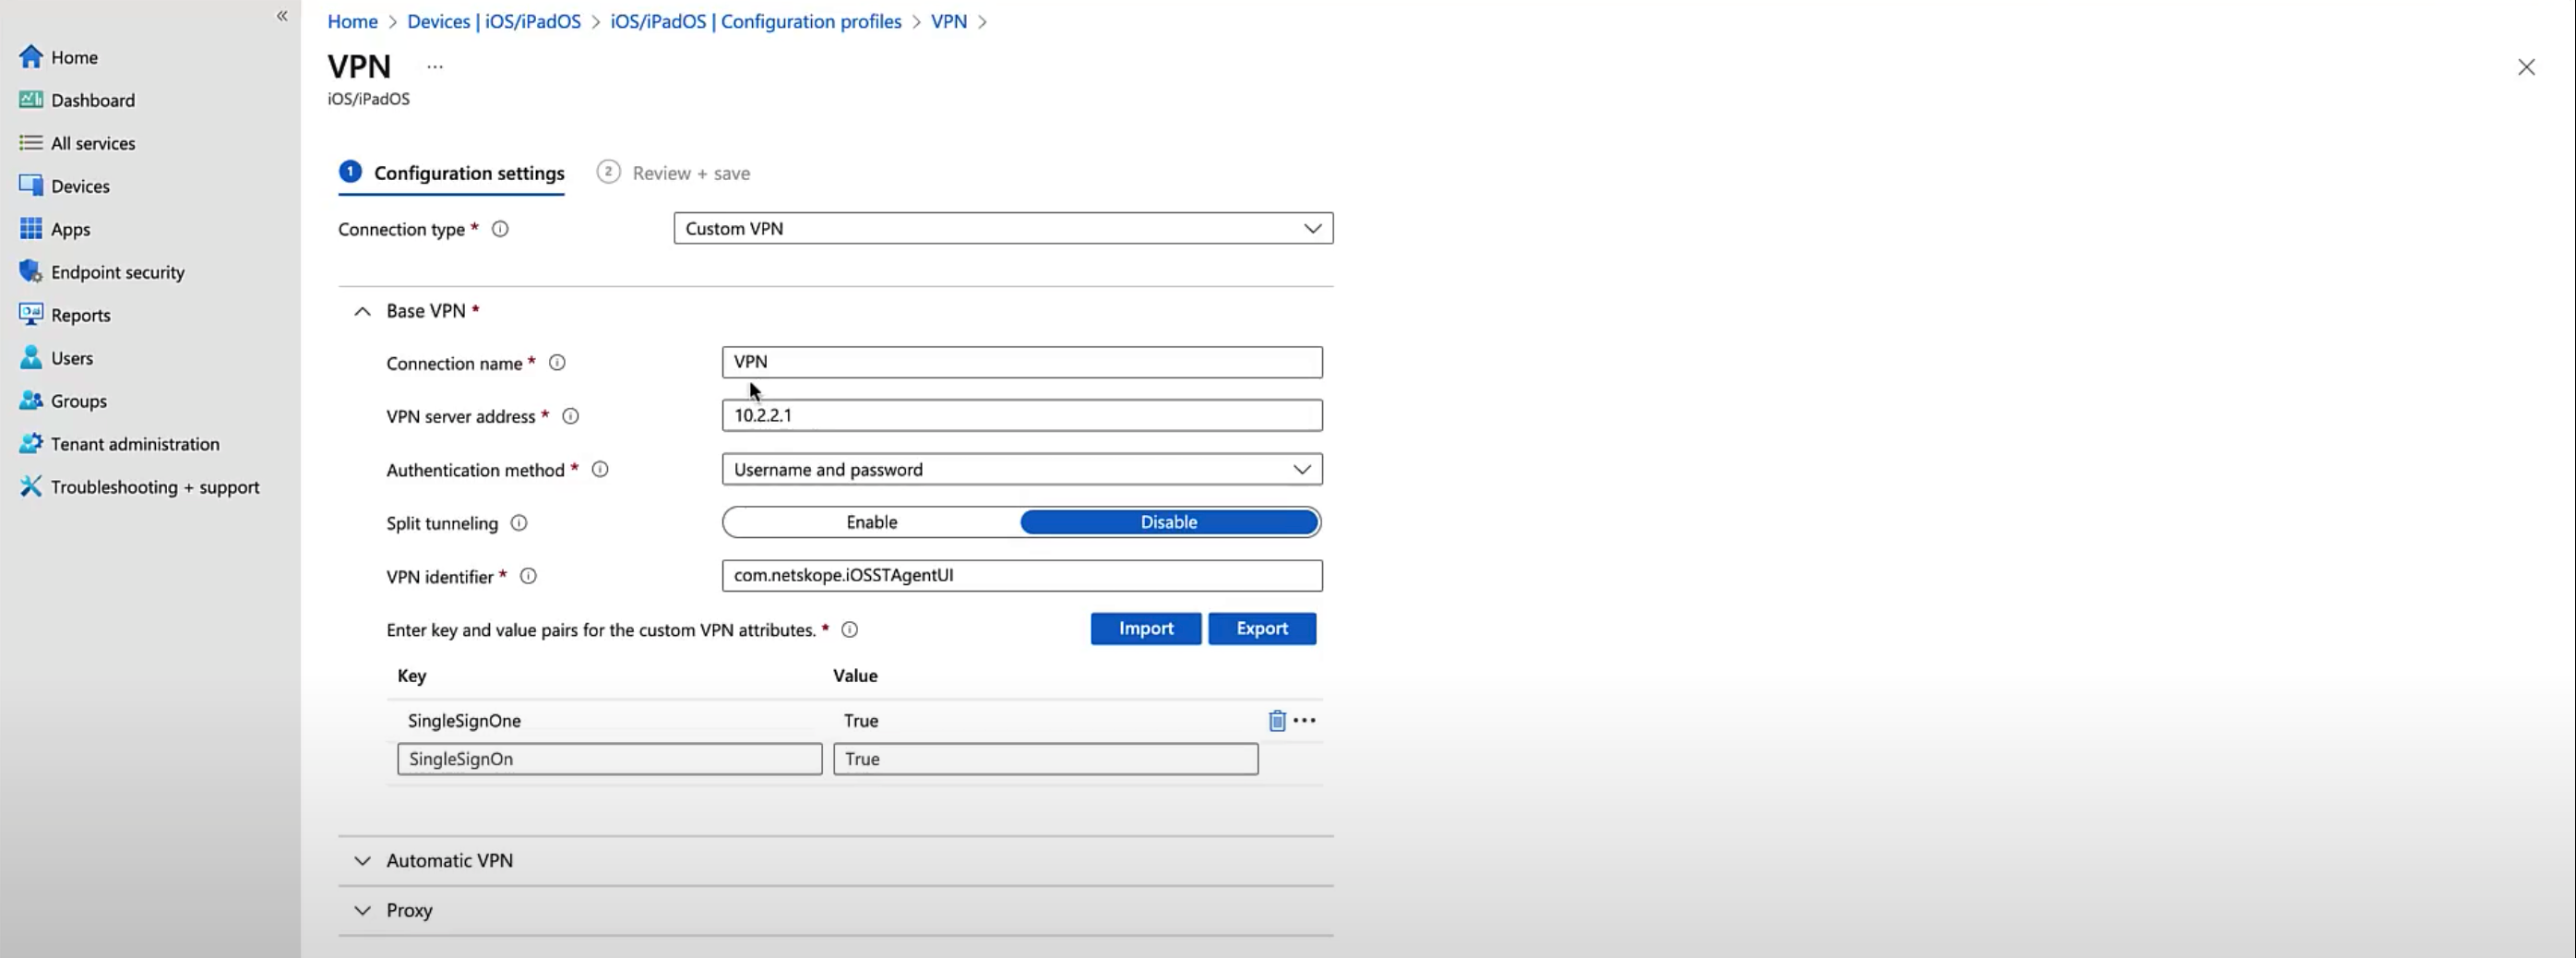
In Configuration settings, choose the Connection Type as Custom VPN.
After you select the connection type, do the following:
Under Base VPN, provide the following:
Connection name
VPN server address gateway-<tenant>.goskope.com
Authentication method: Username and Password
VPN identifier: com.netskope.Netskope
Intune requires at least one key-value pair to define custom VPN attributes. Here,
SingleSignOnis used as a key andTrueas a value.
Note
If you want Netskope Client steer only Private Access traffic, provide the following Key-Value pair:
ForceDisabledSteering: True.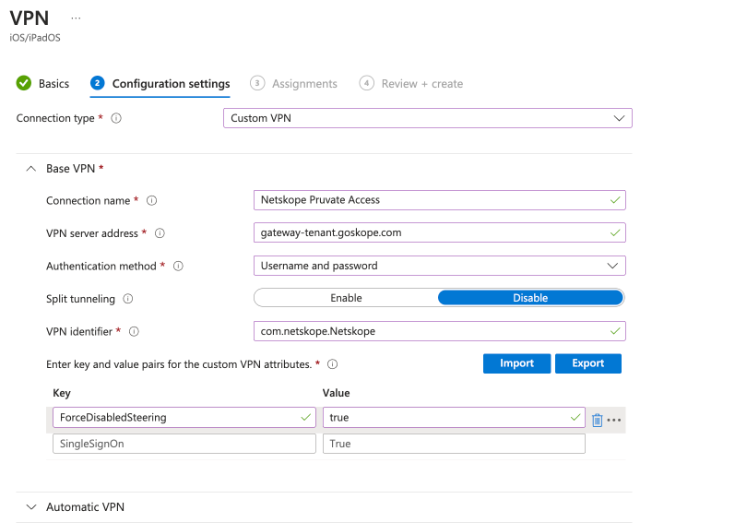
Under Automatic VPN, choose one of the following VPN type you want to configure:
On-demand VPN: Specify on-demand rules if necessary
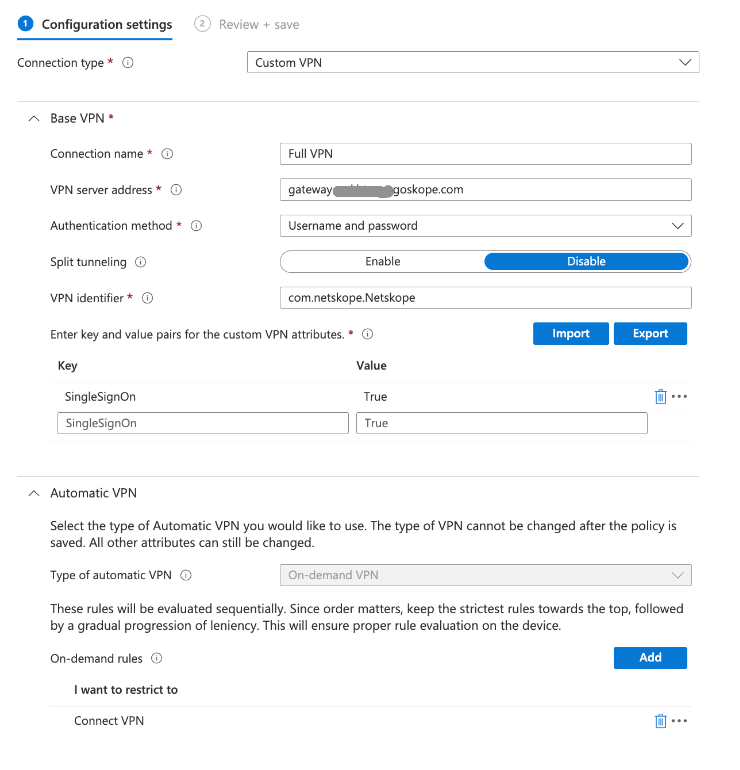
Per-app VPN: Specify Provider Type as packet-tunnel and specify associated domains, Safari URLs, and excluded domains if necessary.
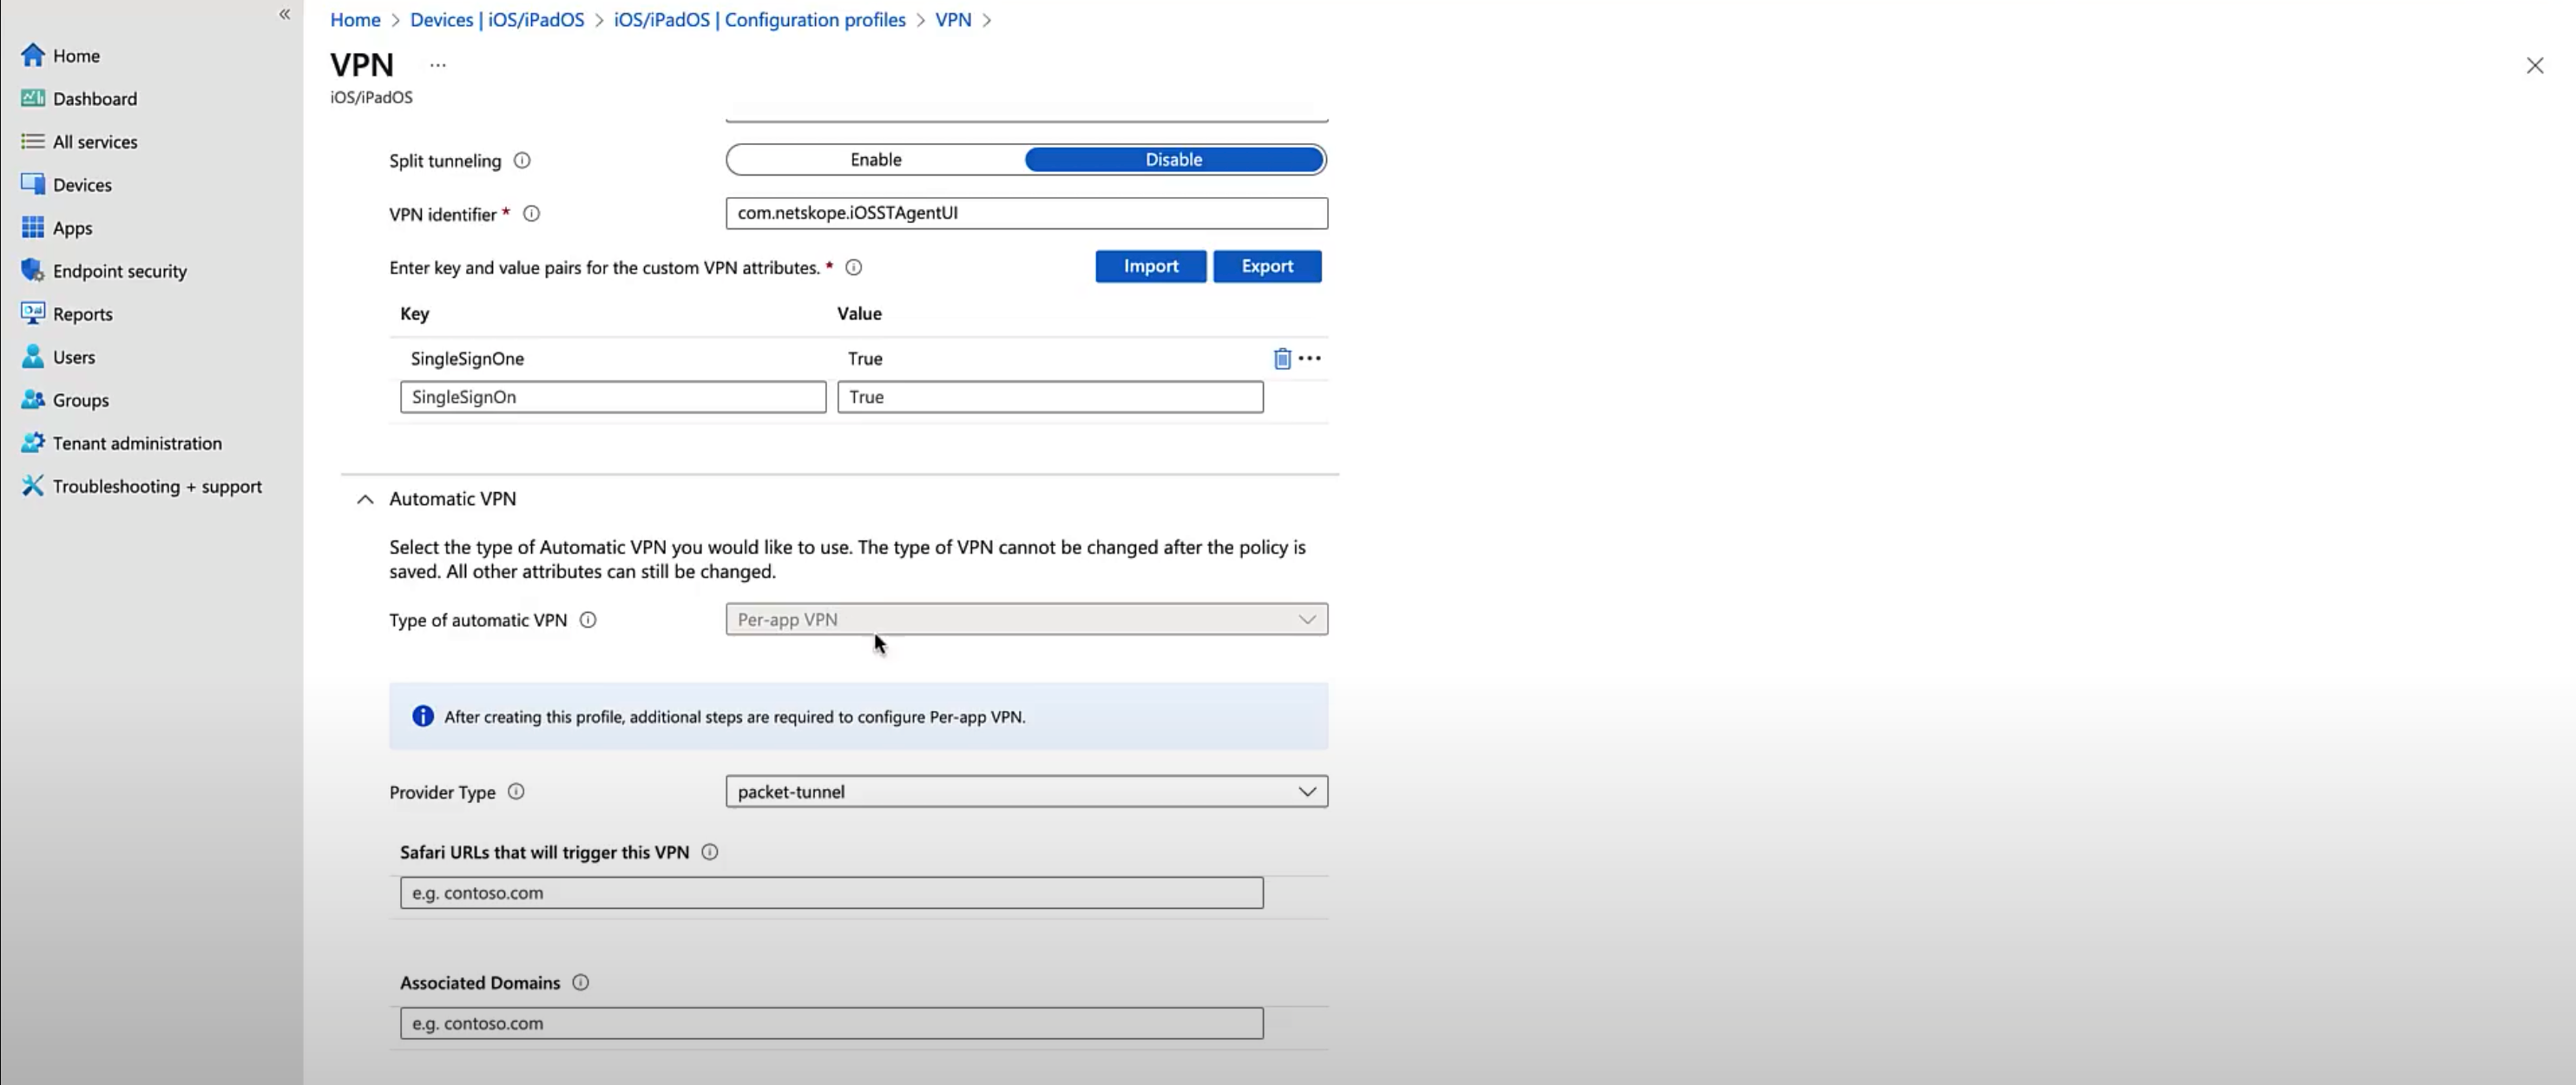
Assign the appropriate user/device groups and click Next.
Review the configuration and click Create.
Associating the Per-App VPN profile with the Apps
Associate the Per-App VPN profile with the applications to steer through the VPN connection
In the Microsoft Endpoint Manager admin console, go to Apps > All apps , select one of the apps listed there, and then click Properties.
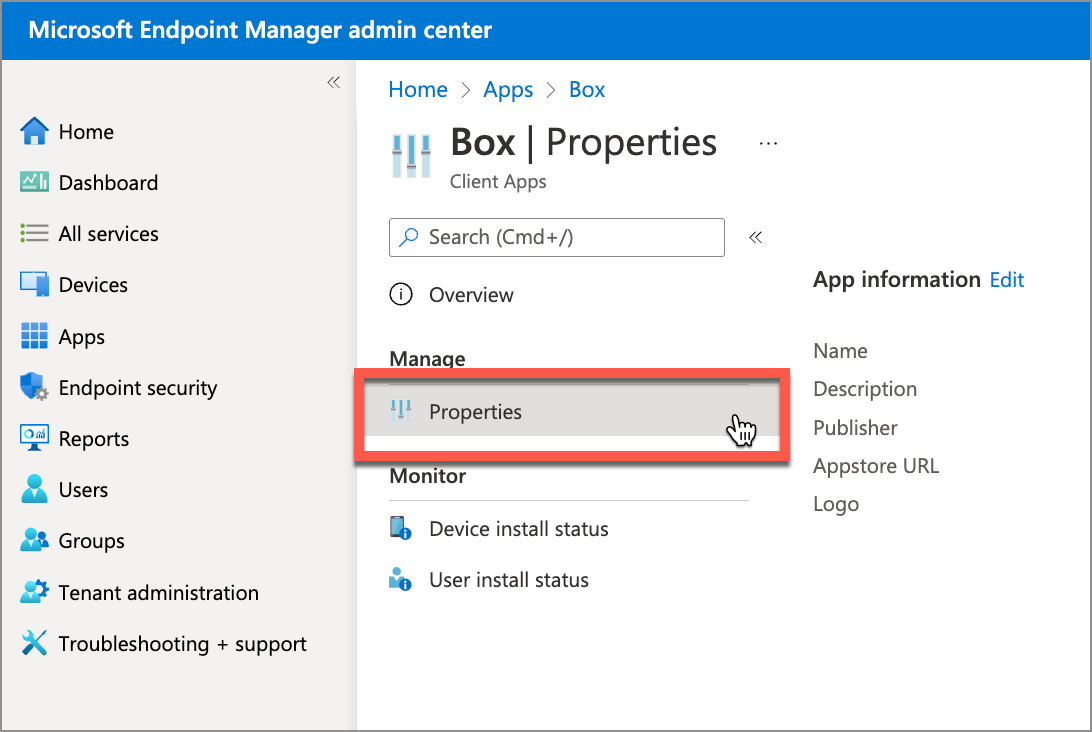
In the app properties page, click Edit for Assignments.
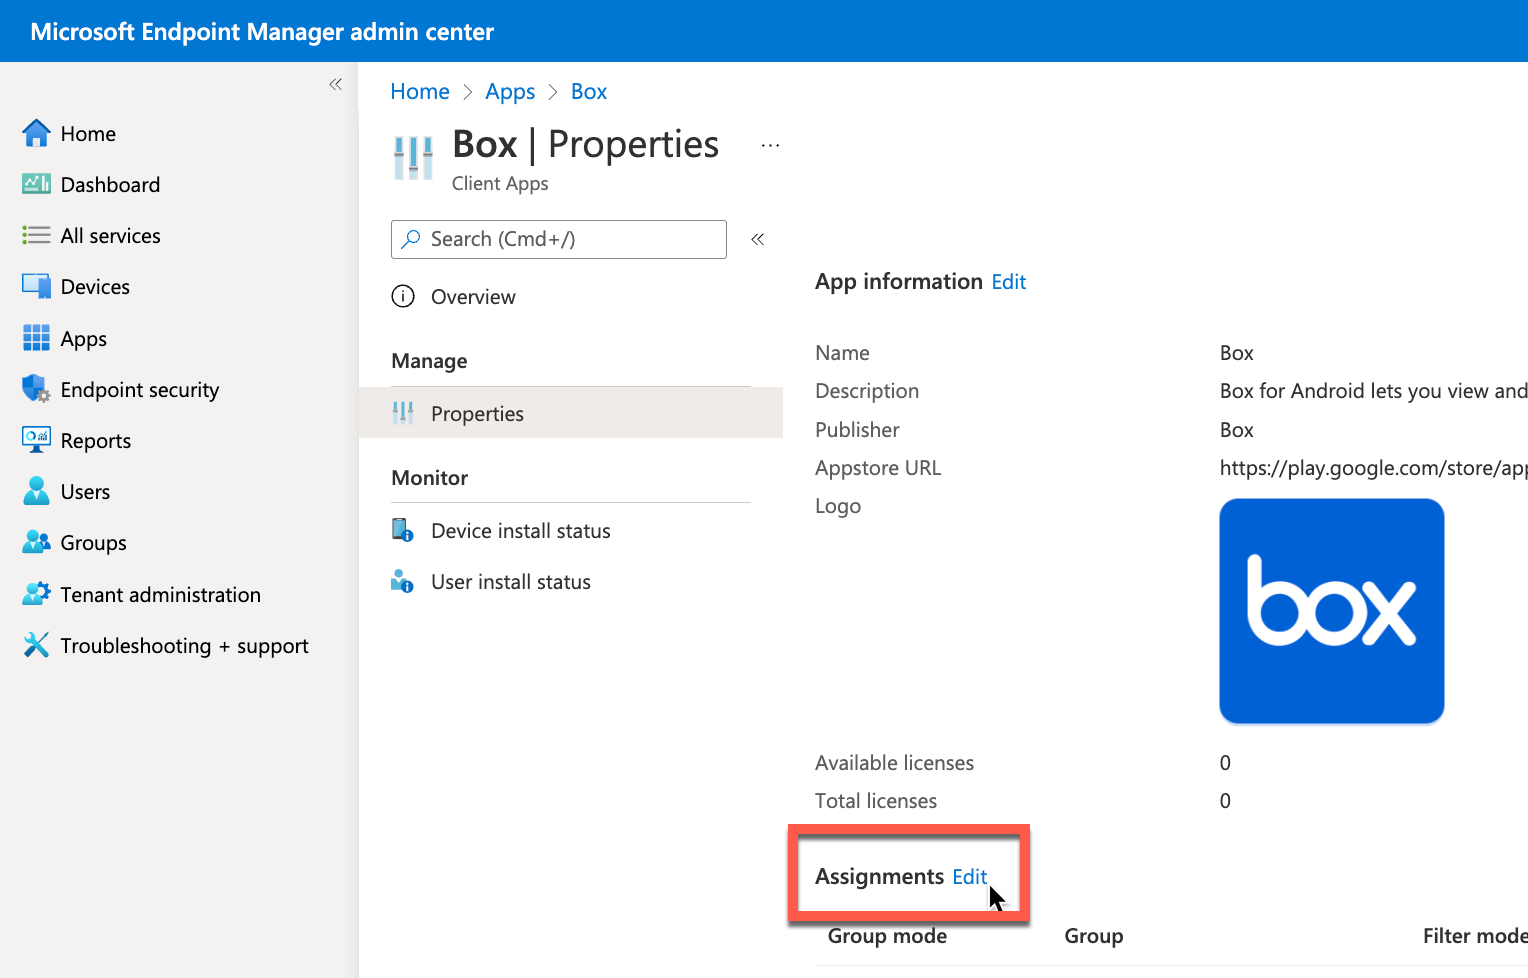
In the Required section, click Add Group. Search and choose one or more groups.
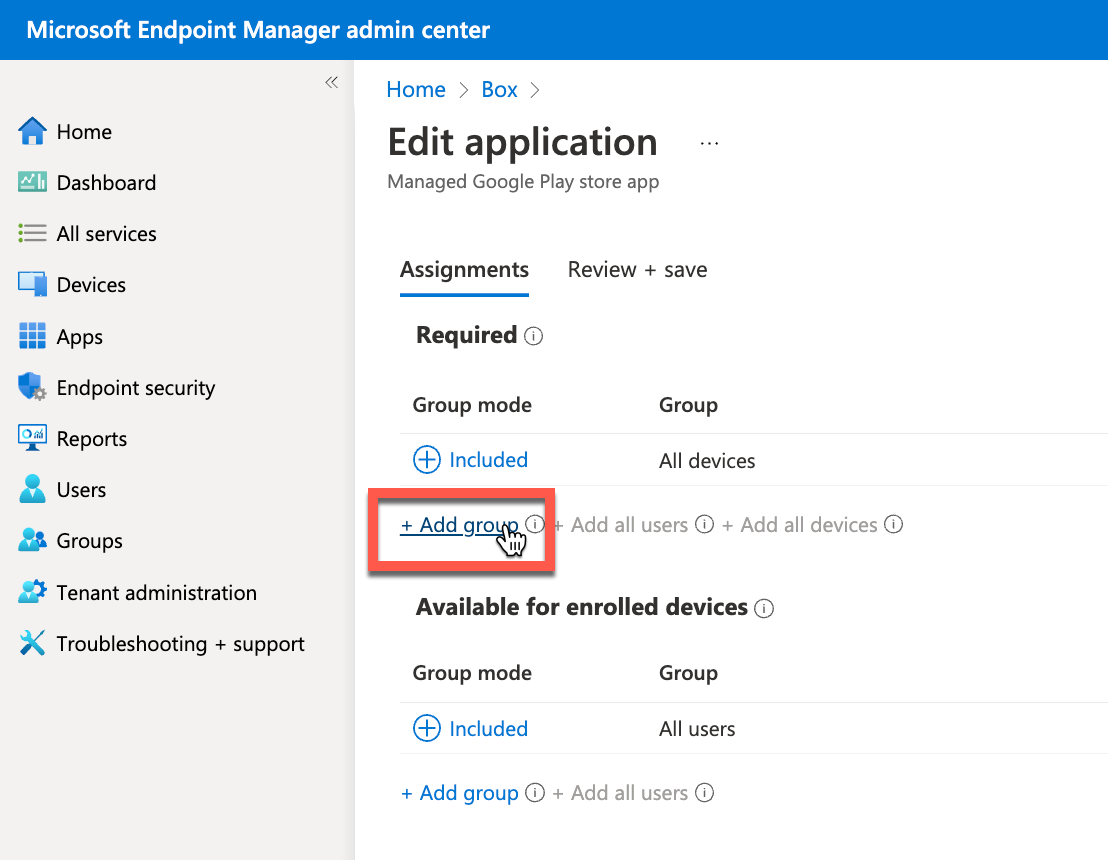
Click Select.