Configure ADFS for Netskope SAML
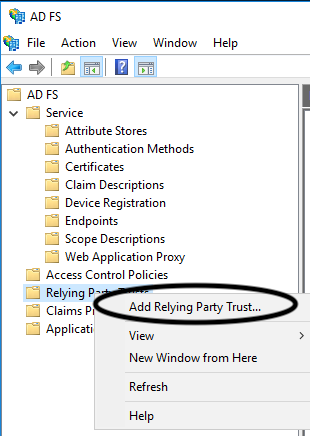
Add the Netskope Secure Web Gateway service as a relying party trust. Open the ADFS Management window and select the Relying Party Trusts folder. Right click the Relying Party Trusts folder to add a Relying Part Trust.
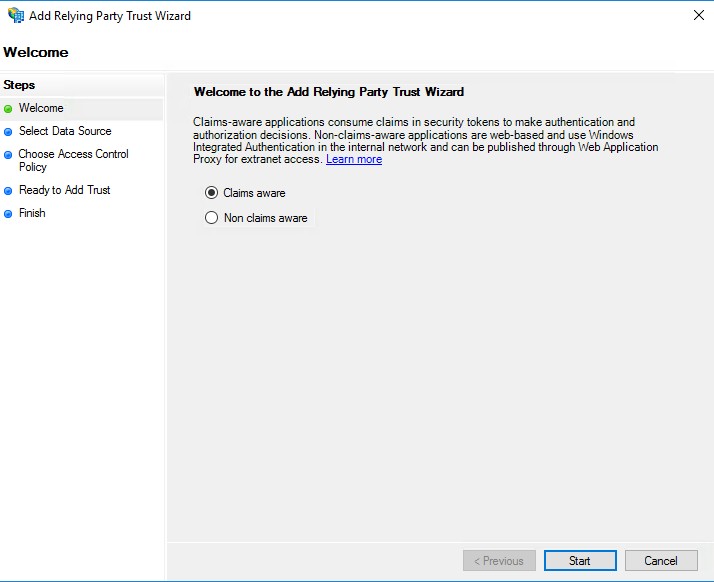
When the Add Relying Party Trust wizard appears, click Start.
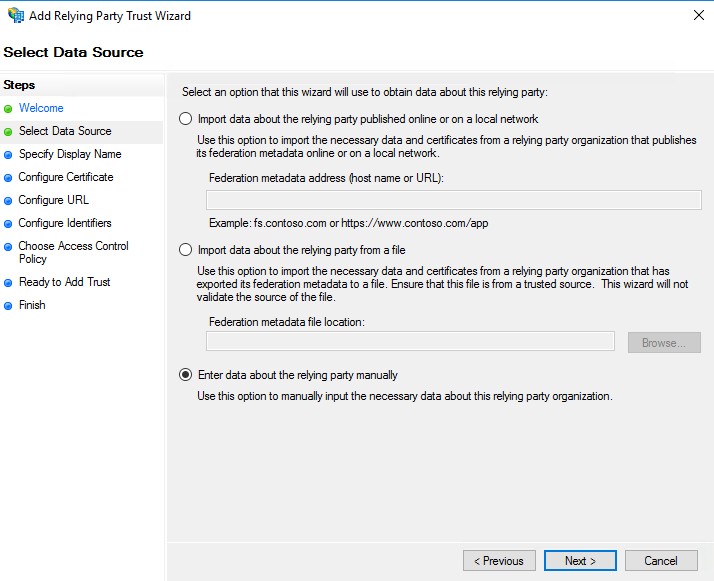
In Select Data Source, select Enter Data about the relying part trust manually and click Next.
For Display name, enter a display name for the Netskope Secure Web Gateway service, such as Netskope-SAML, and then click Next.
For Configure Certificate, click Next and proceed to the next step.
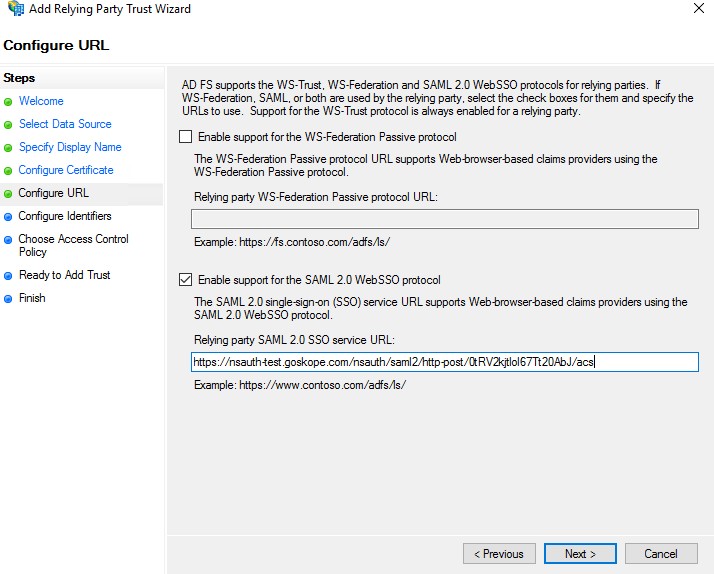
For Configure URL, select Enable support for the SAML 2.0 WebSSO protocol and enter the Netskope SSO URL. Log in to the Netskope UI and go to: Settings > Security Cloud Platform > Forward Proxy > SAML > SAML Settings. Copy the SAML ACS URL into ADFS, and then click Next.
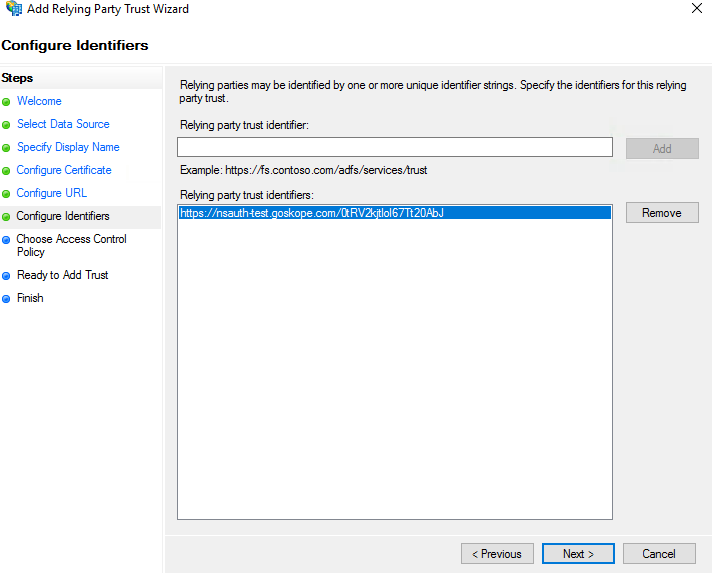
For Configure Identifiers, enter the Netskope SAML Entity ID. Log in to the Netskope UI and go to: Settings > Security Cloud Platform > Forward Proxy > SAML > SAML Settings. Copy the SAML Entity ID into ADFS, and then click Add and Next.
For Choose Access Control Policy, select Permit everyone and click Next.
For Ready to Add Trust, the wizard displays the configured settings. Click Next.
Click Finish to add the relying party trust to the database. Clear the option to open the Edit Claim Rules dialog.
Log in to the Netskope UI and go to: Settings > Security Cloud Platform > Forward Proxy > SAML > SAML Settings. Click Download Certificate. Rename the file with a
.crtfile extension. In ADFS, right click the relying party trust that was created above and open its Properties. In the Signature tab, click Add, navigate to the Netskope certificate, and then click Open. In the Advanced tab, select SHA-1 from the Secure Hash algorithm dropdown list, and then click OK.Tip
ADFS may reject the certificate as part of the signing certificate revocation checks; see the error message in the image below. If you get signature errors, then check if you have disabled Signing and Encryption checks for the Relying Party Trust.
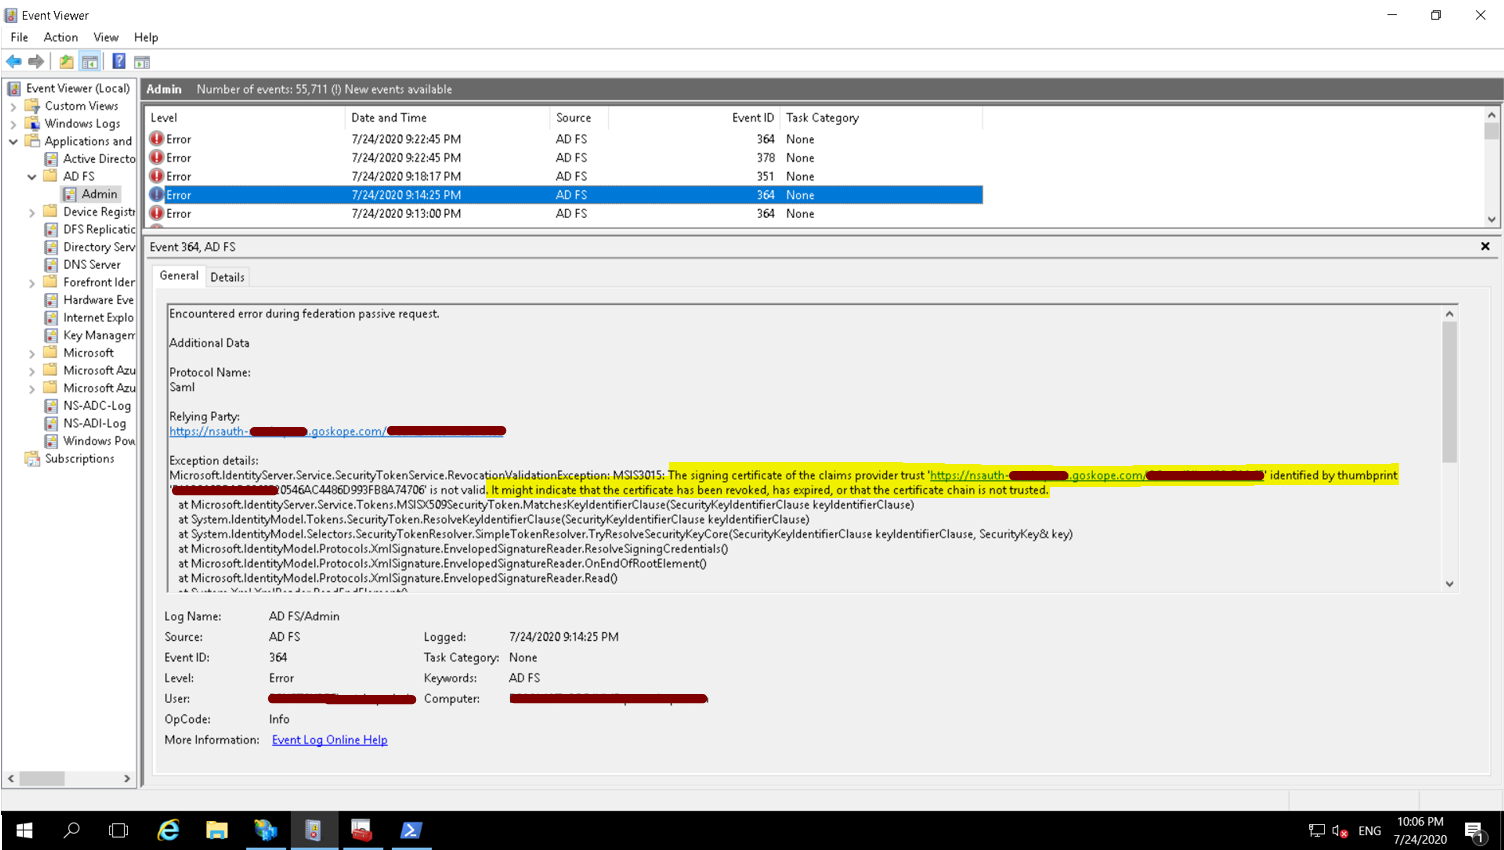
Netskope Certificates are self-signed and cannot be validated via the public internet. Also, the certificates do not have any public facing CRL Distribution Points or AIA values configured within the certificate. You need to set the certificate checks to None.

In the ADFS Management Window, open the Trust Relationships > Relying Party Trusts folder. Right-click the relying party trust created earlier and select Edit Claim Issuance Policy. When the Edit Claim Issuance Policy appears, click Add Rule. In Choose Rule Type of the Add Transform Claim Rule Wizard, select Send LDAP attributes as Claims as the claim rule template so claims contain LDAP attribute values from the attribute store, AD. Then click Next. For Claim Rule, do the following and click Next.
Enter a name for the claim rule.
From the Attribute Store menu, choose Active Directory.
Map the LDAP attributes that represent the user’s login name to a field in the outgoing claim.
From the LDAP attribute column, select the attribute for the login name. For example: User-Principal-Name. From the Outgoing Claim Type column, select Name ID. (Note that Name ID is entered as two words, with a space between them). Click Finish.