Enabling Forensics for Azure Blob Storage
To configure your Azure Blob Storage as a forensic destination,
Ensure that you have Blob storage with a storage account and a container within the storage account. You can use existing resources or create new resources.
Note
Netskope recommends that the container in the storage account is specifically used to store forensic data only.
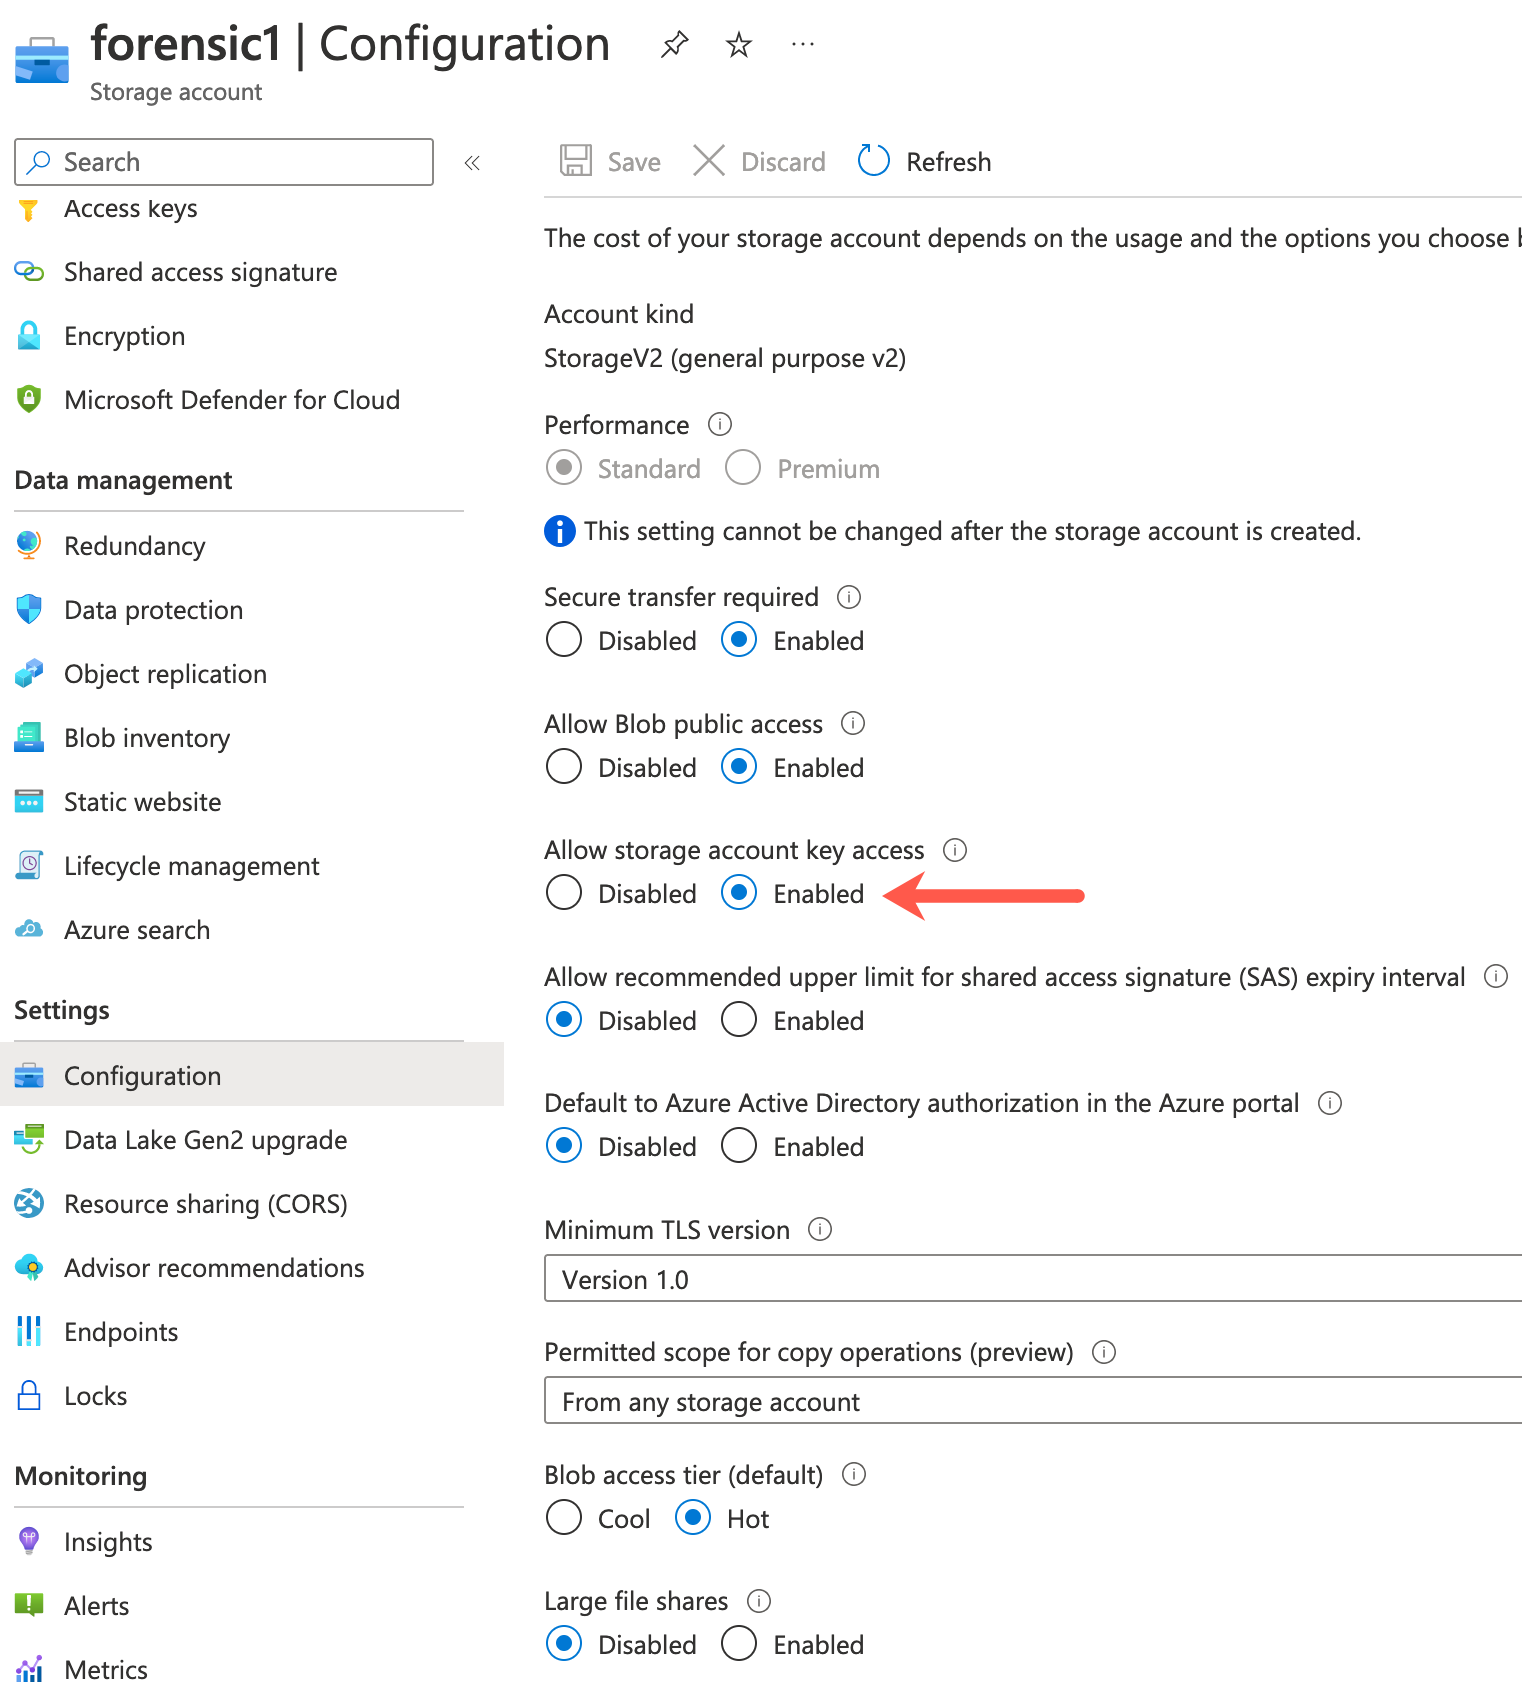
Allow storage account key access. You should enable key access in the storage account for Netskope to access the Azure Blob storage. To do so:
Log in to portal.azure.com.
On the left navigation, click All services. Then click Storage > Storage accounts.
Select the storage account for forensic.
On the left navigation, navigate to Settings > Configuration.
Ensure that Allow storage account key access is enabled.

Configure an Azure Active Directory Application. To learn more: Step 1/3: Configure an Azure AD Application for Forensics.
Assign permissions to store objects in the Blob storage. To learn more: Step 2/3: Assign Azure permissions to store forensic objects.
Add the Azure Subscription to the Netskope tenant. To learn more: Step 3/3: Add the Azure Subscription to the Netskope tenant for Forensics
Note
Netskope normalizes the term "Account" to help with cross CSP summaries. Netskope normalized “Account” field maps to Azure Subscription.