Creating a Threat Protection Policy for Patient Zero
A patient zero event occurs when a user downloads a file that's not detected by signature-based analysis (e.g., Netskope AV engine) in Standard Threat Protection. However, if you have Advanced Threat Protection, you can prevent patient zero events by creating a Threat Protection policy that only releases unknown files to users after the Netskope advanced threat engines determine they're benign. Netskope holds the unknown file and notifies the user that it's analyzing the file until it determines a verdict. The Netskope advanced threat engines can take up to 10 minutes to analyze the file.
Netskope recommends using patient zero policies for high risk use cases, such as the following:
Risky file types (file type constraint)
Risky users (low Behavior Analytics User Confidence Index)
Risky application (low Cloud Confidence Index)
Risky locations
Unknown websites
A combination of the above cases.
This policy complements the inline ML-based Portable Executable (PE) classifier in Standard Threat Protection that detects and prevents zero-day threats.
To create a Threat Protection policy that prevents patient zero events:
Go to Policies > Real-time Protection.
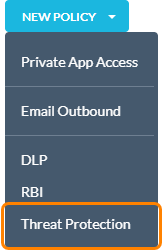
Click New Policy and then Threat Protection.

On the Real-time Protection Policy page:
Source: Select the users, user groups, or organizational units you want to apply the patient zero policy to. Click Add Criteria to add other sources.
Destination: Select the traffic destination you want to apply the patient zero policy to. You can scan traffic for URL categories, cloud apps, app instances, or any web traffic with a specific Cloud Confidence Level (CCL), application tag, or country destination. For patient zero prevention, Netskope recommends scanning for all URL categories.
For Category, select Select All.
For Activities, select Download and Upload.
Click Add Criteria & Constraints.
Go to Activity Constraints > File Type.
Note
To enable the File Type activity constraint, contact your sales team.
For File Should, ensure it's match.
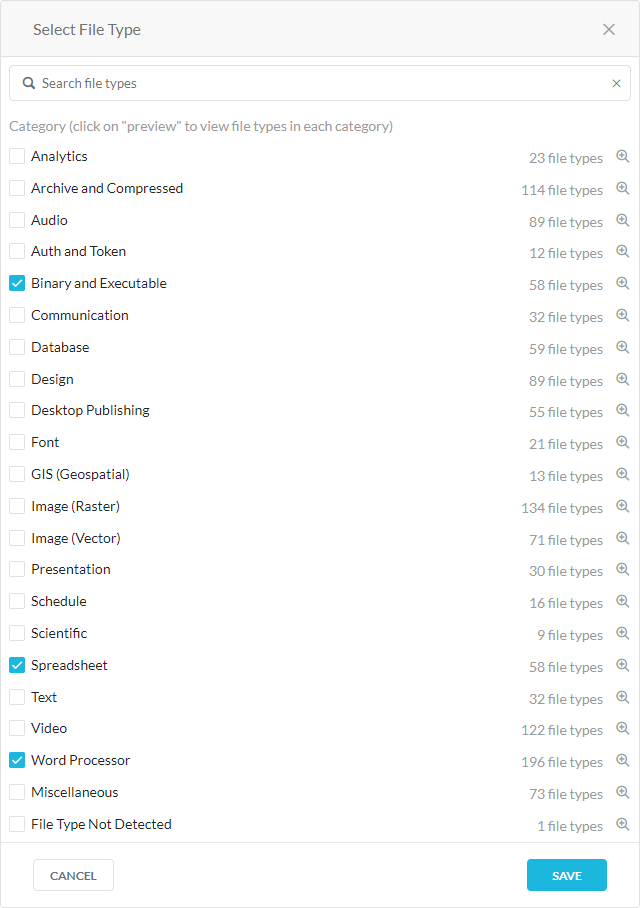
For File Type, click Select File Type.
In the Select File Type window, select Binary and Executable, Spreadsheet, and Word Processor. Netskope recommends creating a patient zero policy for these high risk file types. You can select more file types if needed.

Profile & Action: Configure the following.
Threat Protection Profile: Ensure it's Default Malware Scan (predefined). You can't edit the default malware scan profile or add more profiles with the default profile.
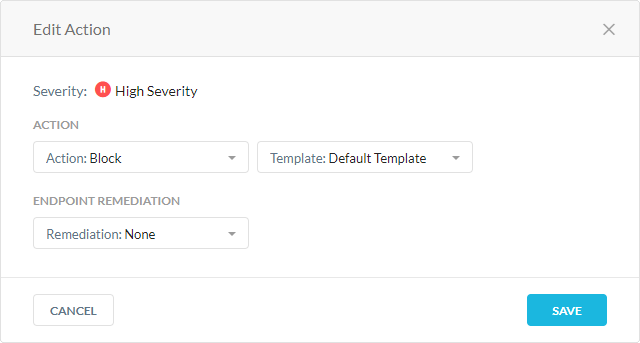
Severity-Based Actions: Edit each severity level and select Block for the Action.

Block till benign verdict by dynamic threat analysis: Select to block users from uploading or downloading a file until Netskope dynamic threat analysis provides a benign verdict. The analysis can take up to 10 minutes.
Set Policy: Enter a policy name. You can only use alphanumeric characters and symbols such as underscore (_), dash (-), and square brackets ([ ]). You cannot use the greater-than (>) or less-than (<) symbols in policy names. Optionally, You can:
Click + Policy Description to add notes or information.
Click + Email Notification to configure email notifications for these events. See Real-time Protection Policies.

Click Save.
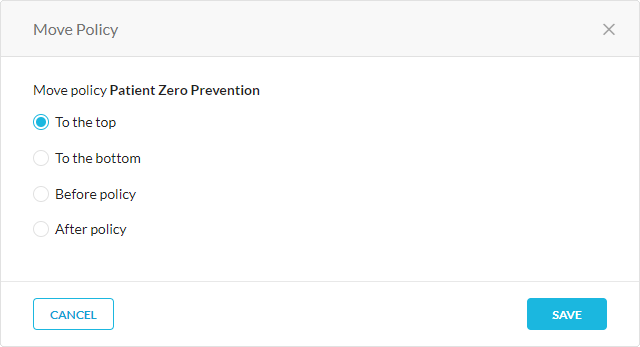
In the Move Policy window, move the policy To the top. Patient zero policies must be above all other threat protection policies.

Click Save.
Click Apply Changes.
After creating a patient zero policy, you can use the Policy alert type to view the matched patient zero policy alerts on the Skope IT Alerts page. To learn more: Viewing Patient Zero Events.