Forward Proxy Authentication
This feature, when enabled, provides authentication through the Netskope Security Cloud Platform. In addition, you can bypass specific domains and web categories for which authentication is not required. Administrators can use this page to configure user authentication settings. You can enable SAML authentication and cookie surrogate, and also select an authentication refresh interval.
You can use Netskope as an authentication mode to integrate with an Identity Provider (IdP). This feature acts as an authentication module taking Netskope's framework and an IdP's auth assertion after authentication.
Enable Authentication
Go to Settings > Security Cloud Platform > Forward Proxy > Authentication.
Click Enable Authentication.
Click Enabled to turn on this feature.
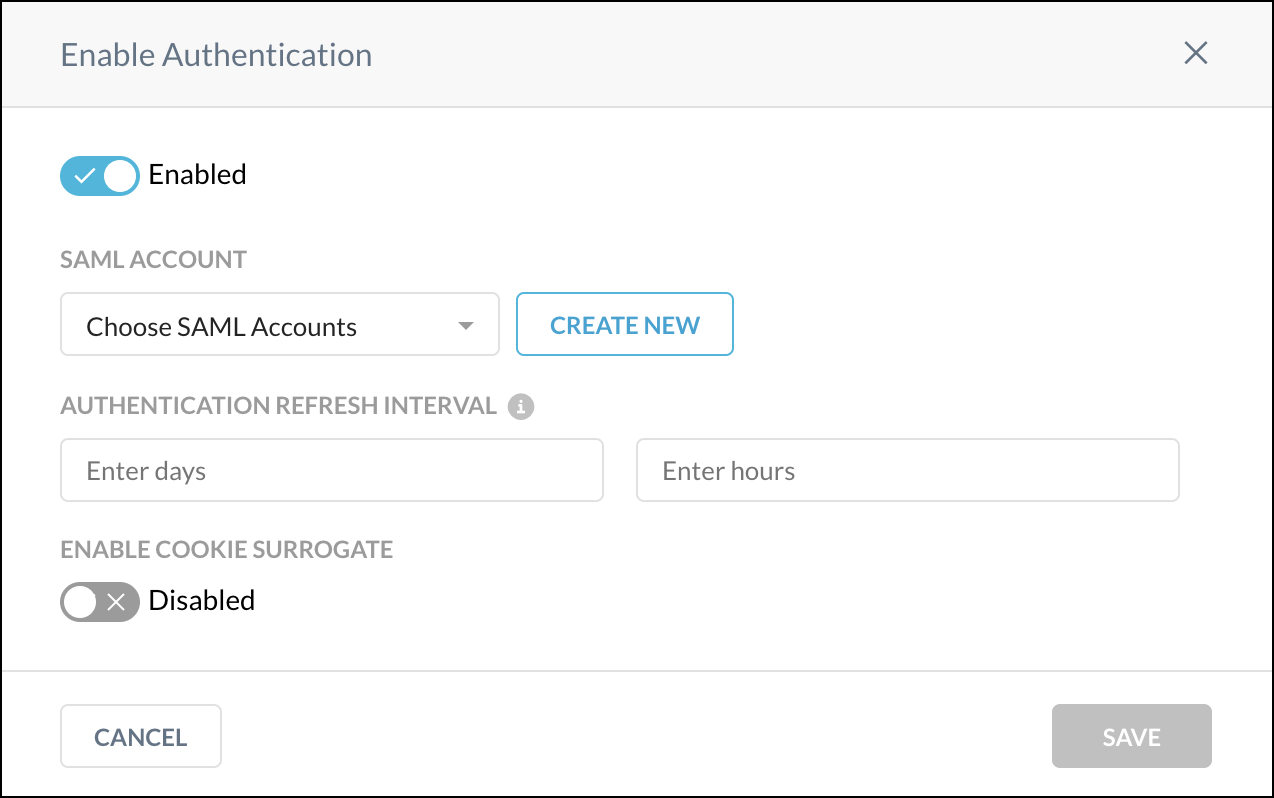
To use SAML authentication, select a SAML account from the dropdown list or create a new one. To create a SAML account here, proceed to the next step. For cookie surrogate authentication, jump to step 8.
Click Create New for SAML-based authentication. The Add SAML Account window opens.
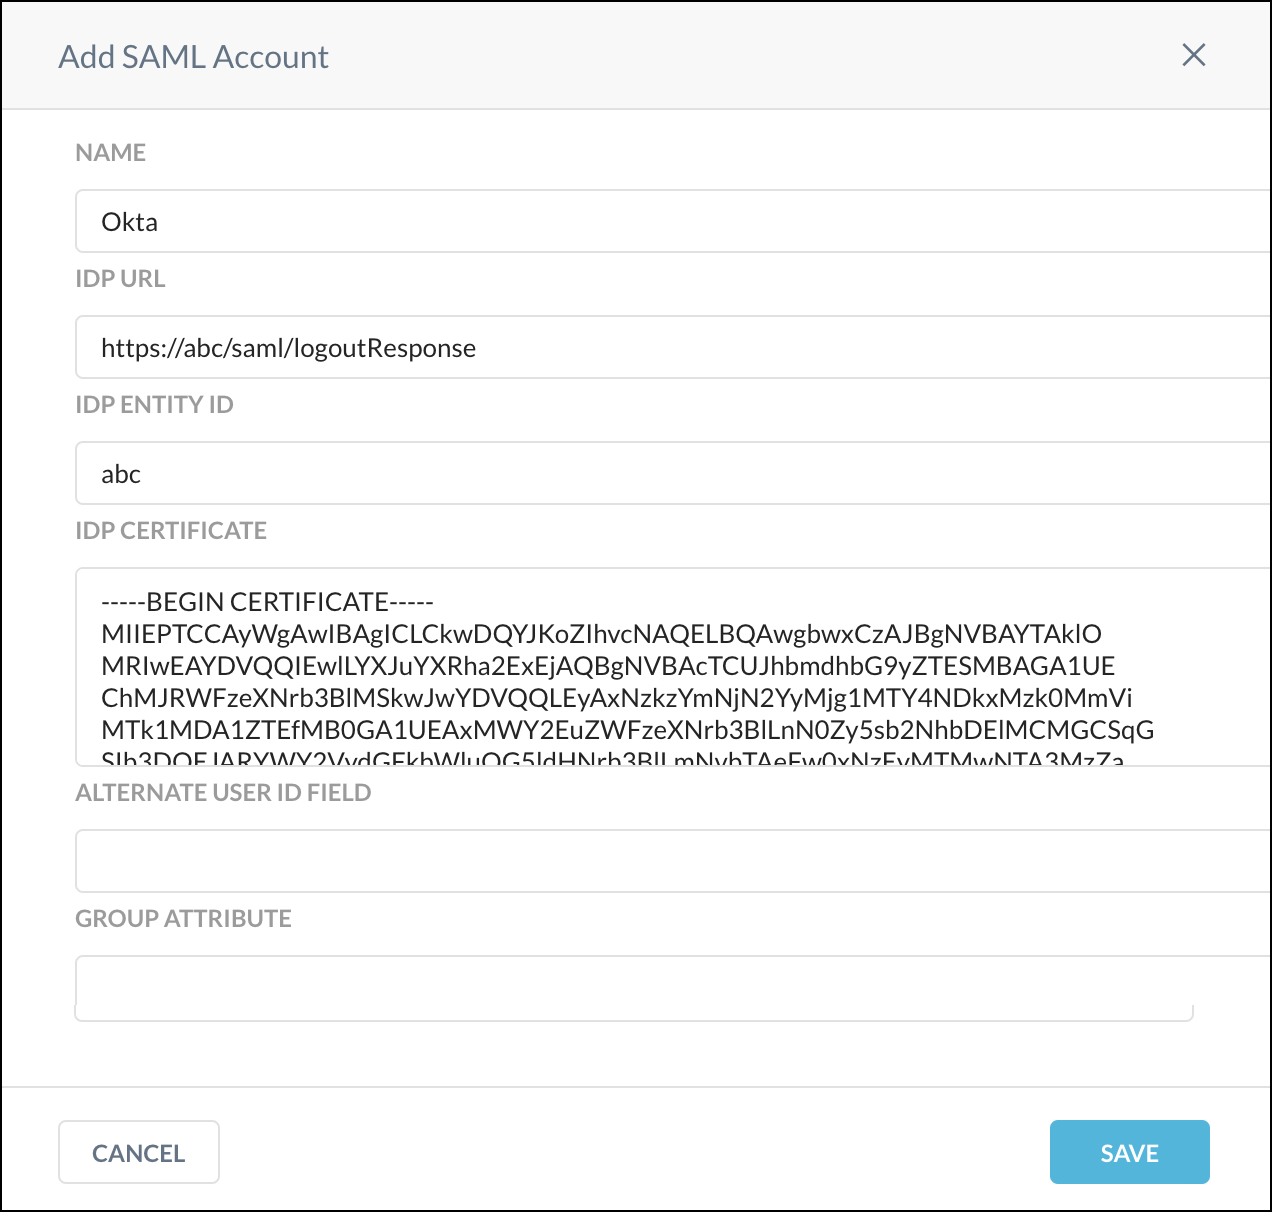
Configure these parameters:
Name: Enter a name identifying the account.
IdP URL: Contact your third party Identity Provider and add the unique IdP login URL in this field.
IdP Entity ID: An entity ID is a globally unique name for a SAML entity. Either an Identity Provider (IdP) or a Service Provider (SP).
IdP Certificate: Copy and paste the PEM format certificate of the third party IdP in this field. This is required by Netskope to validate the signature of the SAML assertion.
Alternate User ID Field: Netskope looks at the NameID field in the SAML assertion to get the user identity. If you would like to use another field for user identification, type the name of the SAML attribute in this field.
Group Attribute: Enter the name/value pair that identifies the user group and role membership. Only one membership attribute can be defined for each LDAP repository.
Click Save.
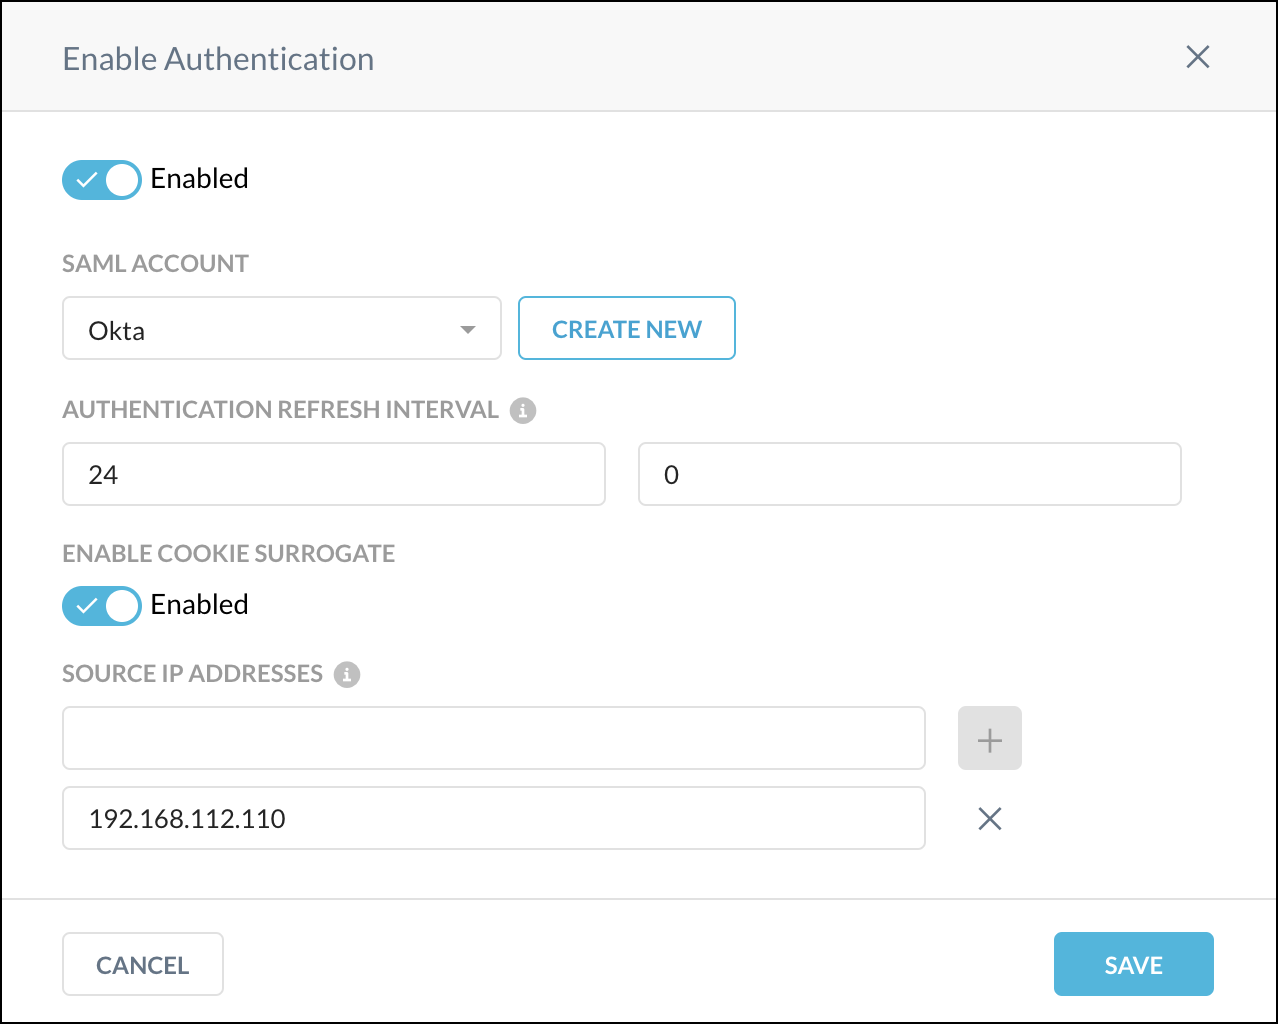
To use a cookie surrogate, enable the Enable Cookie Surrogate toggle, and then enter the source IP address (like 1.1.1.1) or subnet (like 1.1.1.0/24) for the cookie surrogate in the Source IP Addresses text field and click the + button.
A cookie surrogate is useful in cases where users are behind a NAT device and the Netskope Security Cloud Platform sees the same IP for all the users that are behind NAT. When this feature is enabled, the cookie surrogate resolves this by using a cookie to fetch user identity. For this purpose, enter the private IP address of the NAT.
To refresh the authentication token after a specified length of time, enter the days and hours for the Authentication Refresh Interval. This feature is optional; the default is 7 days, the minimum is 1 day, and the maximum is 180 days.
Note
The ability to enter minutes for the Authentication Refresh Interval is a Controlled General Availability feature. When this feature is enabled, the minimum is 1 hour. If you want to enable this feature in your tenant, contact your sales team.
If native apps on desktops are involved, refer to the following Note:
Note
Cookie Surrogate Use Only
Native apps on a desktop that do not honor cookie redirects, or background traffic from a browser such as .js and .css that do forward cookies or support redirects, may not have user identity available. When user identity is unavailable:
Policies that are user specific for access to specific apps, instances, or SSL decryption, etc., will not be enforced.
Events (Application/Page) will not show user information, but will show the IP address of the user.
With cookie surrogate, IdP authentication will happen for each browser instance because it is cookie dependent.
Device information is not supported with cookie surrogate.
Remediate actions include bypassing authentication for problematic domains.
When finished, click Save.
Authentication Bypass Settings
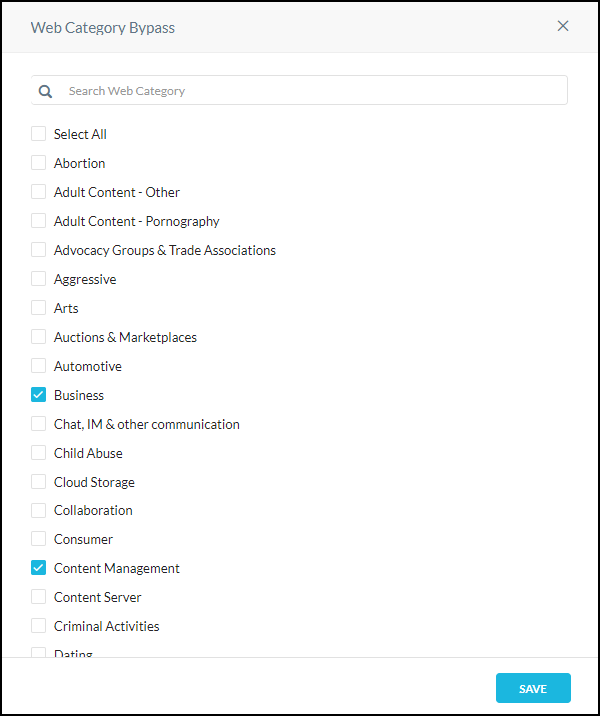
You can specify domains, web categories, and network IP addresses for which user authentication is not required.
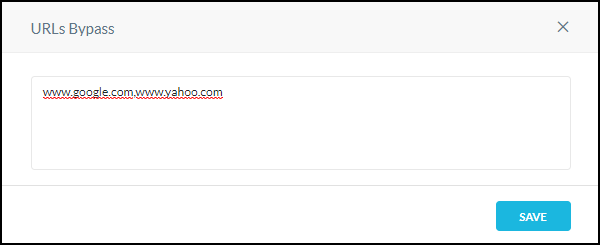
Click Edit and add comma-separated URLs to bypass. When finished, click Save.
 |
Note
Adding your IdP domains here are recommended.
Click Edit and add comma-separated URLs to bypass. When finished, click Save.
 |
Click Edit and search for source networks. For each of the networks found, you can choose to bypass based on User IPs or Egress IPs (just one, not both).
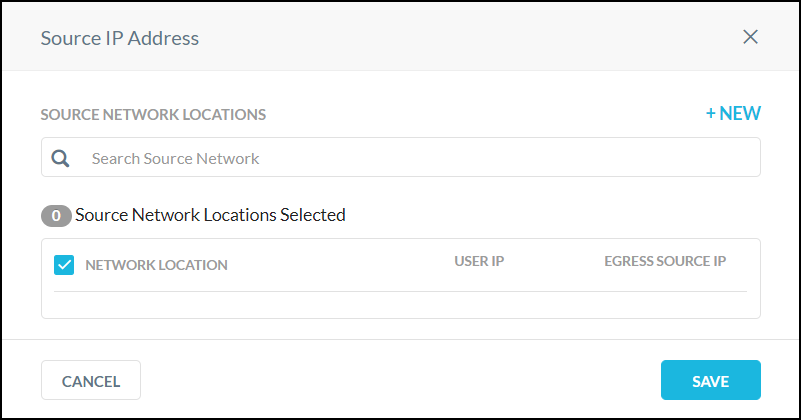 |
If search does not locate the network you want to bypass, click +New to add it.
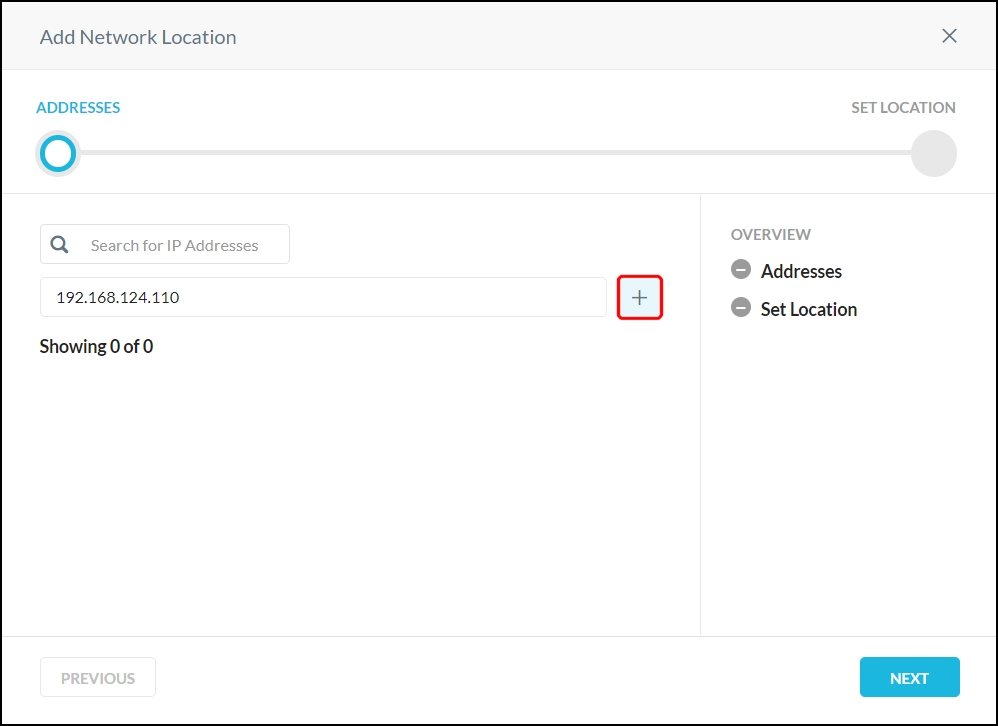 |
Enter the IP address, IP address range, or CIDR netmask in the text field, and then click the adjacent + button. Multiple network locations can be added. After adding the network locations, click Next, enter a name, and then click Save Network Location.
Select User IP or Egress Source IP for each network location, and then click Save.