Forward to Proxy Integration
Use this page to configure custom proxy settings. Once configured you can use the Forward to Proxy action in your Real-time Protection policy to redirect traffic to this proxy. But, before you begin, upload your self-signed trusted certificate to Netskope. For more information, refer to Certificates.
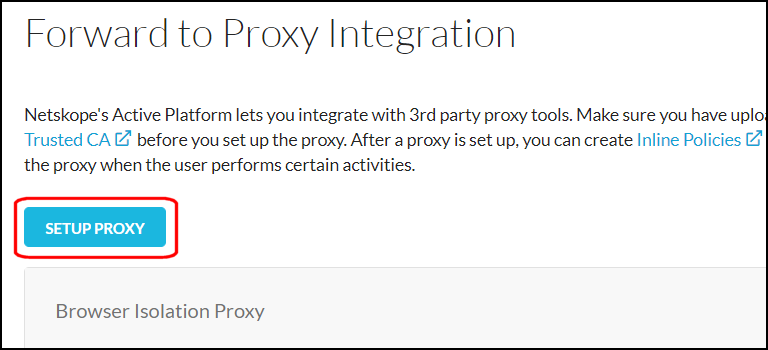
Go to Settings > Manage > Forward to Proxy Integration.
Click Setup Proxy.

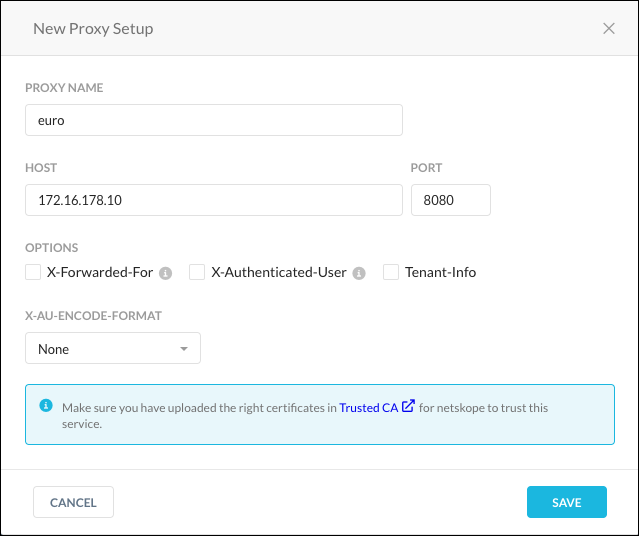
Enter these parameters:
Proxy Name: Enter a meaningful name.
Host: Enter a domain name or IP address.
Port: Enter a port number.
Options: (Optional). For embedding traffic source identifiers, choose either the source IP address (X-Forwared_For) or username (X-Authenticated-User) or Tenant-Info (a unique identifier identifying if the tenant is attached). You can also use base64-encoded values (X-AU-ENCODE-FORMAT).
The X-AU-ENCODE-FORMAT allows you to chose from three formats from:
None: The username is sent without modification. For example, johndoe@example.com
Domain User: The user name is sent as a base64 encoded value long with the domain url. For example: base64Encode(“example.com/johndoe“).
Schema Domain User: The user name is sent as a base64 encoded value with full AD url. For example: base64Encode(“WinNT://example.com/johndoe“)
Note
Only WinNT schema is supported.

Click Save.
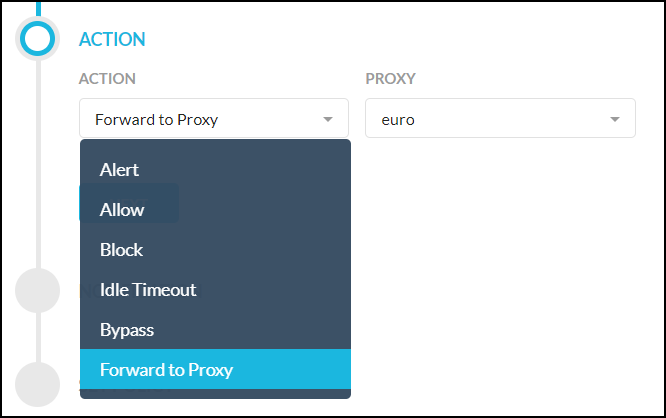
To use this proxy in your Real-time Protection policy, select Forward to Proxy under Action, and then select the configured proxy.
 |