Trend Micro Vision One Plugin for Threat Exchange
This document explains how to configure the Trend Micro Vision One integration with the Cloud Threat Exchange module of the Netskope Cloud Exchange platform. This plugin supports sharing of URLs, Domains, Sha256 File Hashes and IP addresses to Netskope that have been identified by Trend Micro Vision One. This plugin also allows for sharing of URLs and SHA256 File Hashes to Trend Micro Vision One.
Fetched indicator types | URL, IP, SHA256, Domain |
Shared indicator types | URL, SHA256 |
To complete this configuration, you need:
A Netskope tenant (or multiple, for example, production and development/test instances).
A Netskope Secure Web Gateway subscription for URL sharing.
A Threat prevention subscription for malicious file hash sharing.
A Netskope Cloud Exchange tenant with the Threat Exchange module already configured.
A Trend Micro Vision One account.
Connectivity to the following hosts: https://api.xdr.trendmicro.com for the America region. For other regions, refer to: https://automation.trendmicro.com/xdr/Guides/Regional-Domains.
Get your Trend Micro auth token.
Configure the Trend Micro Plugin.
Configure sharing for Netskope and Trend Micro.
Validate the Trend Micro Plugin.
Click play to watch a video.
Go to https://tm.login.trendmicro.com/ and log in with your credentials. This site is for the America region; use the one for your region.
Go to Administration > User Accounts.
Click the account name that you use for API access. Note that a simple Analyst role has permission for these operations, so there's no need for a Master Admin Account. You can also create a custom role that have these permissions:
Suspicious Object Management
View, filter, and search
Manage lists and configure settings
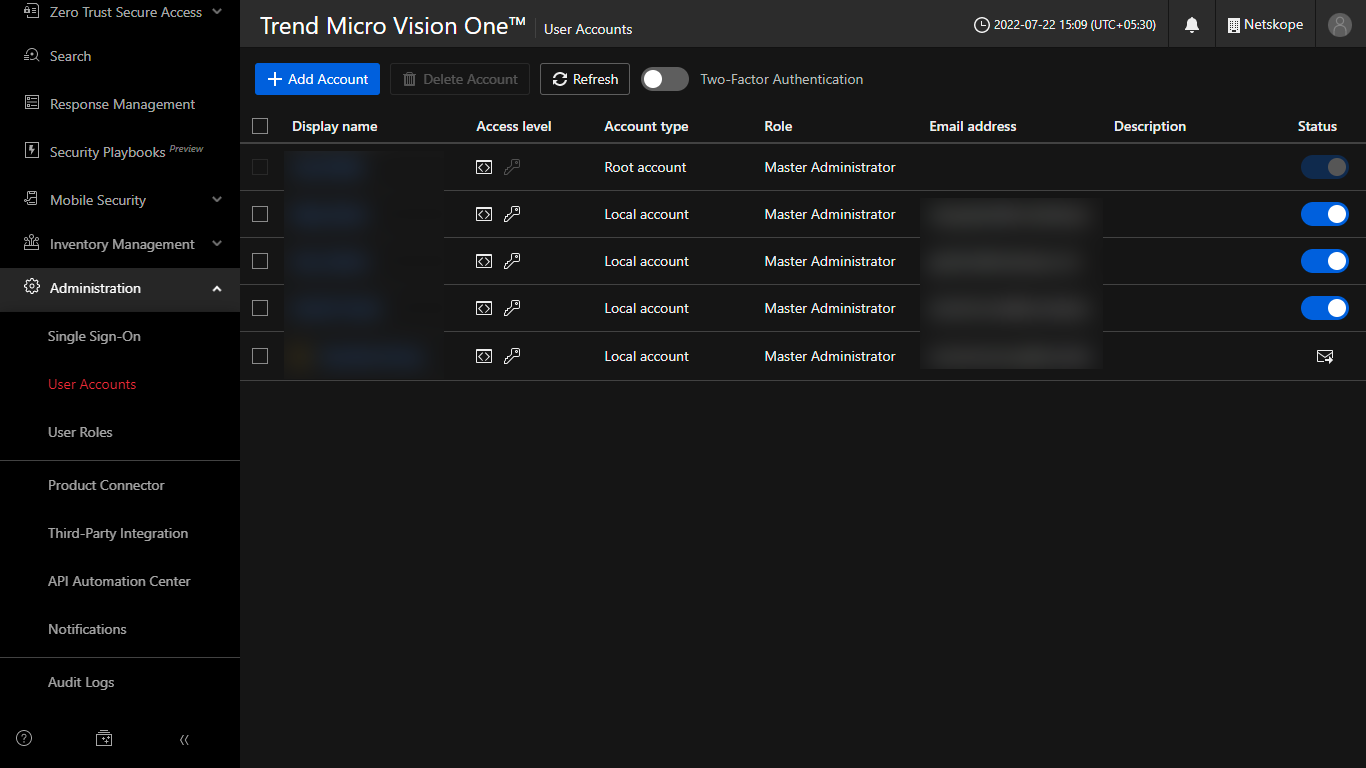
Verify that the Access level is set to Trend Micro Vision One console and API.
Click Generate new authentication token.
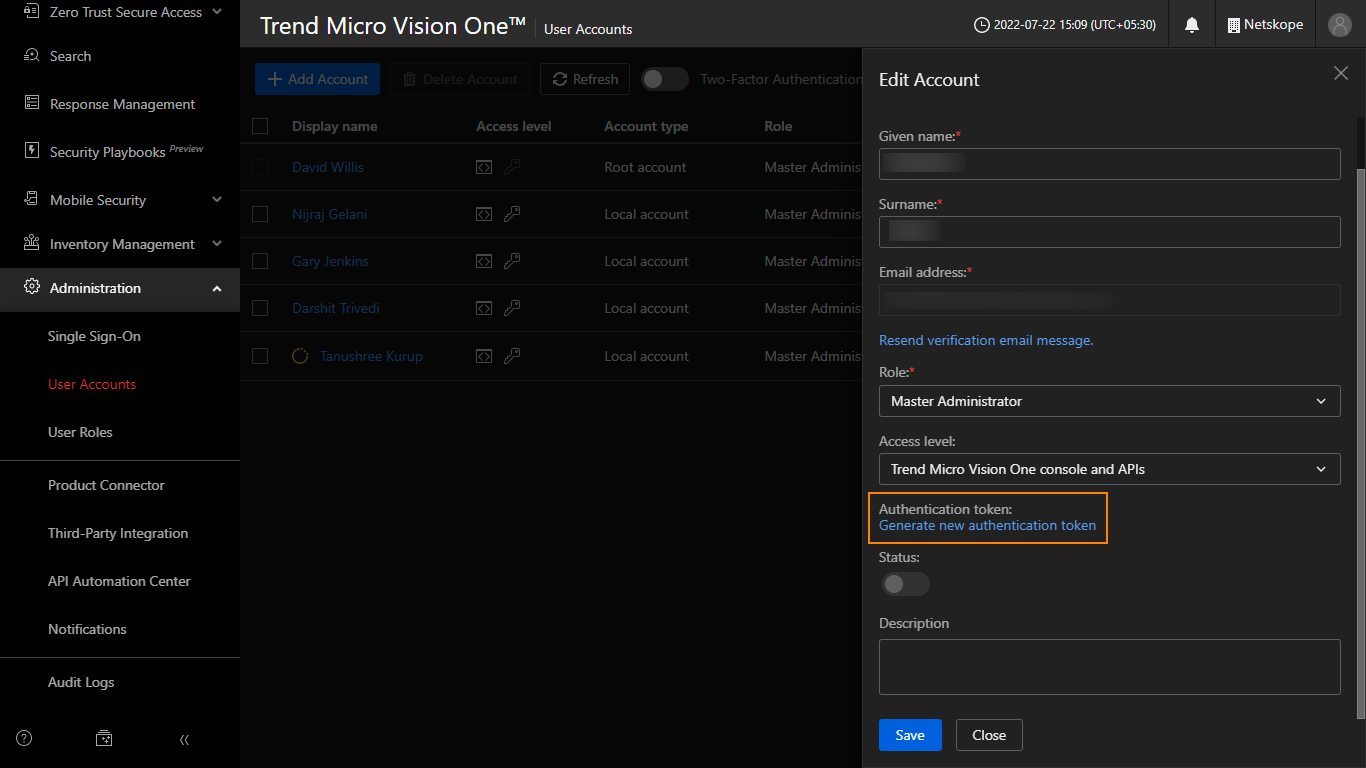
Copy and save the generated Authentication Token because it will be displayed only once.
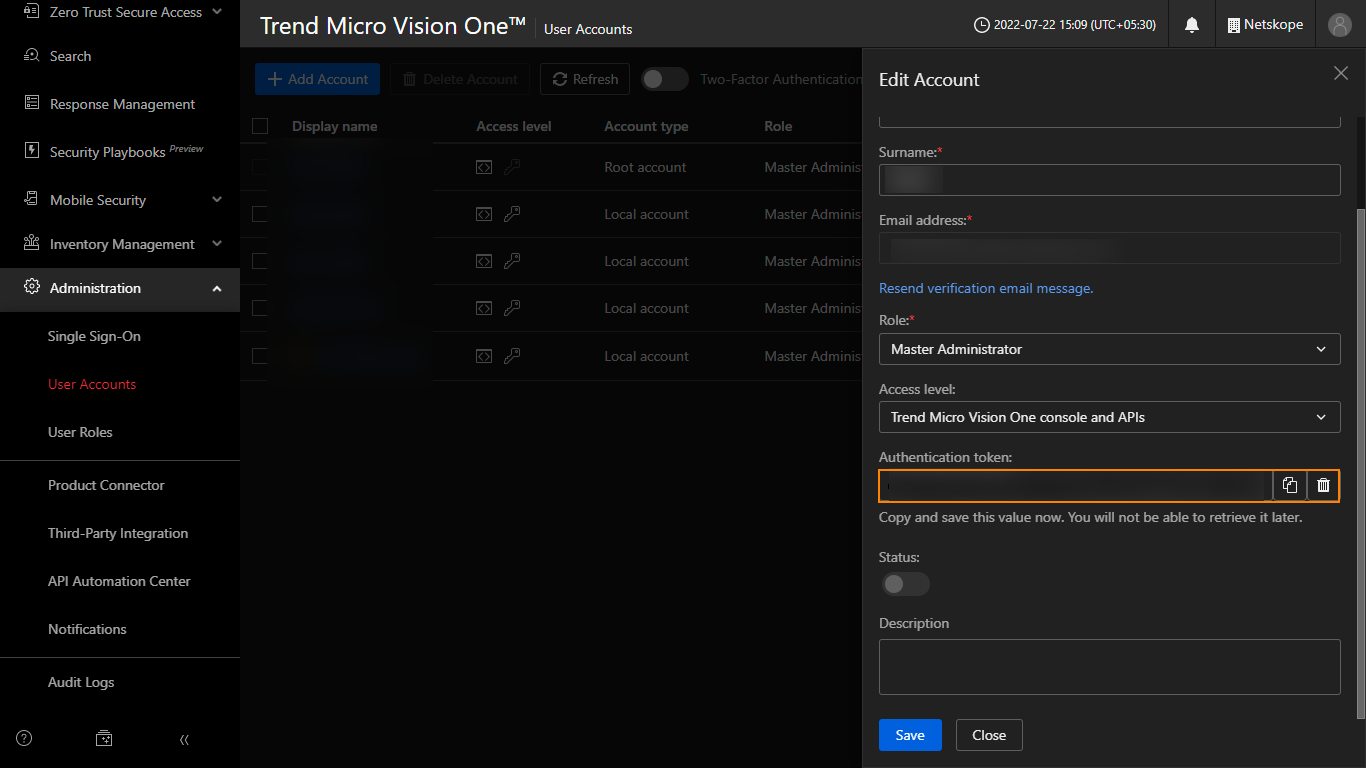
Click Save.
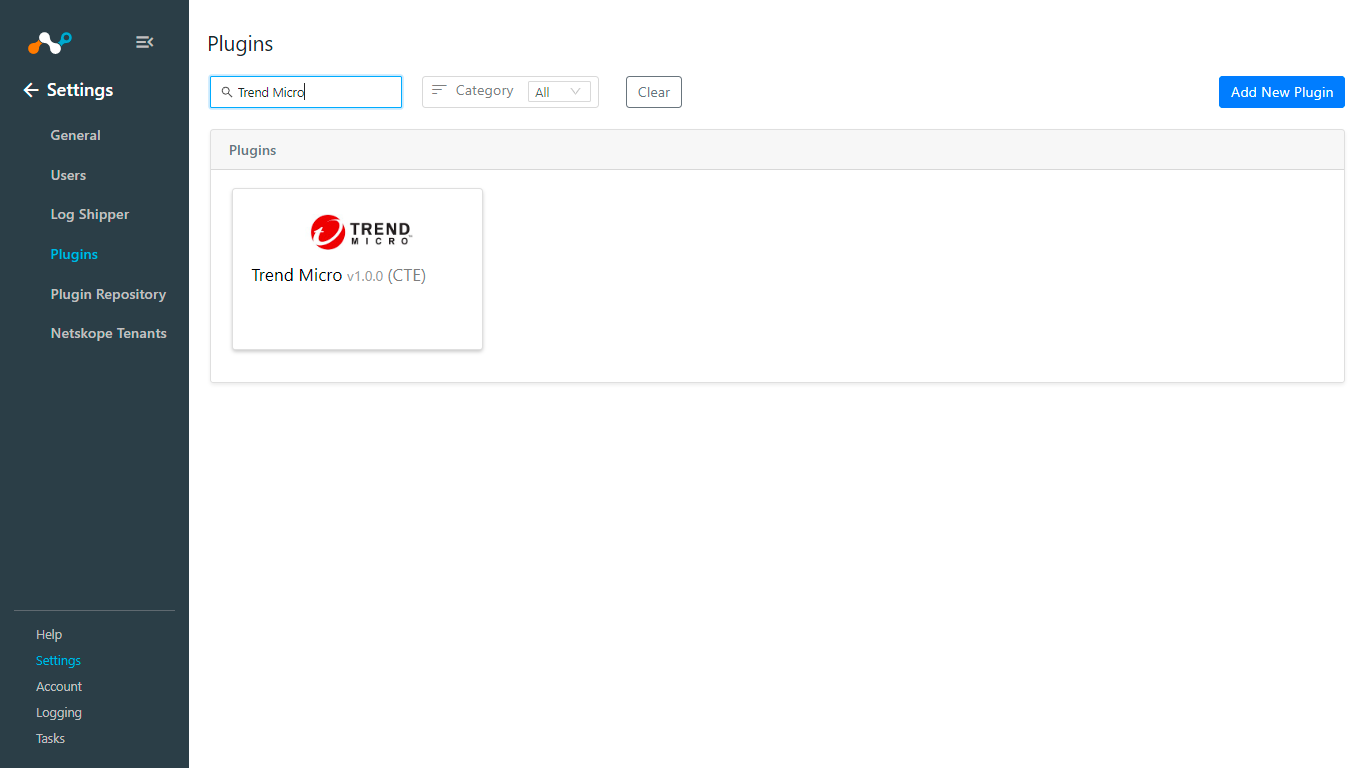
In Cloud Exchange, go to Settings and click Plugins.
Search for and select the Trend Micro Plugin box to open the plugin creation pages.
Enter and select the Basic Information on the first page:
Configuration Name: Enter a name appropriate for your integration.
Sync Interval: Adjust to environment needs. We recommend not to go below 5 minutes for production environments.
Aging Criteria: Expiration Date for indicators.
Override Reputation: Leave Default.
Enable SSL verification: Enable if SSL verification is required for communication.
Use System Proxy: Enable if proxy is required for communication
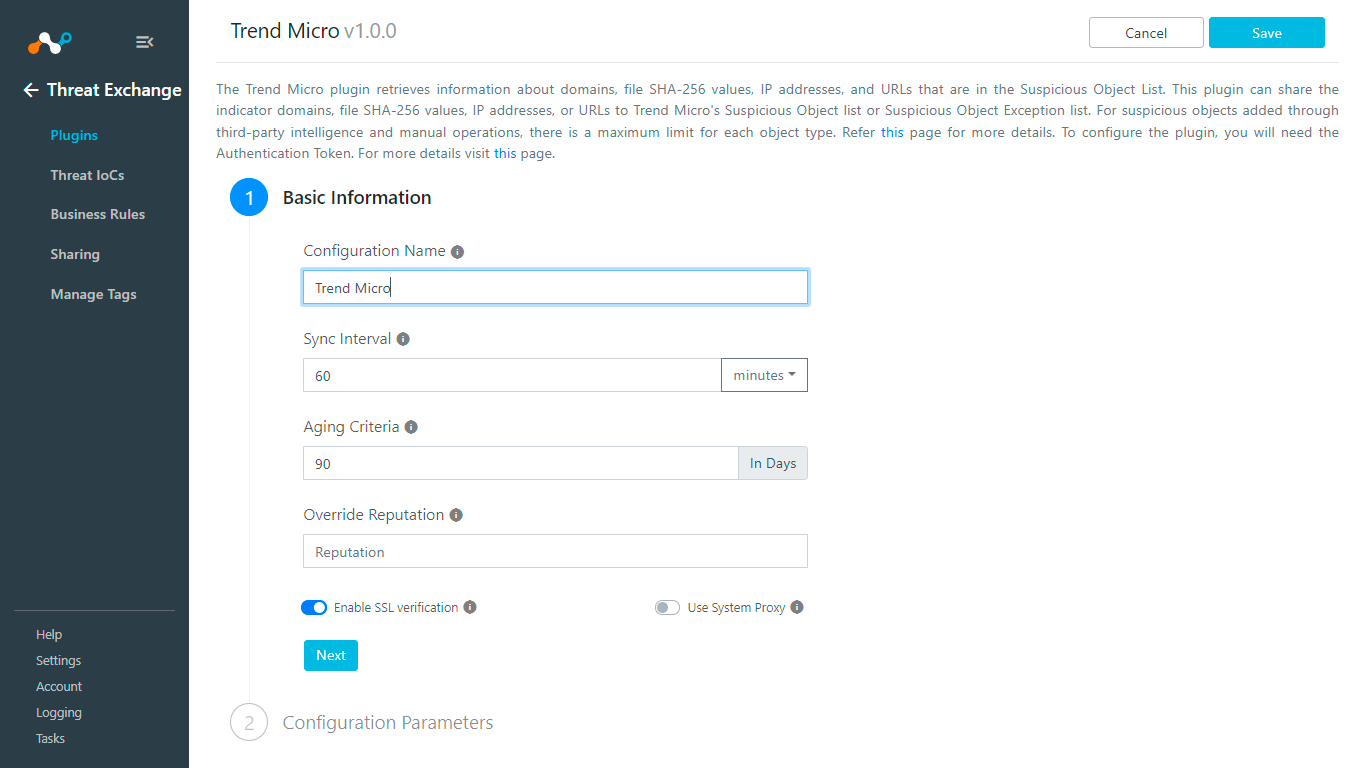
Click Next.
Enter and select these Configuration Parameters:
Data Region: Select a Region for your Trend Micro Account.
Authentication Token: Enter your Trend MicroAuthentication Token obtained previously.
Enable Polling: Enable to start pulling data.
Initial Range (in days): Enter an Initial range to fetch indicators.
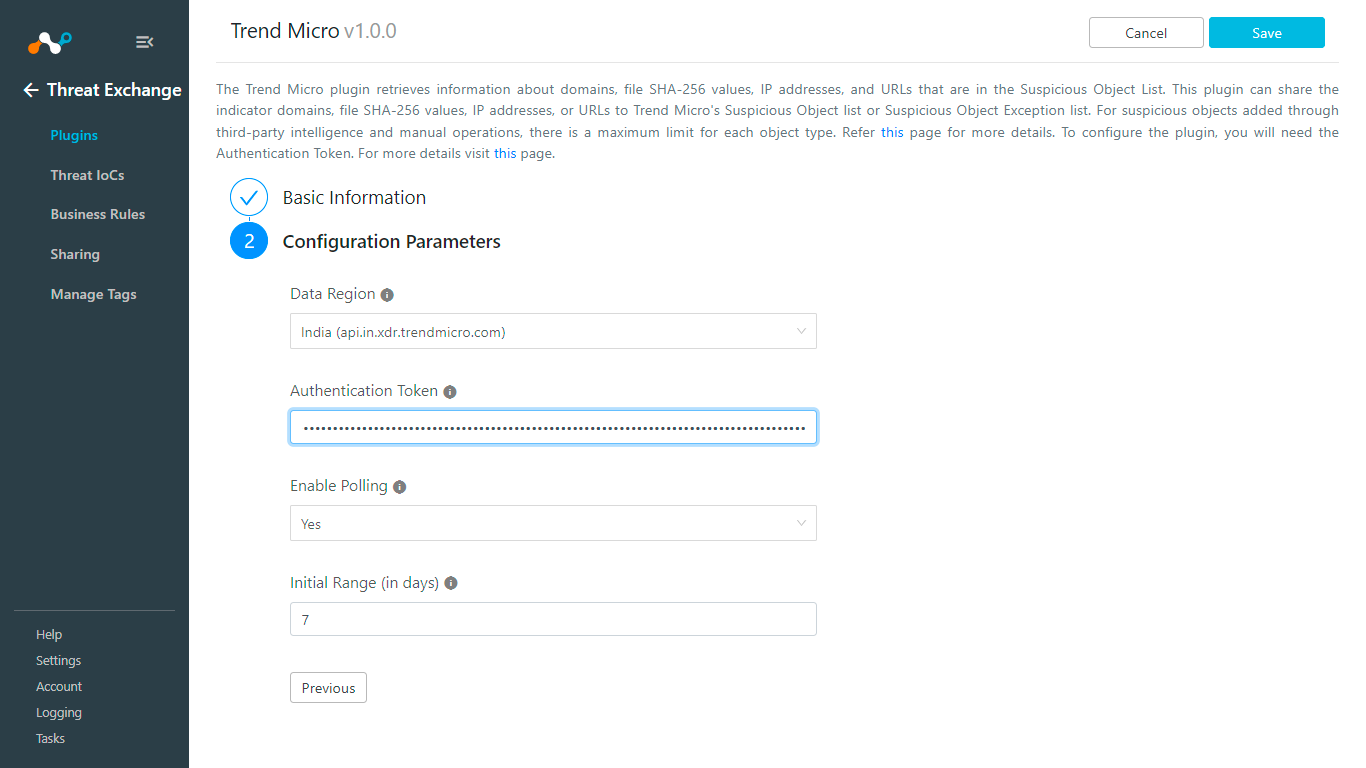
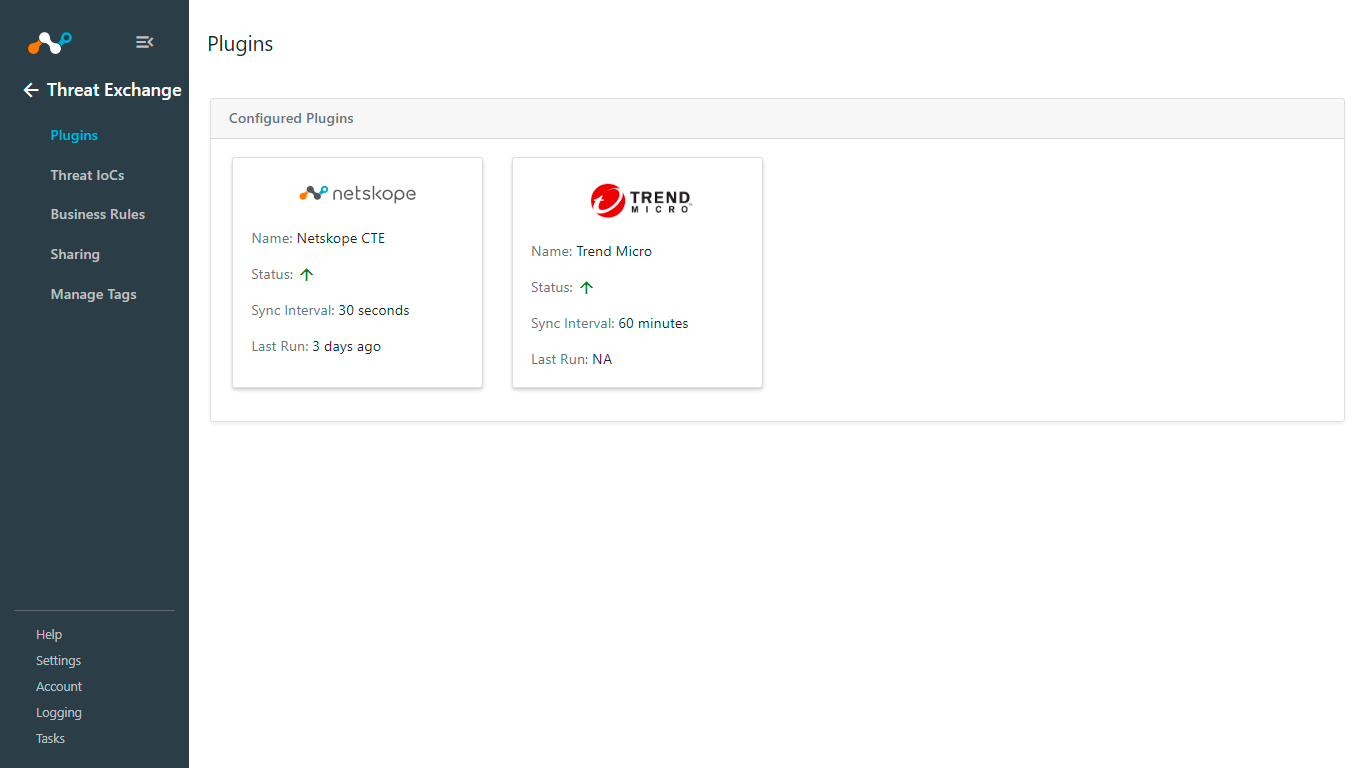
Click Save.
Add to Suspicious Object List
Add to Suspicious Object will share indicators to Trend Micro’s Suspicious Object List.
Create a Business Rule.
Go to Threat Exchange > Sharing.
Click Add Sharing Configuration.
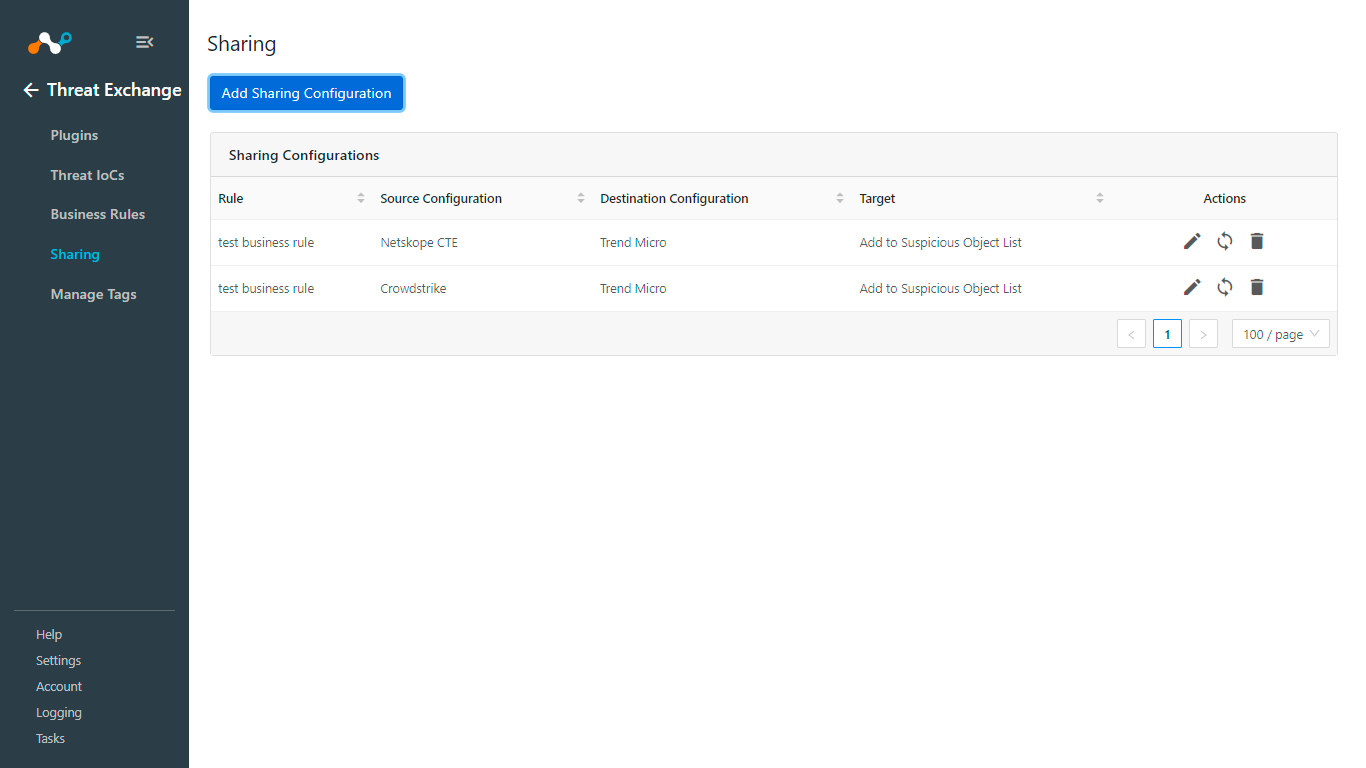
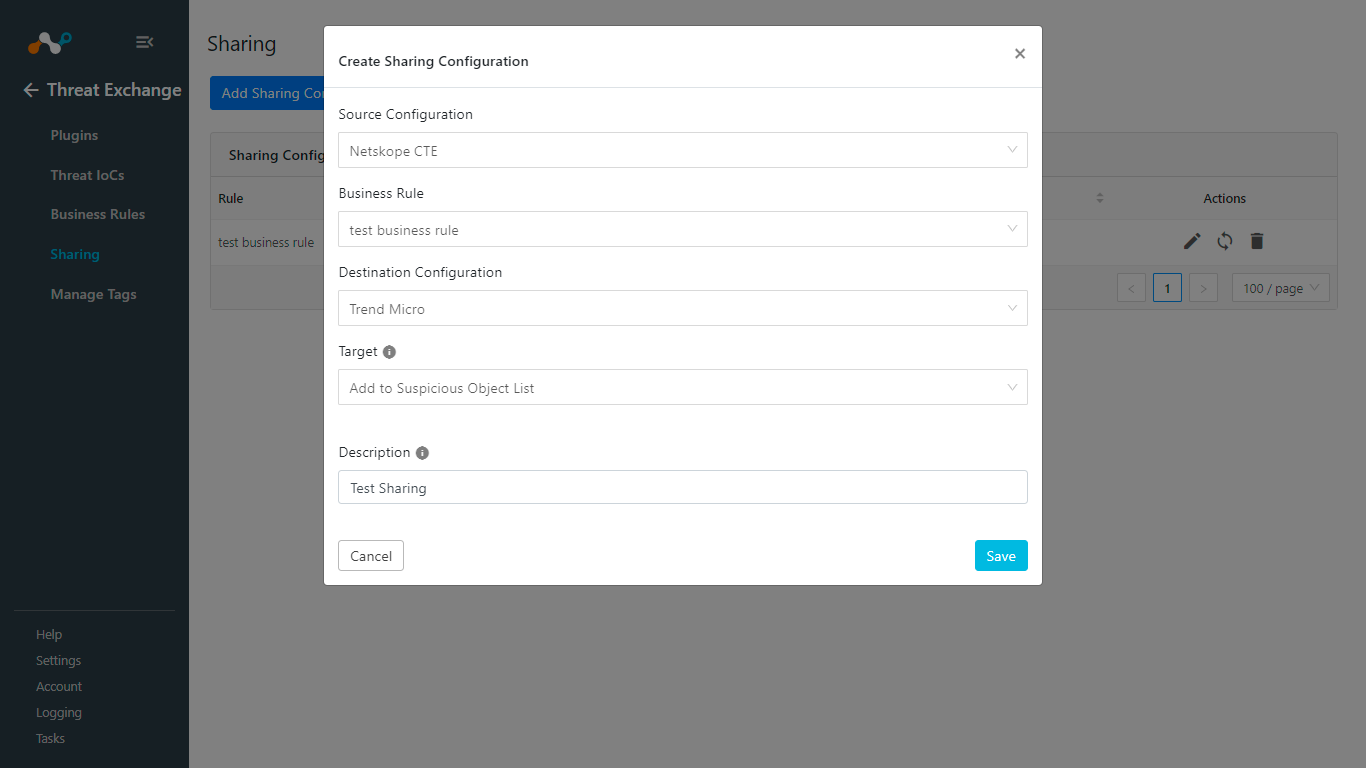
From the Source Configuration dropdown, select a source plugin configuration.
From the Business Rule dropdown, select a Business Rule.
From the Destination Configuration dropdown, select Trend Micro.
From the Target dropdown, select Add to Suspicious Object List.
Add a Description.
Click Save.
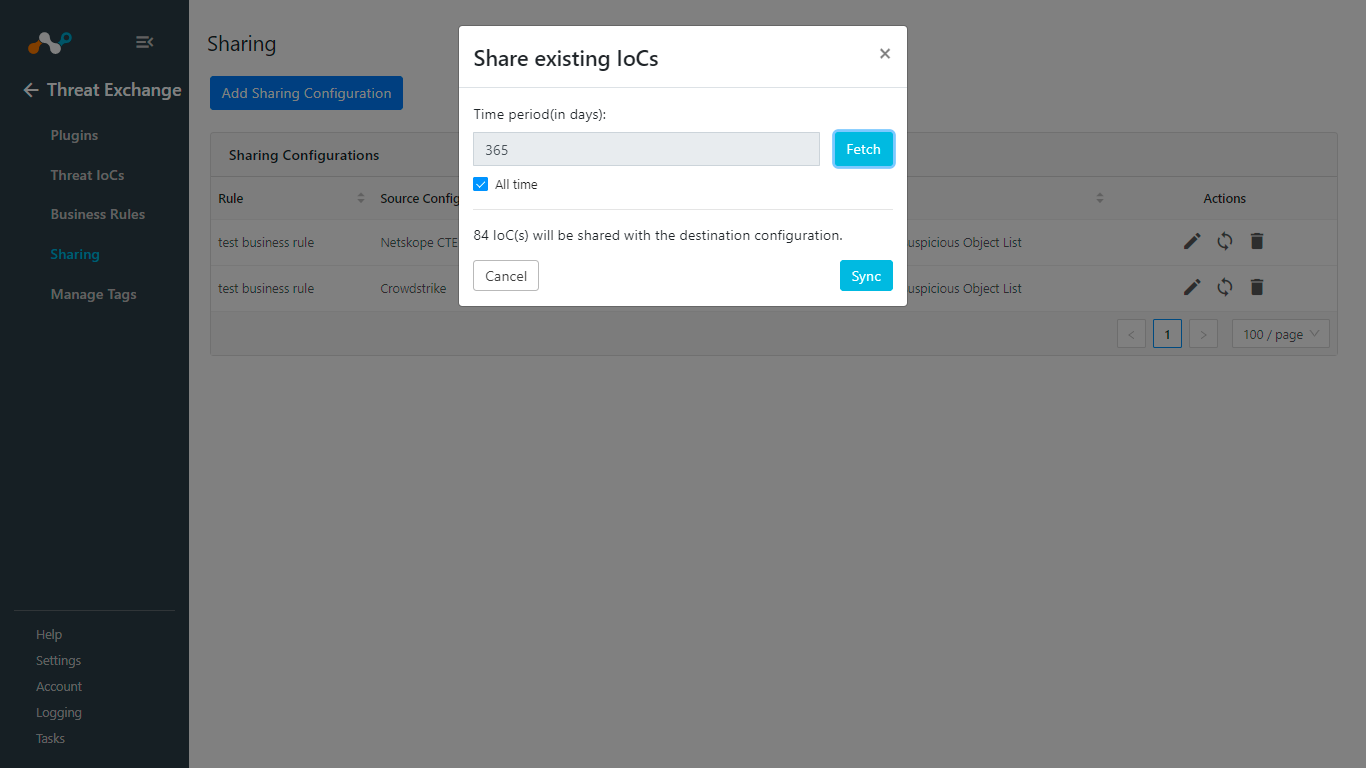
Click Sync.
Add Time Period and click Fetch. The number of IoCs will be shared when you click Sync.
Click Save.
Add to Suspicious Object Exception List
Add to Suspicious Object will share indicators to Trend Micro’s Suspicious Object Exception List.
Create a Business Rule.
Go to Threat Exchange > Sharing.
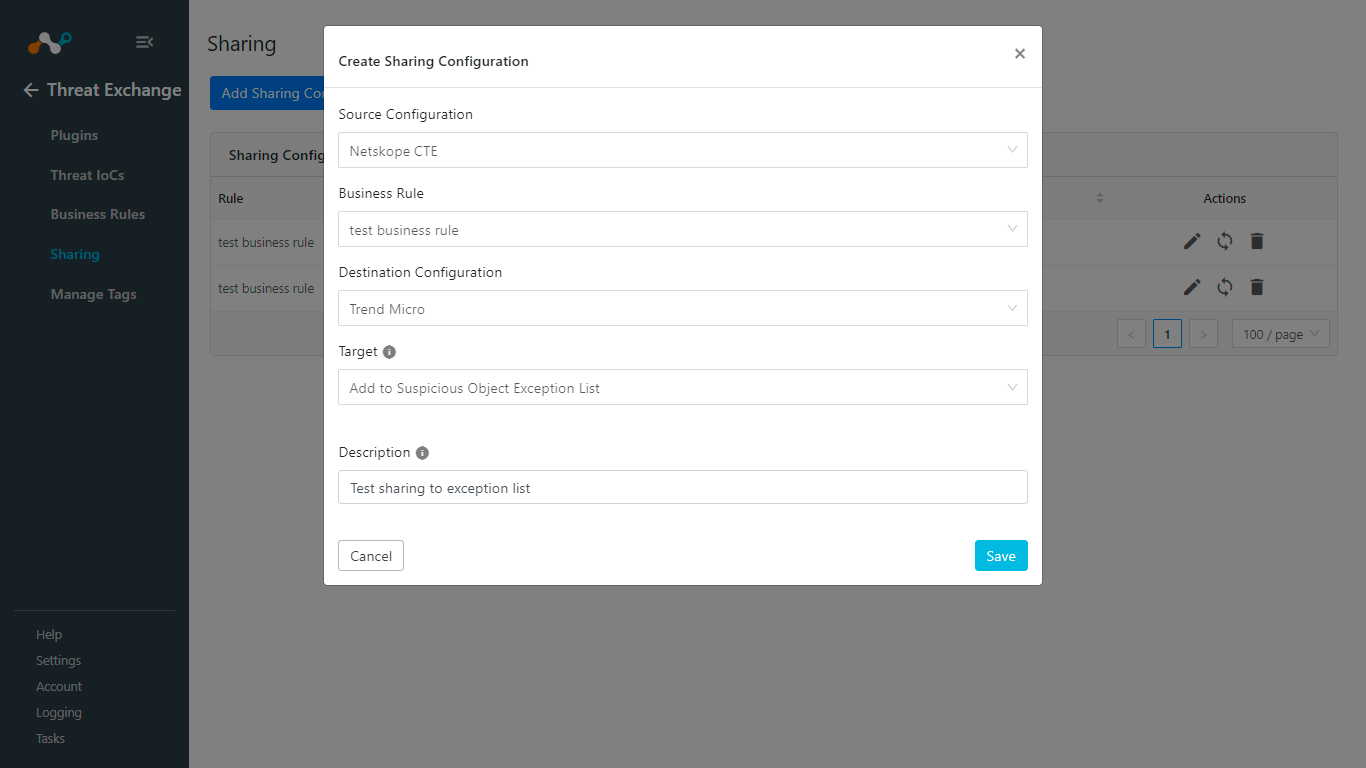
Click Add Sharing Configuration.
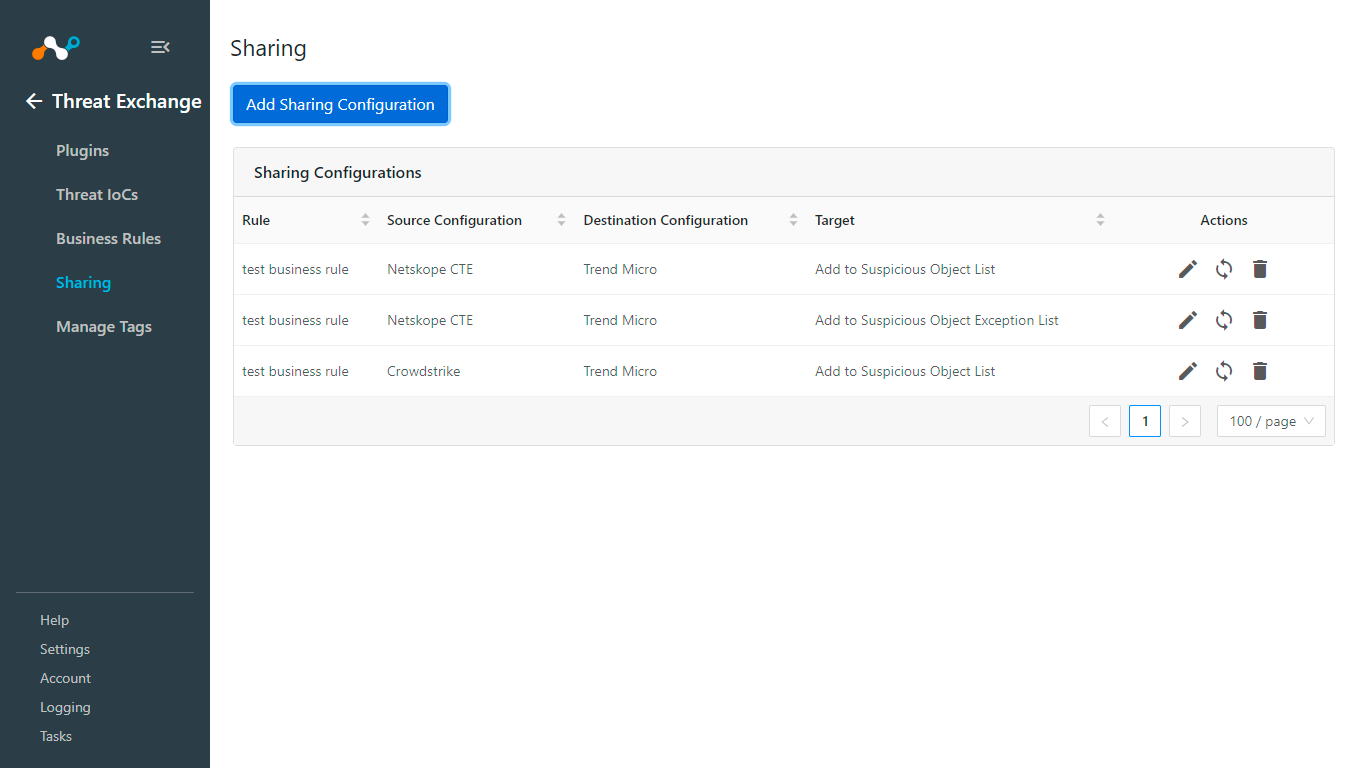
From the Source Configuration dropdown, select thes ource plugin configuration.
From the Business Rule dropdown, select a Business Rule.
From the Destination Configuration dropdown, select Trend Micro.
From the Target dropdown, select Add to Suspicious Object Exception List.
Add a Description.
Click Save.
Click Sync.
Add a Time Period and click Fetch. The number of IoCs will be shared when you click Sync.
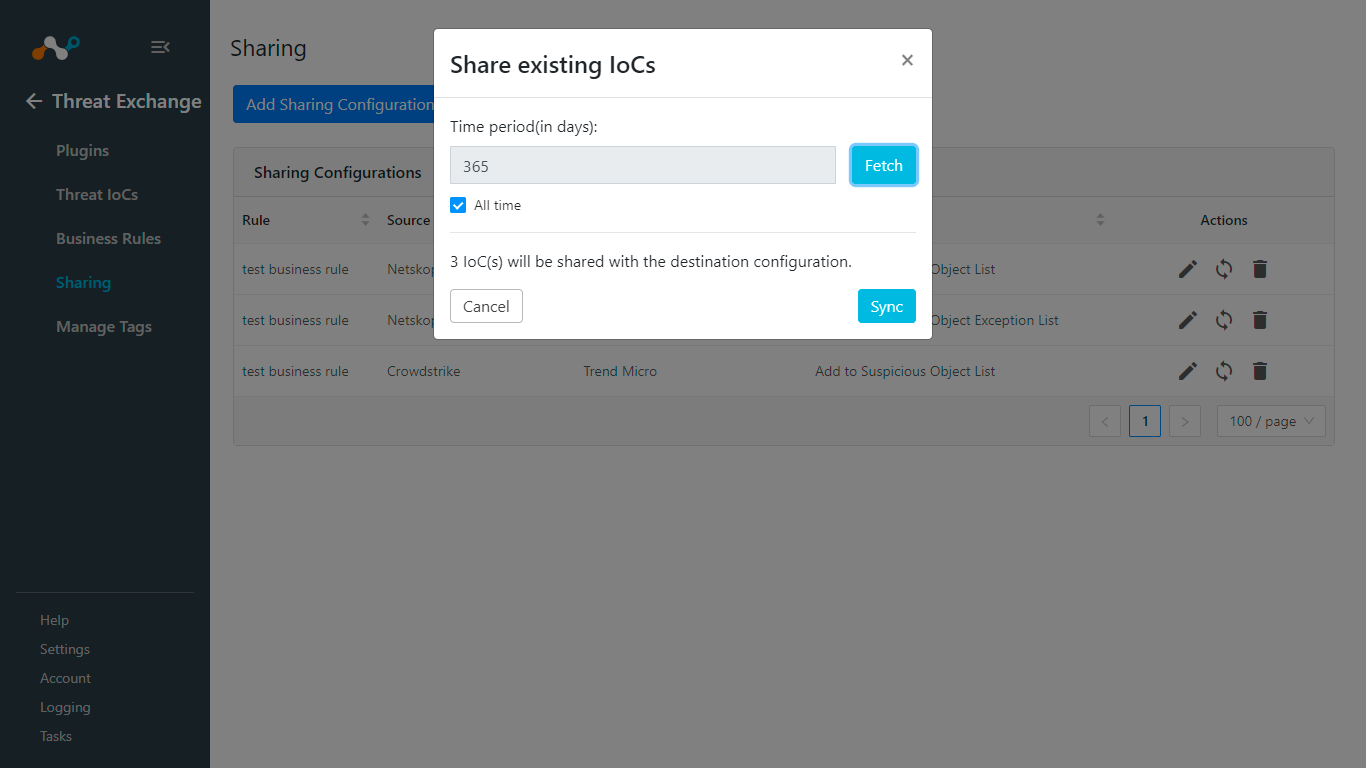
Click Save.
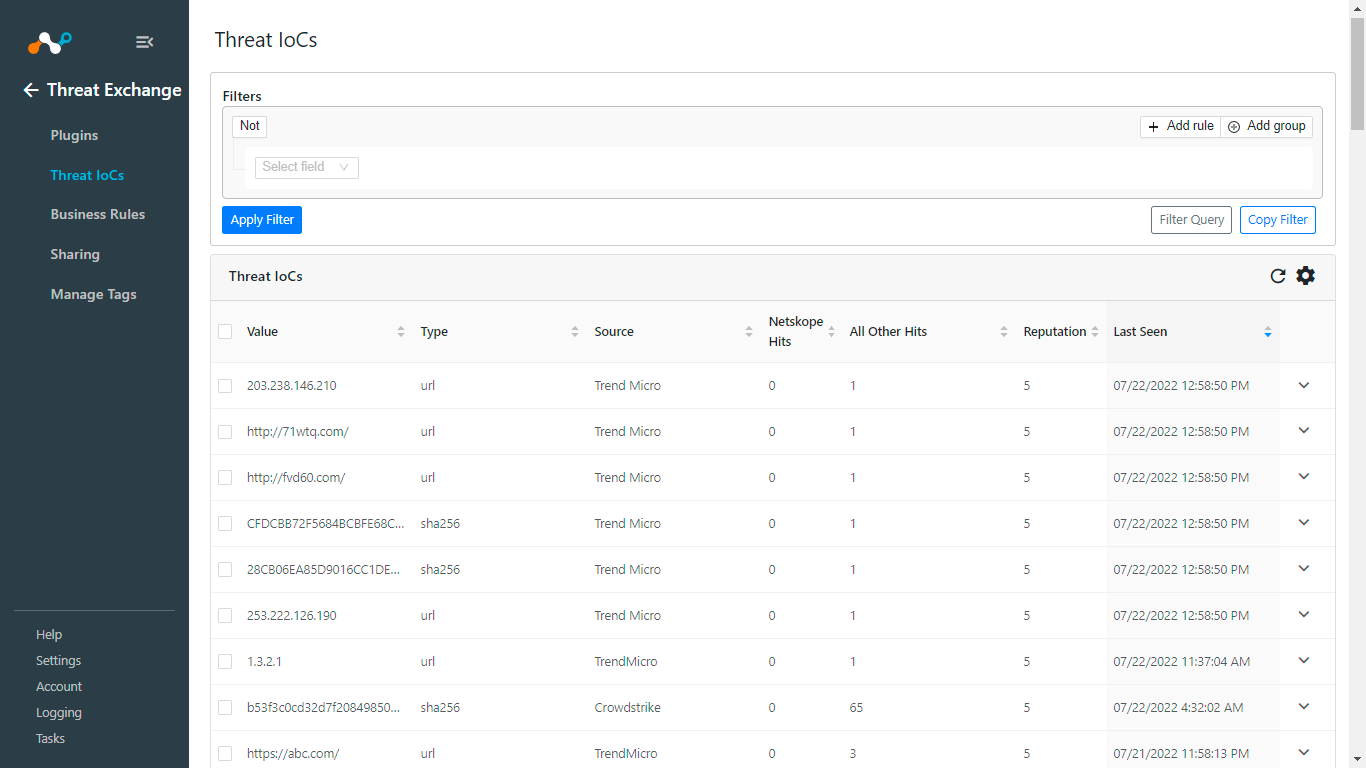
Pulling of Indicators
In Threat Exchange, select Threat IoCs.
 |
Sharing of Indicators
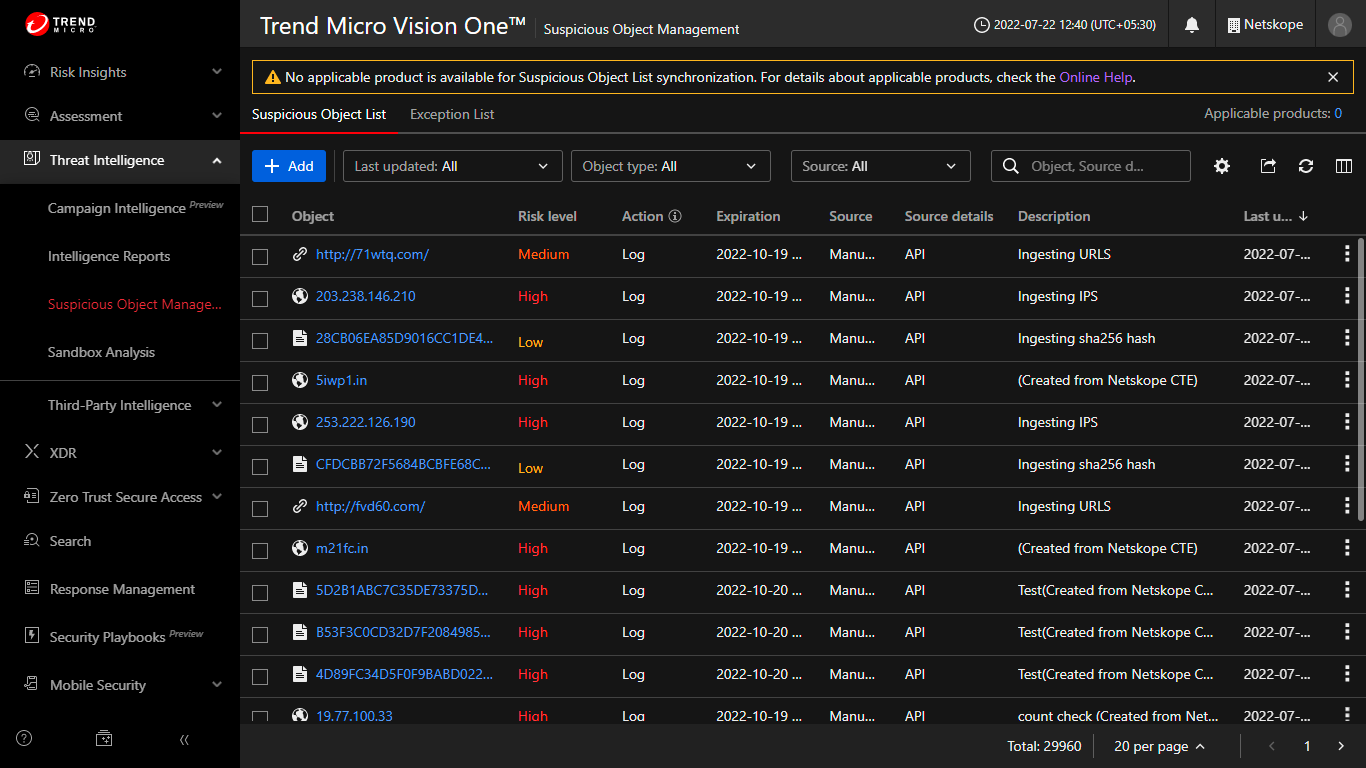
Log in to the Trend Micro Vision One console.
Go to Threat Intelligence > Suspicious Object Management.
Select the Suspicious Object List or Suspicious Object Exception List tab on top.
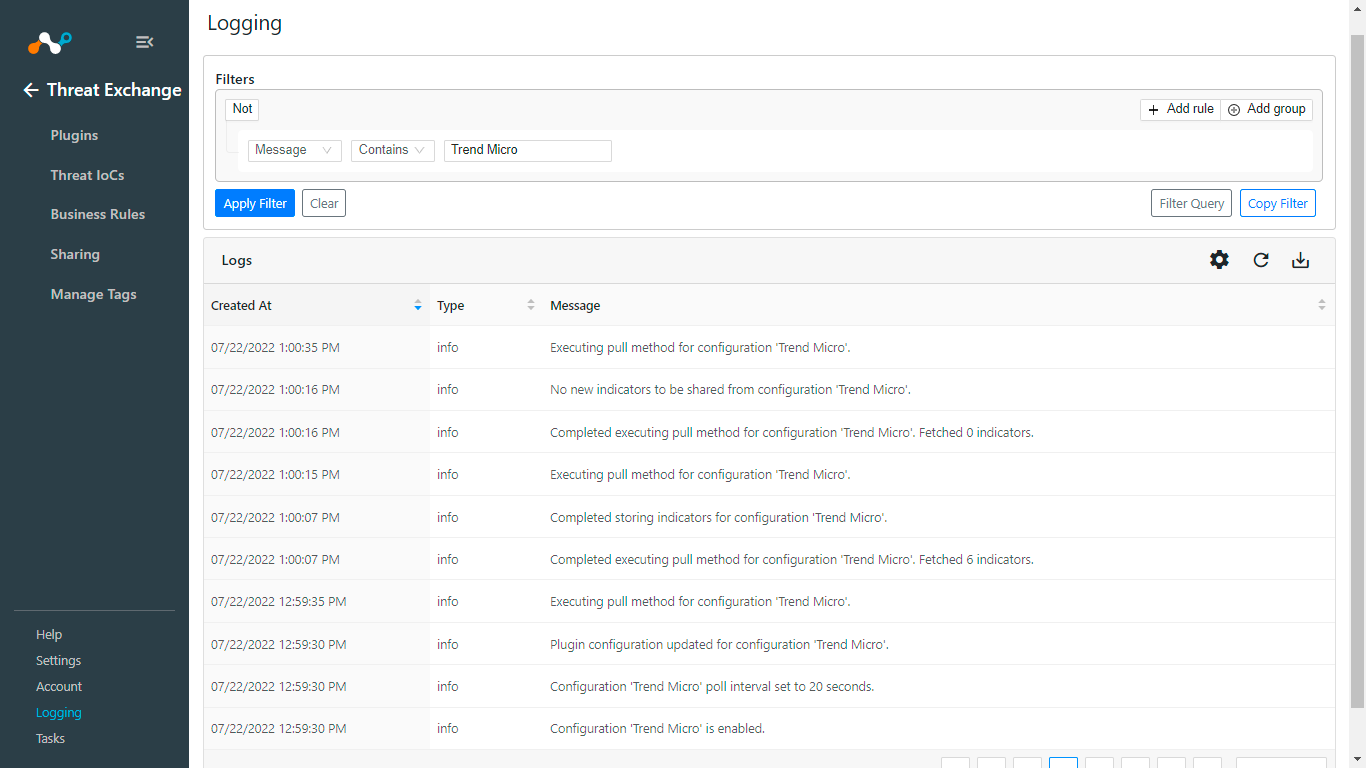
If data is not being fetched from the platform, you can look at the logs in Cloud Exchange. In Cloud Exchange select Logging. Look through the logs for errors.
