Best Practices for Threat Protection Policies
Netskope recommends creating three Threat Protection policies for coverage:
The first policy (i.e., [Threat] Block Security Risk Categories) blocks all users from accessing websites that are known security risks. These websites are entries in a custom category and URL list you can create to tailor to your organization's needs.
The second policy (i.e., [Threat] Block Malware) blocks all severity levels of malware from being downloaded or uploaded from all users across all categories of content. Netskope notifies the admin for each detected event.
The third policy (i.e., [Threat] Allow Security Risk Exceptions) allows all users access to URLs that aren't a security risk for your organization. These websites are entries in a custom category and URL list you can create to tailor to your organization's needs.
 |
Recommended Custom Categories
Before creating your first recommended Threat Protection policy, you must create two custom categories:
One that includes all predefined high security risk categories, a custom global URL blocklist, and a custom URL allowlist for security risk exceptions.
Another that only includes the custom URL allowlist for security risk exceptions.
Go to Policies > Web.
In the Custom Categories tab, click New Custom Category.
In the New Custom Category window:
Custom Category Name: Enter a name for the custom category.
Categories: Select all the Netskope predefined security risk categories.
Security Risk
Security Risk - Ad Fraud
Security Risk - Attack
Security Risk - Botnets
Security Risk - Command and Control Server
Security Risk - Compromised/malicious sites
Security Risk - Cryptocurrency Mining
Security Risk - DGA
Security Risk - Hacking
Security Risk - Malware Call-Home
Security Risk - Malware Distribution Point
Security Risk - Miscellaneous
Security Risk - Phishing/Fraud
Security Risk - Spam sites
Security Risk - Spyware & Questionable Software
To learn more about security risks: About Malicious Sites.
URL List (Include): Select the custom URL list that contains risky URLs you want to block all users from accessing.
URL List (Exclude): Select the custom URL list that contains risky URLs you want to allow users access.
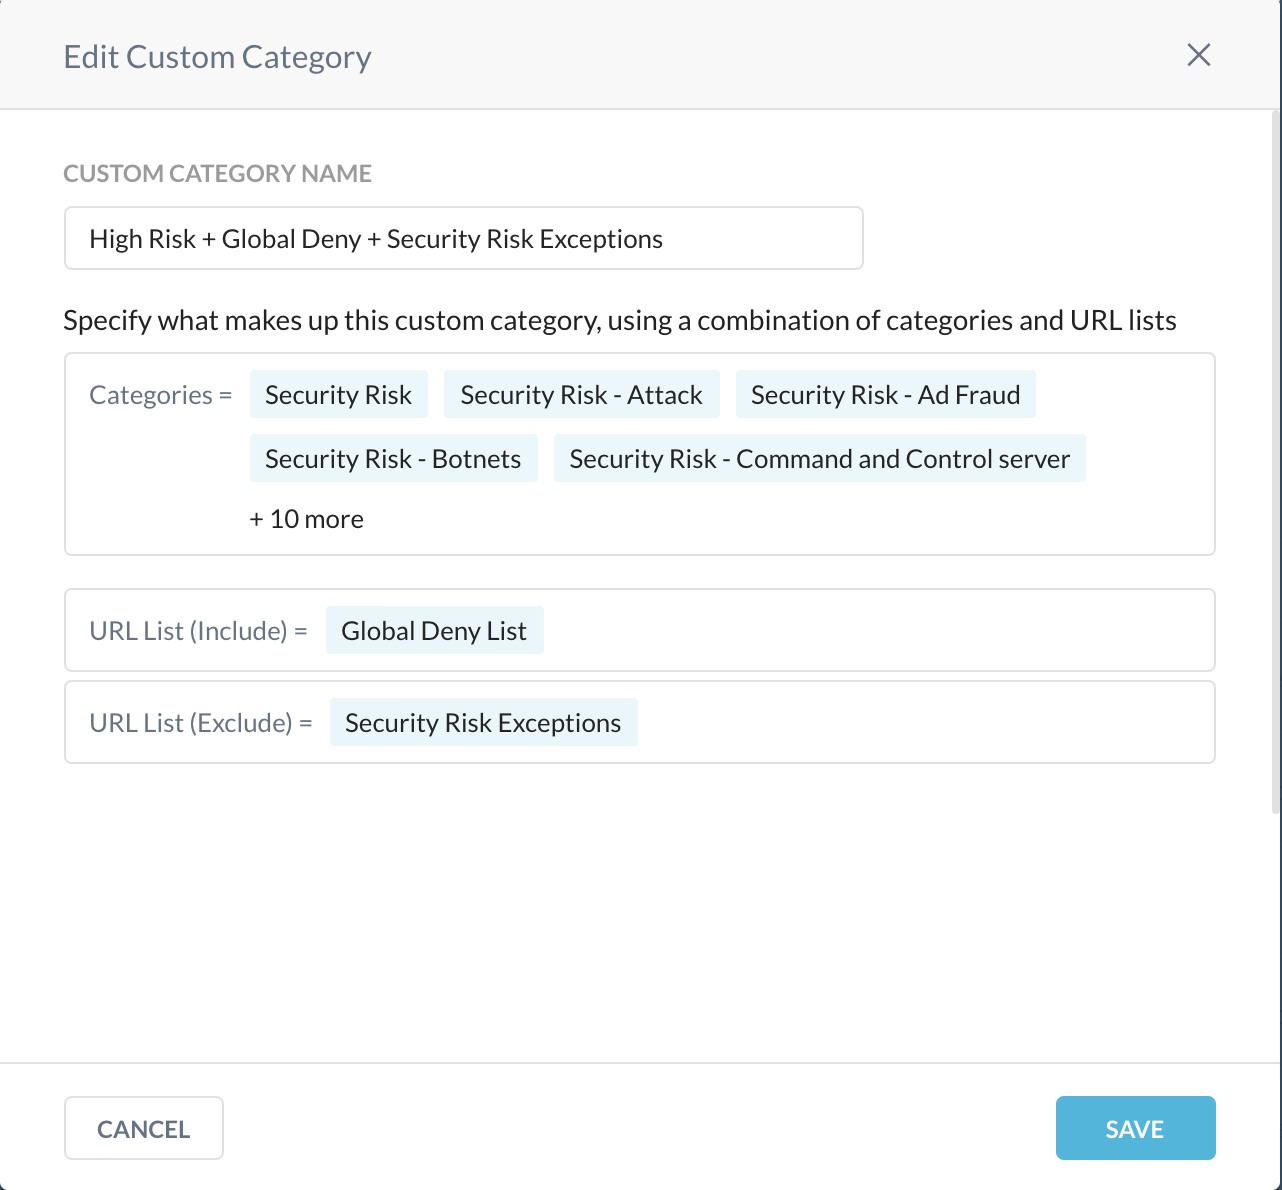
Click Save and then Apply Changes.
Repeat the above steps and create a second custom category that only contains the risky URLs you want to allow users access.
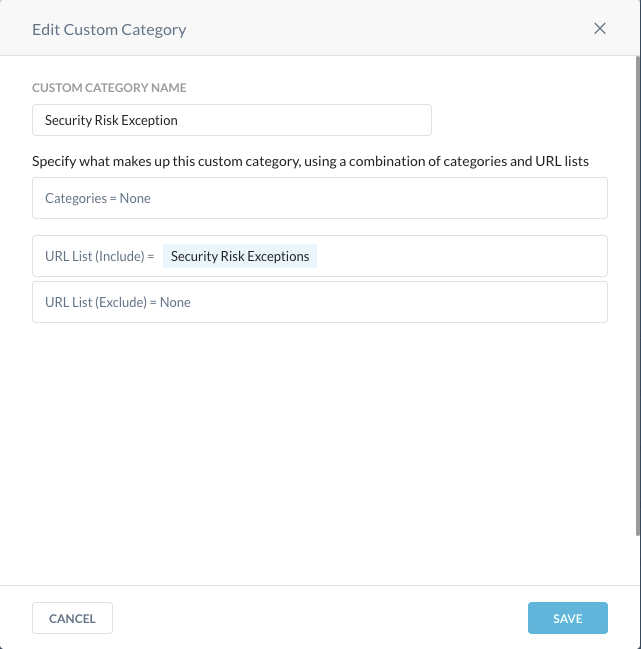
Recommended Threat Protection Policy #1
Use the recommended custom category above to create your first recommended Threat Protection policy that blocks all security risks.
Go to Policies > Real-time Protection.
Click New Policy and then Web Access.
On the Real-time Protection Policy page:
Source: Click X on the right to change scope to Any.
Destination: Choose Category, and select the recommended custom category you created above that contains the security risks you want to block. Ensure the Activities & Constraints is Any.
Profile & Action: Do the following.
Action: Choose Block.
Template: Choose a predefined or custom template that displays when Netskope blocks users from accessing a risky website.
Set Policy: Enter a name for the policy.
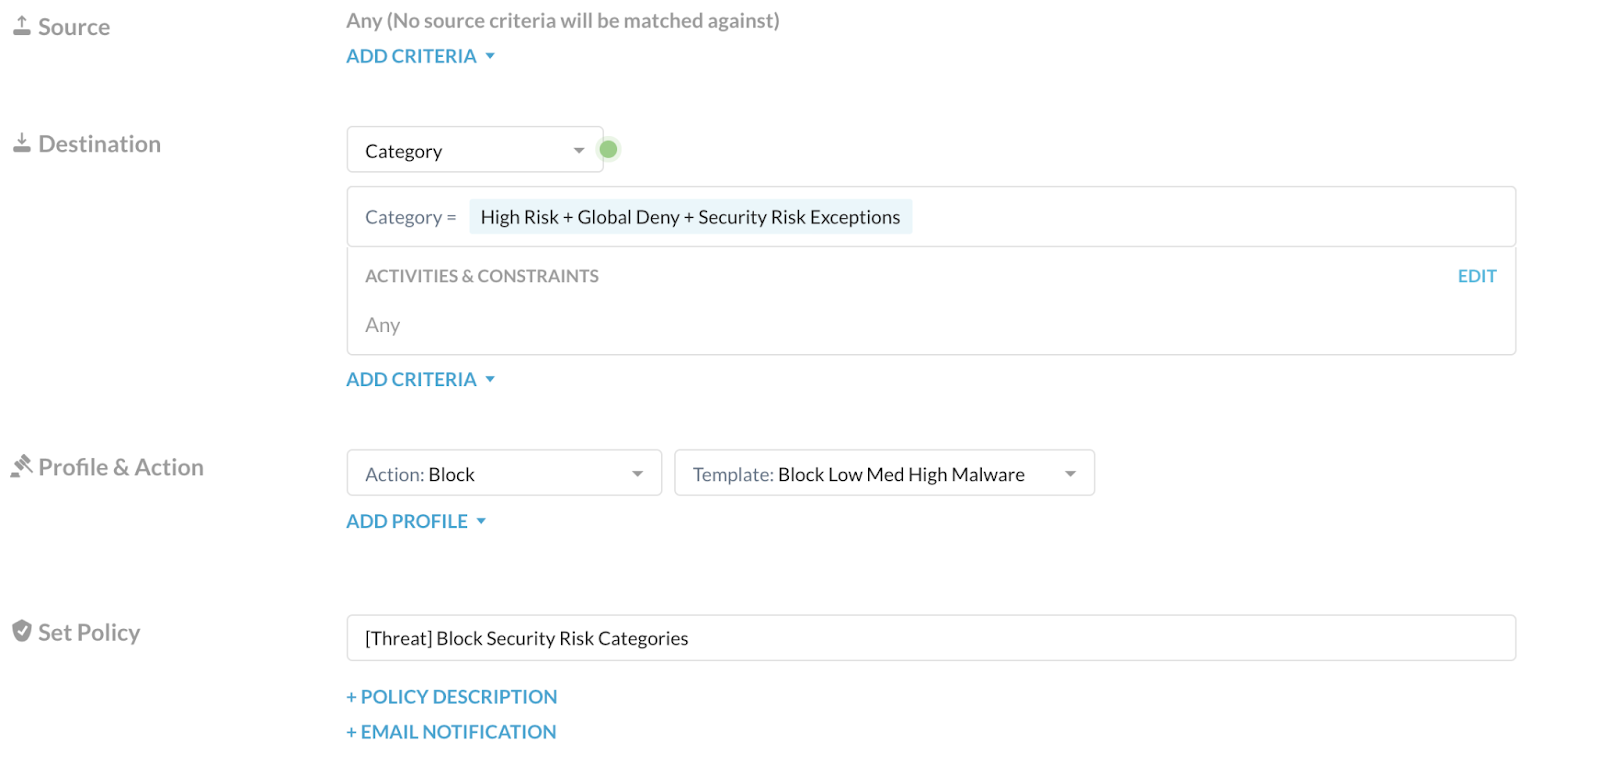
To learn more about any of these fields: Real-time Protection Policies.
Click Save and then Apply Changes.
Recommended File Profiles
Before creating your Malware Detection profile, create two file profiles that provide control for known good and bad files. Creating multiple file profiles allows you to create exceptions for different groups across your organization.
Use the first file profile to allow list business critical applications and/or false positives by file hash, type, object id, file size, and/or encryption.
Use the second file profile to block list known risky file types, hashes, and IOCs.
Go to Policies > File.
Click New File Profile.
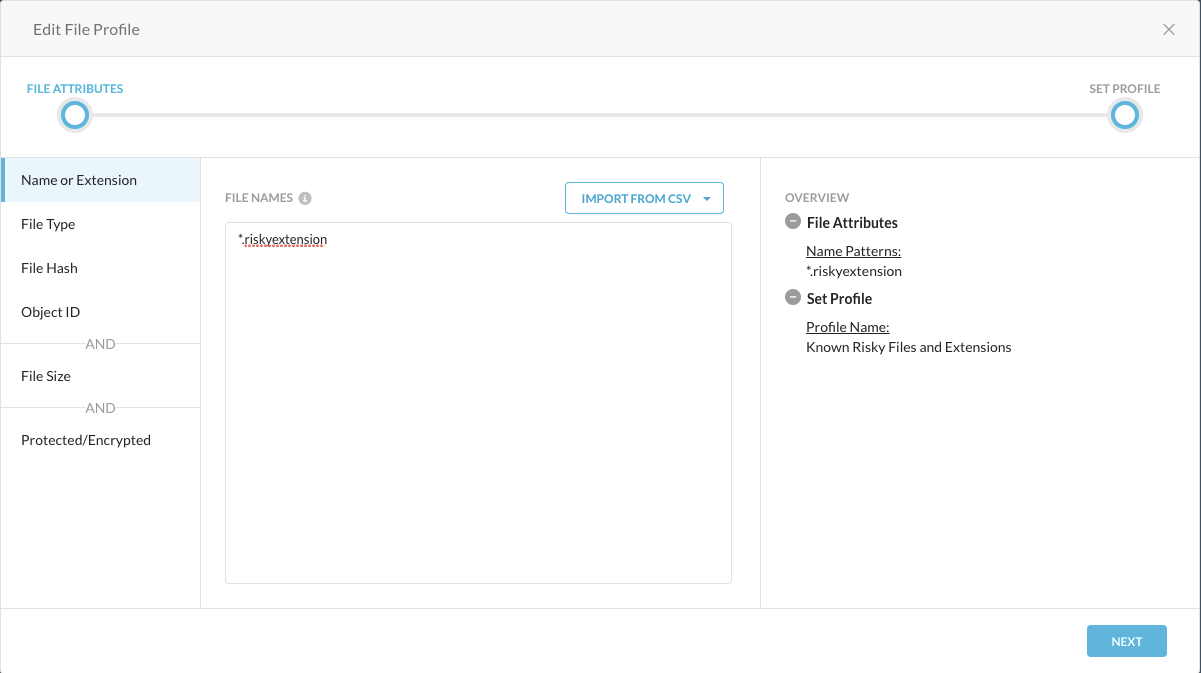
In the Add File Profile window, customize the attributes for files you want to bypass from Netskope malware detection. You can enter file names, extensions, hashes, object IDs, size, or if it's protected/encrypted.
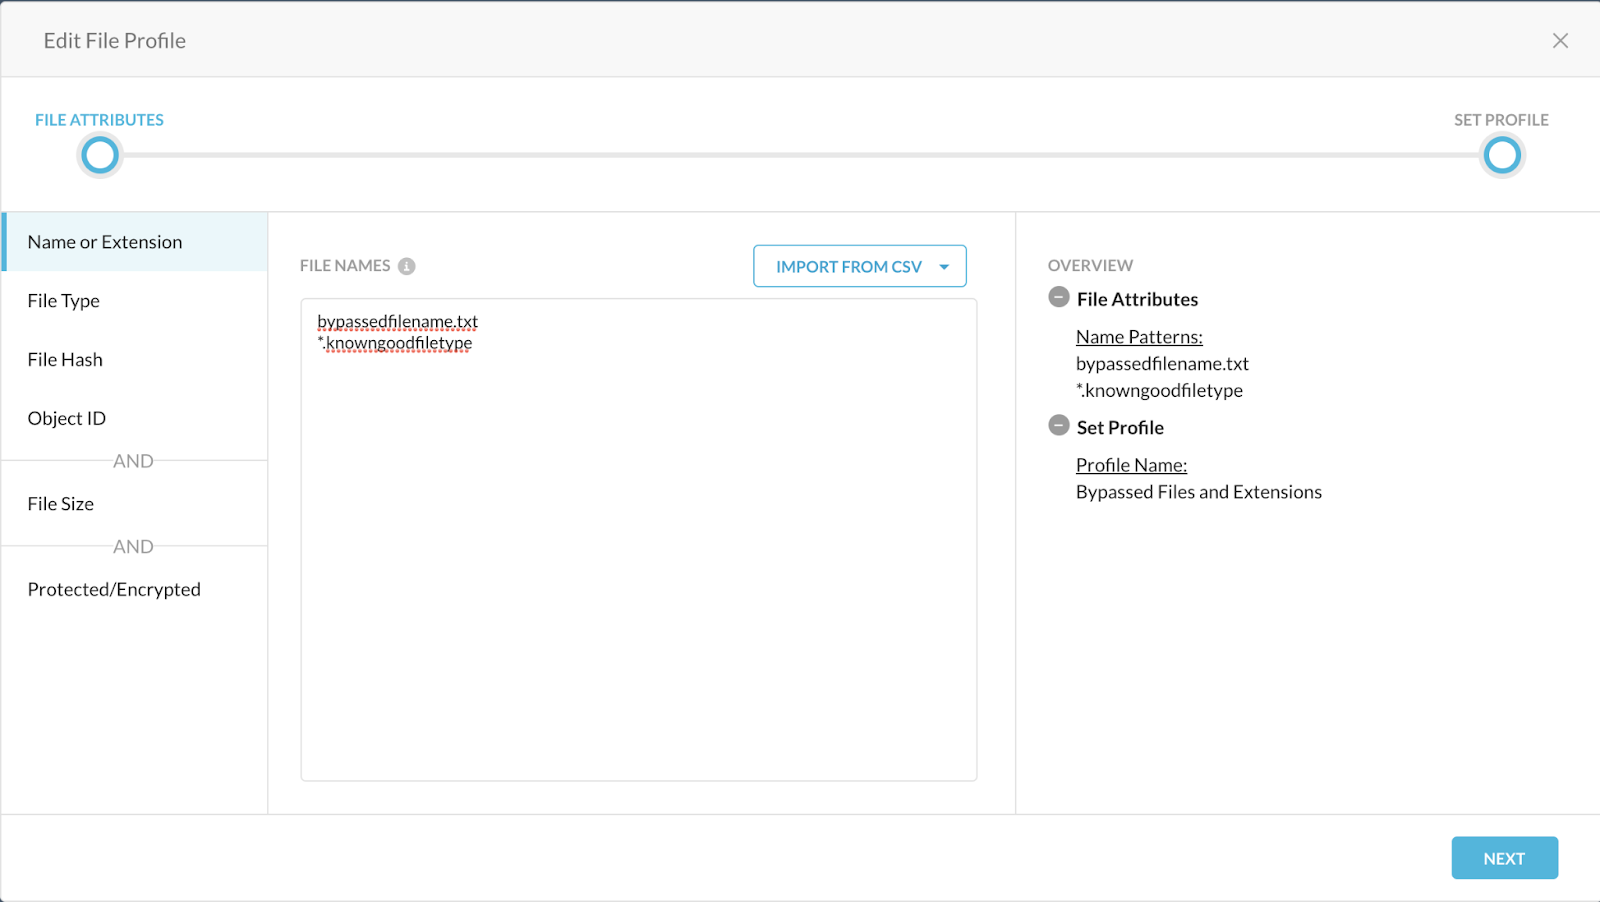
Click Save and then Apply Changes.
Repeat the above steps and create a second file profile for known malicious files you want to block.
Recommended Malware Detection Profile
Use the recommended file profiles above to create the recommended Malware Detecton profile.
Go to Policies > Threat Protection.
In the Malware Detection Profiles tab, click New Malware Detection Profile.
In the New Malware Detection Profile window, under Threat Scan, select Default Malware Scan.
Click Next.
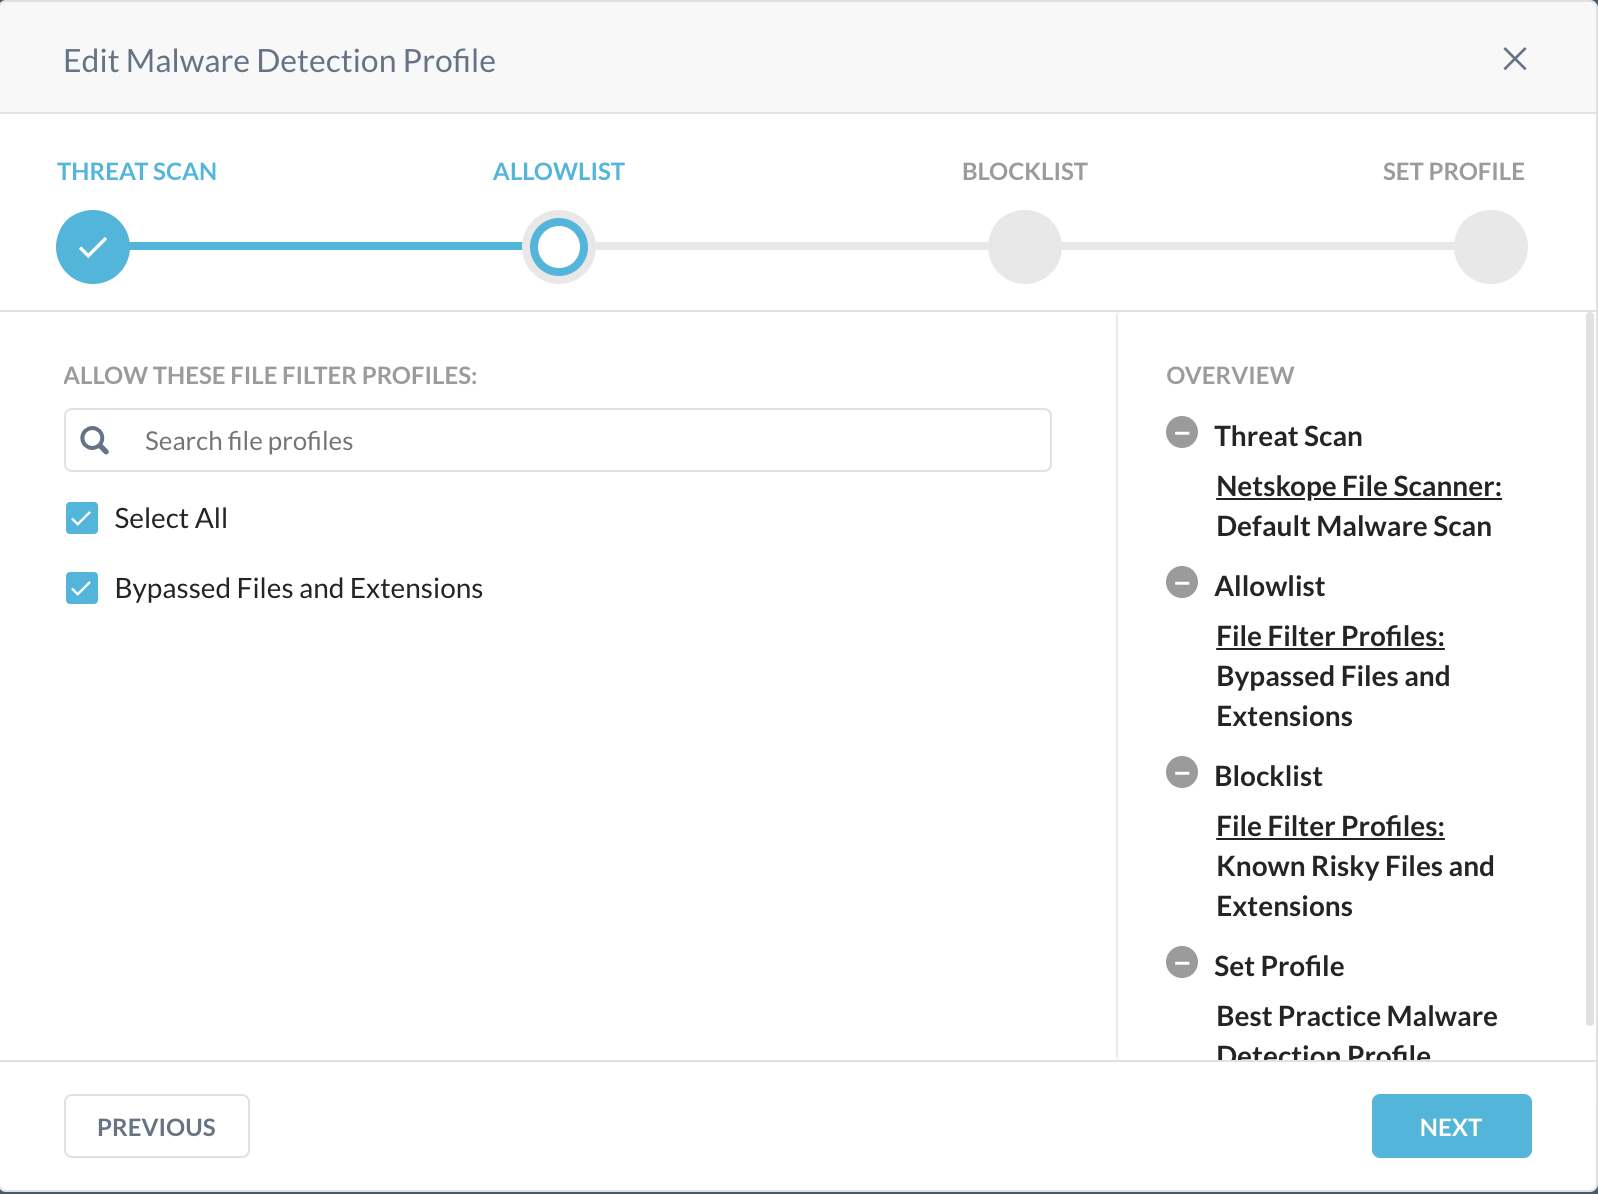
Under Allowlist, select the recommended file profile you created above that contains the benign files you want to bypass from malware detection.
Click Next.
Under Blocklist, select the recommended file profile you created above that contains the malicious files you want to block.
Click Next.
Under Set Profile, enter a name for the Malware Detection profile.
Click Save and then Apply Changes.
 |
Recommended Threat Protection Policy #2
Use the recommended Malware Detection profile above to create your second recommended Threat Protection policy.
Go to Policies > Real-time Protection.
Click New Policy and then Threat Protection.
On the Real-time Protection Policy page:
Source: Click X on the right to change scope to Any.
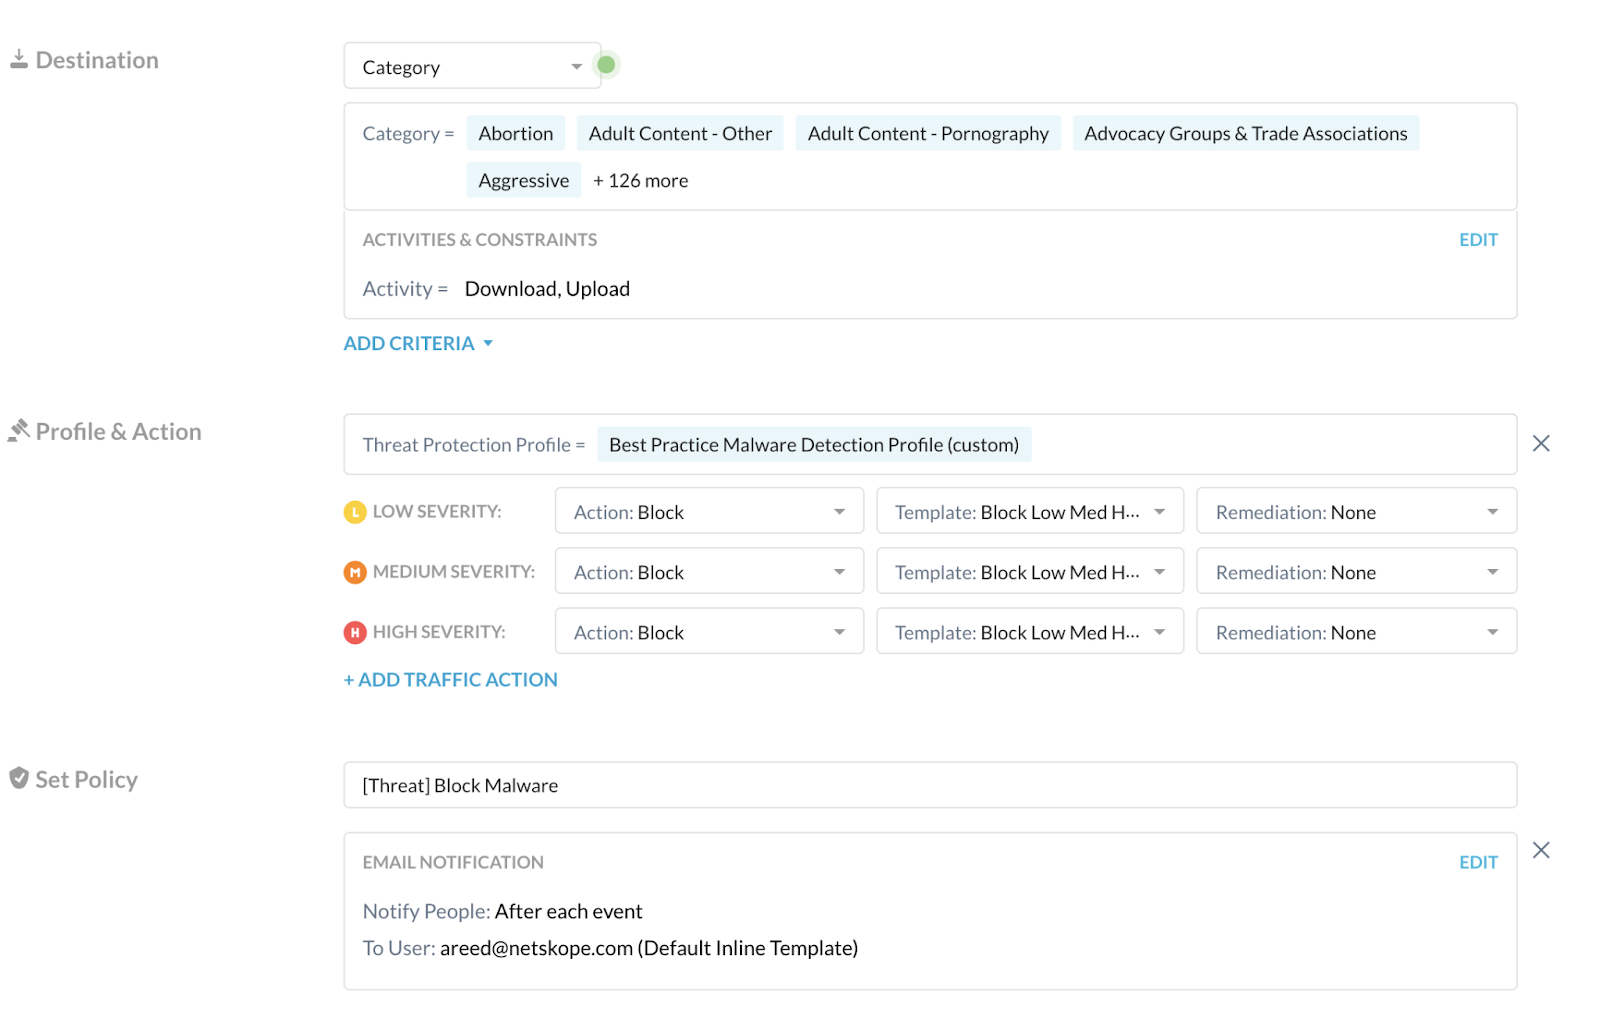
Destination: Choose Category, and do the following.
Category: Choose Predefined Categories and then select Select All.
Activities & Constraints: Click Edit, and select Download and Upload.
Profile & Action: Do the following.
Threat Protection Profile: Choose the recommended Malware Detection profile you created above.
Severity-Based Actions: Choose the following for all severity levels.
Action: Choose Block.
Template: Choose a predefined or custom template that displays when Netskope blocks users from uploading and downloading malicious files.
Remediation: Choose None.
Set Policy: Enter a name for the policy.
+Email Notification: Click, and do the following.
How Often to Notify People?: Choose After each event.
Send Notifications To: Enter the email addresses of the admins who must be alerted for these events.
To learn more about any of these fields: Real-time Protection Policies.
Click Save and then Apply Changes.
Recommended Threat Protection Policy #3
Create your third recommended Threat Protection policy for security risk exceptions, which allow users access to URLs that aren't a security risk for your organization.
Go to Policies > Real-time Protection.
Click New Policy and then Web Access.
On the Real-time Protection Policy page:
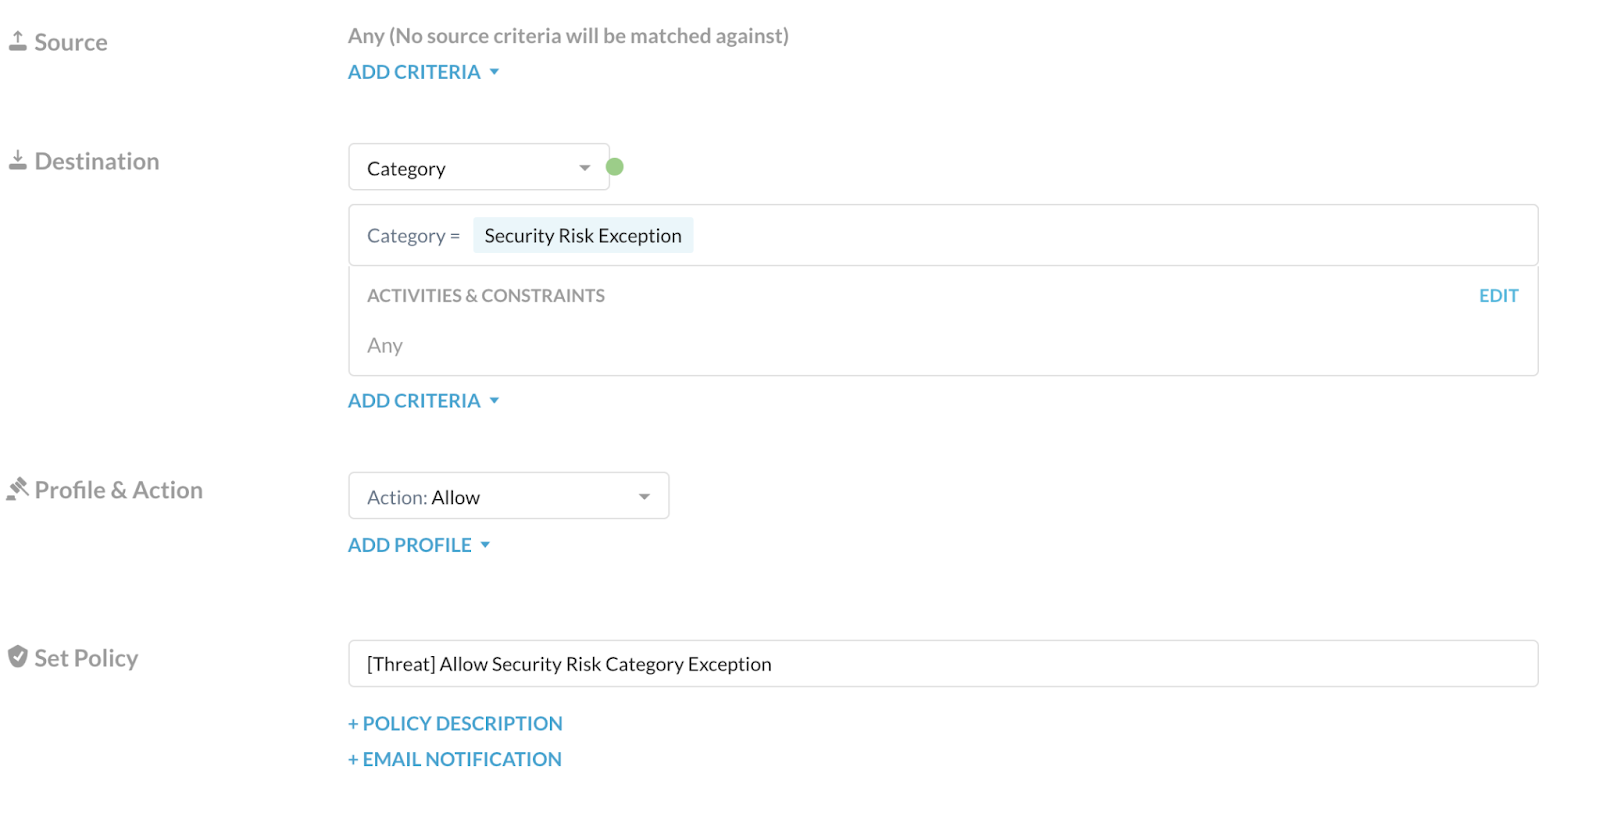
Source: Click X on the right to change scope to Any.
Destination: Choose Category, and select the recommended custom category you created above that contains the security risks you want to allow. Ensure the Activities & Constraints is Any.
Profile & Action: Choose Allow.
Set Policy: Enter a name for the policy.
To learn more about any of these fields: Real-time Protection Policies.
Click Save and then Apply Changes.