Deploy Client on iOS Using VMware Workspace ONE
A VPN profile is required for sending traffic to Netskope’s gateway for advanced DLP and risk analytics. In iOS, a VPN profile can be created for On-Demand or Per-App VPN. You should already have a configuration of VMware Workspace ONE with a Certificate Authority and Template with the Subject Name in PEM format to generate user certificates for VPN authentication.
Create an iOS Profile
This topic describes configuring an iOS profile for on-demand VPN. By default VPN is set to on-demand. On-demand VPN is a device-wide VPN.
To create an iOS profile:
On the VMware Workspace ONE Console, go to Resources > Profiles & Baselines > Profiles.
Select Add Profile from the Add dropdown menu.

Select Apple iOS from the platform list.
Select Device Profile in Select Context.
On the General page, enter the following parameters:
Name: Enter a unique name
Deployment: Managed
Assignment Type: Auto
Allow Removal: Always ( You can select the desired option)
Managed By: Netskope Inc.
Smart Groups: Select a smart group
Exclusions: No
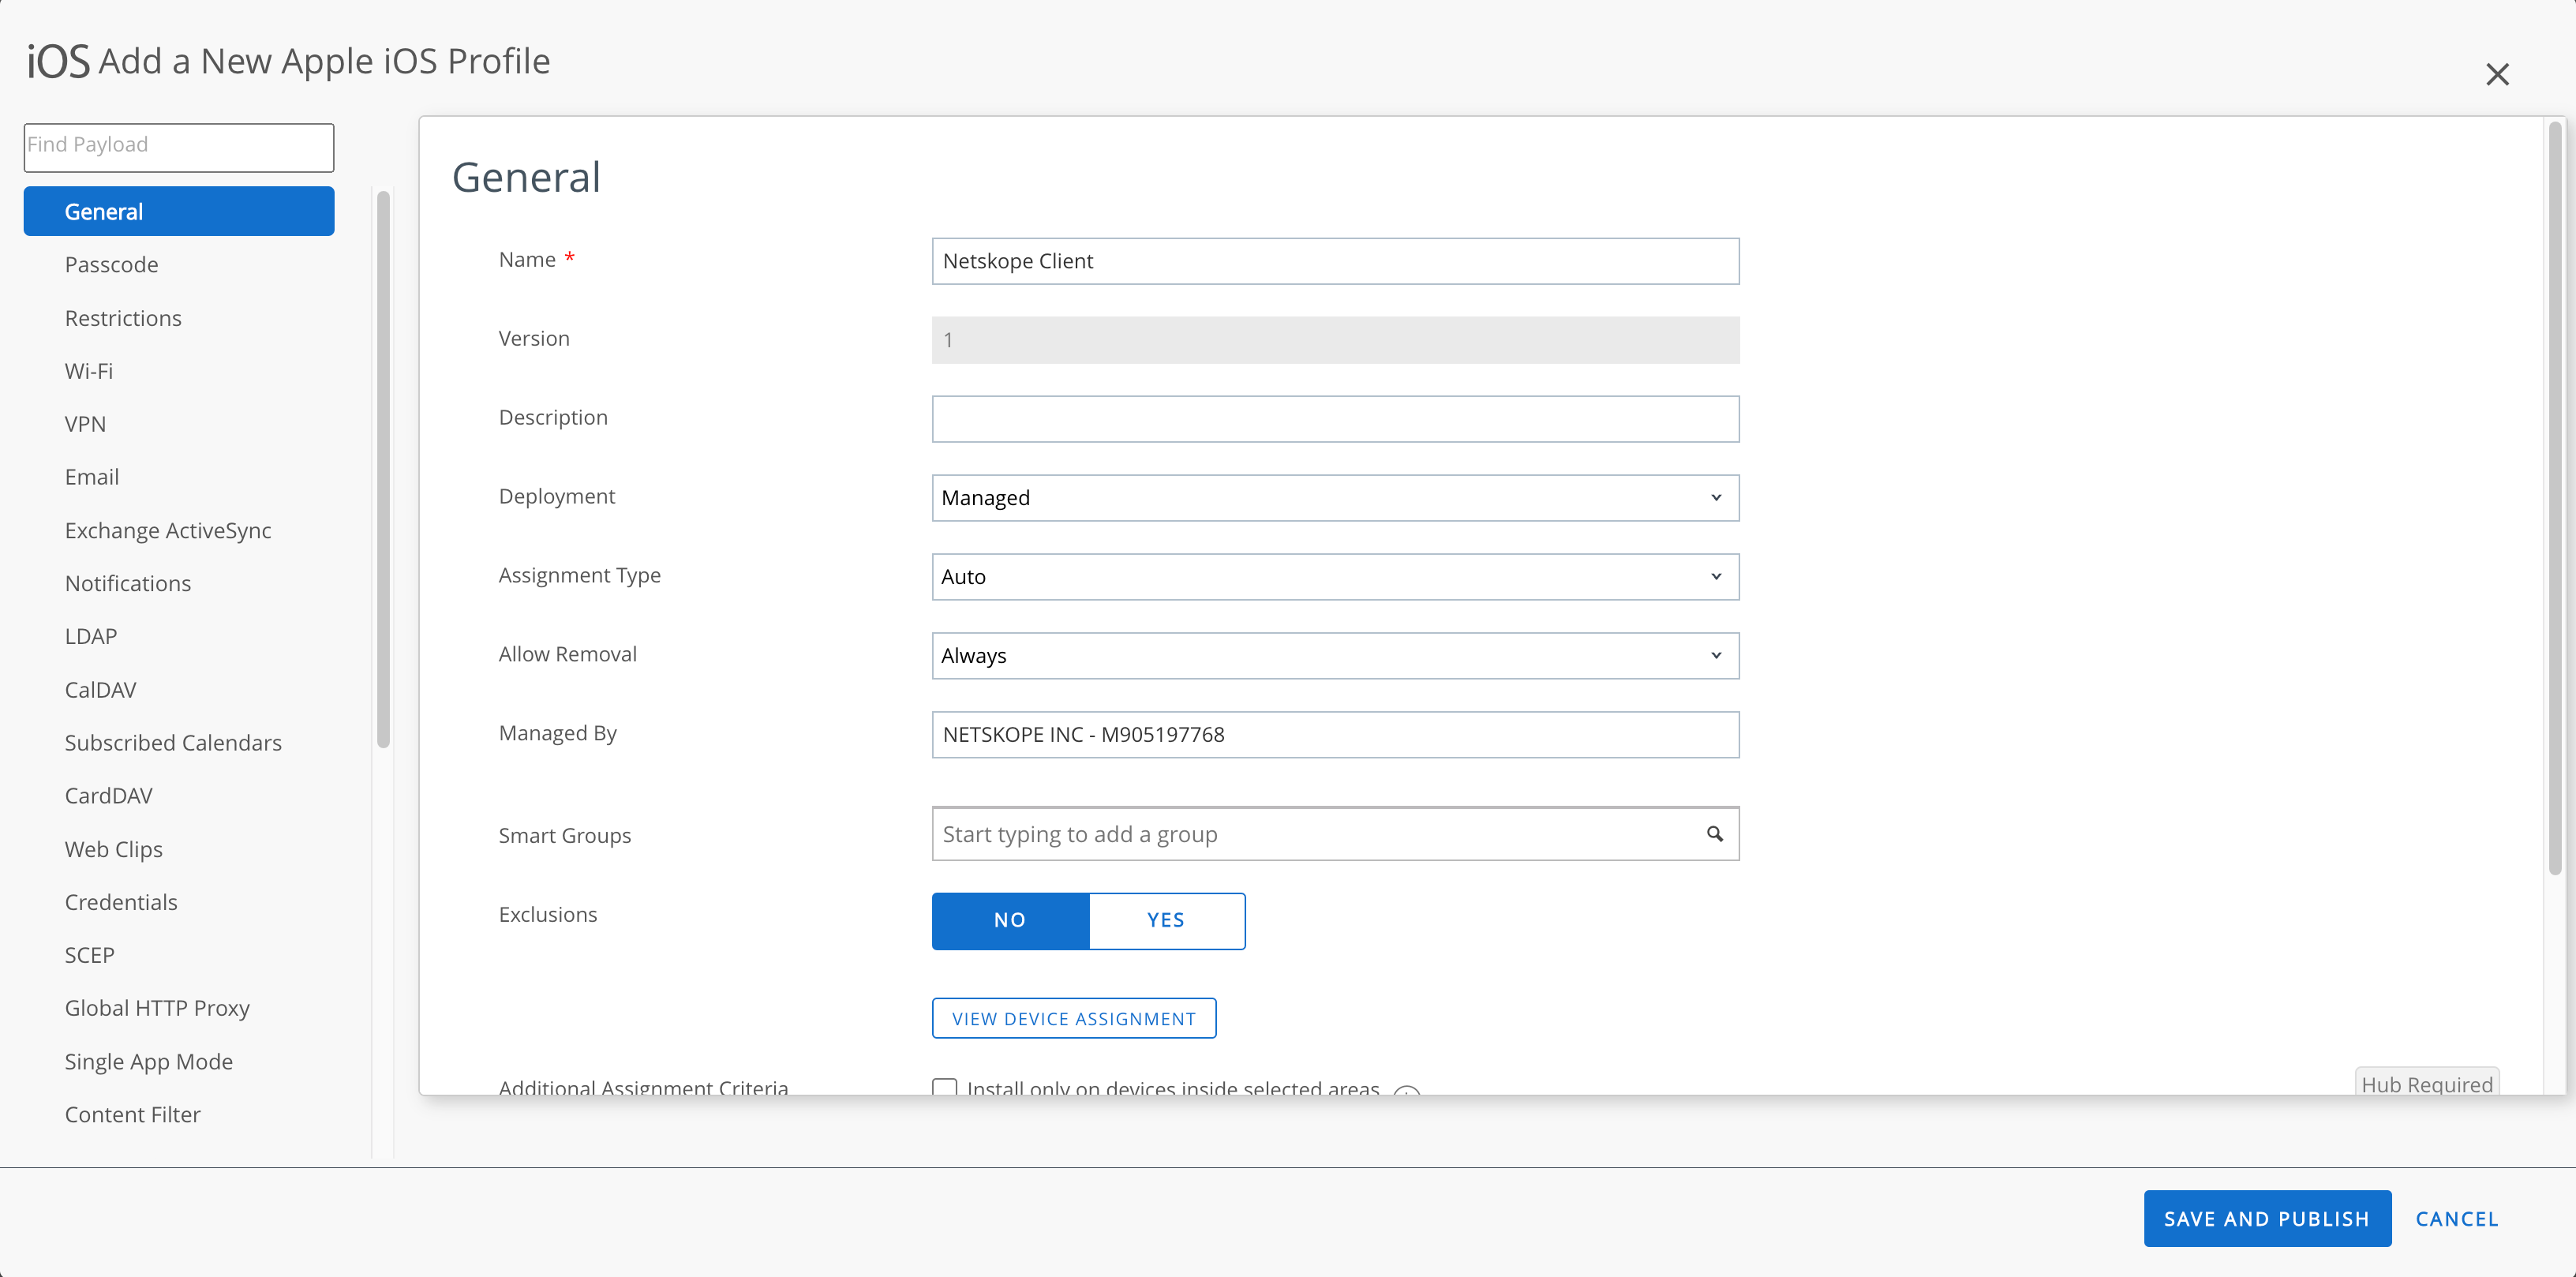
Next, configure the relevant sections to create an iOS profile.
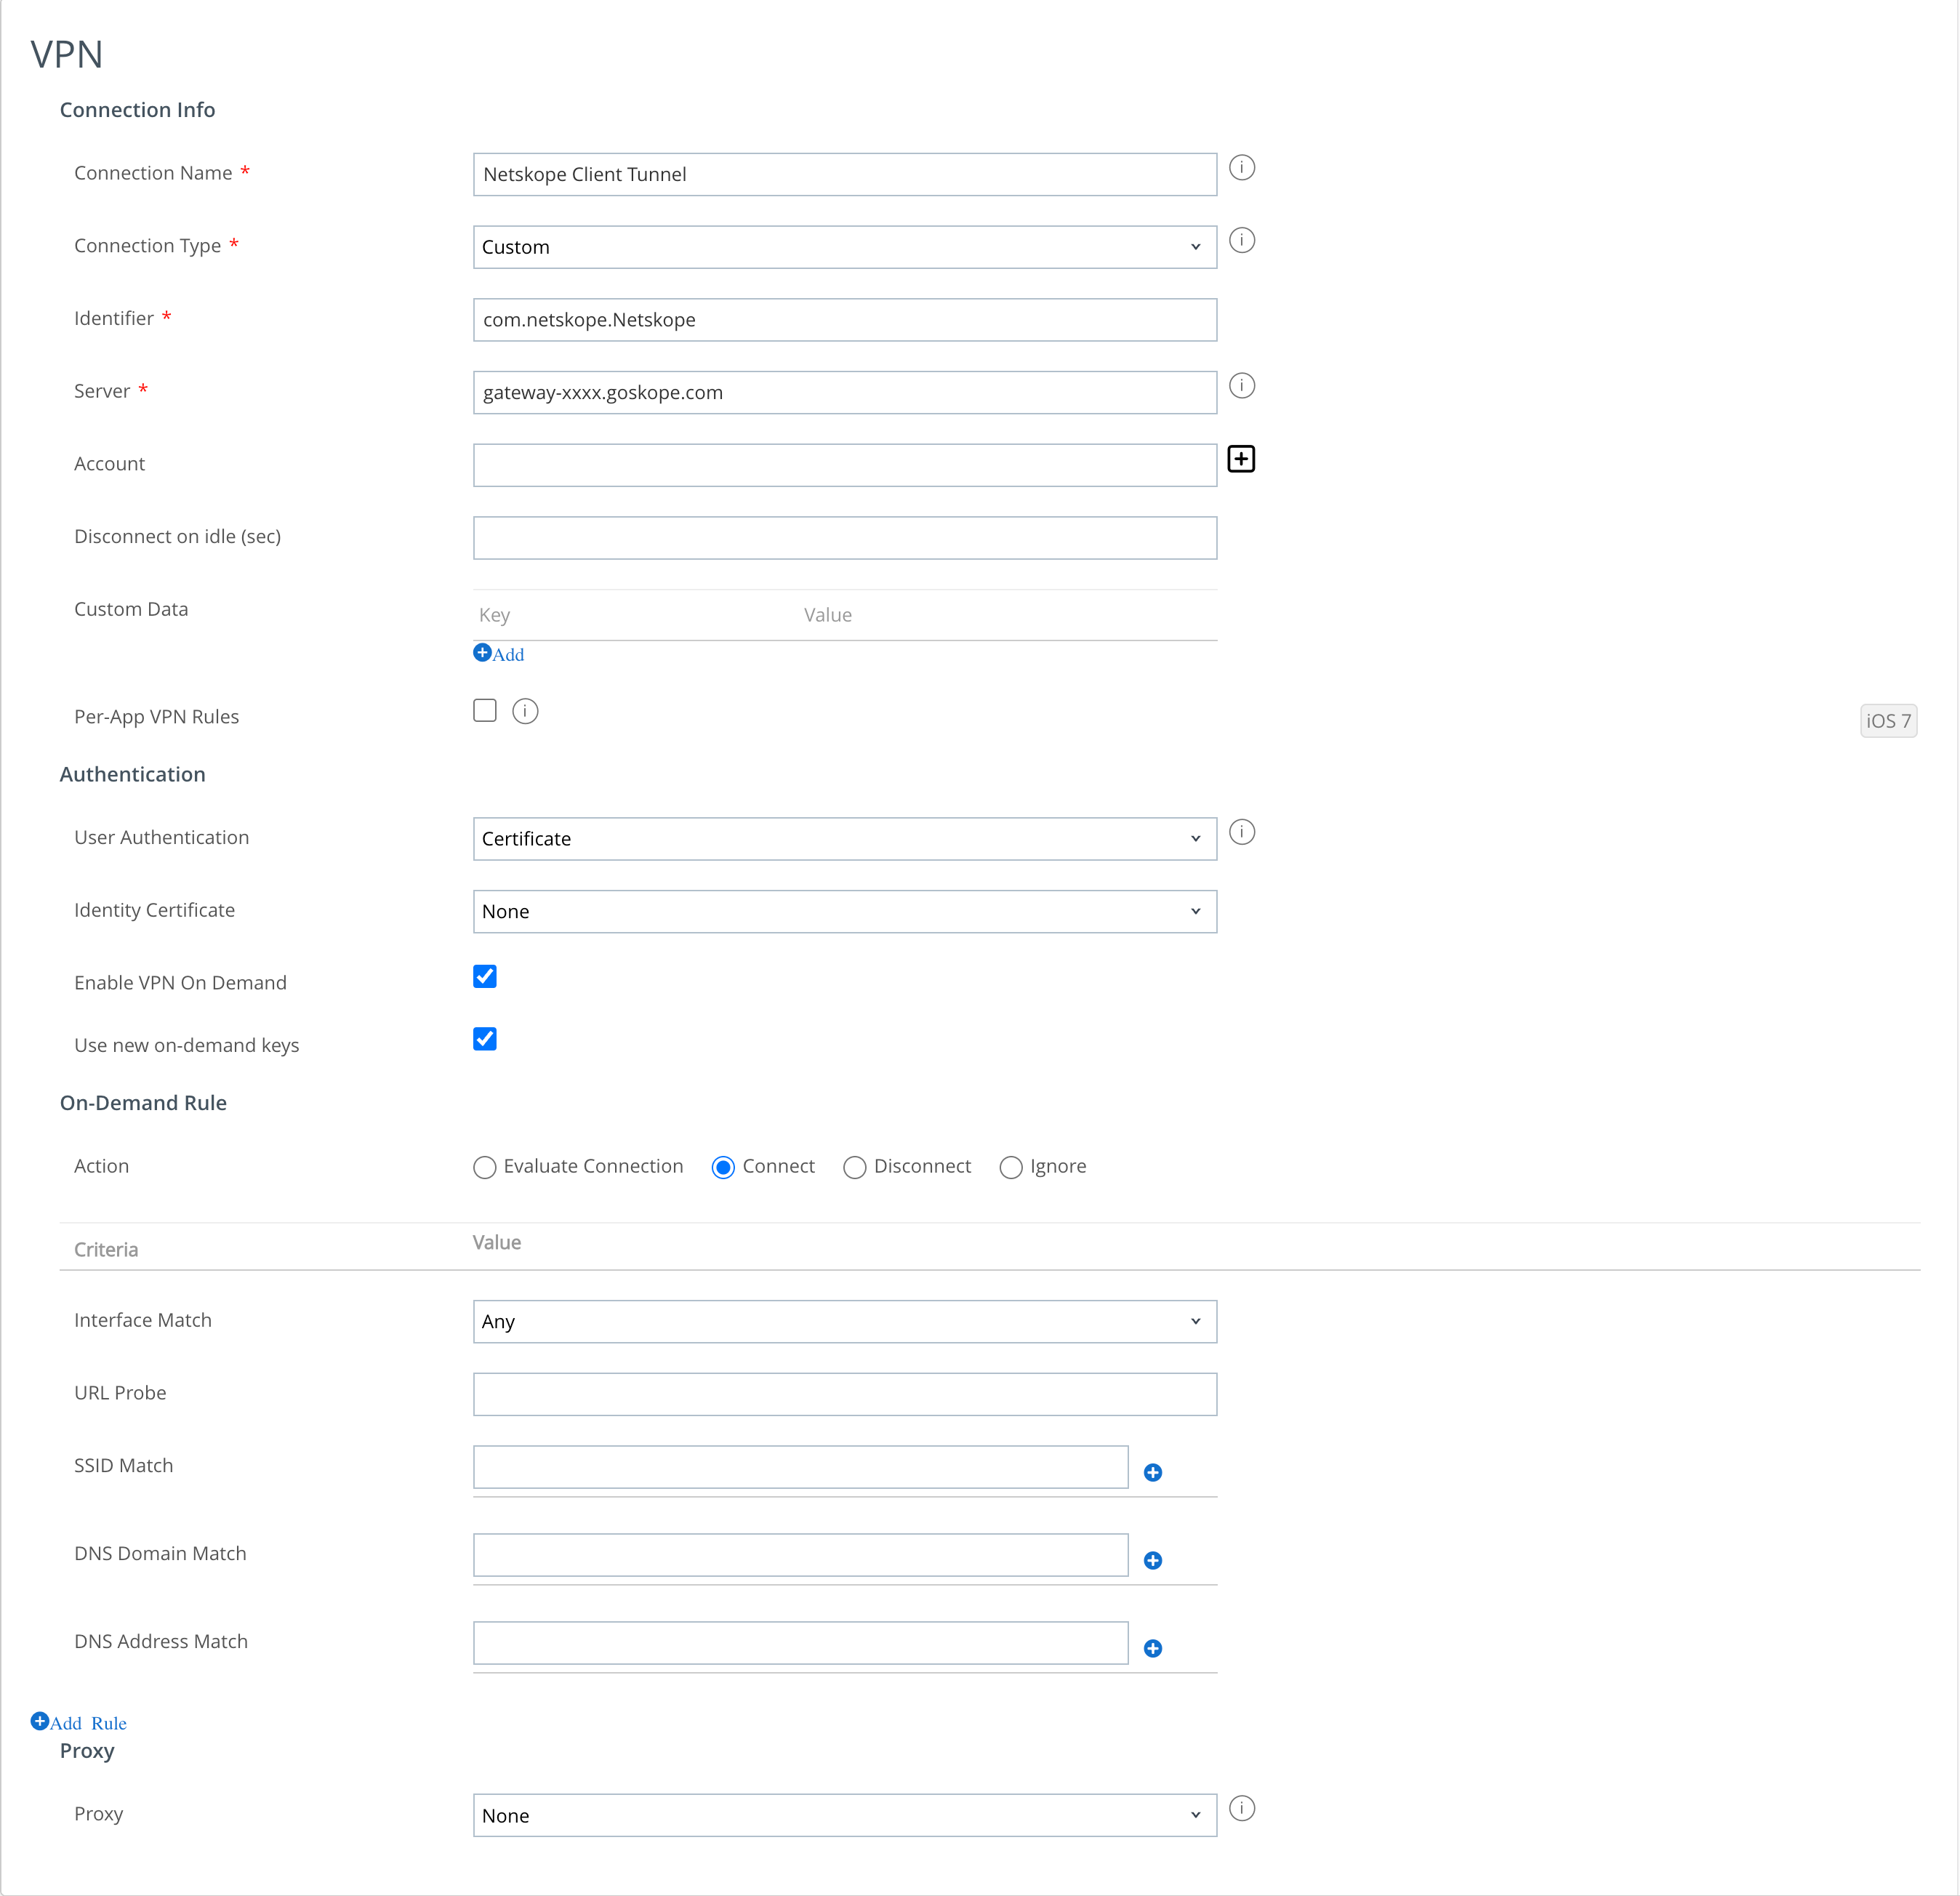
Select VPN in the left navigation panel. Click Configure and enter the following parameters:
Connection Name: Enter a unique name.
Connection Type: Select Custom.
Identifier: Enter the bundle ID of the identifier. For example, com.netskope.Netskope (case sensitive).
Server: Enter your VPN server name from the Netskope UI. For example, gateway-[tenantname][.eu].goskope.com.
Account: Click the + symbol and select EnrollmentUserID.
User Authentication: Select Certificate.
Identity Certificate: None
Identity Certificate: None
Enable VPN On Demand: Select the checkbox to enable this option.
Use new on-demand Keys: select the checkbox to enable this option.
Action: Select Connect in the Action field under On-Demand Rule.
In the Criteria and Value pair, select Any for Interface Match.
If you want to enable Zero-Touch configuration to allow automated deployment of the Client, leverage the Custom VPN data. Select VPN in the left navigation panel. Click Configure and enter the following parameters:
Note
You can skip this step if you are adding the key-value pair while assigning app settings.
Connection Name: Enter a unique name.
Connection Type: Select Custom.
Identifier: Enter the bundle ID of the identifier: com.netskope.Netskope (case sensitive).
Server: Enter your VPN server name from the Netskope UI. For example, gateway-[tenantname][.eu].goskope.com.
Account: Click + and select EnrollmentUserID.
Custom Data: Add the following Key-value pairs:
OrgKey: Use the tenant organizational key.
AddonHost: Use the addon URL for the tenant: addon-[tenant].[eu].goskope.com.
UserEmail: Use the variable that contains the user identity for the enrolment: {EmailAddress}.

Note
If you want Netskope client to steer only Private Access traffic, provide the following Key-Value pair:
ForceDisabledSteering: True.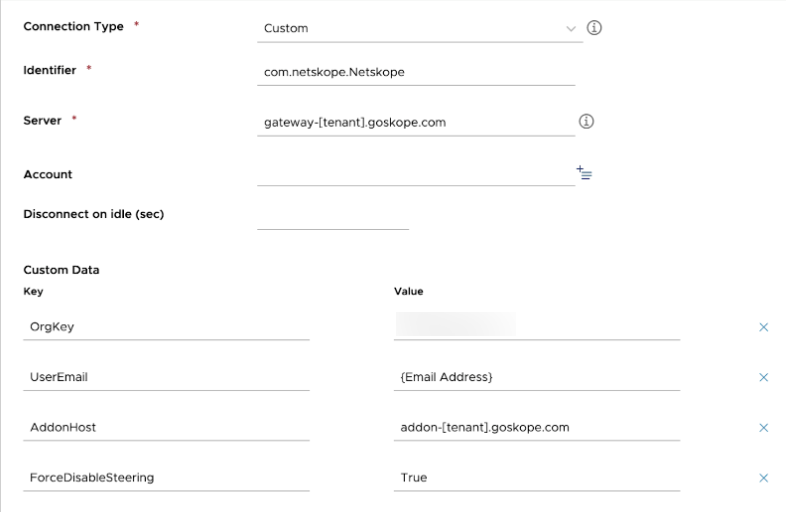
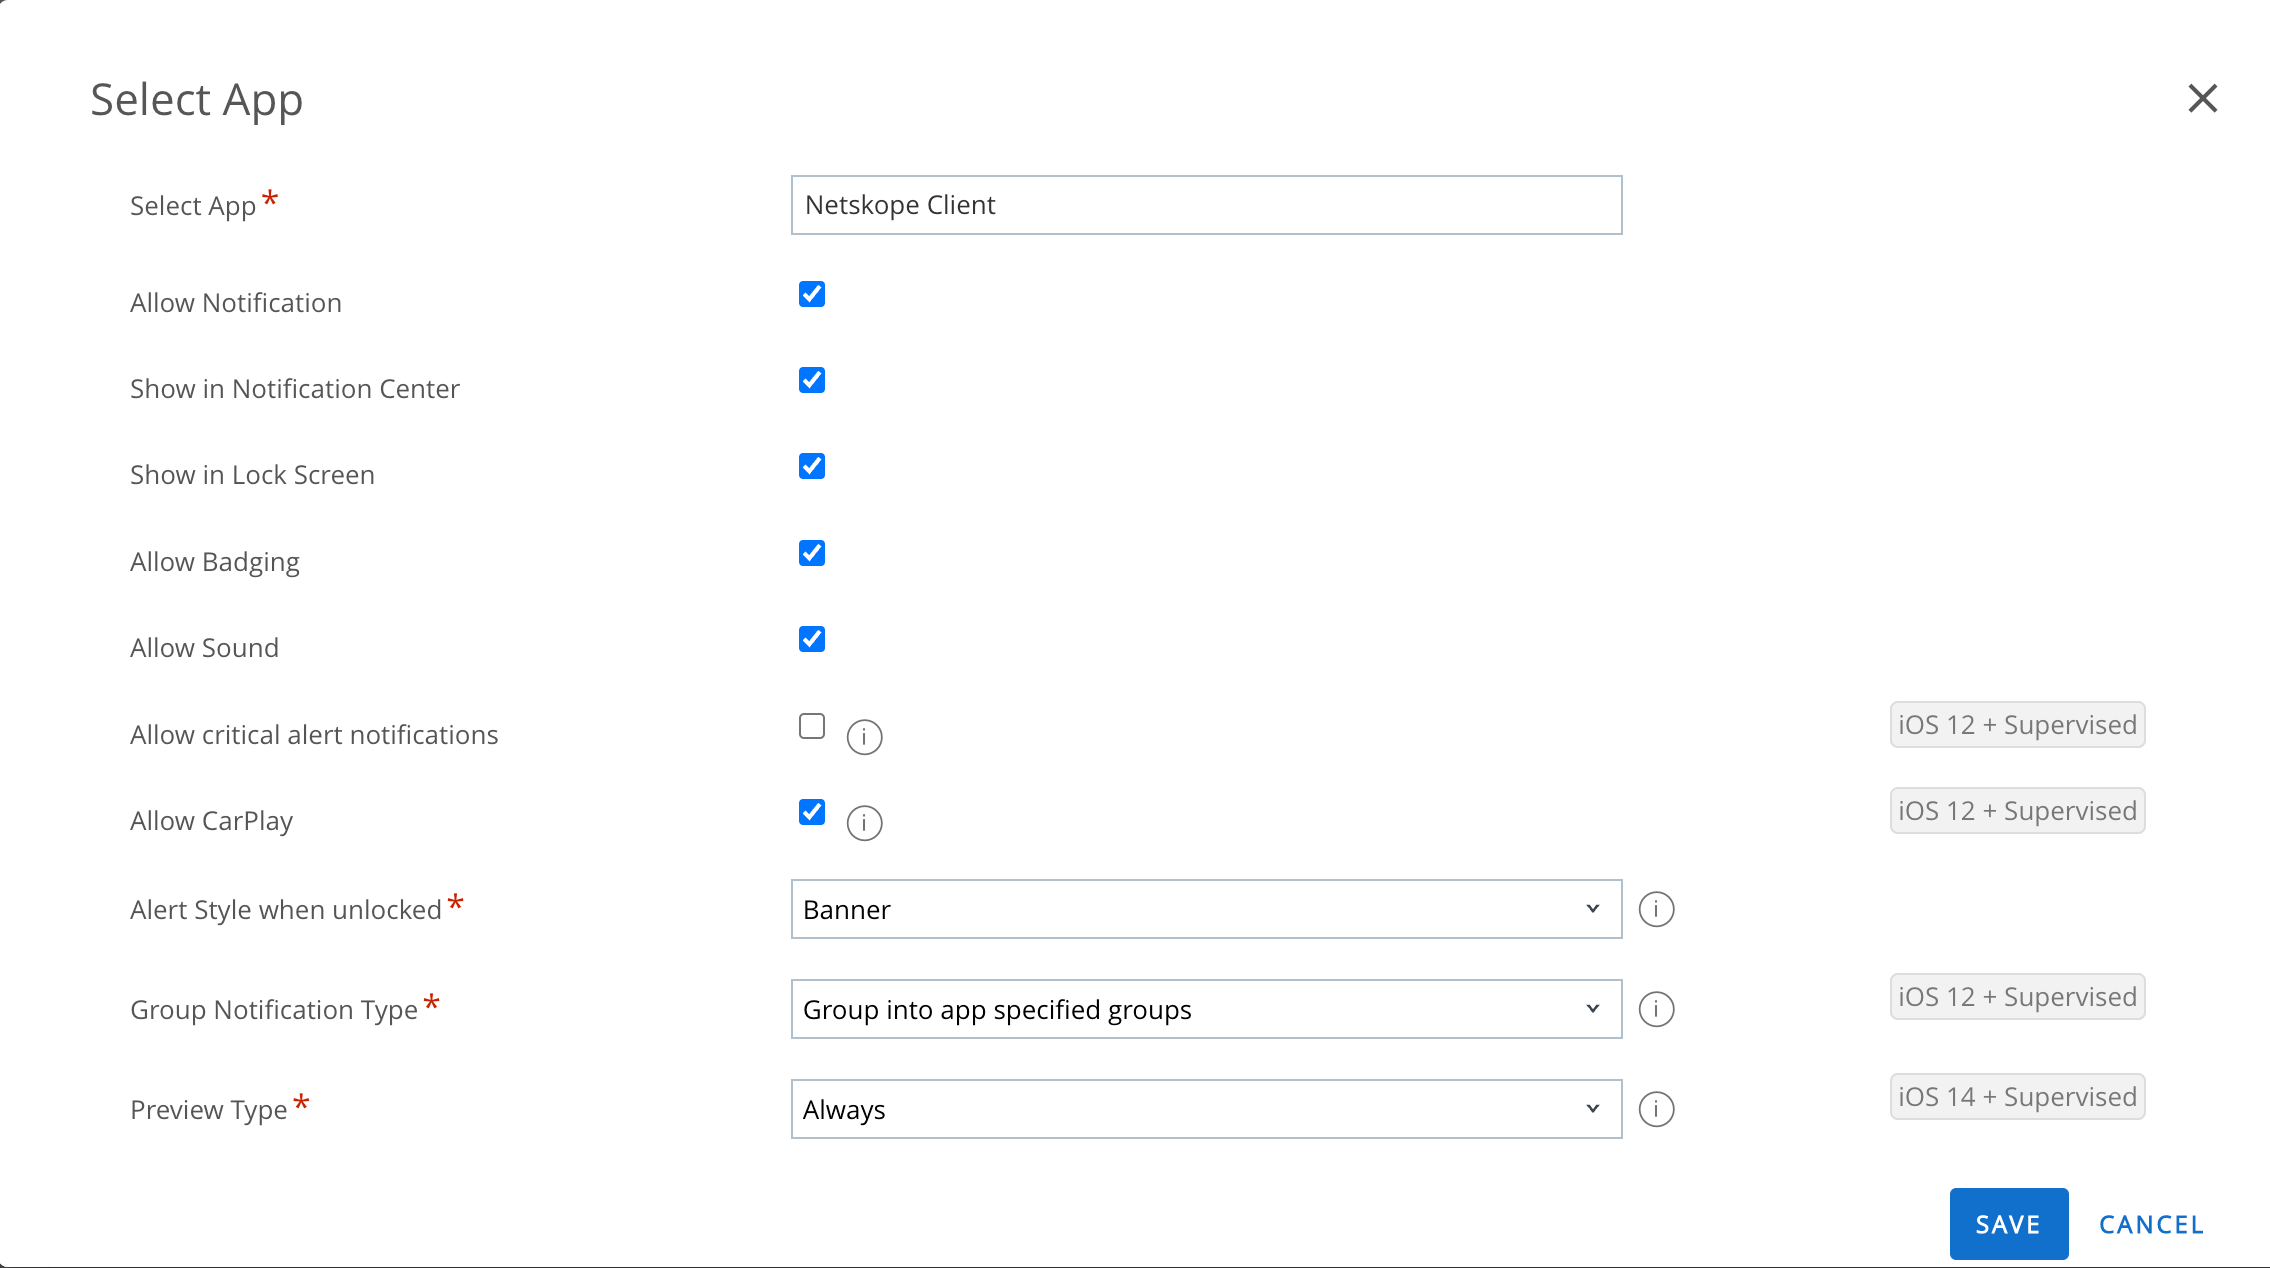
Select Notifications in the left navigation pane. Click Configure and perform the following actions:
Select App: Choose Netskope Client.
You can keep the default settings for the later options in this section.
Note
This is only valid if the device is supervised (Company-owned).
Select Credentials in the left navigation panel. Click Configure and enter the following parameters:
Credential Source: Select Upload.
Credential Name: Enter rootcaCert.pem. This is the name of the Netskope Root certificate so a browser can trust the certificates issued by the Netskope proxy.
Certificate: Click Upload.
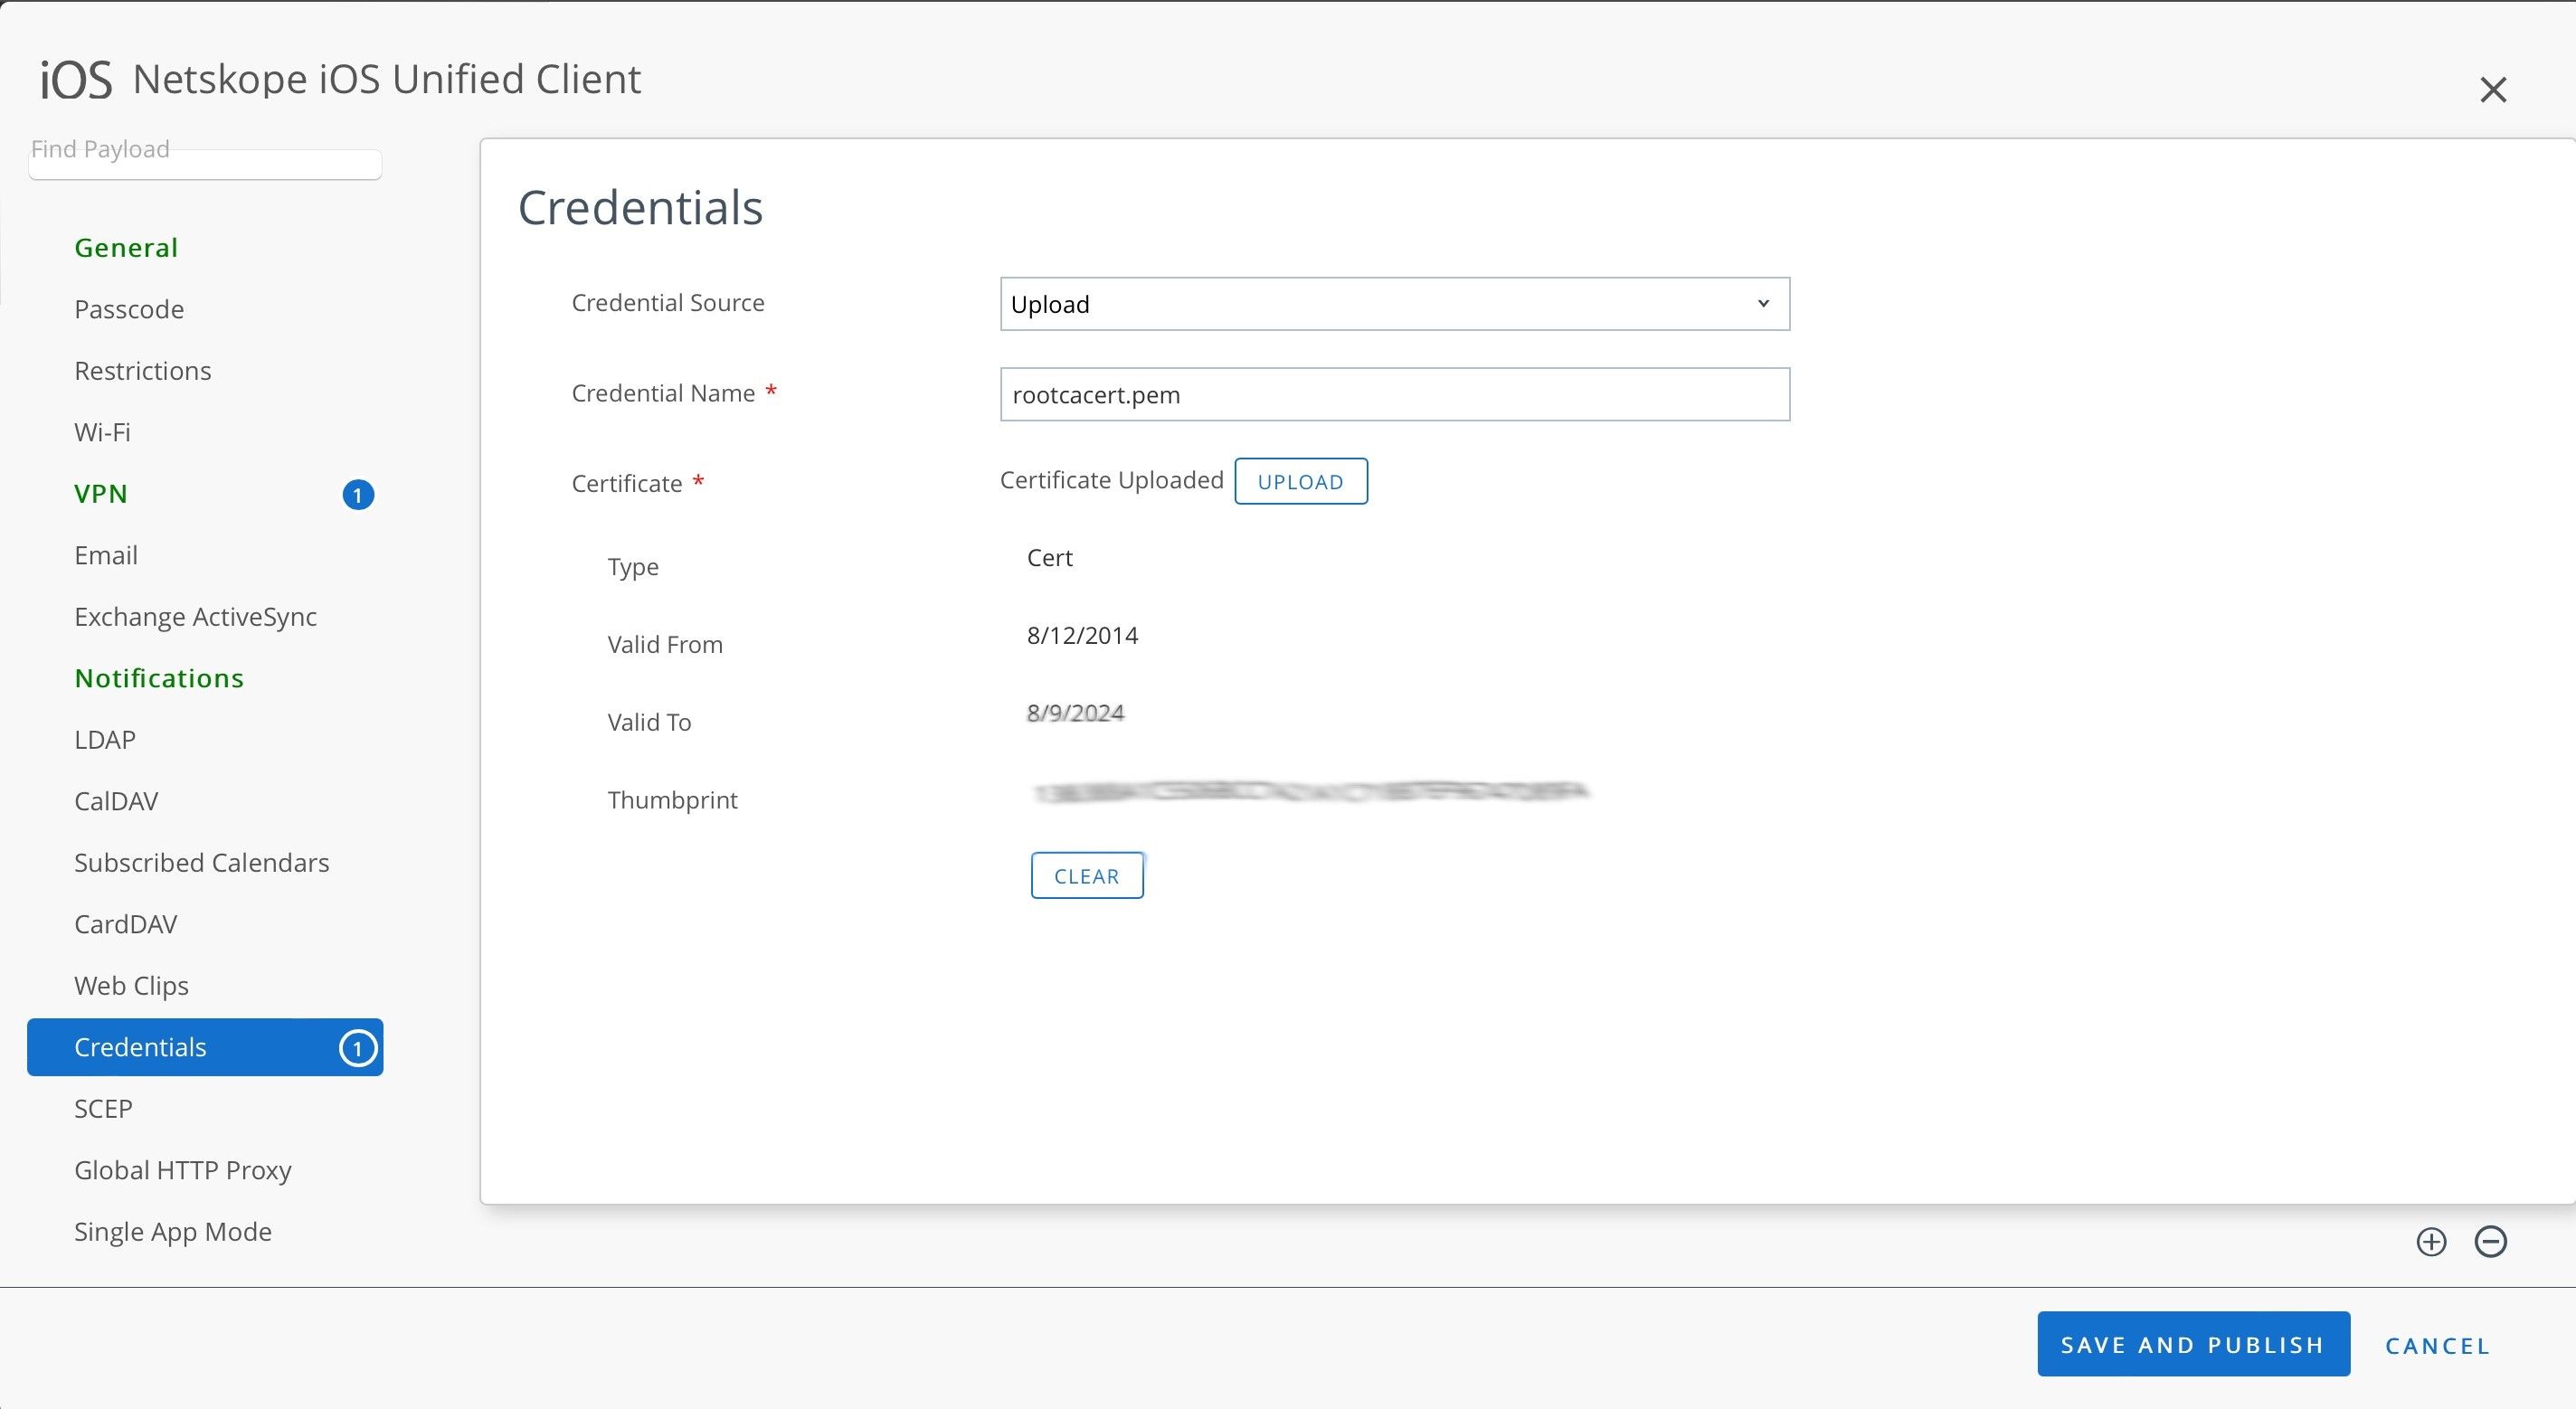
Click + in the bottom-right corner and enter these parameters:
Credential Source: Click Upload.
Credential Name:Enter caCert.pem. This is the name of the Netskope Tenant Certificate.
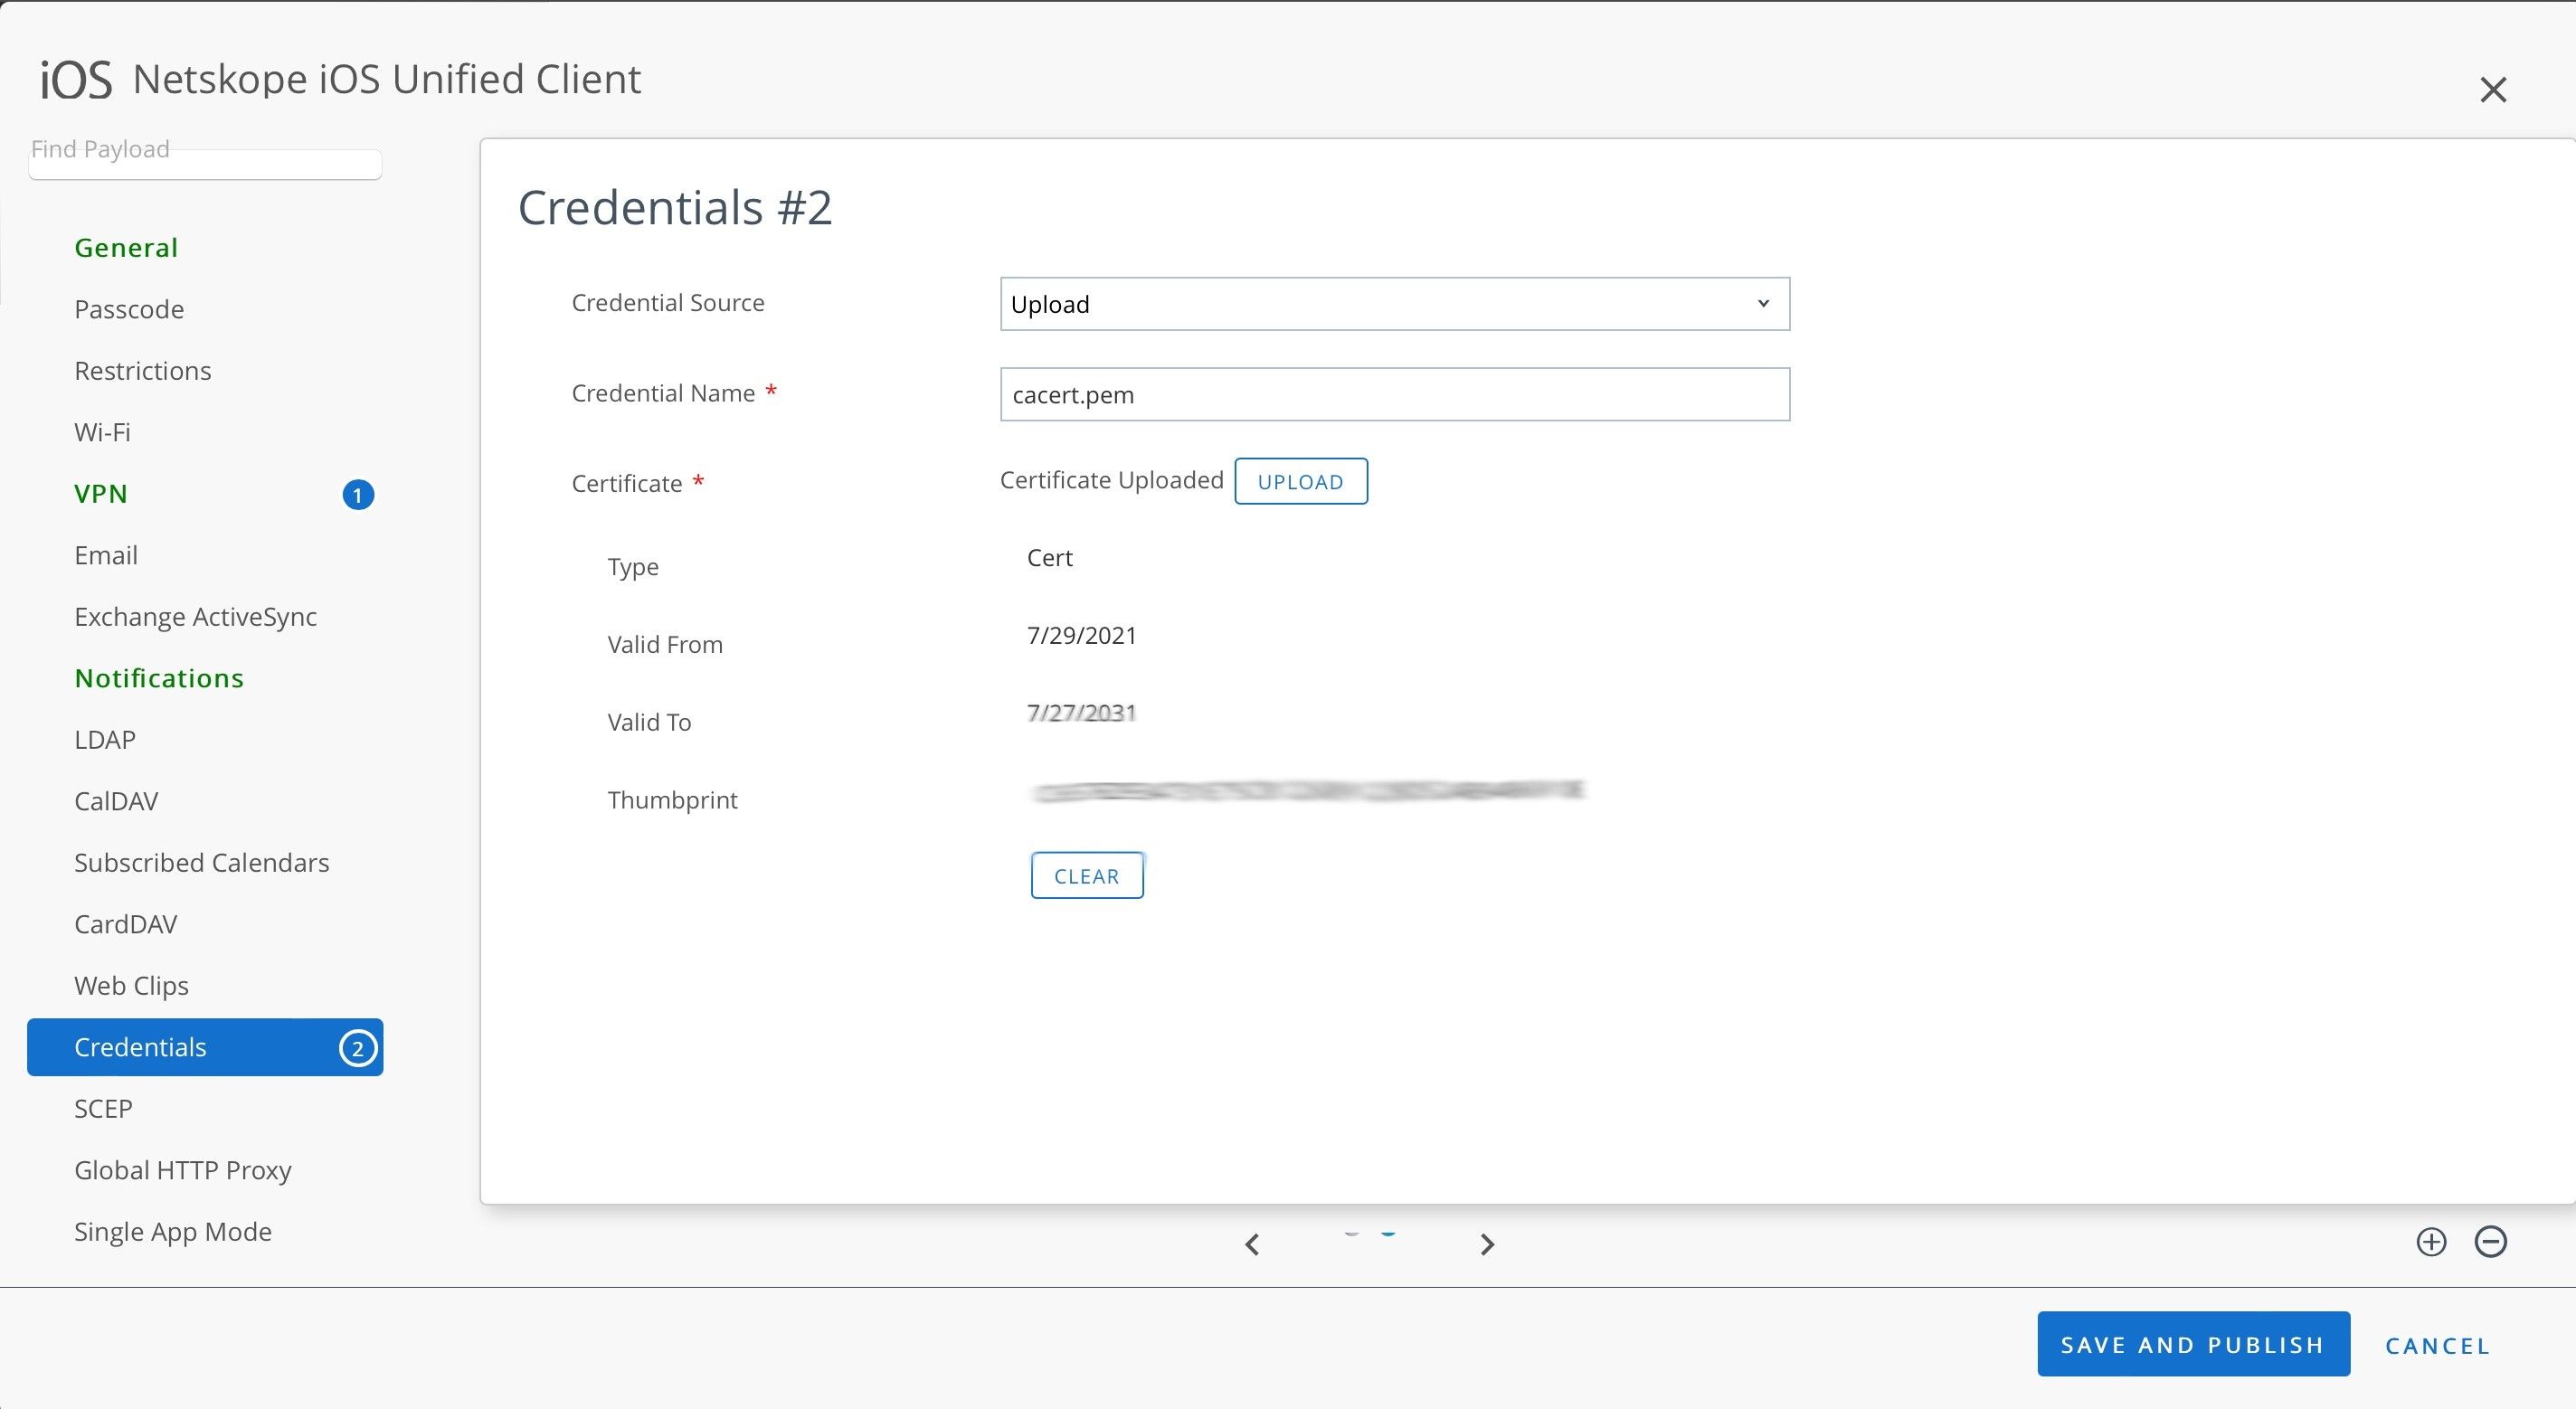
To get the root and tenant certificates, view Certificates.
Click Save & Publish.
Add Netskope Client App
The following section describes the steps to add the application from the public store in VMware Workspace ONE.
To add Netskope Client:
Go to Resources > Apps > Native.
Click the Public tab.
Click +ADD APPLICATION.
Select Apple iOS from the Platform dropdown menu.
In Source, click SEARCH APP STORE.
Enter Netskope Client in the Name field.
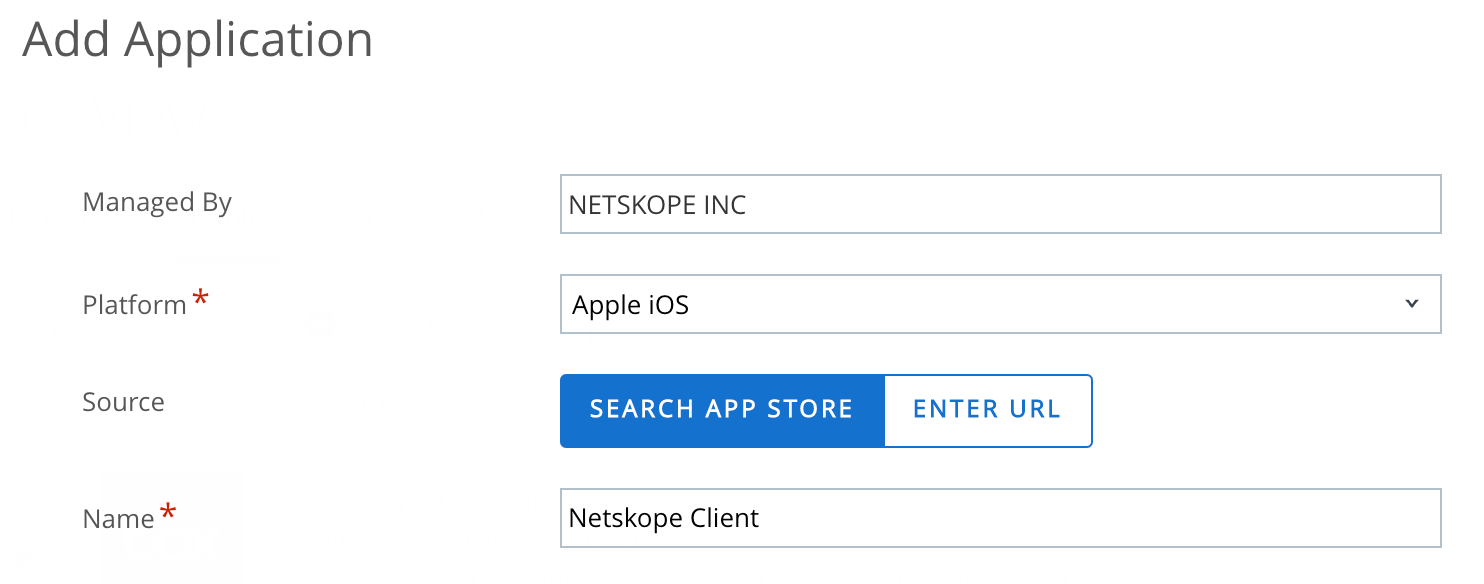
Click Next.
Click +Select for Netskope Client application.
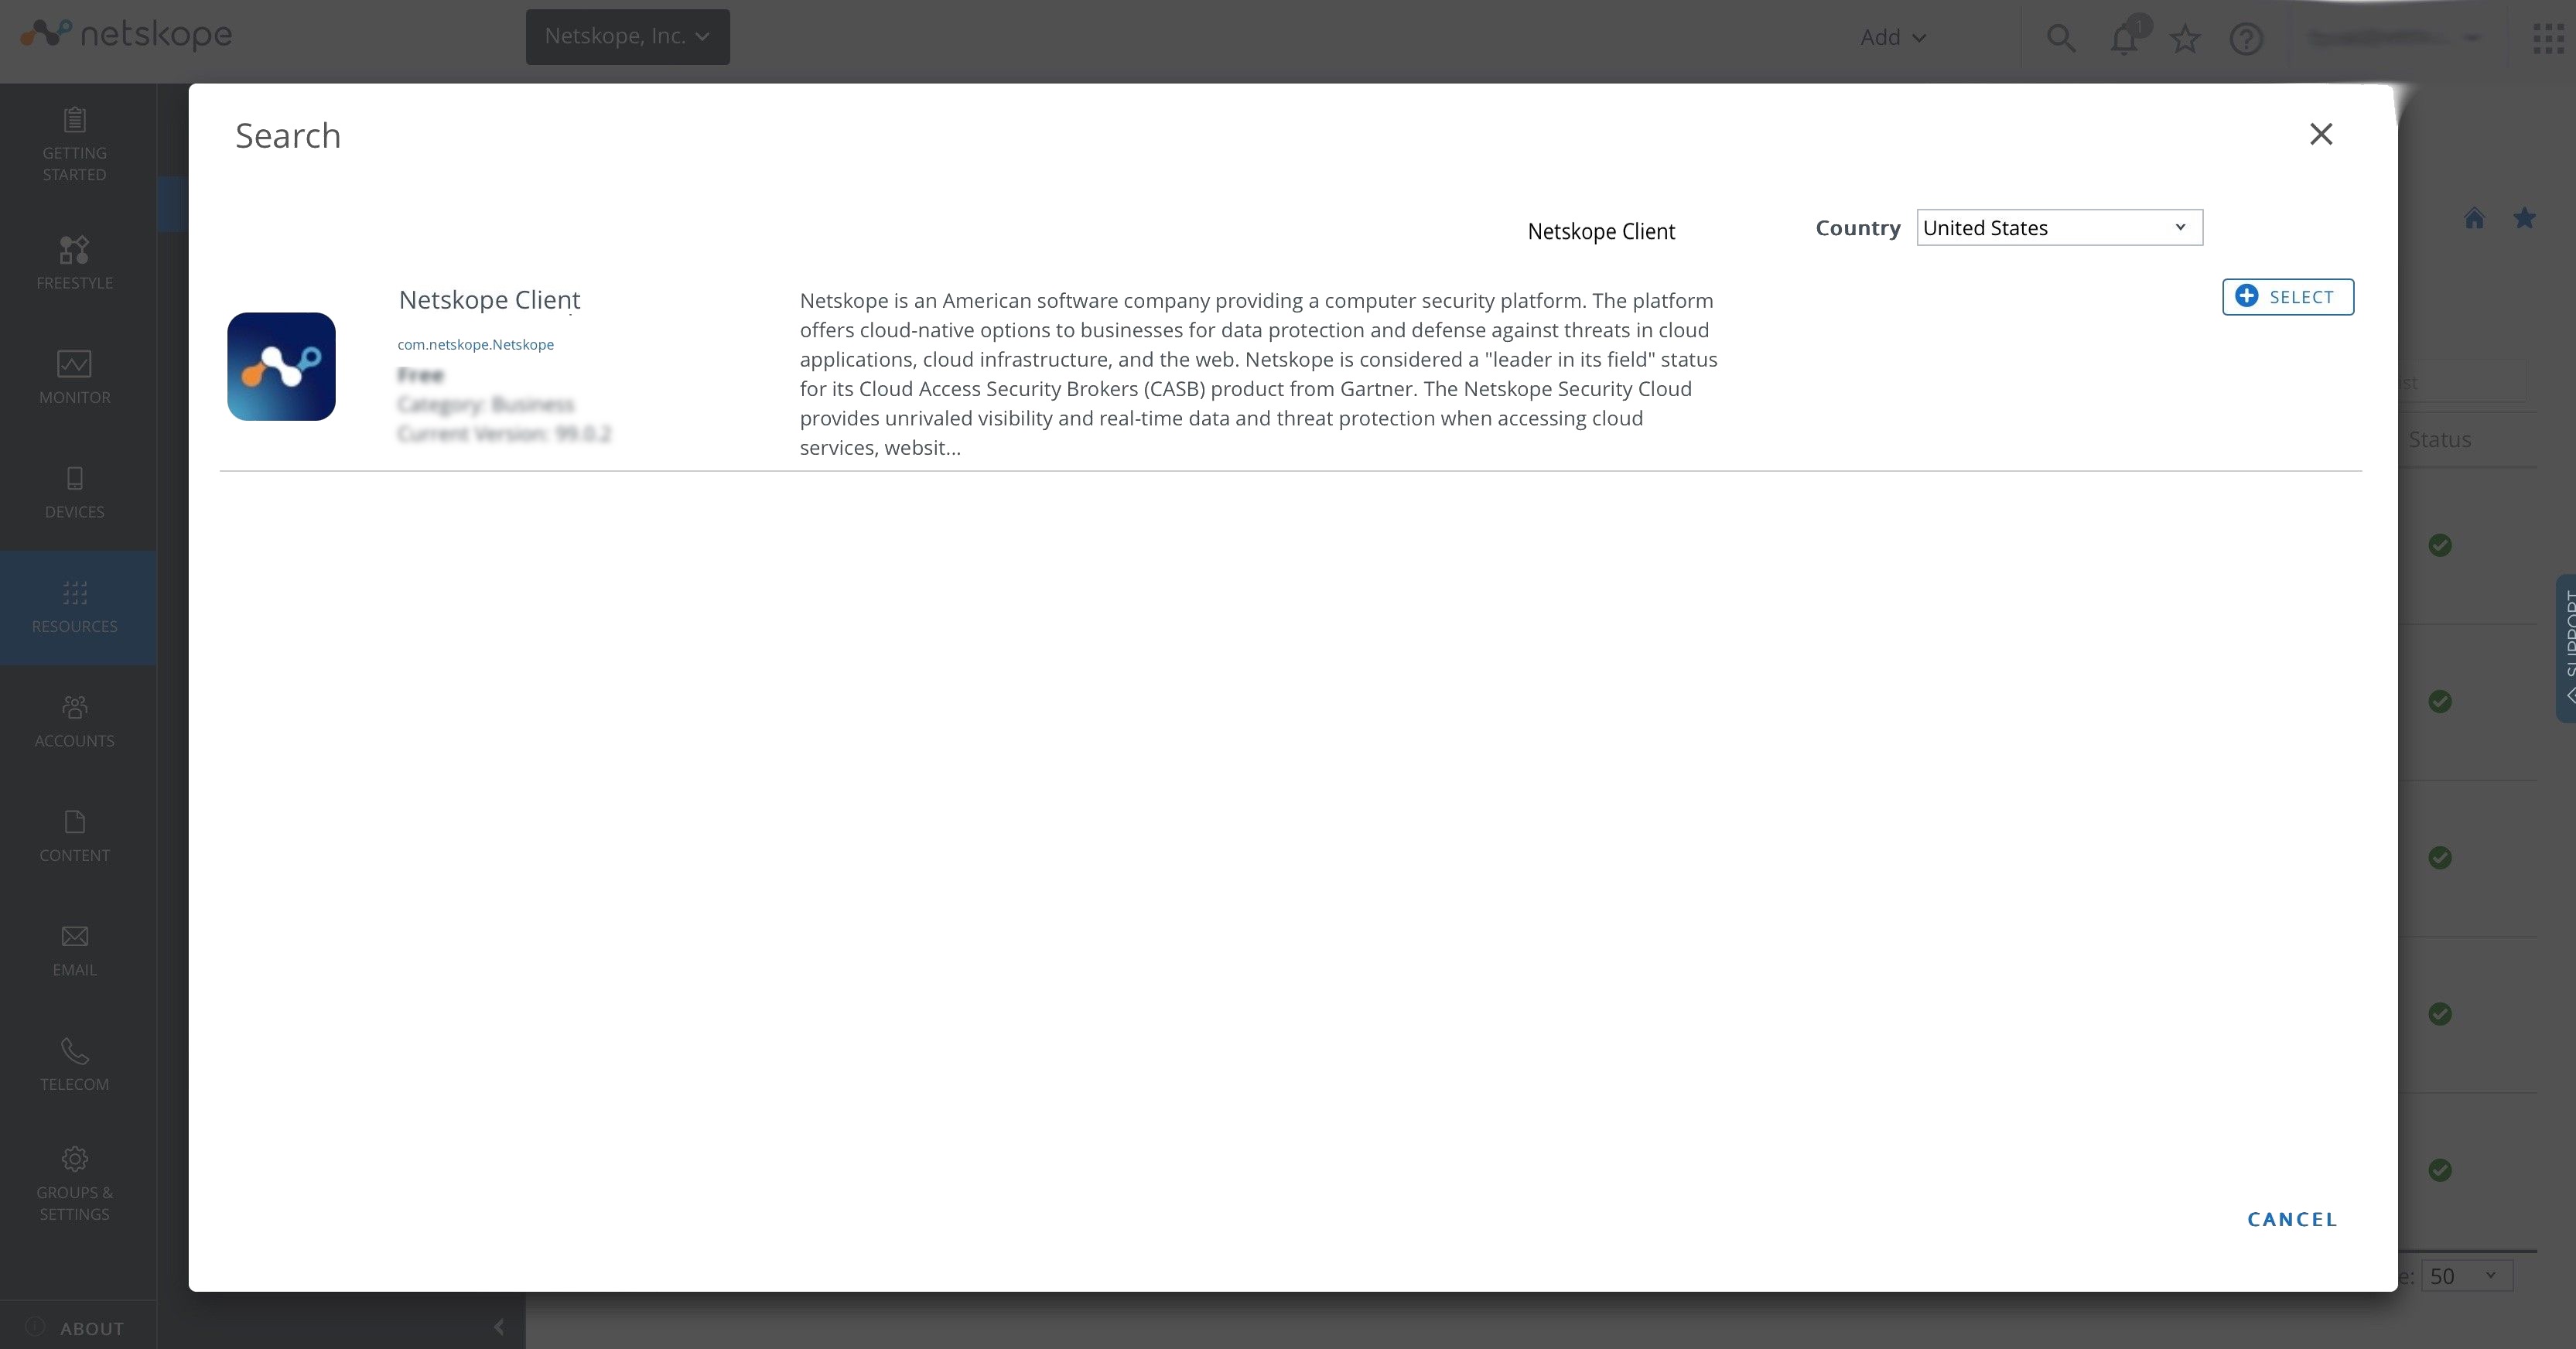
In the Add Application - Netskope Client window, click Save & Assign.
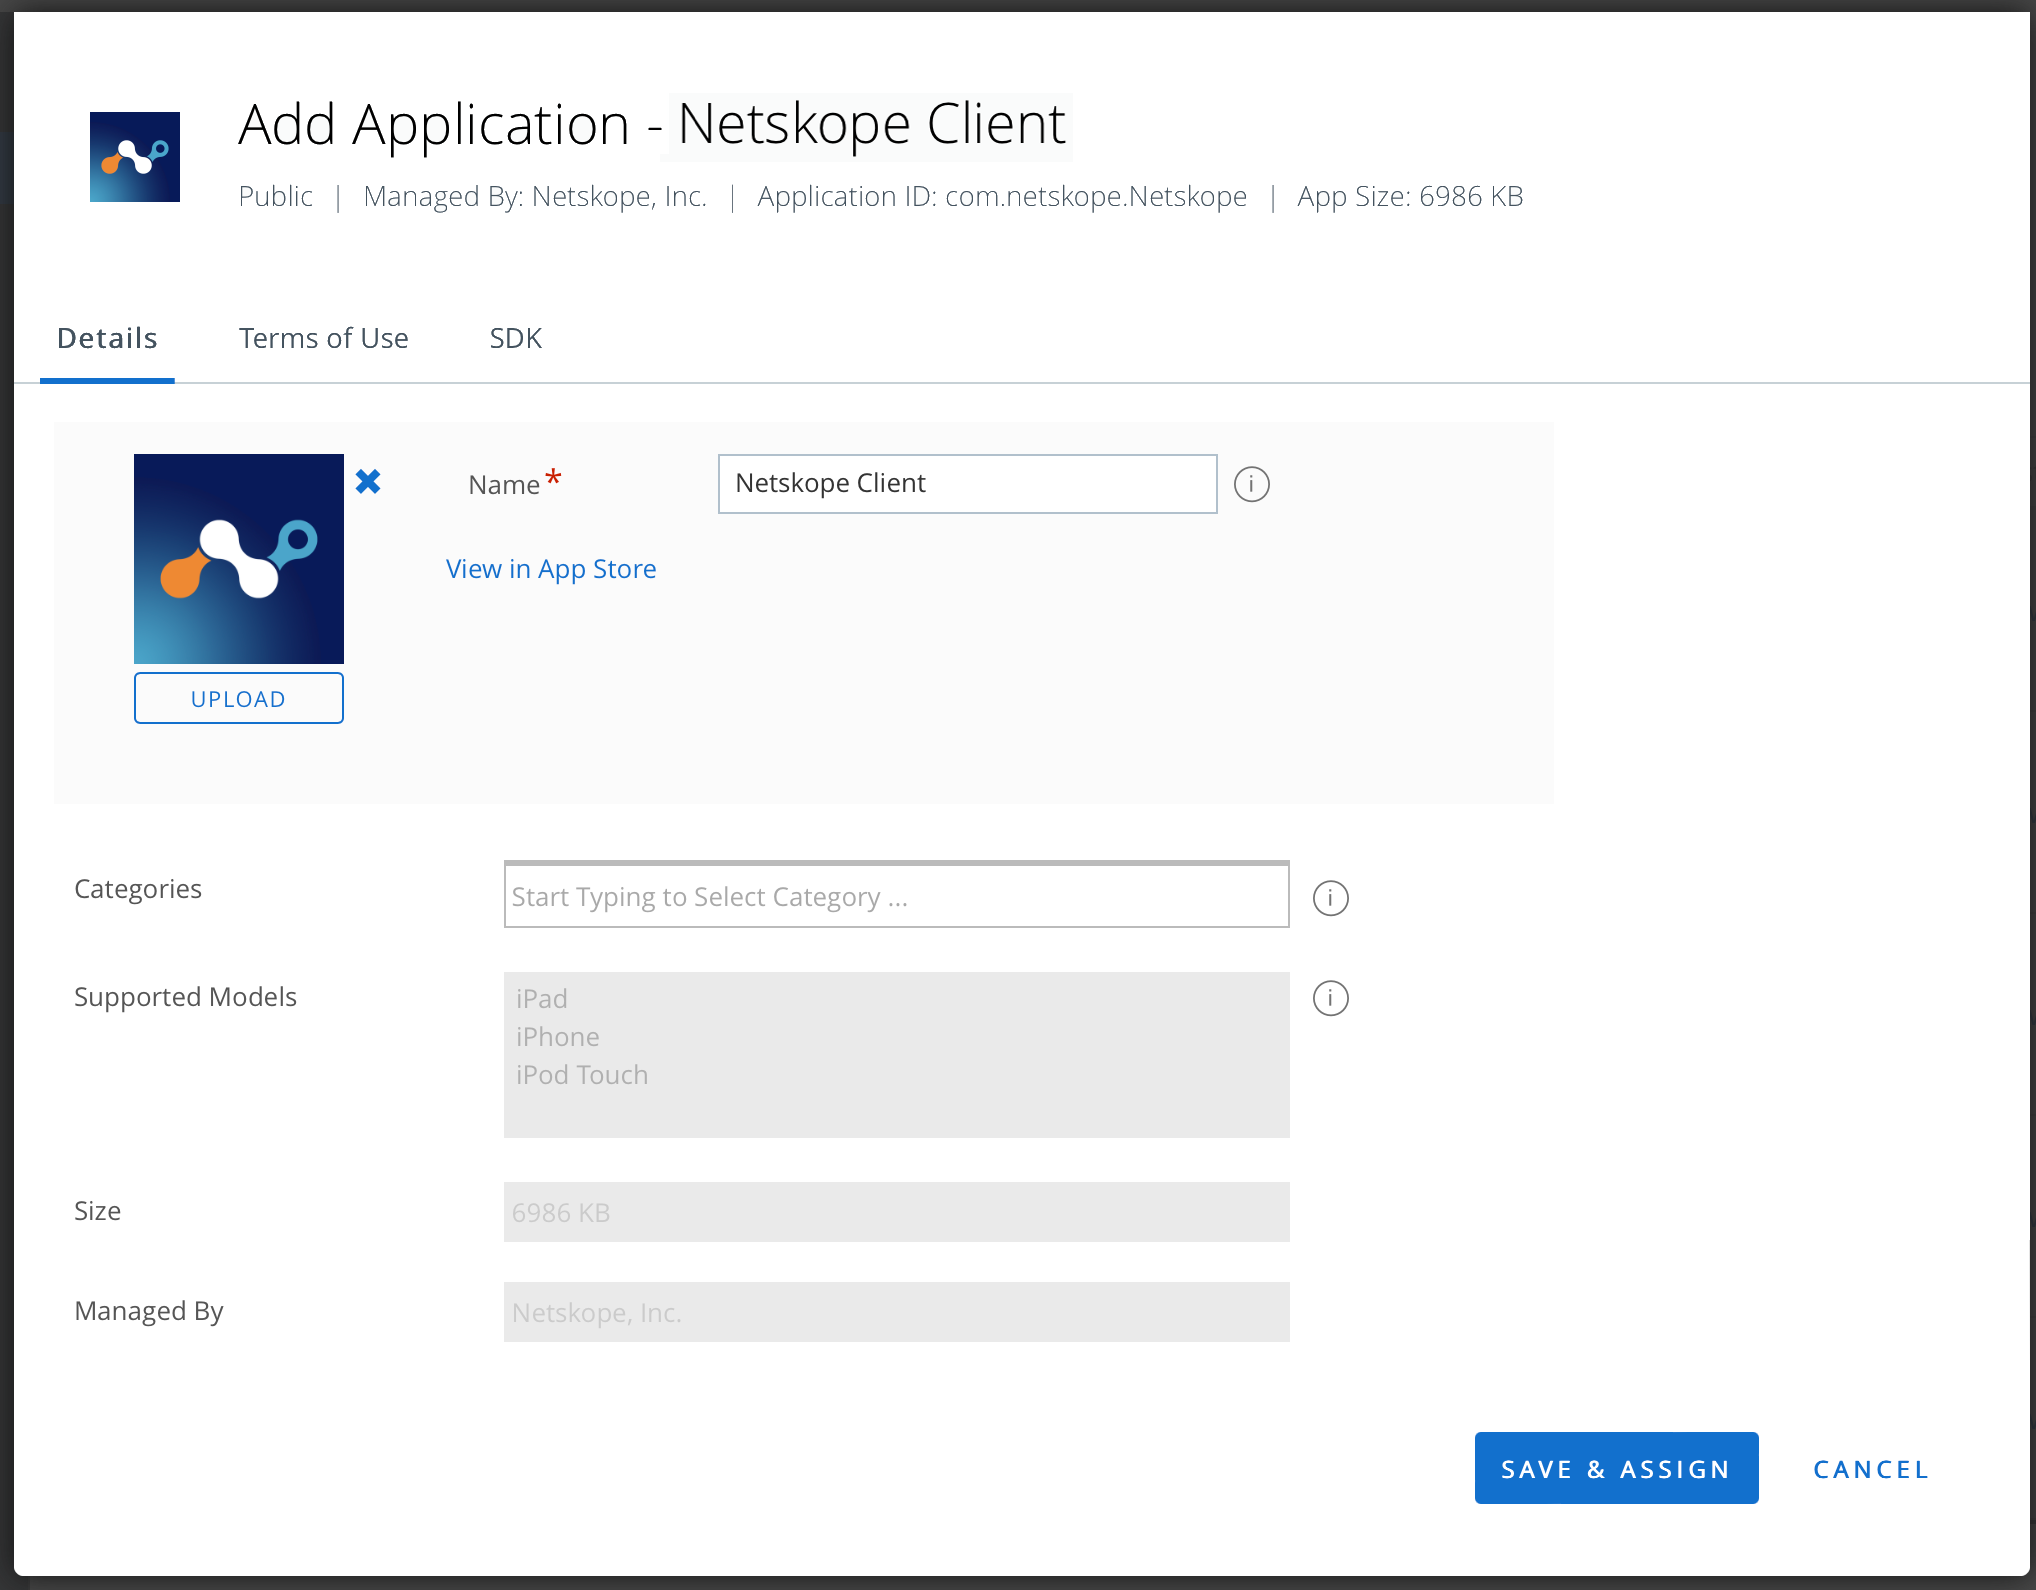
After you click Save & Assign, it navigates to the assignment configuration for the app.
In Netskope Client - Assignment > Distribution, enter the assignment name and select a target.
In Netskope Client - Assignment > Restrictions, configure the app restrictions.
In Netskope Client - Assignment > Tunnel & Other Attributes, select Per App VPN Profile (Optional).
In Netskope Client - Assignment > Application Configuration, configure the app for automatic enrollment. You can provide the following Key-Value pair:
OrgKey: Value of the tenant organizational key (string).
UserEmail: Use environment variable {EmailAddress} from Airwatch (string).
AddonHost: Provide the addon URL addon-[tenant name].[eu].goskope.com (string).

Note
Skip this step if you choose Zero-Touch configuration.
Click Create and save the assignments.
Click Publish once you review the app setting.