Forensics
With Forensics, you can see all the information you need in terms of what your users are doing in the cloud and what you should be looking at. When a violation is found, the object is placed in a forensics folder so you can review the specific types of sensitive data that are exposed. An automated cloud policy enforcement program is necessary for getting to a quick resolution and remediation.
Note
Netskope recommends to use a public cloud storage (like Azure Blob, AWS S3, or GCP Cloud Storage) as a forensic destination over a SaaS storage app. A SaaS storage app has the following limitations:
A SaaS storage app cannot scale for high frequency forensic write workloads. This may result in forensic data loss.
A SaaS storage app may force API rate limiting on high frequency write function.
If your environment anticipates a low frequency of forensic data writes, you can use a SaaS storage app as a forensic destination. Continue reading through this article. However, if you notice a significantly high volume of forensic data, move to a public cloud storage repository. To learn more: Forensics for Public Cloud.
To use forensics, you need to:
Configure the SaaS/IaaS app(s) you want to store forensics data.
Note
For a list of apps that support forensic as a destination, see API Data Protection Policy Actions per Cloud App.
Create a forensic profile that flags policy violations and stores the files in a forensic folder.
Note
For most apps, the user email ID is needed and must be a valid user email ID in the app. It can be an admin user email ID or a normal user email ID. A forensic folder named Netskope Forensic Folder will be created inside the respective user email ID's account. Create this user email ID 24 hours before creating the forensic profile.
Enable the forensic profile.
Review the violations within specific files and take remedial action by contacting users and managing files in the forensics folder.
Use Cases
These are the forensics use cases.
Store Forensics Data
The first step in digital forensics is to collect information while maintain integrity. The data or system is next examined to see if it was altered, how it was altered, and who made the changes. To keep proprietary information safe, Netskope employs a comprehensive data management, data governance, and network security strategy. Having data that is well-managed and secure might speed up the forensic procedure if the data is ever investigated.
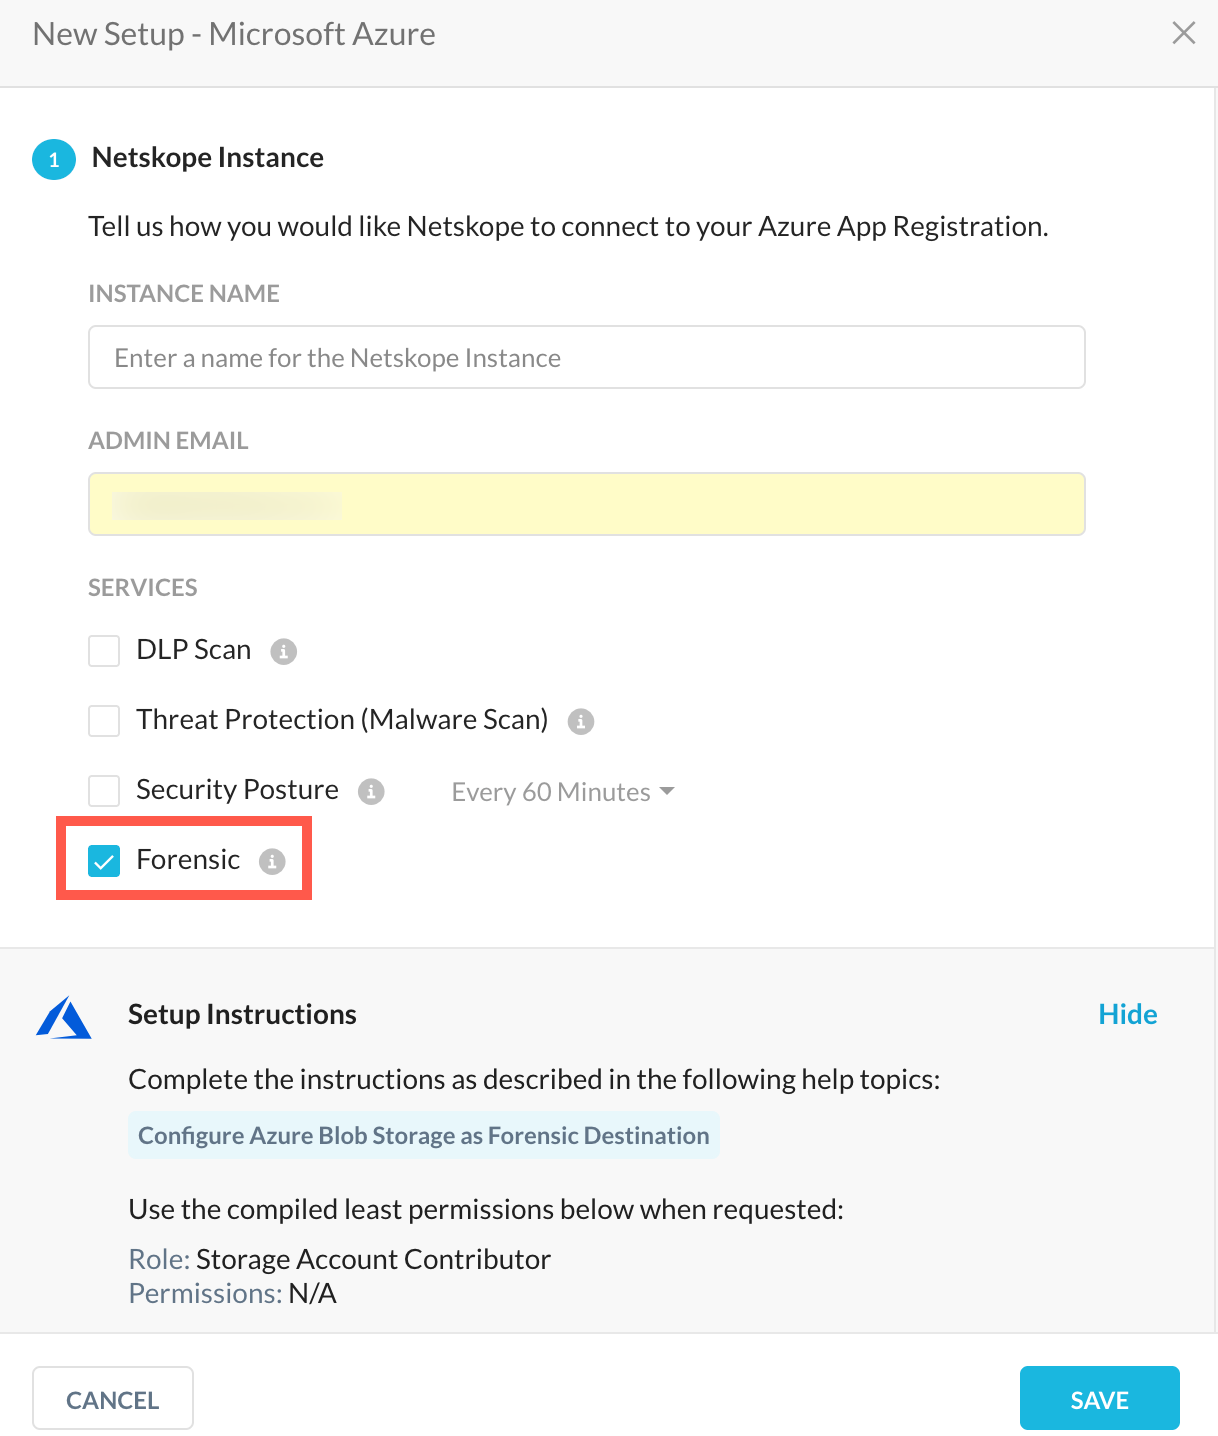
One use case involves Real-time Protection; API Data Protection is not needed for SaaS/IaaS app cloud storage. The goal here is to use a specific SaaS or public cloud app storage space for forensic data. Setup the SaaS/IaaS app instance in UI: Settings > API-enabled Protection > IaaS > Setup Instance. Choose only Forensic as shown when setting up the SaaS/IaaS app instance.
 |
Use API Data Protection and Store Forensic Data
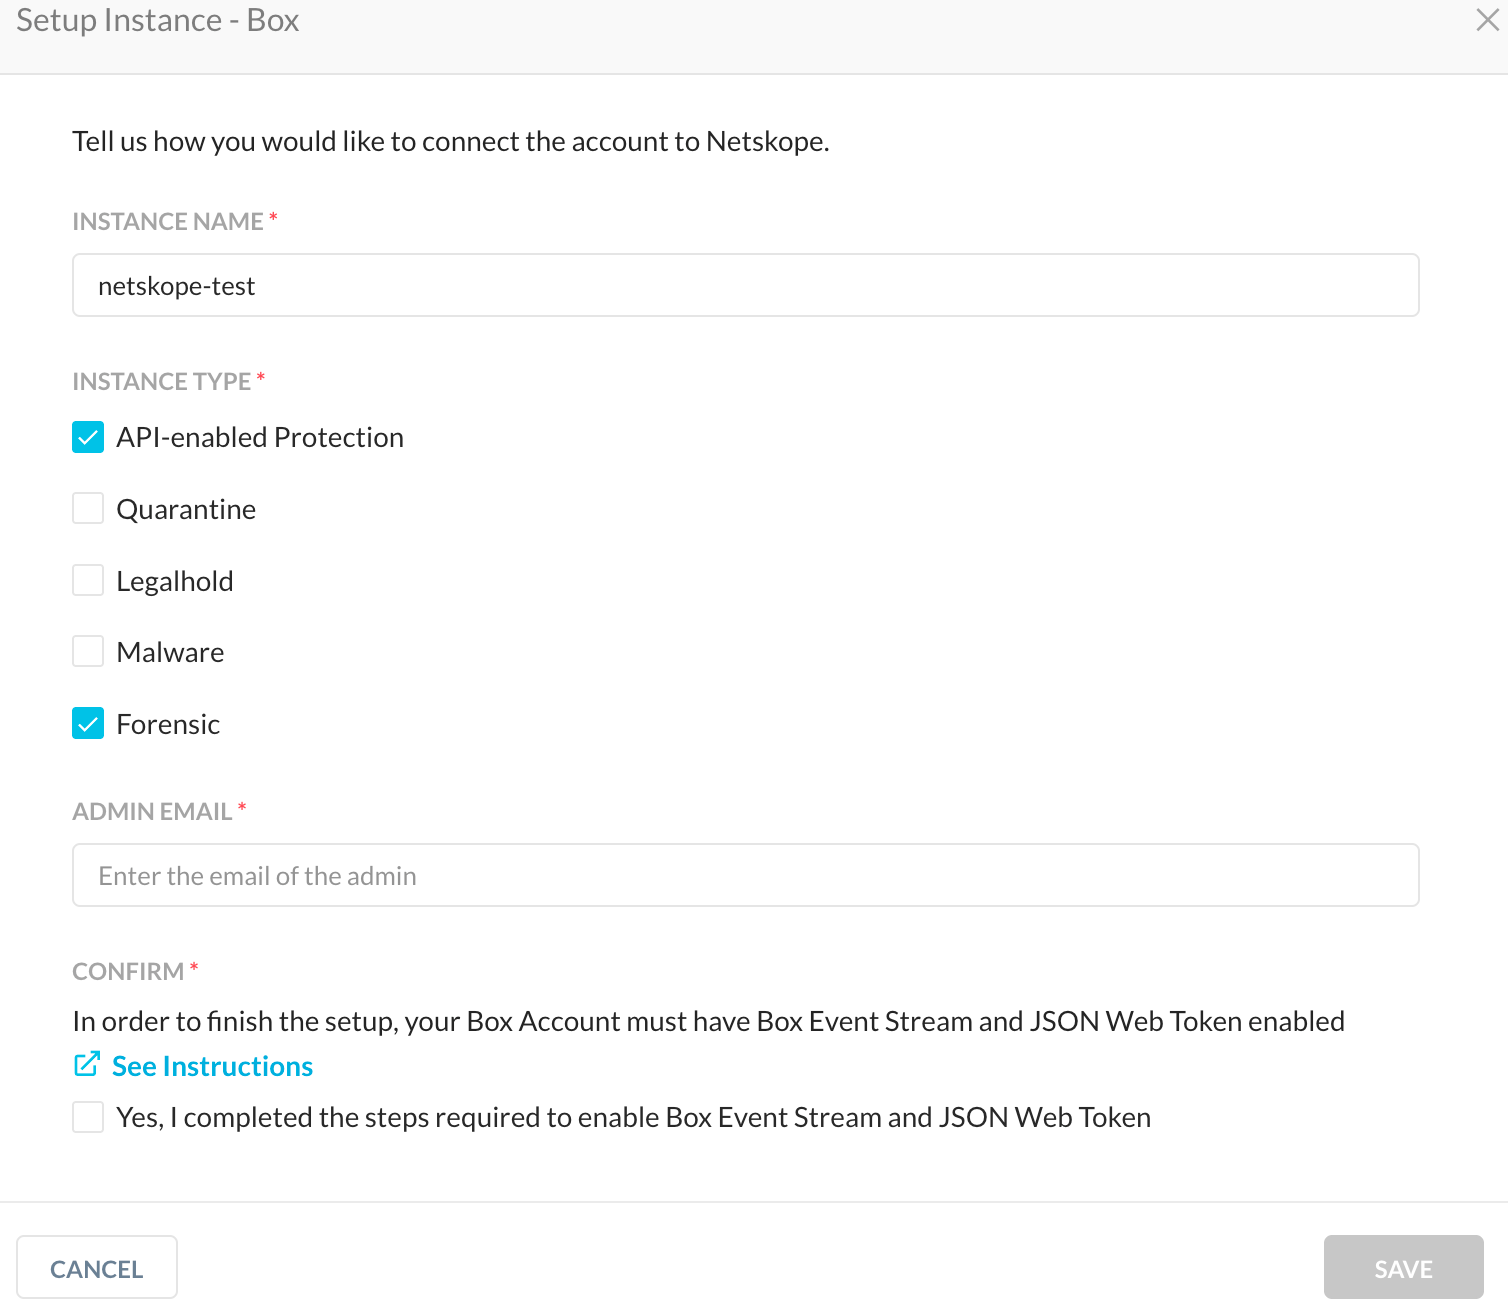
The second use case includes API Data Protection as well as forensic data storage, but keeps the forensic data in a specific user space (like forensic@domain.com user space). Setup the SaaS app instance in the UI: Settings > API-enabled Protection > SaaS > Setup Instance. Choose API Data Protection and Forensic as shown when setting up the SaaS app instance.
 |
Create the required email ID, like forensic@domain.com, wait 24 hours, and then configure a forensic profile using the same email ID for forensic@domain.com and enable it. This will create a Netskope Forensic Instance folder in the forensic@domain.com user space and store forensic data there.
You can choose quarantine, legal hold, and malware as well.
View Forensics Data
Go to Incident > DLP to view Forensics data. You must be an Administrator with the required permissions to access the data.
 |
Click on an incident to view the details.
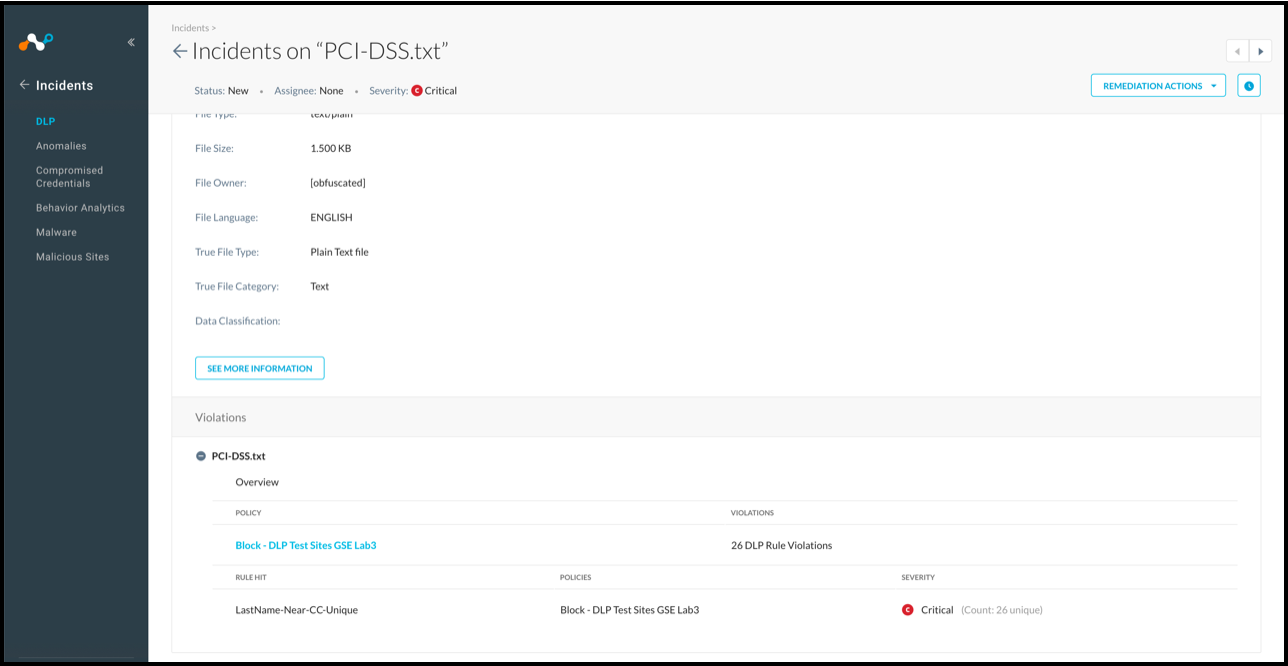 |
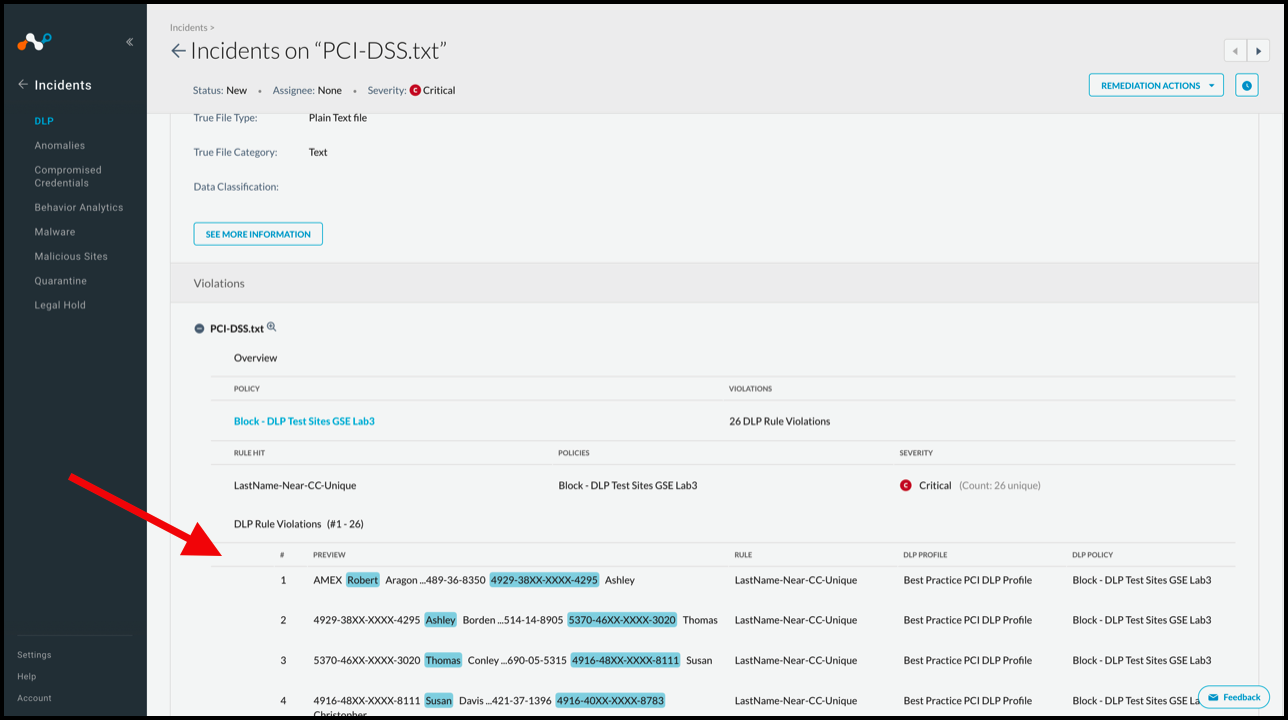
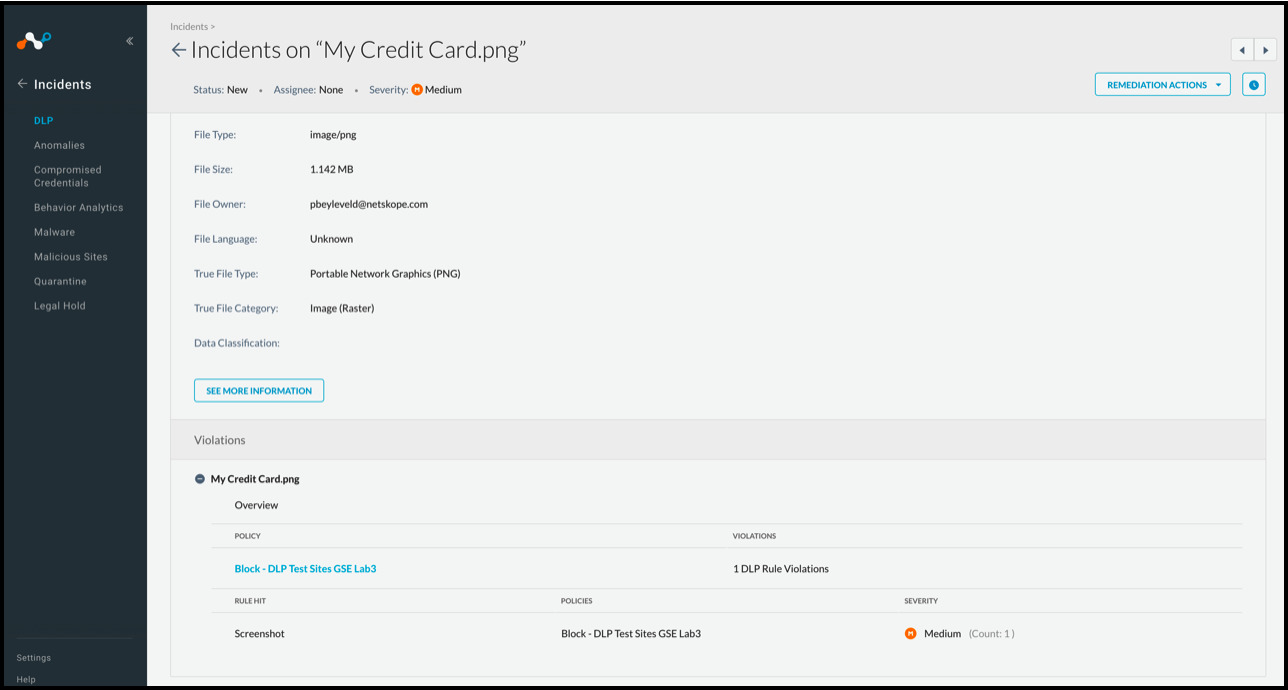
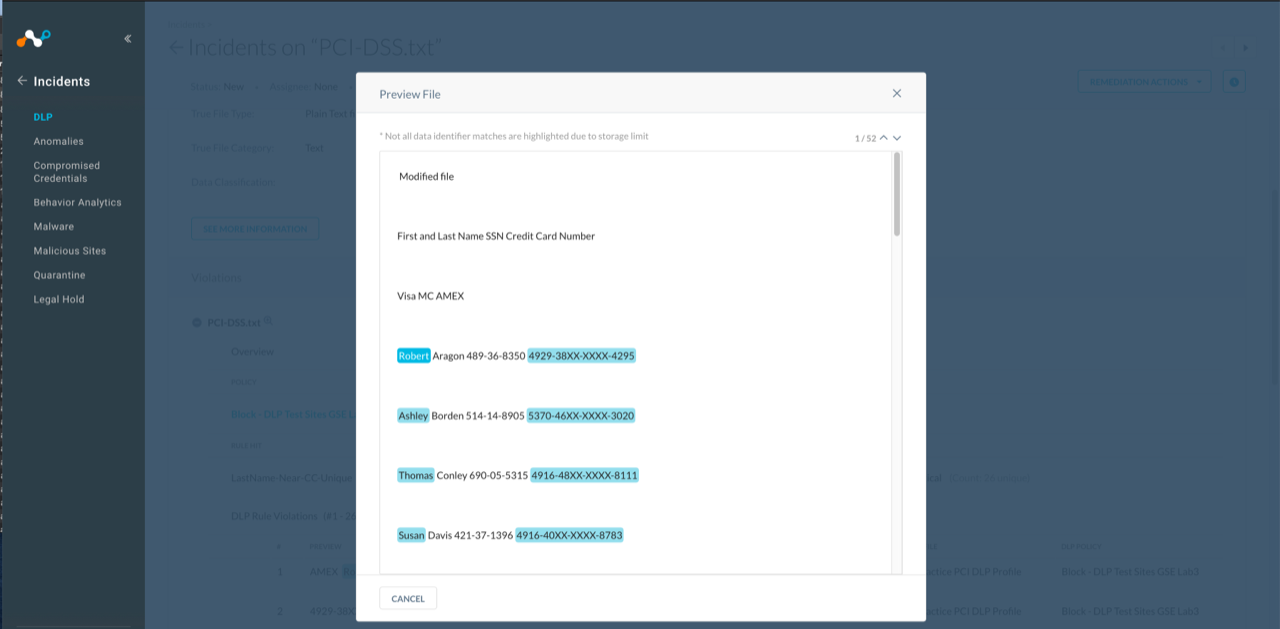
Forensic data is shown at the bottom of the detailed view when it is available, displayed with text-based DLP rules. ML-based rules do not display this type of forensic data. This is only visible when the admin role is allowed file access.
 |
Here is an example of what is shown for an ML-based rule violation.
 |
You can also view the data by clicking on the magnifying glass icon next to the file name in the Violations section.
 |
Here's an example of what a restricted admin sees when trying to access the data, or when Forensics is not configured.
 |
To learn more: About DLP.