Create a policy to allow sharing with approved external users
Prerequisites for the API protection use cases | Roles/actors using the use cases |
|---|---|
|
|
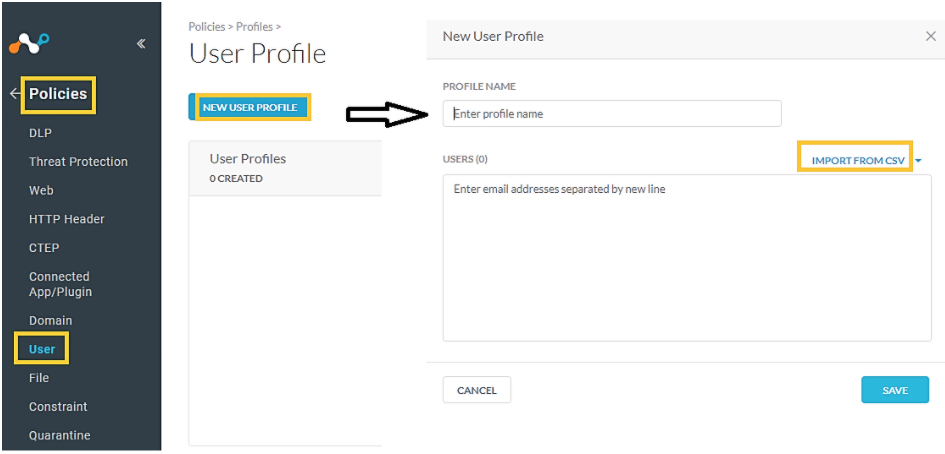
To have a set of approved/identified users, a user profile can be created. The user profile can then be included in a policy and appropriate actions can be taken based on the actions (allow/block) selected in the policy. Follow the steps below to create a user profile.
From the Netskope Console UI, click on Policies > Profiles > User.
Click New User Profile.
Provide a name in the Profile Name box.
Add the users to be approved in the Users Box. This may also be populated via CSV import.
Click Save.
Click Apply Changes and then Apply again to activate the policy.

To modify the internal or external sharing settings in a policy or to incorporate the desired user profiles in a policy, follow the steps shown below:
From the Netskope Console UI, click on the Policies menu item, then API-Enabled Protection.
Click the New Policy button.
In the Application box choose the Application and Instance for the policy and click next.
In the Users box, choose the desired users and click next.
In the Content box, select Specific Sharing Options and check the box for Shared Externally.
Click Next and the Activity box is shown.
Choose Share. Make sure all other activities are not selected.
Click Next multiple times until the Action box is shown.
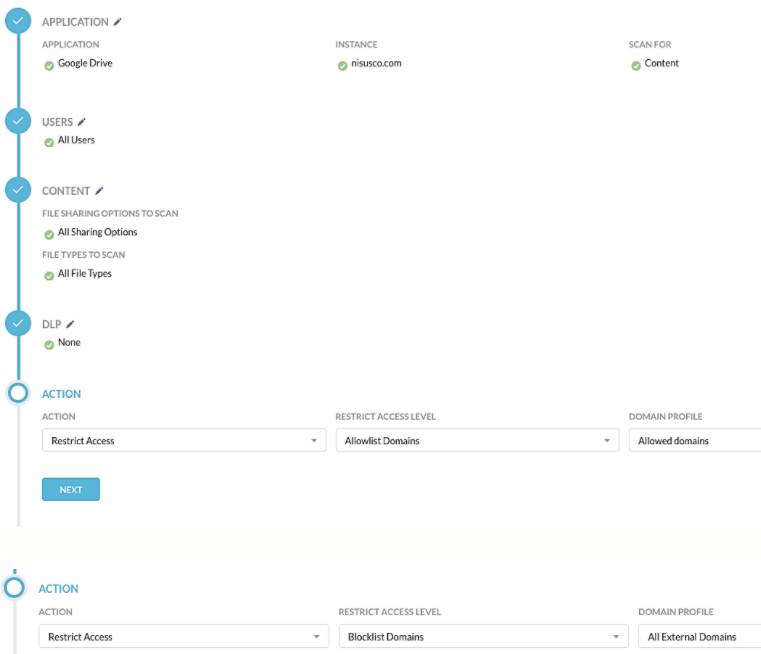
Set the Restrict Access level:
To allow sharing with approved external users, set the Action to Restrict Access and the Restrict Access Level to ‘Allowlist User Profiles’ and select the User Profile to the one created earlier.
To block access to identified external users, set the Action to Restrict Access and the Restrict Access level to ‘Blocklist user profiles and select the User profile to the one created earlier.
To block access to identified external users, set the Action to Restrict Access and the Restrict Access level to ‘Remove Public Links’.
Click Next until the Set Policy box is shown.
Provide a name for the policy in the Policy Name box.
Click Save.
Click Apply Changes and then Apply again to activate the policy.


To view the alerts triggered by the policies navigate to Skope IT > Alerts.
Click Add Filter > Policy Name and choose the name of the desired policy.This shows all alerts triggered by the specified policy.
To learn more: Understanding API Protection