SAML Reverse Proxy with Okta
Integrate Okta with the Netskope SAML reverse proxy for a SaaS application, like Salesforce or O365 to establish single sign-on (SSO) between Okta and the SaaS application with Netskope as the SAML reverse proxy. Then use an API request to modify the Okta App configuration to override the endpoint URL and use the Netskope SAML reverse proxy instead of the original SaaS application.
Netskope Reverse Proxy with Okta
This document explains a new way to integrate Okta with the Netskope SAML reverse proxy for a SaaS application, like Salesforce or Office 365. First establish single sign-on (SSO) between Okta and the SaaS application, then configure Netskope to be the SAML reverse proxy. To complete the integration, use an API request to modify the Okta App configuration to override the endpoint URL and use the Netskope SAML reverse proxy instead of the original SaaS application. The following videos explain the procedure for Salesforce and O365.
Netskope Reverse Proxy for Salesforce with Okta - Netskope Reverse Proxy with SalesForce
Netskope Reverse Proxy for O365 with Okta - Netskope Auth Proxy with Okta and O365
Prerequisites
In order to complete the instructions in this document, you must first:
Ensure that you have existing Okta and SaaS application admin accounts
Configure Okta for a Saas application with SAML following the setup instructions in Okta's website . While configuring the SaaS application, click View Setup Instructions on the Settings page after adding an application, and then copy the following. You will need these during this configuration procedure.
IdP SSO URL
IdP Issuer URL
Certificate
Establish an SSO connection between the SaaS application and Okta and then verify it works. Refer to the SaaS application's Help documentation for instructions.
Before you begin, download the Postman app. You will need this app (or a similar app) to add the SSO ACS URL override described in this document.
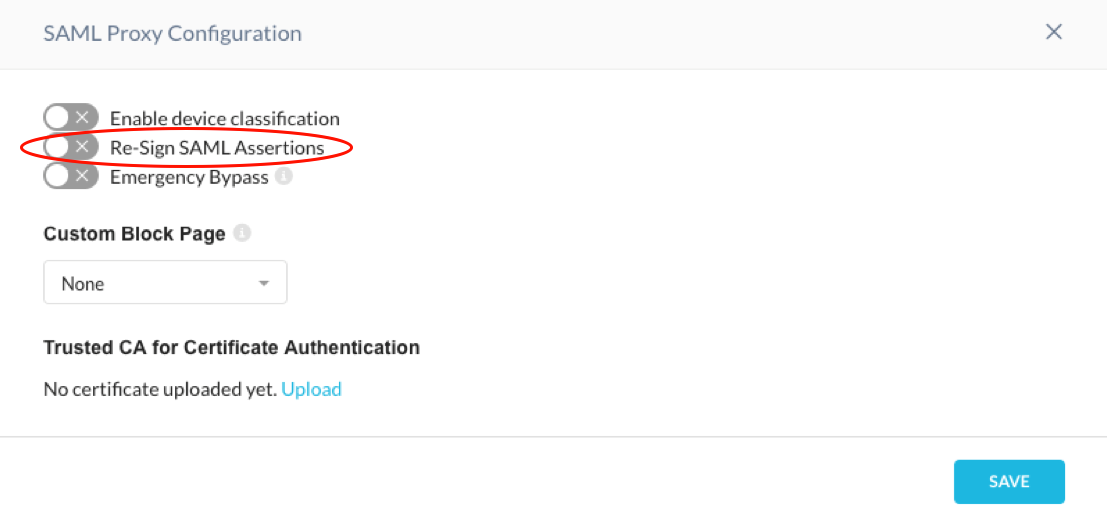
Disable the Re-Sign SAML Assertion - If you are working within a new Okta environment, log into your Netskope tenant to disable the Re-Sign SAML Assertion setting following the steps below:
Go to Settings > Security Cloud Platform > Reverse Proxy > SAML and click Settings.

Disable the Re-Sign SAML Assertion.

Click Save.