Configure Azure AD SAML
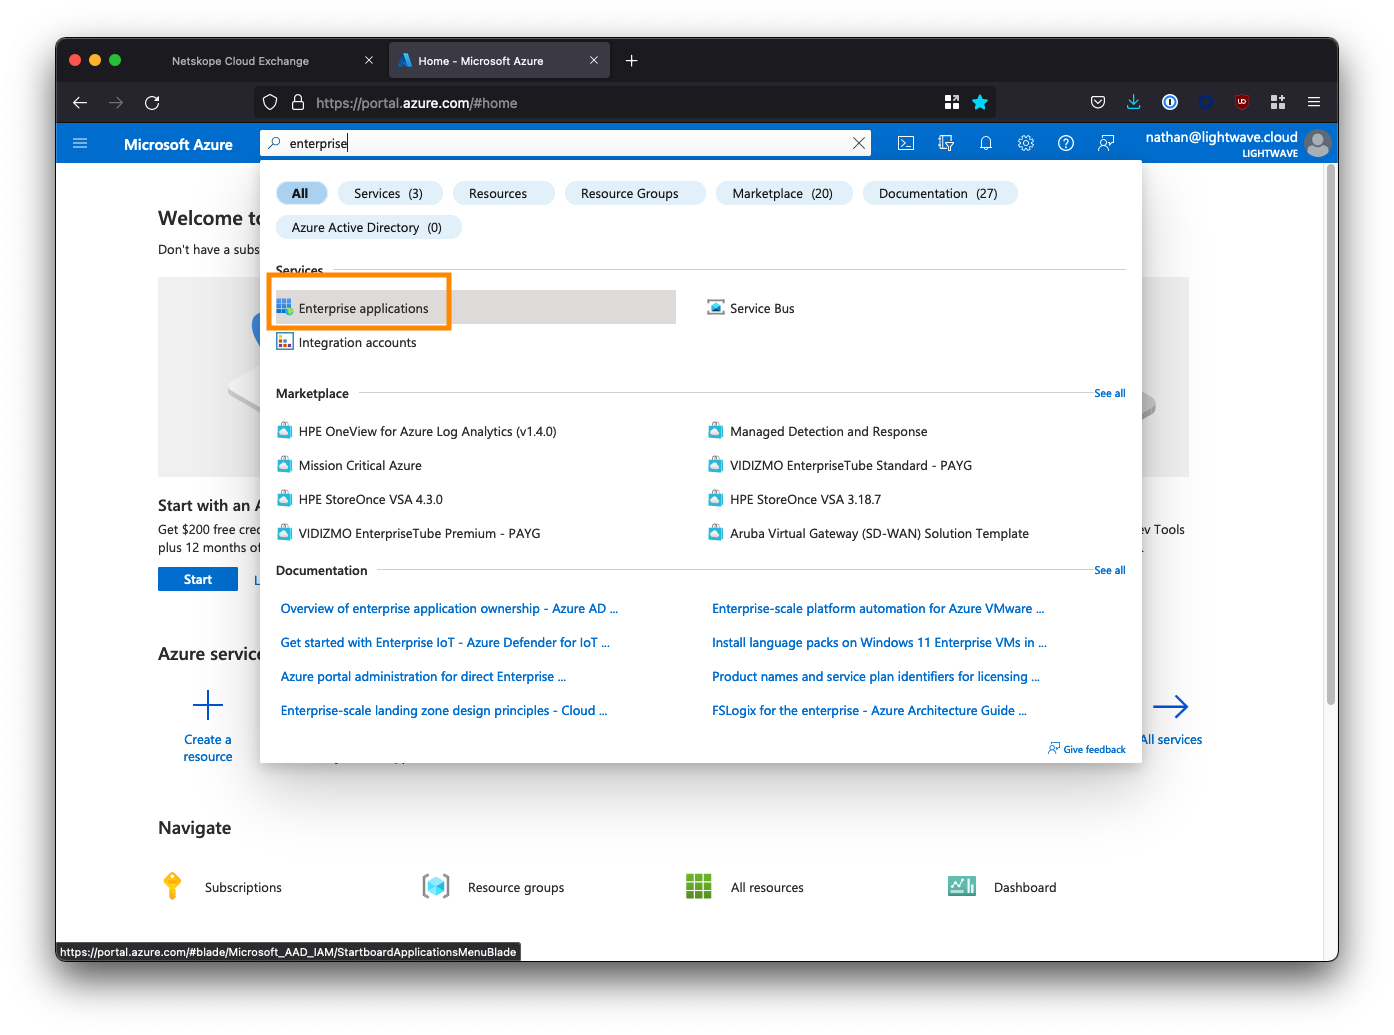
Log in to the Azure AD portal, and go to Enterprise Applications. You may need to search for this at the top of the portal.
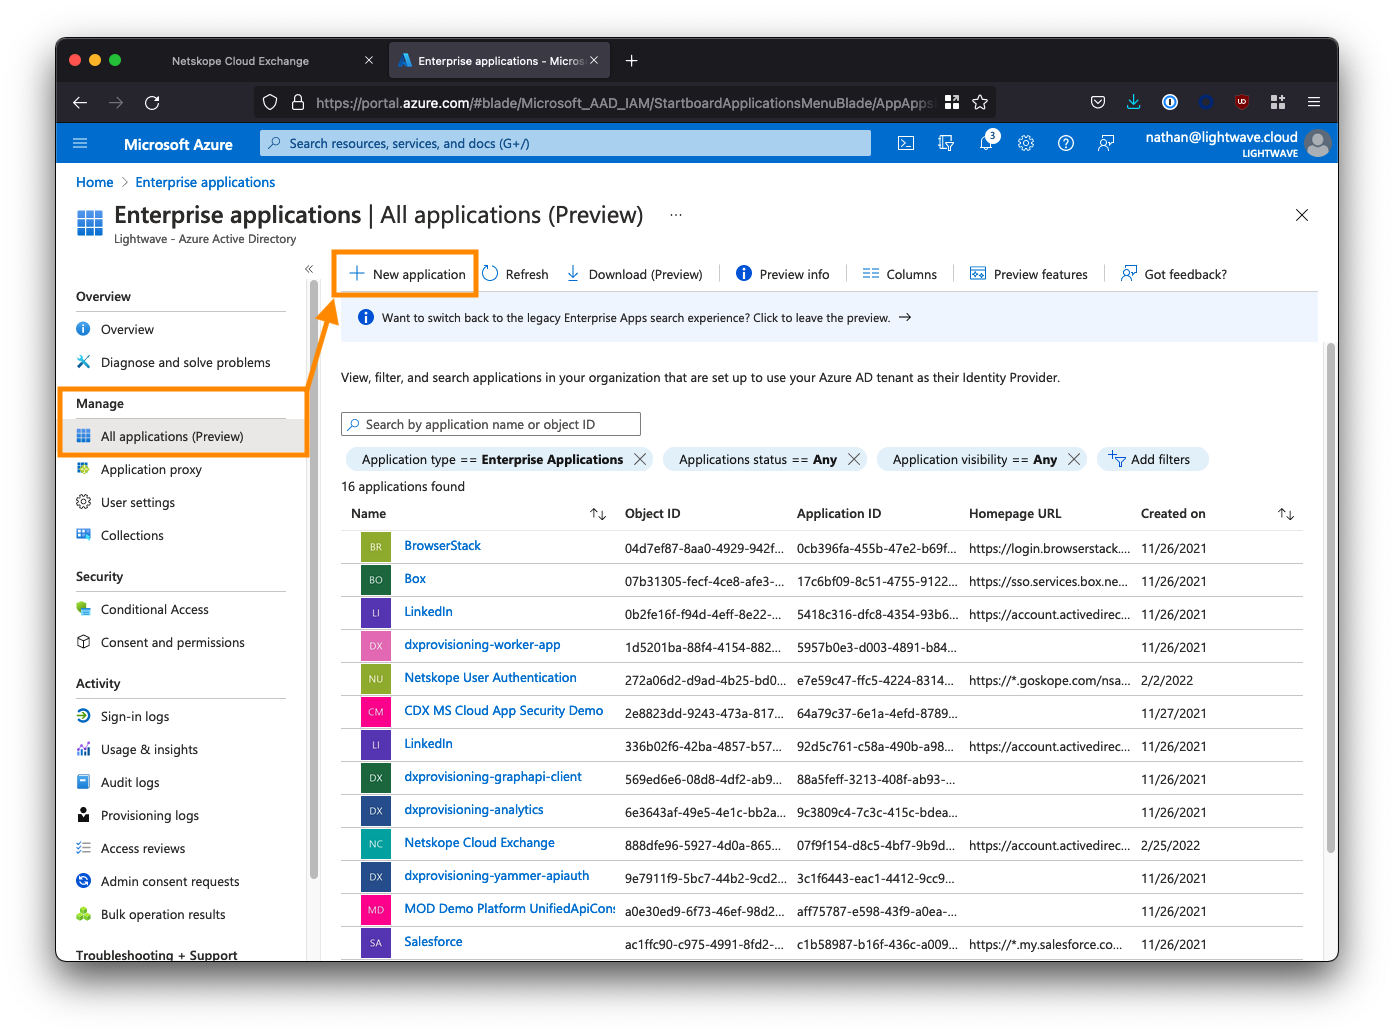
Click New application.
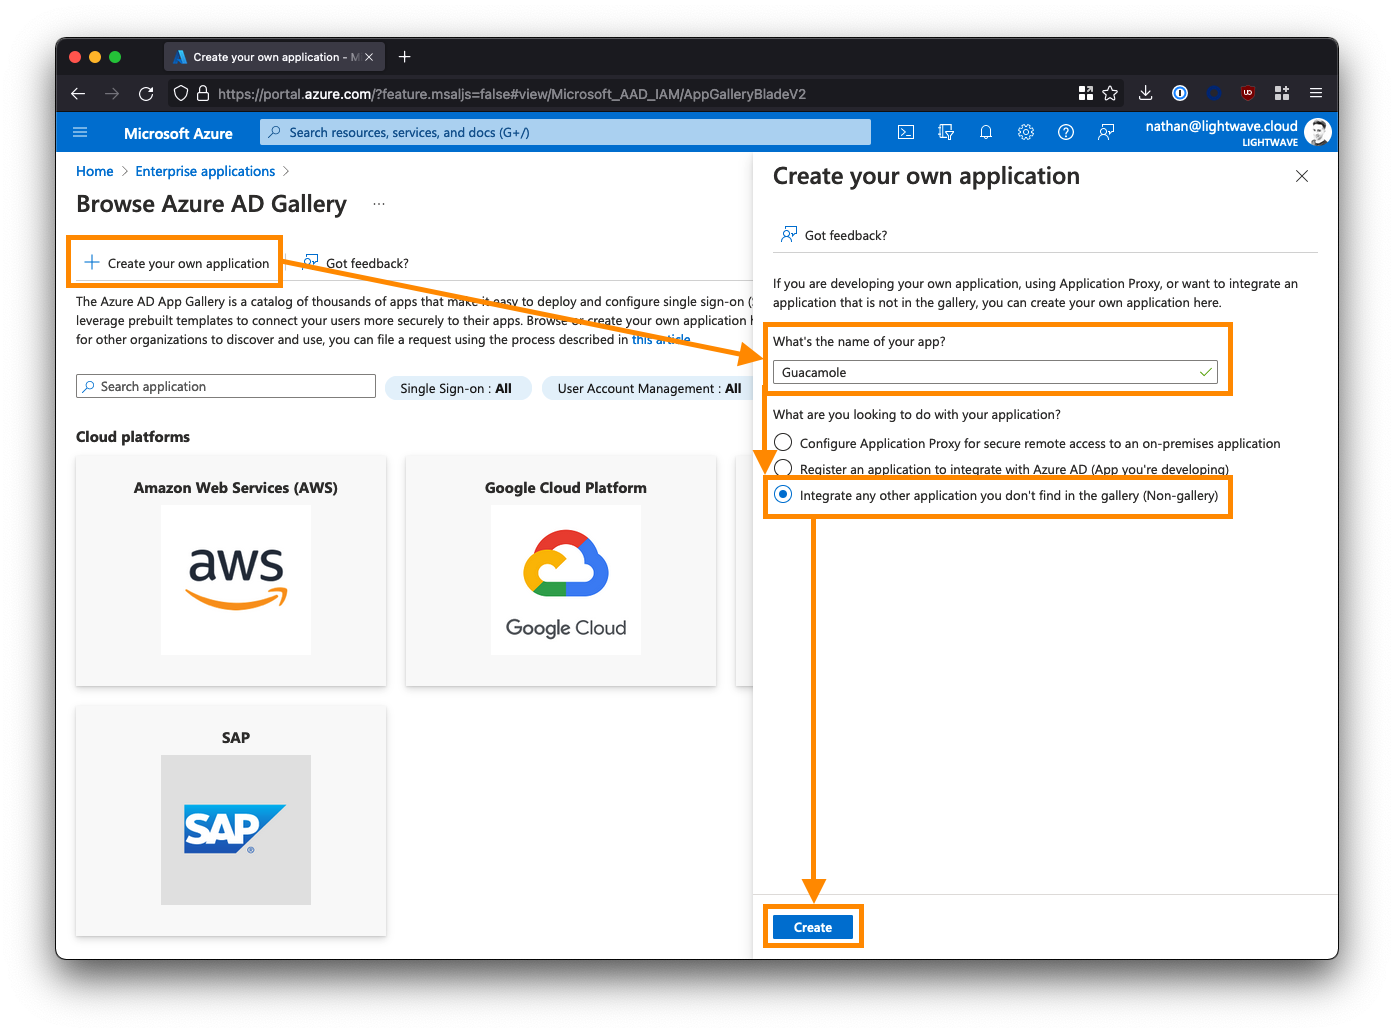
Click Create your own application and name the application Apache Guacamole SSO.
Select the 3rd option to create a non-gallery app: Integrate any other application you don’t find in the gallery.
Click Create when you are done.
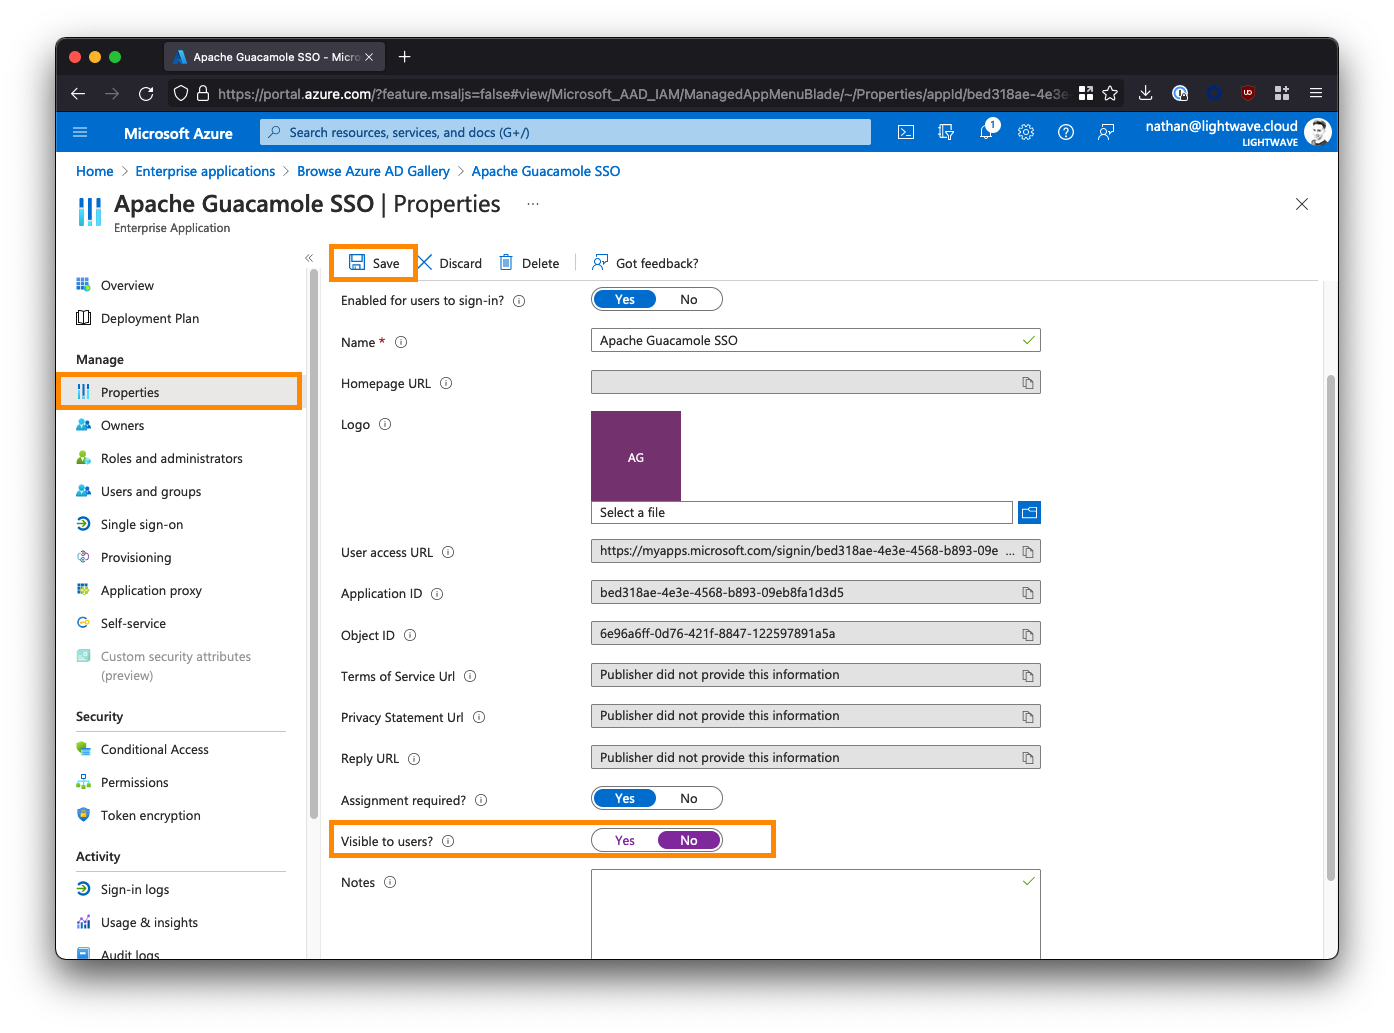
From the left-side menu, click Properties, and set the Visible to Users? option to No.
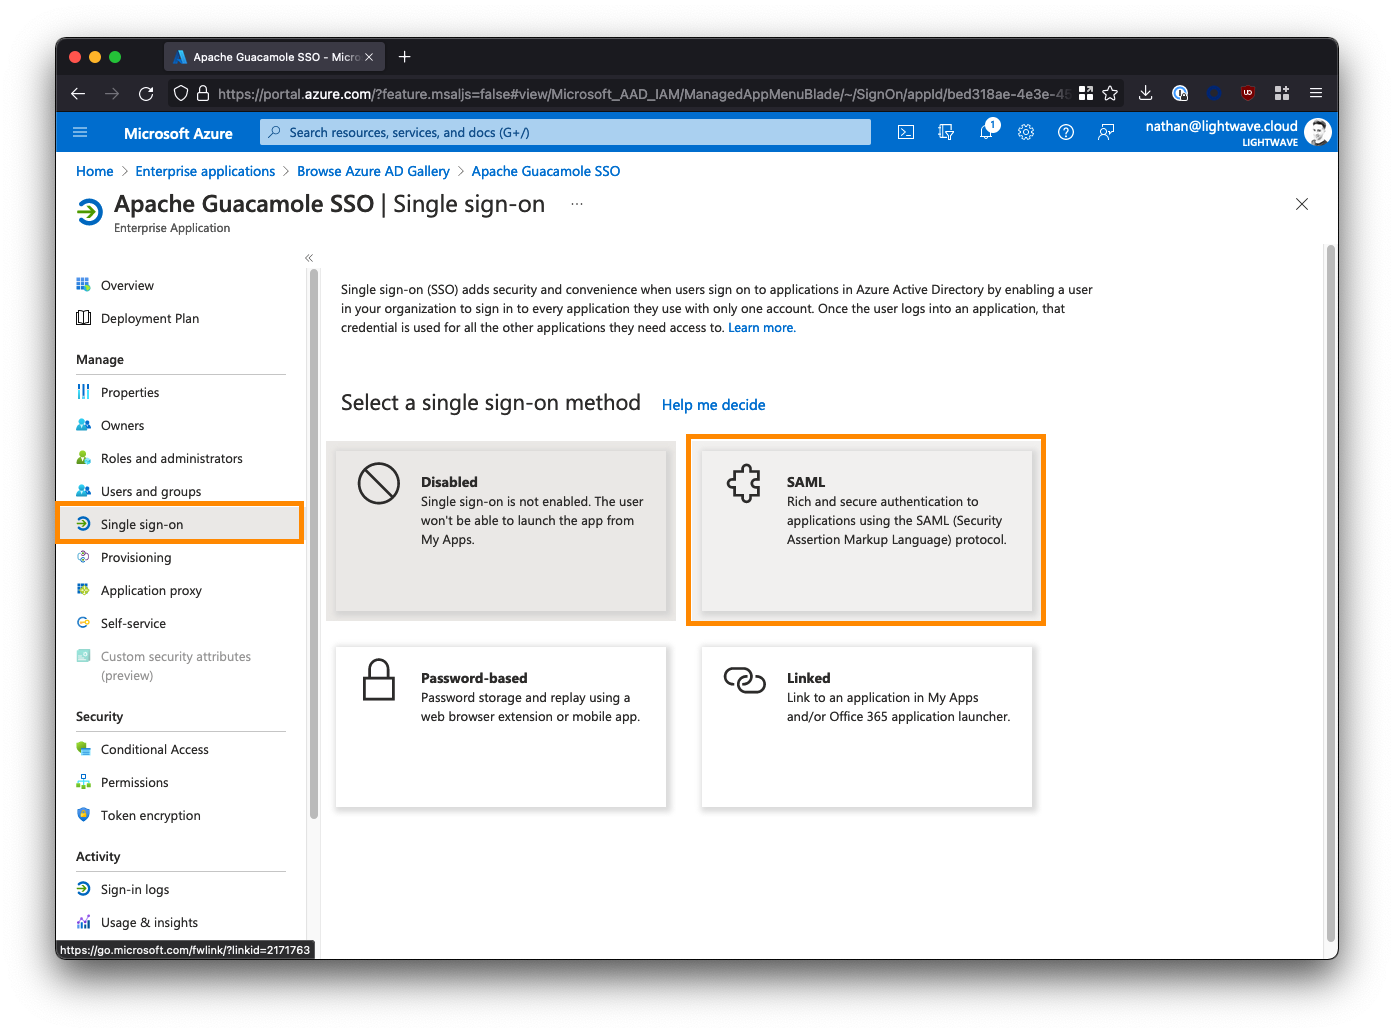
Click Single sign-on from the left-side menu, and select SAML when prompted.
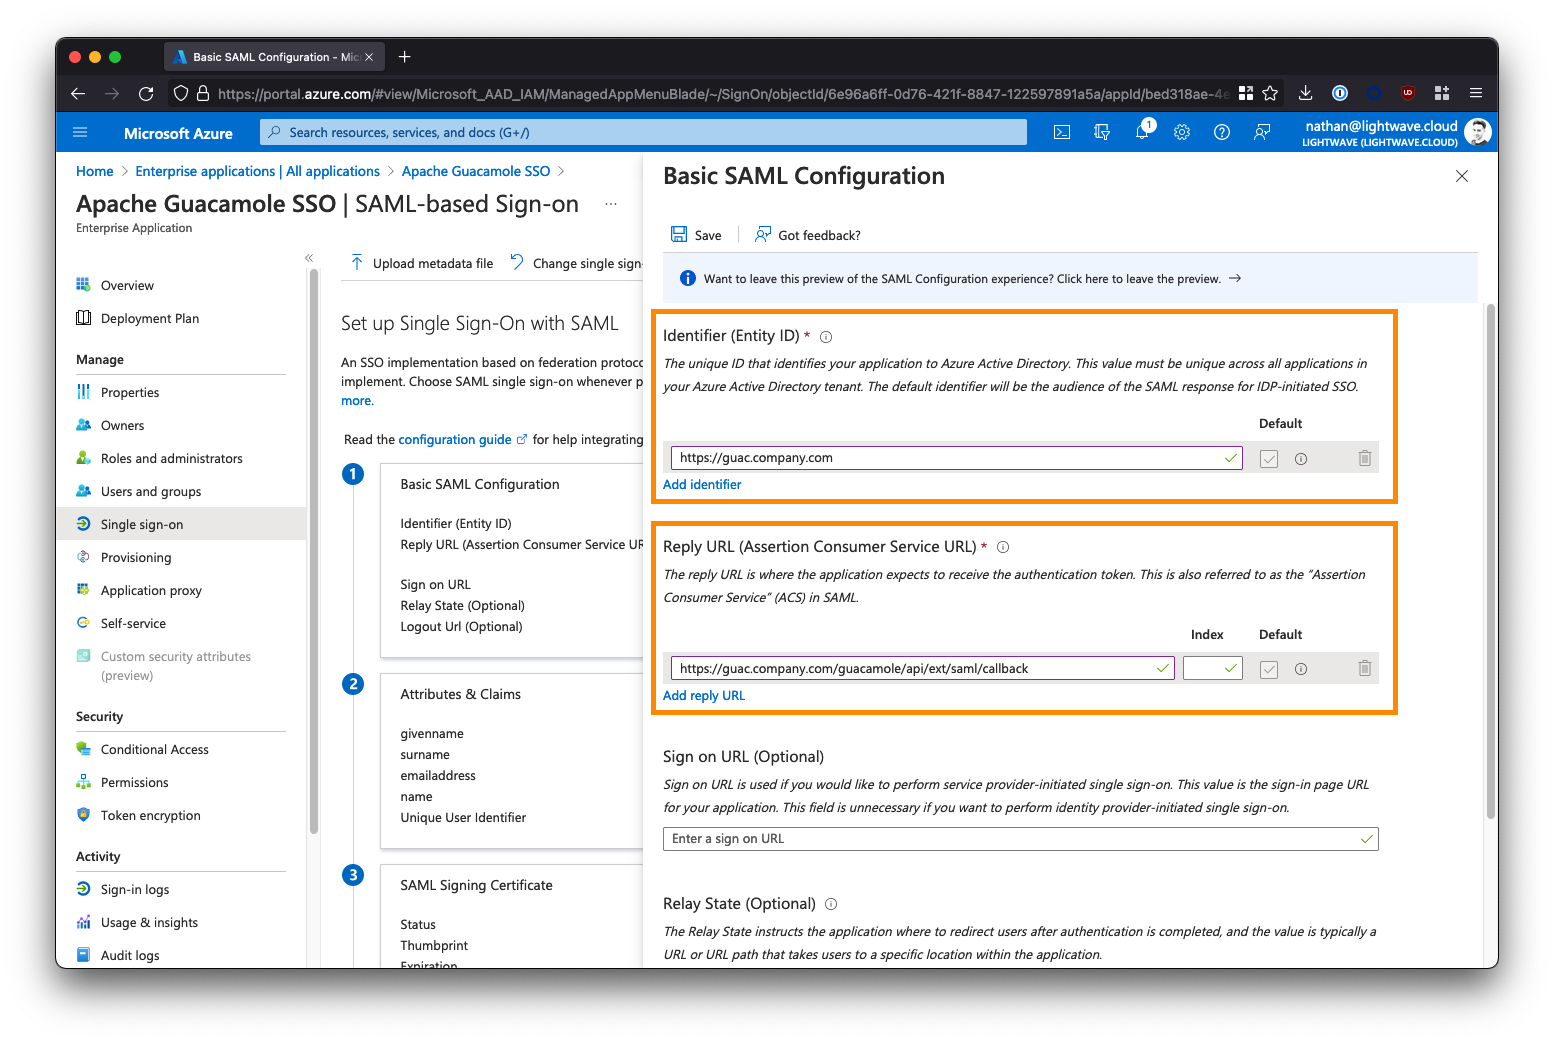
Under Basic SAML Configuration, click Edit and enter the following parameters. Substitute
<fqdn-of-your-guacamole-instance>with the domain you wish to use to access the Guacamole UI. For example:guac.company.com.Identifier (Entity ID):
https://<fqdn-of-your-guacamole-instance>For example:https://guac.company.comReply URL (Assertion Consumer Service URL):
https://<fqdn-of-your-guacamole-instance>/guacamole/api/ext/saml/callbackFor example:https://guac.company.com/guacamole/api/ext/saml/callbackLeave all the other fields blank (Sign on URL, Relay State, etc).
When finished, save your configuration.
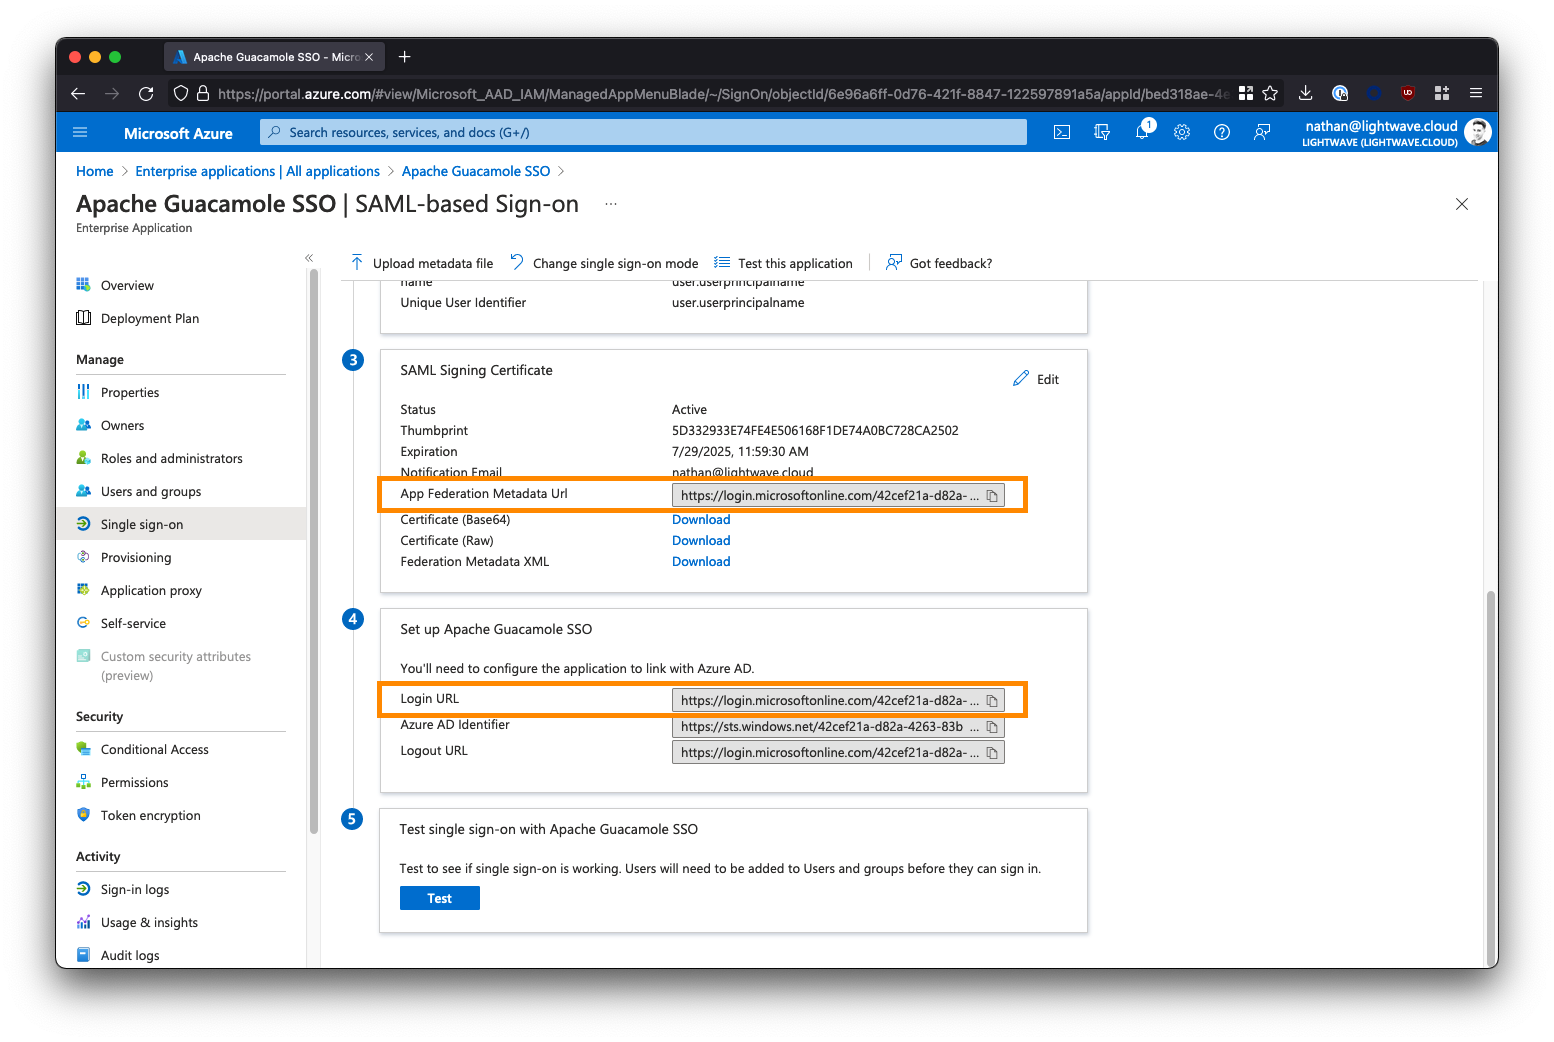
Scroll down and under Section 3 - SAML Signing Certificate, copy the App Federation Metadata URL. You will need this later. The URL should look like this:
https://login.microsoftonline.com/a1b2c3d4-e5f6-0a1b-2c3d- 4e5f6a1b2c3d/federationmetadata/2007- 06/federationmetadata.xml?appid=a1b2c3d4-e5f6-0a1b-2c3d- 4e5f6a1b2c3d
 |
In Azure AD, you need to assign users and/or groups to the Apache Guacamole SSO app to provide them with access. Any user or group added here will be permitted through SSO to access your Guacamole instance, so be cautious.
From the left-side menu within the Apache Guacamole SSO Enterprise Application, select Users and groups, then click Add user/group.
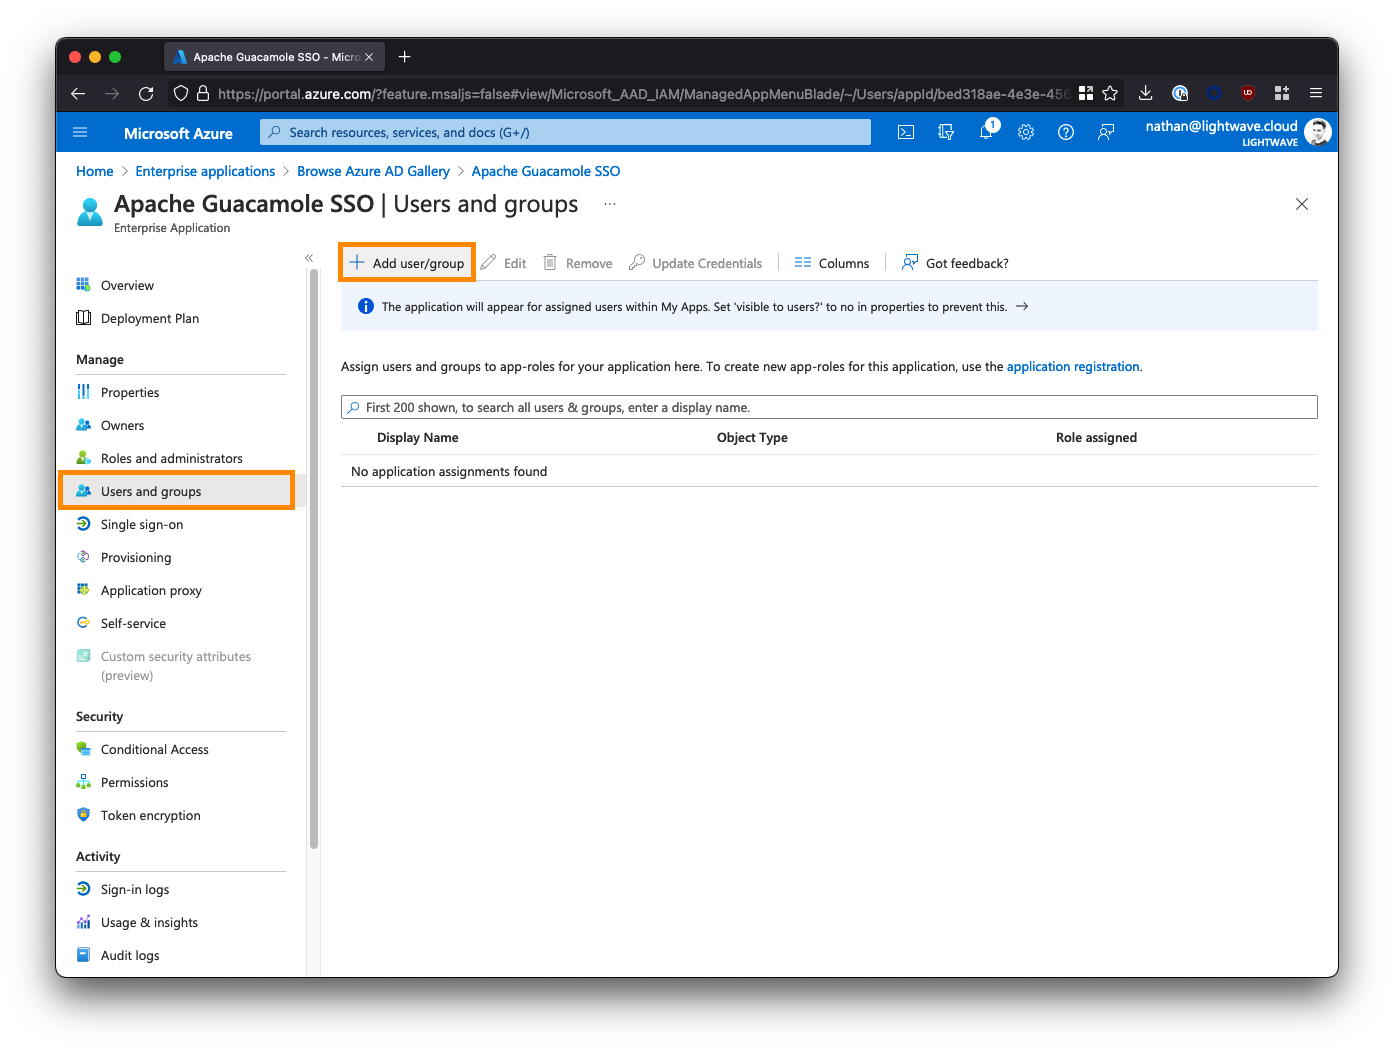
Select the users and/or groups that are permitted to access your Guacamole instance. Note that nested groups are not supported.
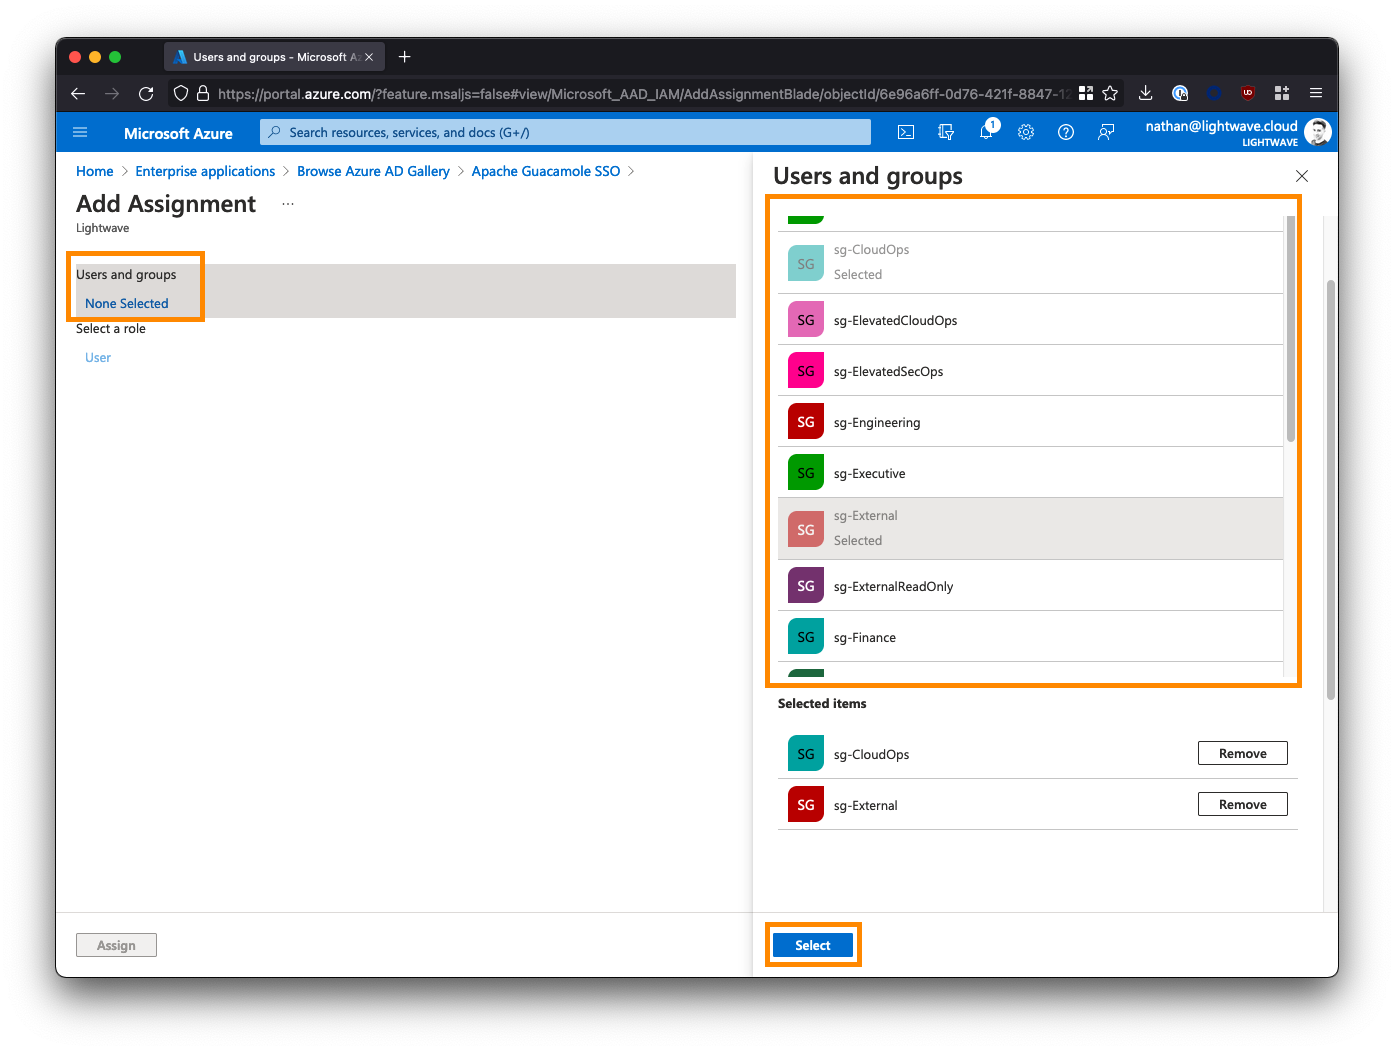
If you are deploying Guacamole to provide clientless access for 3rd parties/contractors to access internal resources via a ZTNA solution (like Netskope NPA), then you may want to create a group/security group specifically for these individuals and assign it to the Guacamole app. For example:
sg-External. Note down the groups you select here as these will be the same groups that you add to a ZTNA policy later on.Note
If you are using Azure AD’s free tier, you might not be able to correctly use Groups. Keep to assigning individual users only.
After assigning users/groups and applicable roles, your user/group list should look similar to this:
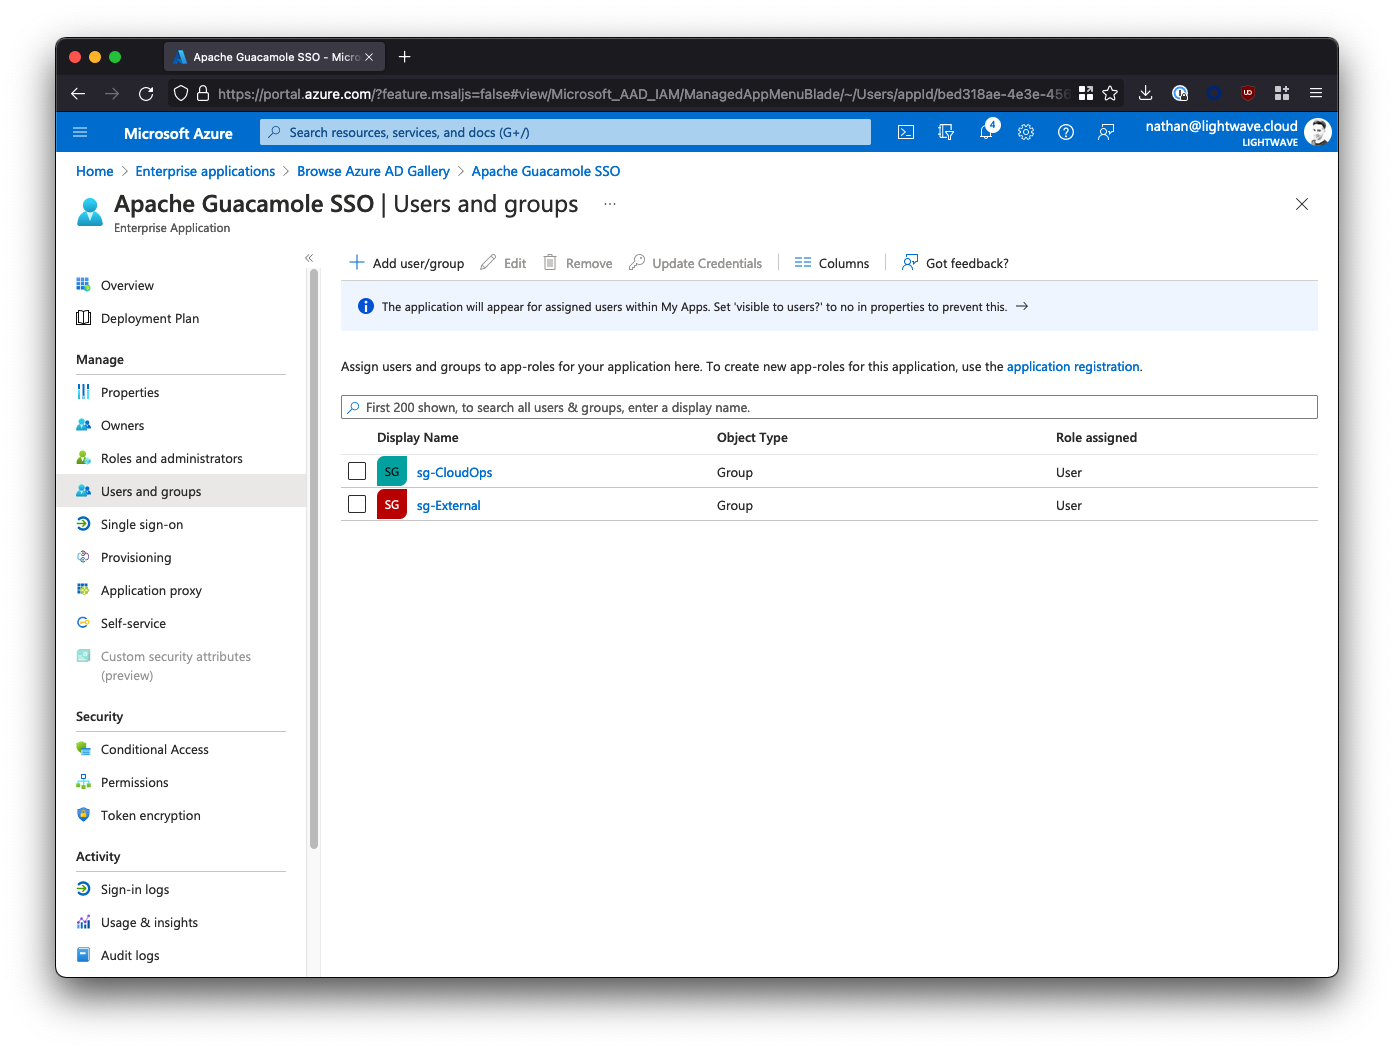
You’ve now finished the configuration in Azure AD and can proceed to installing Guacamole.