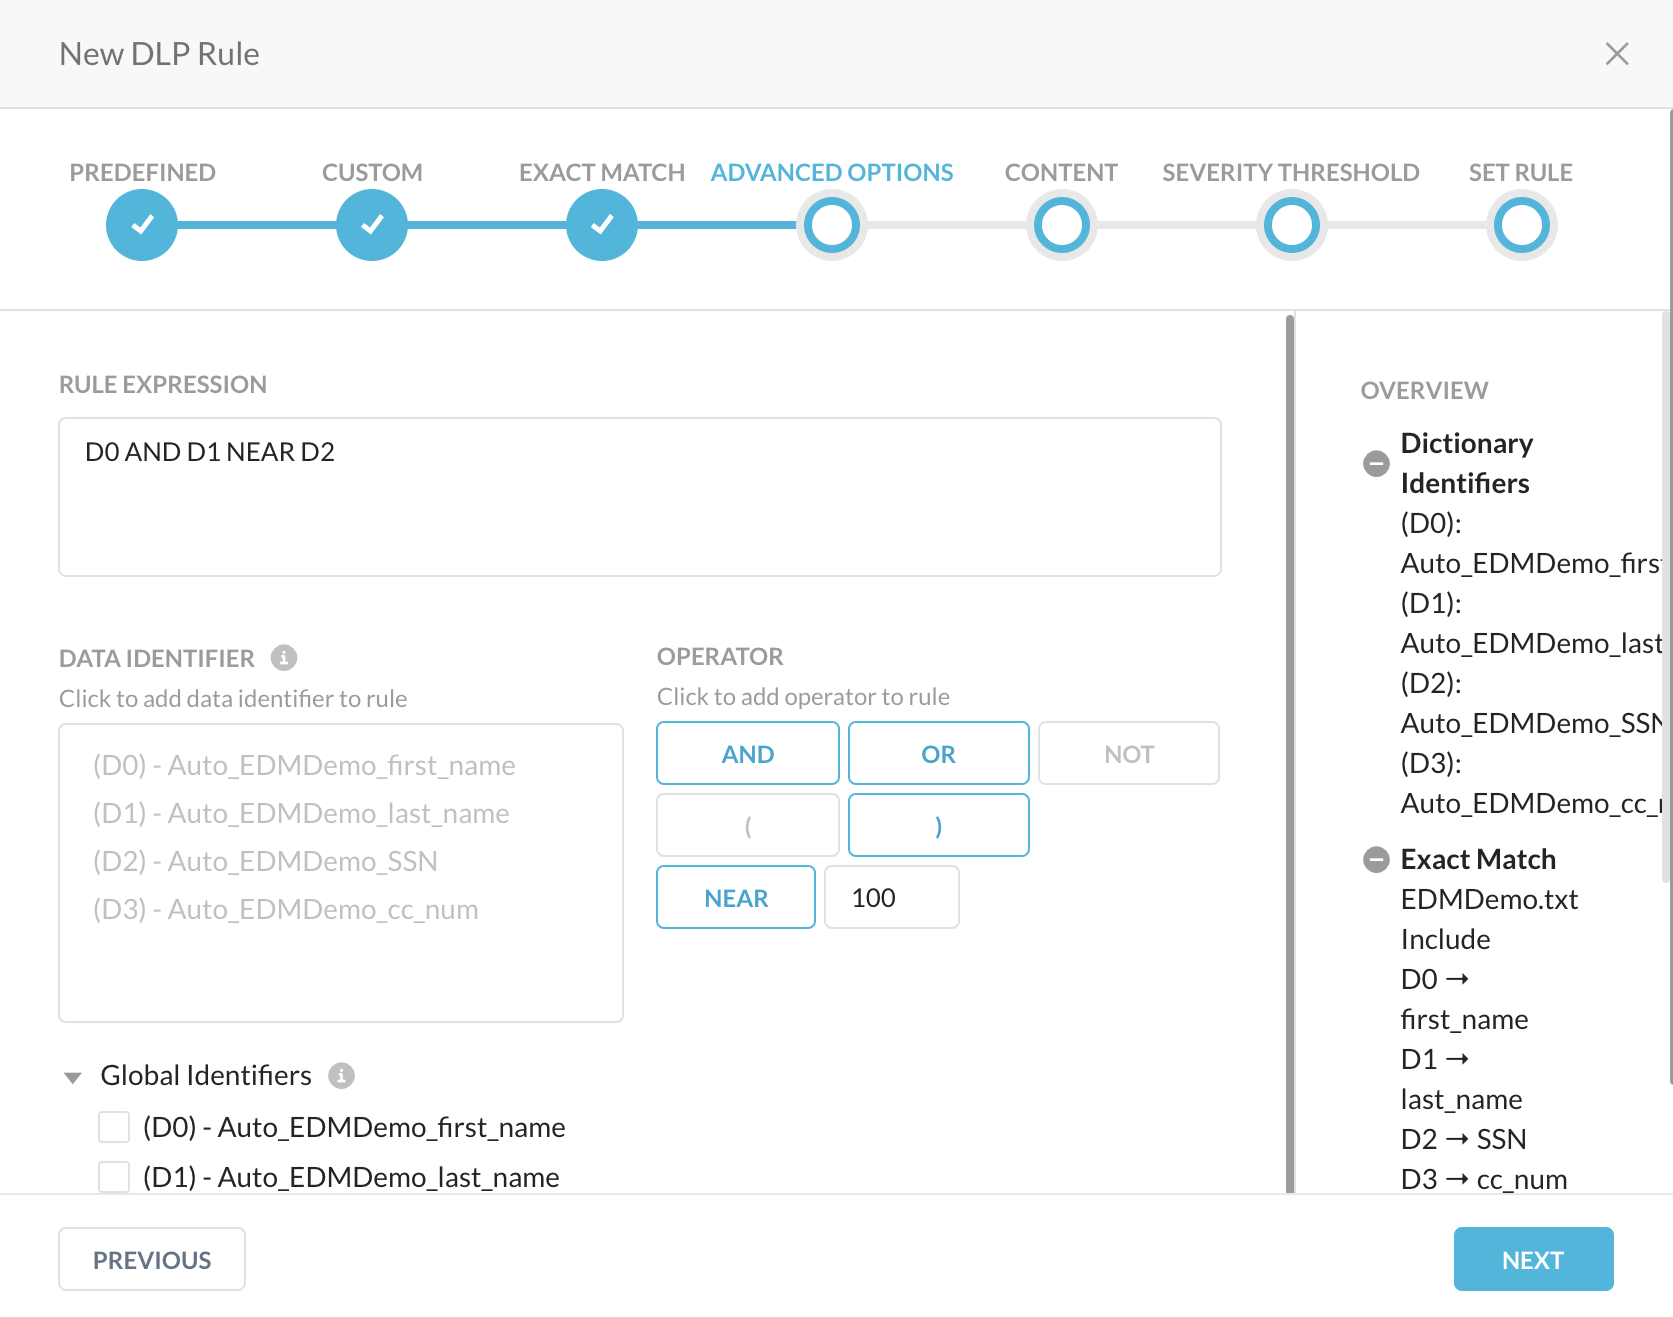
Use Advanced Expressions
To fine-tune your DLP rules, add boolean and proximity operators to the expressions used to find sensitive data.
Boolean expressions allow you to add AND and OR operators to multiple data identifiers to create a classification. For example, to find credit card numbers, but only for banks in the US, you can create a classification that ensures both identifiers exist in a document.

To add boolean operators:
Select predefined or create custom identifiers when creating a rule.
On the Advanced Options page, click on an identifier under Click to add Classification.
Click on one of the boolean expression buttons, like AND, OR or NOT.
Click on a second identifier. You can use one or more boolean expressions in between multiple identifiers.
When finished, click Next.
Proximity operators check for data identifiers within a certain distance of each other within a document. To achieve this, use the NEAR operator in a DLP rule. The NEAR operator is like the AND operator except the NEAR operator specifies a character range for data proximity to ensure identifiers are close. Every NEAR operator can have its own character range. The maximum range of the NEAR operator is set to 1000 characters.
Like the AND operator, the order identifiers are found in the document will not matter. The rule can detect P1 followed by P2, P3, or P0. When you add the NEAR operator, the number showing in the adjacent field will be added in the rule. Use the arrows or enter the desired number.
To use proximity operators:
Select predefined or create custom identifiers when creating a rule.
On the Advanced Options page, click on an identifier under Click to add Classification.
Click NEAR. The NEAR operator counts the number of bytes between the outer most characters of the terms. For example, to match the pair of terms "This'' and "sentence" in "This is a sentence" the NEAR operator looks for the pair of terms within the specified distance and finds a match. In this example, the minimum distance required to match the sentence would be 18 or 19.
Click on a second identifier. You can also use one or more boolean expressions in between identifiers.
When finished, click Next.
Global Identifiers
When creating a rule that is intended to match on at least two data identifiers, you may encounter cases where you will need to use a Global Data Identifier (GDI). GDIs are primarily designed for inspection of structured data such as, data in an Excel document or in a CSV file.
The following example use case provides a detailed explanation of using a GDI.
Consider a CSV file containing social security numbers and last names. If you want to inspect the file with the intent of matching on the term Social Security Number (SSN) AND a Last Name, you will create such a rule using AND logic. This rule by default will match a single SSN term with a single last name in a repeated manner. For instance, if the document has 5 SSN terms and 5 last names, each SSN term will be paired up with a single last name and the result will be 5 rule matches. However, if the CSV file has a column label SSN and you have 5 rows of last names below it, the result will be a single rule match, where the SSN term will match with the first Last Name. The remaining 4 Last Names will not match the rule since there are no other SSN terms in this file.
If you designate the SSN term as a GDI, the rule match results will change from 1 to 5. The reason is that the SSN term will be reused with each Last Name rather than just once with the first Last Name. As such, the nature of the SSN term changes from a simple data identifier to one that will match all objects after it in a repeated manner.
Note
The Global designation only applies to all matches that result in a rule hit after the first instance of the GDI is found.
Since SSN is a column header, all the last names below it will result in a rule match. However, if SSN was not a column header and simply appeared at the end of the document, it would result in only a single match against the very last Last Name.