Configure the Netskope Plugin for Application Risk Exchange
You will need your Netskope tenant name and API token (V1, and optionally V2) to complete this configuration.
If you have not added a Netskope tenant in Cloud Exchange, go the Configure the Netskope Tenant Settings for Cloud Exchange section of Get Started with Cloud Exchange.
Go to Settings > Plugins.
Select the Netskope (ARE) box to open the plugin creation pages. Field descriptions are provided here.
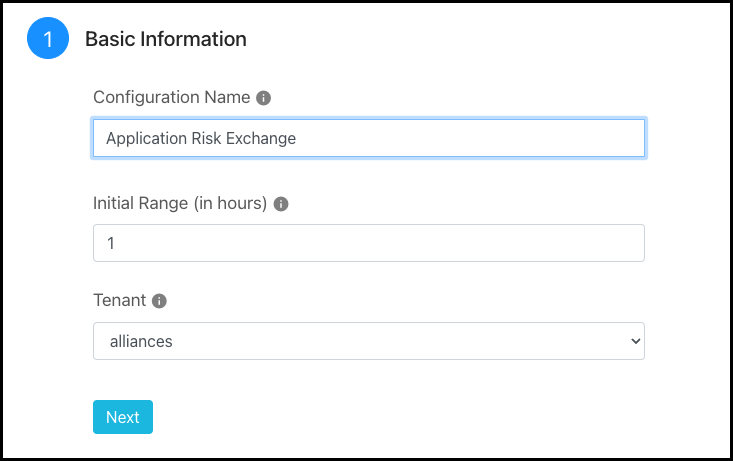
Enter and select the Basic Information on the first page:
Configuration Name: Enter a name appropriate for your integration.
Initial Range: Enter the number of hours to pull the data for the initial run.
Tenant: Choose the Tenant you added previously.

Click Next.
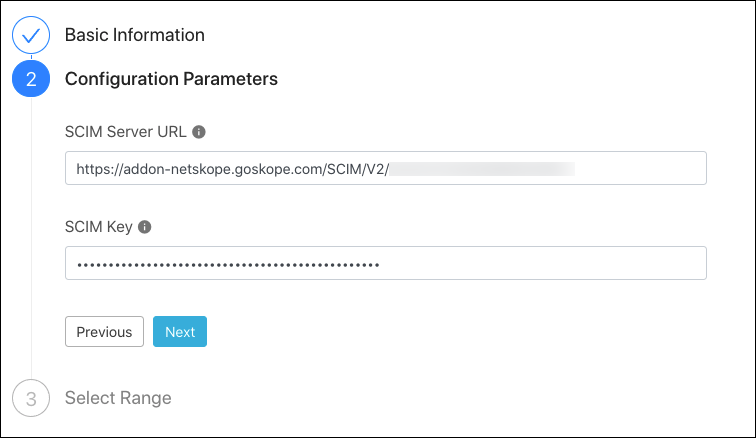
Enter and select the Configuration Parameters on the second page:
SCIM Server URL: Enter the SCIM Server URL from the Netskope UI (Settings > Directory Tools and click the SCIM tab).
SCIM Key: Enter the SCIM Key from the Netskope UI (Settings > Directory Tools and click the SCIM tab).

Click Next.
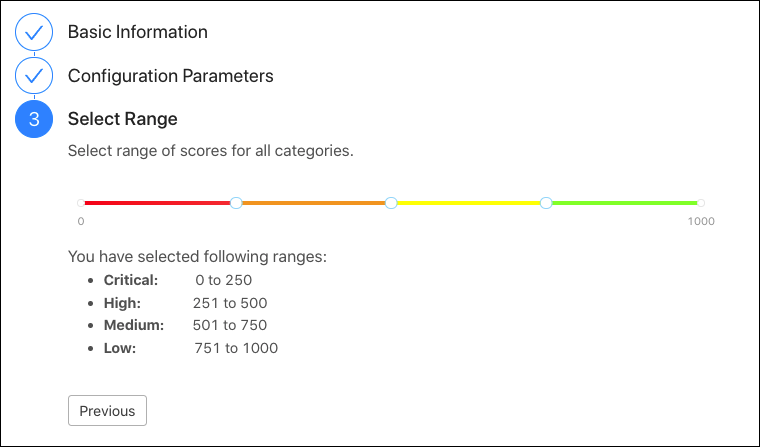
Specify the range of severity levels. Move the white dots to increase and decrease the number shown for each severity category.

Click Save in the top right. Go to Application Risk Exchange > Plugins to see your new Netskope plugin.
Application Risk Exchange Field Descriptions
Field | Description | Default Value |
|---|---|---|
Configuration Name | Name of the User Risk Exchange plugin. | - |
Initial Range | Enable/Disable polling data from Netskope. | - |
Tenant Name | Netskope Tenant name. For | - |