AWS GuardDuty Plugin for Threat Exchange
This document explains how to configure the AWS GuardDuty plugin with the Threat Exchange module of the Netskope Cloud Exchange platform. This integration allows for the AWS GuardDuty plugin fetches SHA256 IoCs from AWS GuardDuty.
Pull | Yes |
Push | No |
To complete this configuration, you need:
A Netskope Tenant (or multiple, for example, production and development/test instances).
A Netskope Threat prevention subscription for malicious file hash sharing.
A Netskope Cloud Exchange tenant with the Threat Exchange module already configured.
Access to your AWS Access Key ID (Public Key), AWS Secret Access Key (Private Key), AWS Session Token (Optional, only for temporary user), Region Name, and Detector ID (Unique Detector ID).
Get your AWS GuardDuty credentials.
Configure the AWS GuardDuty plugin.
Configure sharing between Netskope and AWS GuardDuty.
Validate the AWS GuardDuty Plugin.
Click play to watch a video.
There are two options for entitling Cloud Exchange to pull IoC information from your GuardDuty service: using an access/secret key, or an AWS session token. AWS recommends the latter when Cloud Exchange is running in an AWS environment.
Log in to your AWS Console.
Click on the top right corner; you will see a screen similar to this.
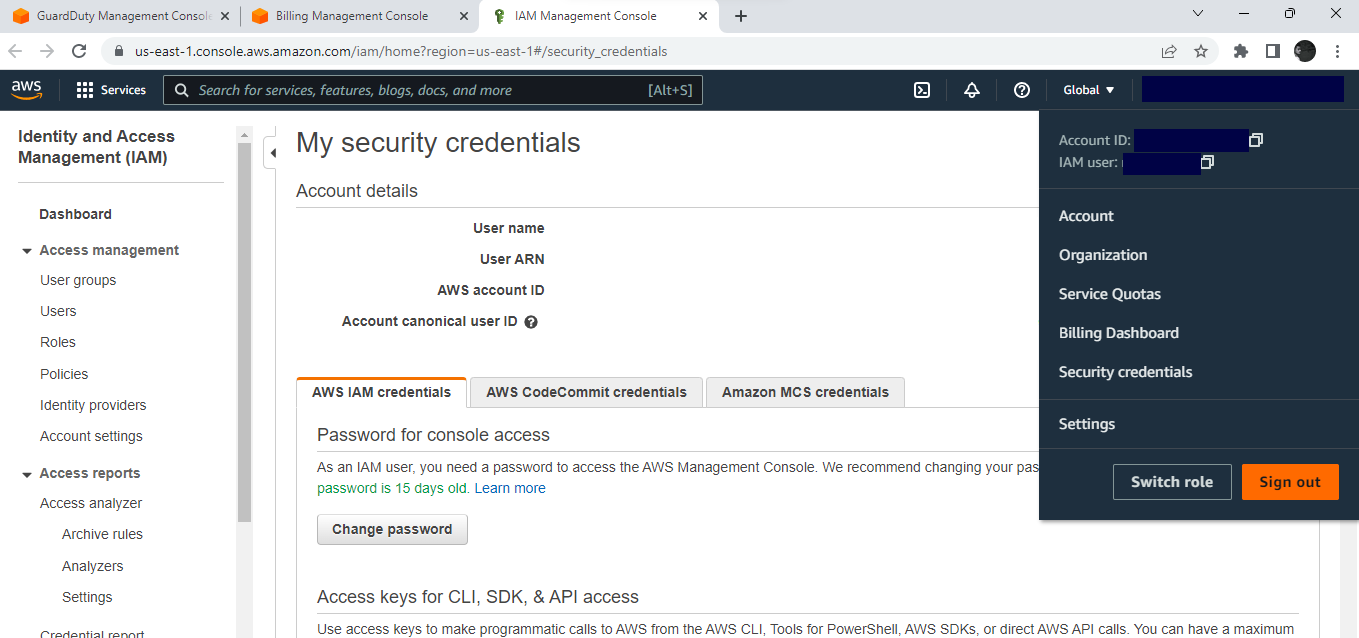
Scroll down and you’ll see the Create access key button.
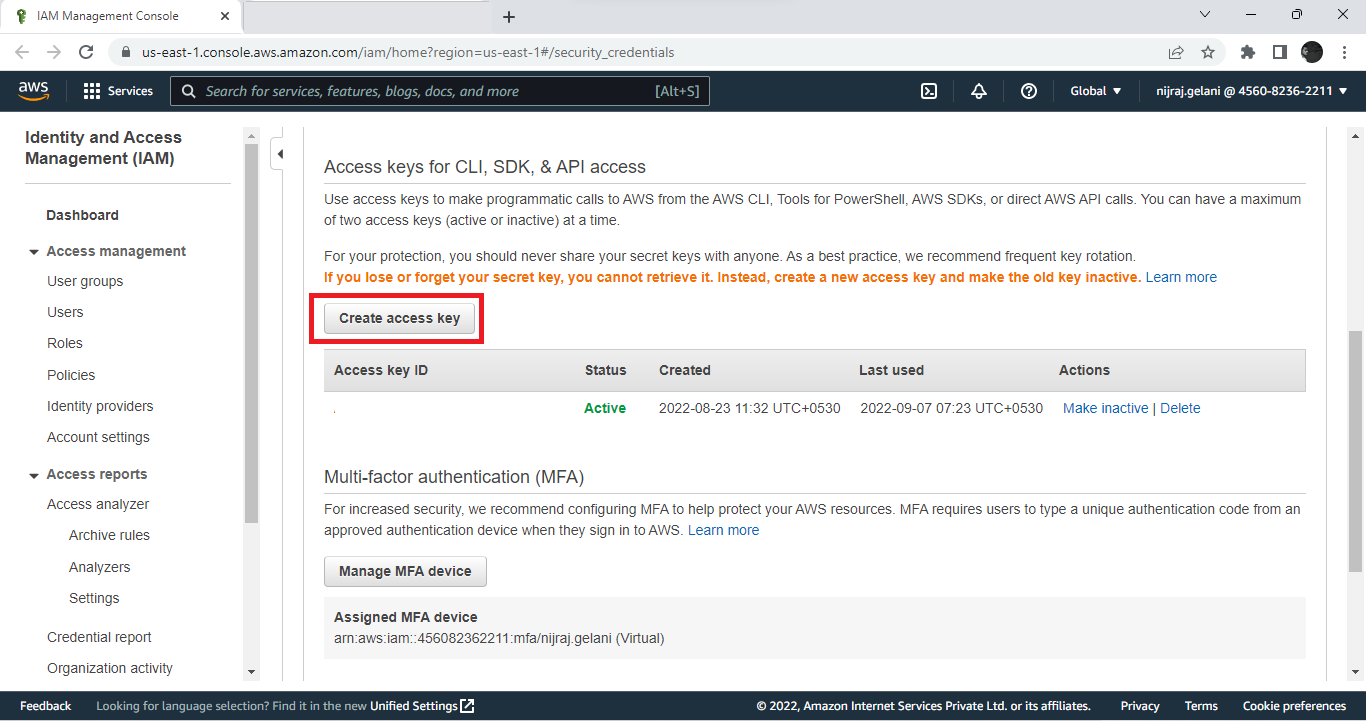
Click Create access key. AWS will automatically create an access key and secret access key to use in Threat Exchange.
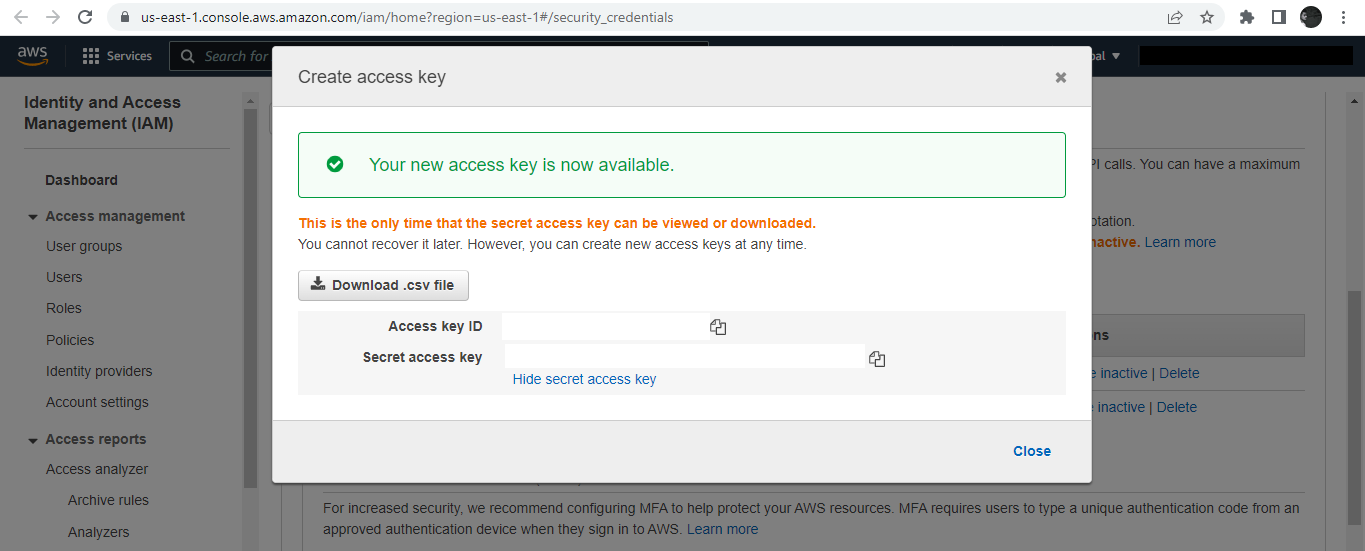
Copy the Access and Secret access keys.
Note
The Secret access key will only be shown once, so store it in a safe location for later use
You can obtain a session token via API or through the SDK. Refer to the links below:
https://docs.aws.amazon.com/STS/latest/APIReference/API_GetSessionToken.html
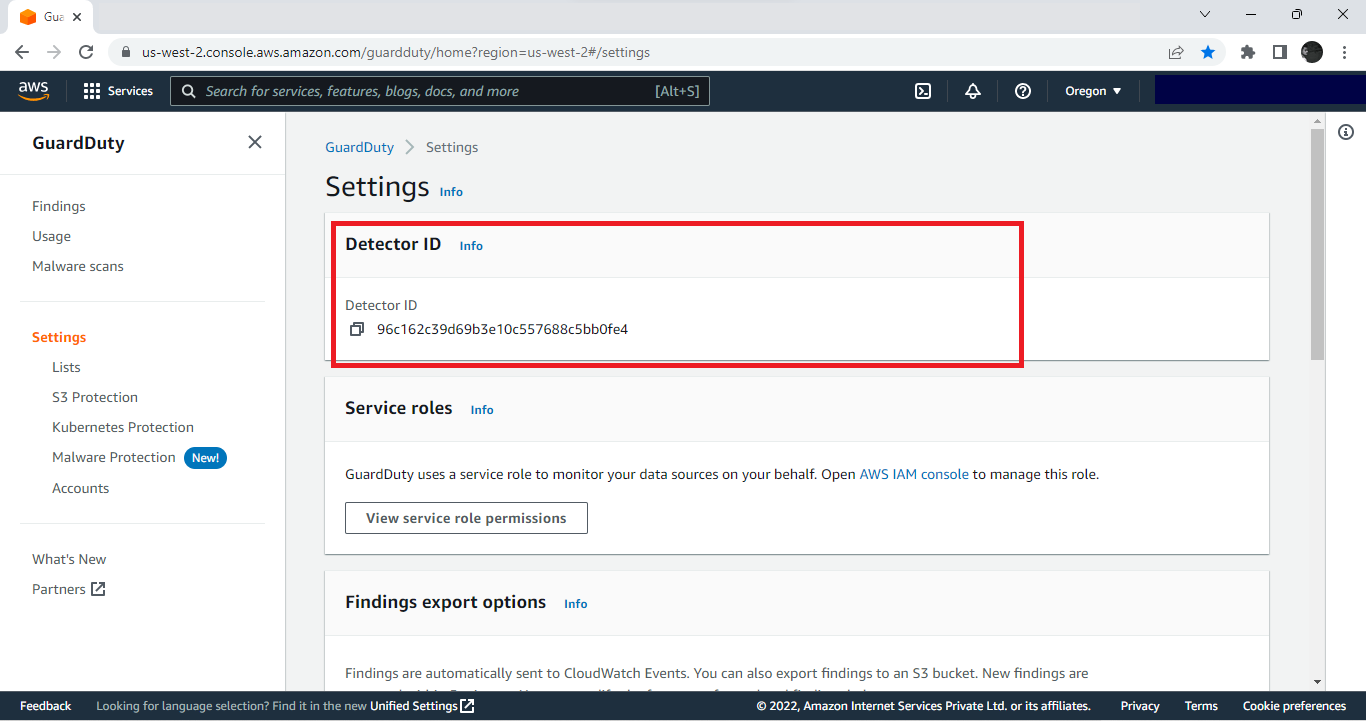
Open the AWS GuardDuty console.
Go to Settings.
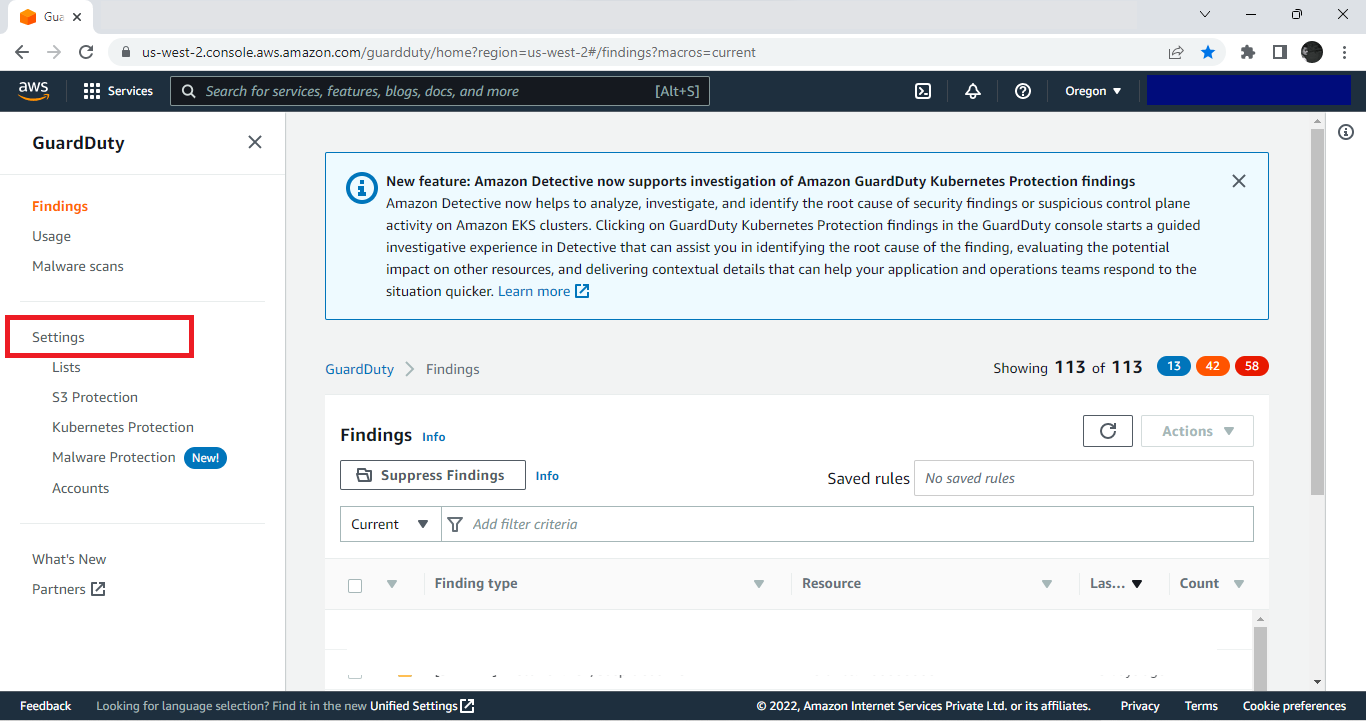
Copy the Detector ID for later use.
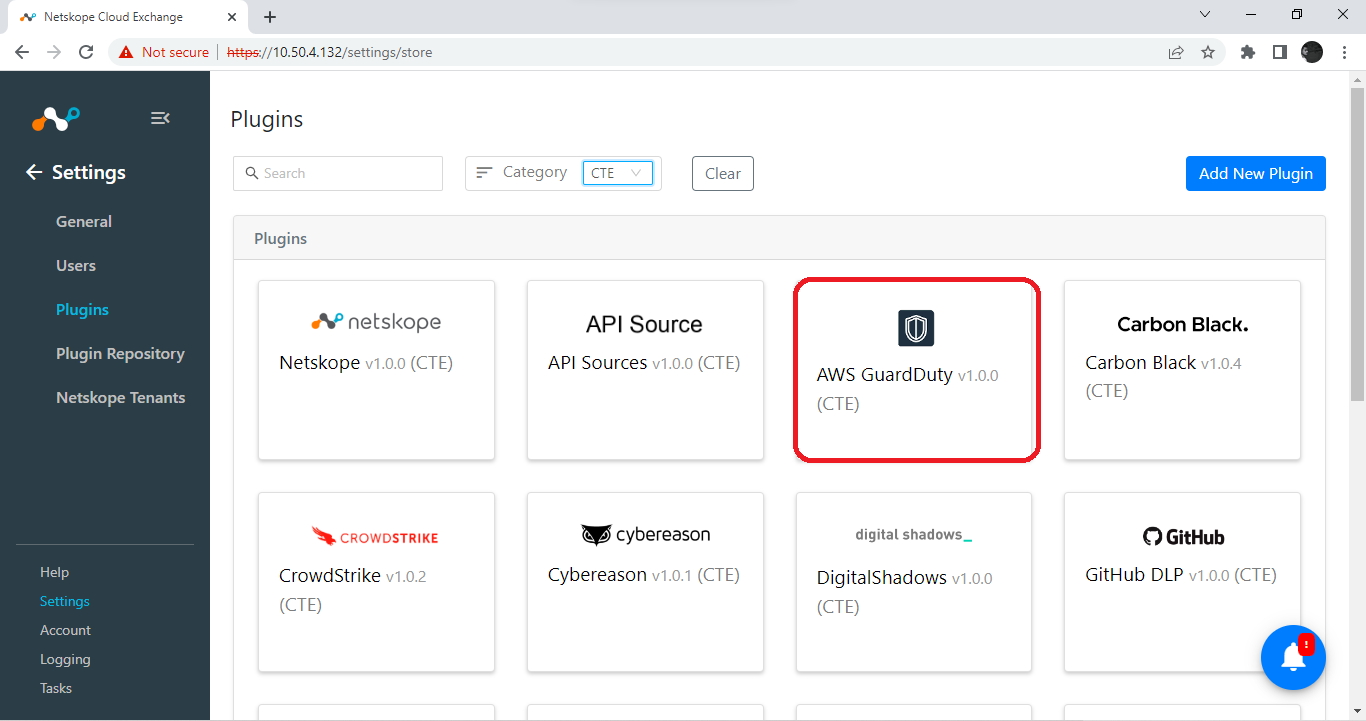
In Cloud Exchange, go to Settings > Plugins.
Search for and select the AWS GuardDuty plugin box to open the plugin creation page.
Enter a configuration name.
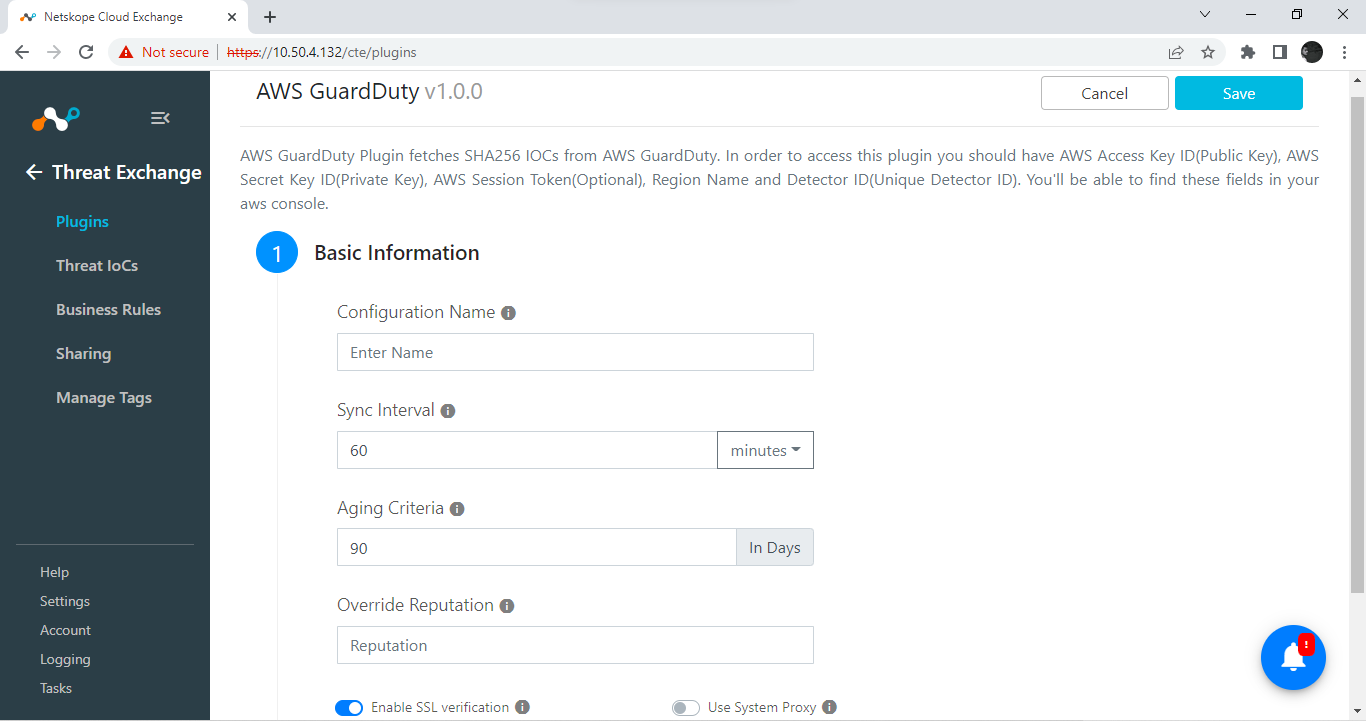
Enter the sync interval according to your needs.
Enter an Aging criteria.
Click Next.
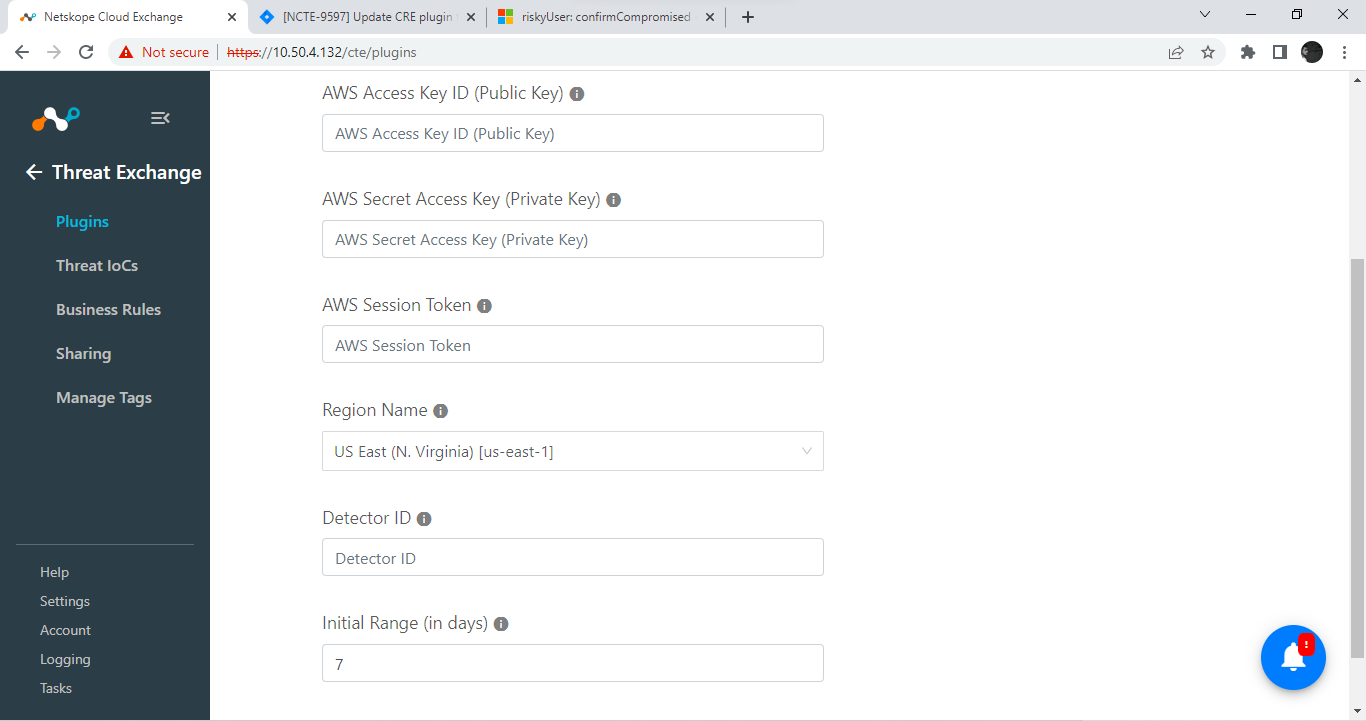
Enter your AWS Access key ID (Public key) and AWS Secret Access key (Public Key), OR the AWS Session Key Token, and then Region Name and Detector ID.
Enter an Initial Range in days (to fetch findings from the last X days).
Click Save.
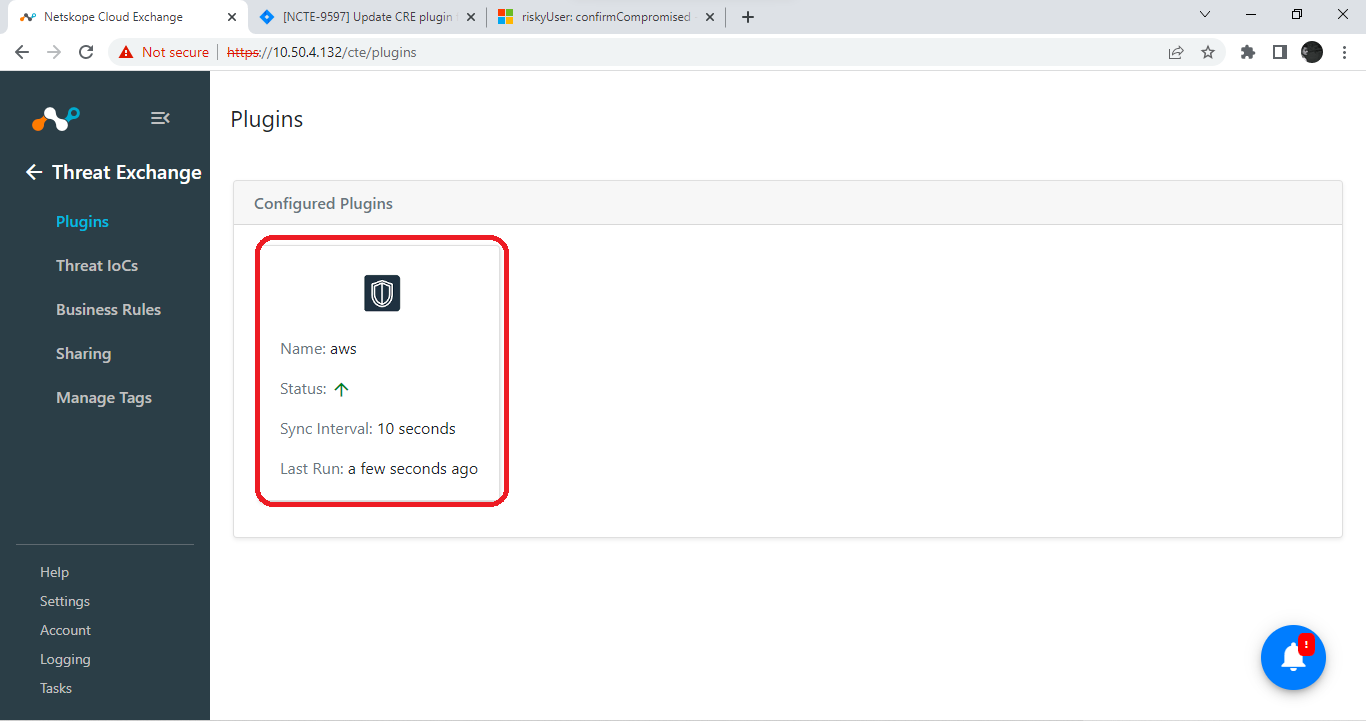
You’ll see the AWS GuardDuty plugin on the Threat Exchange > Plugins page.
Go to Threat Exchange and select Sharing. The Sharing page displays the existing relationships for each sharing configuration in grid view as shown below. The Sharing page also has inputs to configure new sharing from one plugin to another.
Click Add Sharing Configuration, and in the Source Configuration dropdown list, select AWS GuardDuty.
Select a Business Rule, and then select Netskope for the Destination Configuration. Sharing configurations are unidirectional. data obtained from one plugin is shared with another plugin.
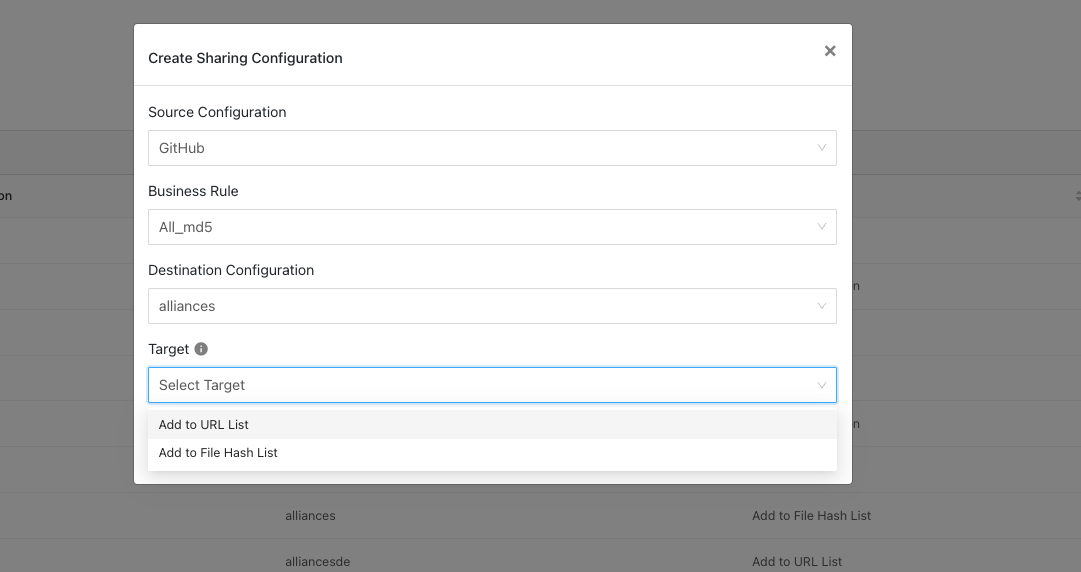
Select a Target. Each plugin will have a different target or destination for the IoC.
For Add a File Hash List, enter a List Name, List Size, and Default File Hash. The List Name needs to exist in your Netskope UI at Settings > Policies > Profiles. For information about creating a File Profile for hashes, refer to Adding a File Profile
Click Save.
Adding a new sharing configuration on the active source poll will share the existing IoCs of the source configuration to the destination configuration. Whenever a new sharing configuration is built, all the active IoCs will also be considered for sharing if they match the source/destination combination.
Note
Plugins that do not have API for ingesting data cannot receive threat data. This is true of the installed plugin API Source, which provides a bucket associated with an API endpoint for remote 3rd-party systems to push data to. Once a Sharing policy has been added, it takes effect.
After a sharing configuration has been created, the sharing table will show the rule being invoked, the source system providing the potential IoC matches, the destination system that will receive matching IoC, and the target applicable to that rule. Multiple Sharing configurations can be made to support mapping certain IoC to multiple targets even on the system destination system.
Modify, Test, or Delete a Sharing Configuration
Each configuration supports 3 actions:
 |
Edit the rule by clicking on the pencil icon.
Test the rule by clicking on the synchronization icon. This tests how many IoC will actually be sent to the destination system based on the timeframe and the rule.
Delete the rule by clicking on the garbage can icon.
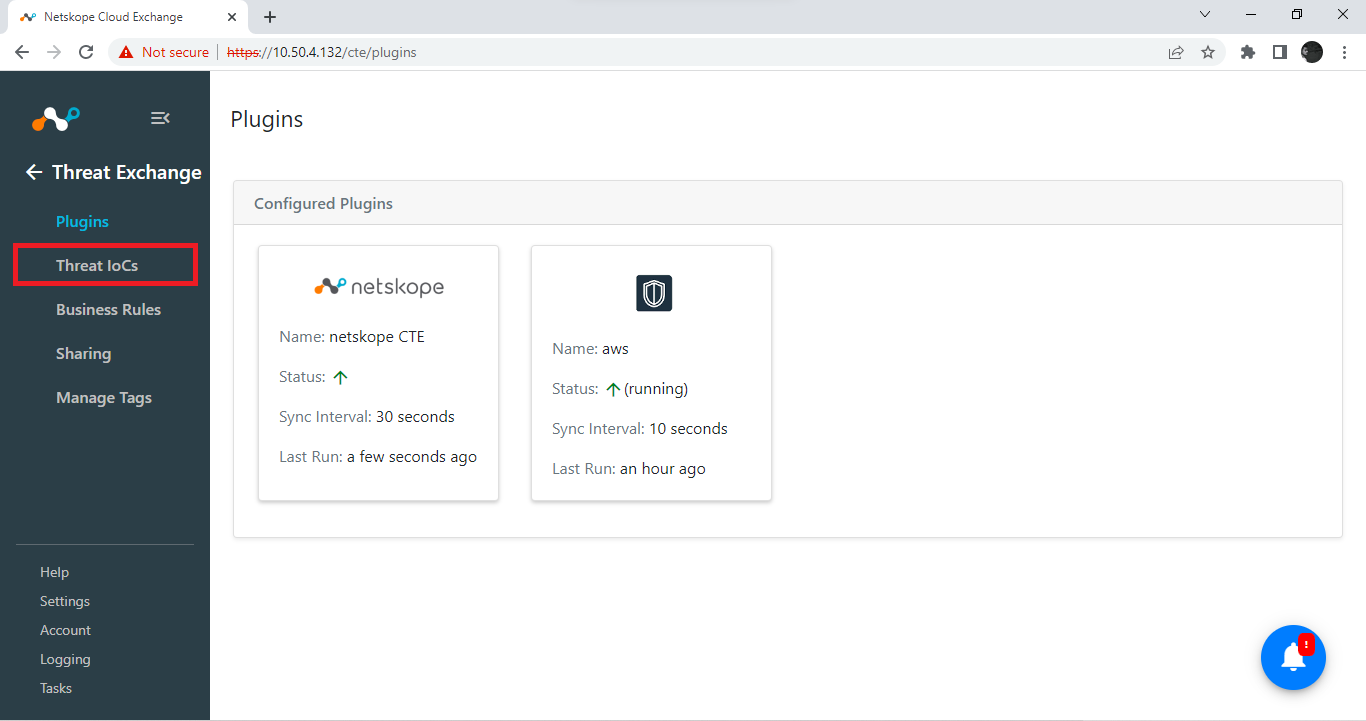
Open Threat Exchange.
Go to Threat IoCs.
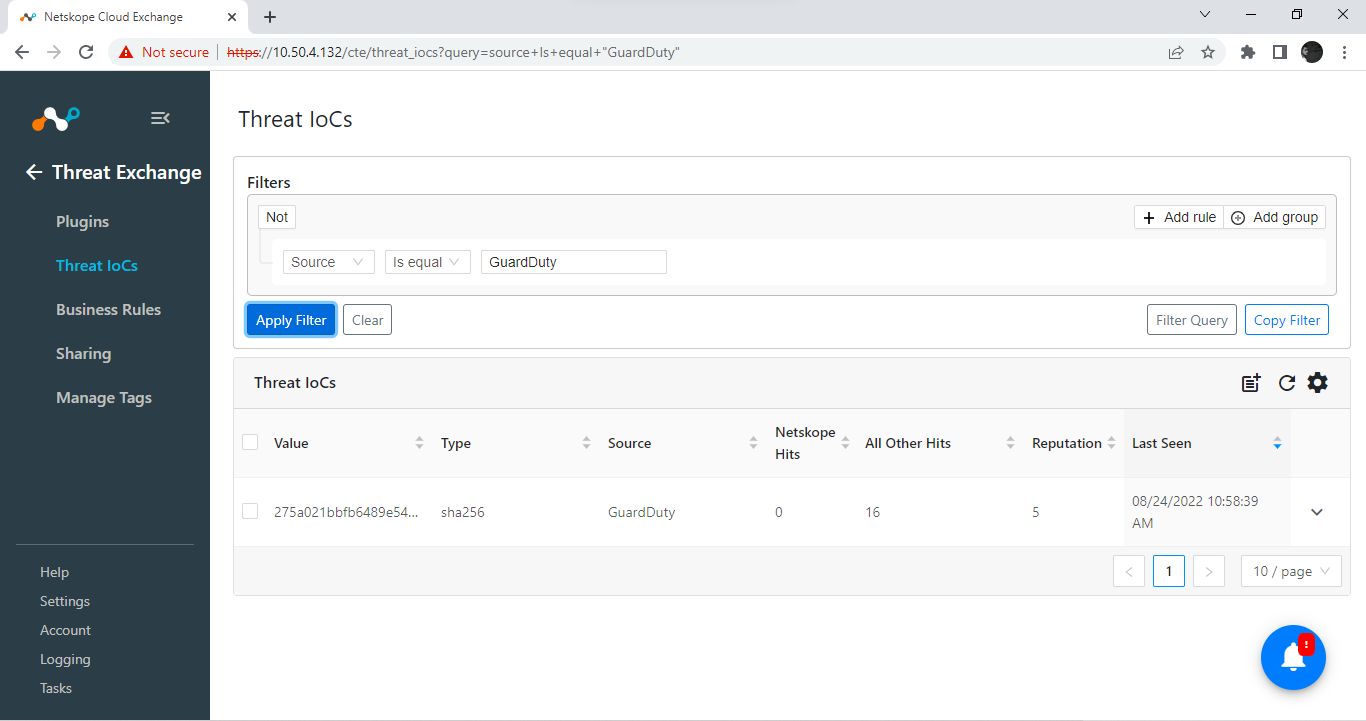
You’ll be able to see the page similar to this.
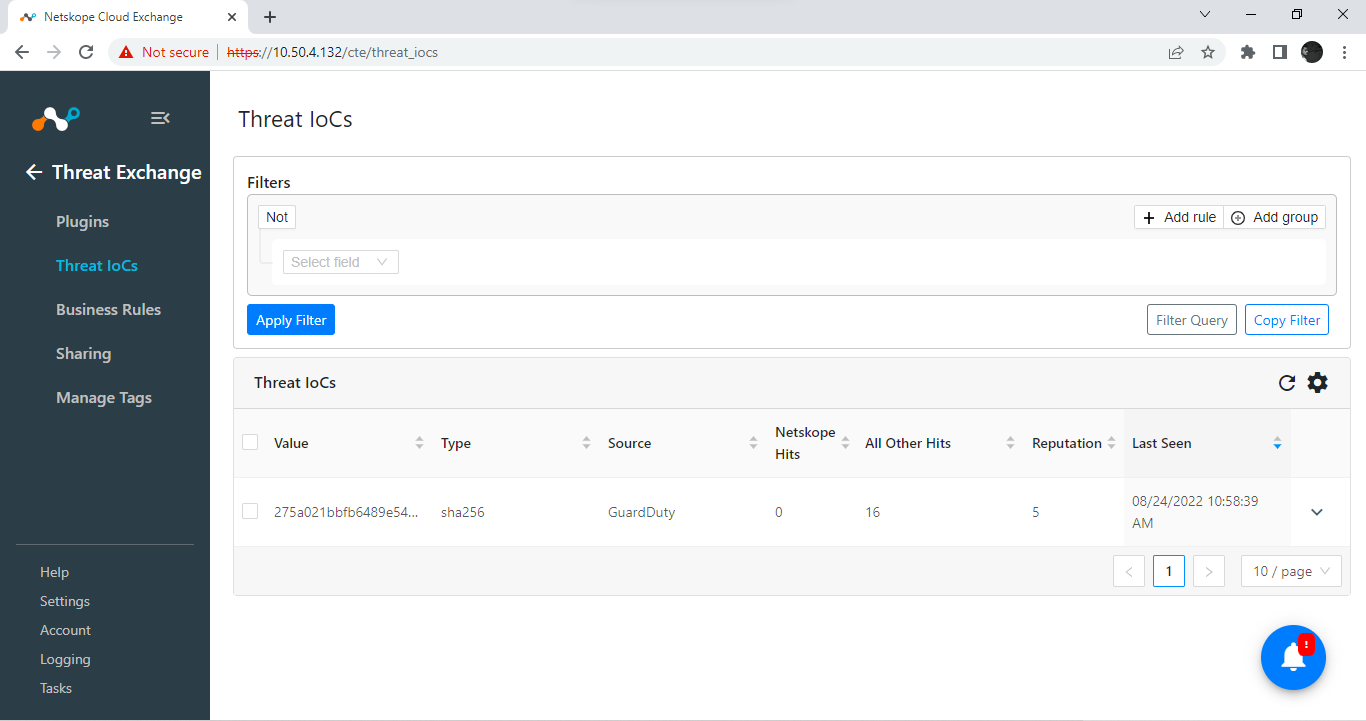
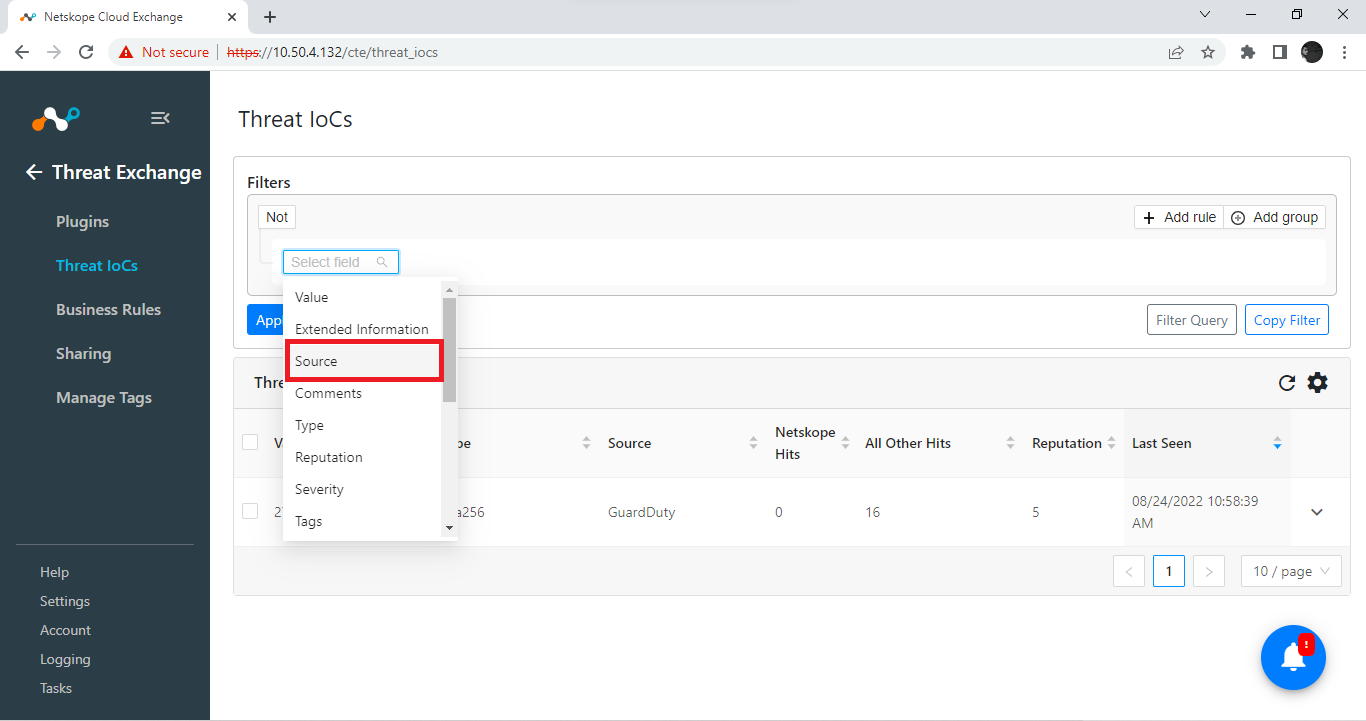
Create a filter for GuardDuty.
Select Source.
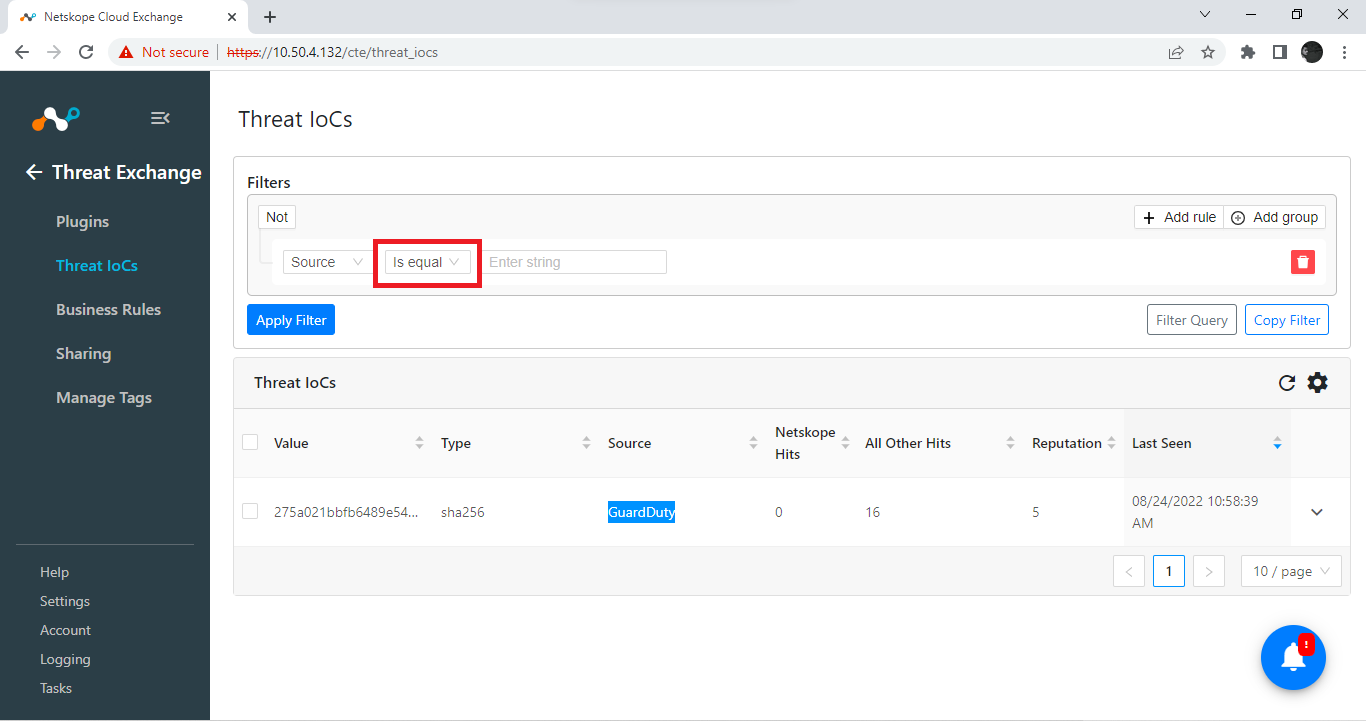
Select Is equal.
Enter
GuardDutyin the text box.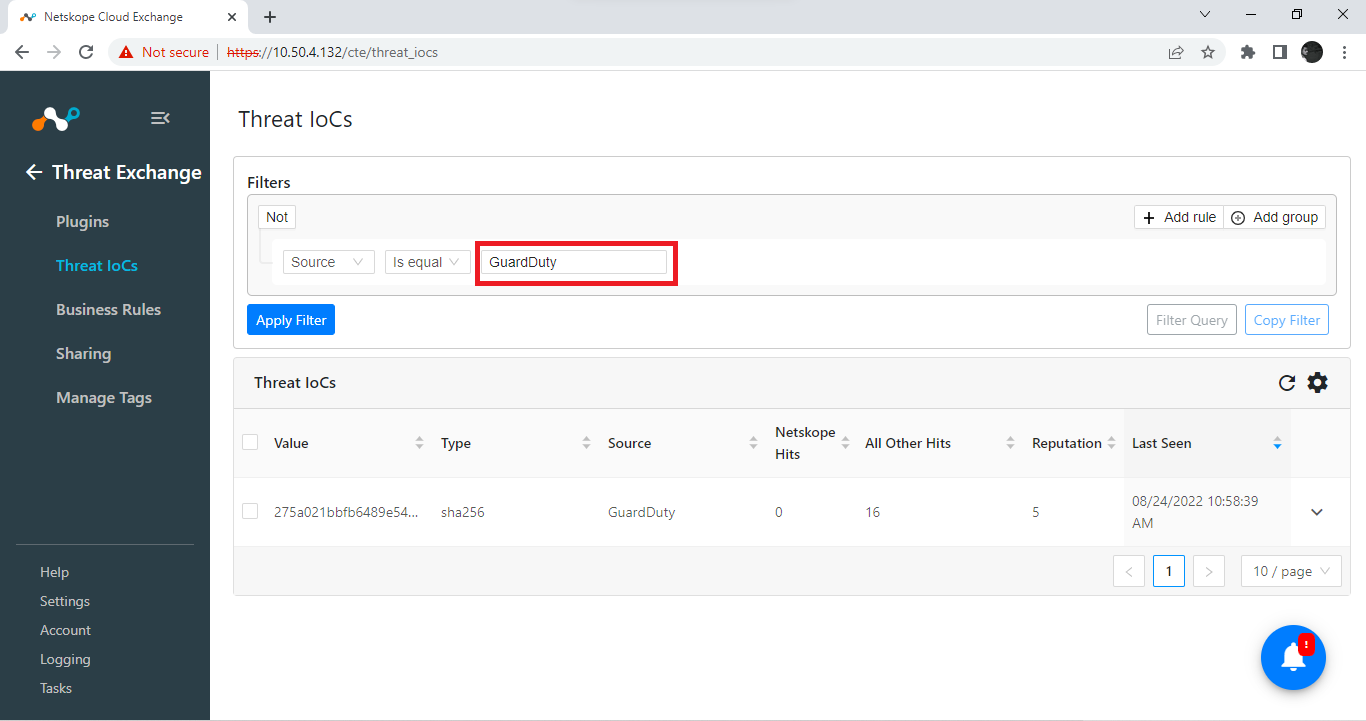
Click Apply Filter.
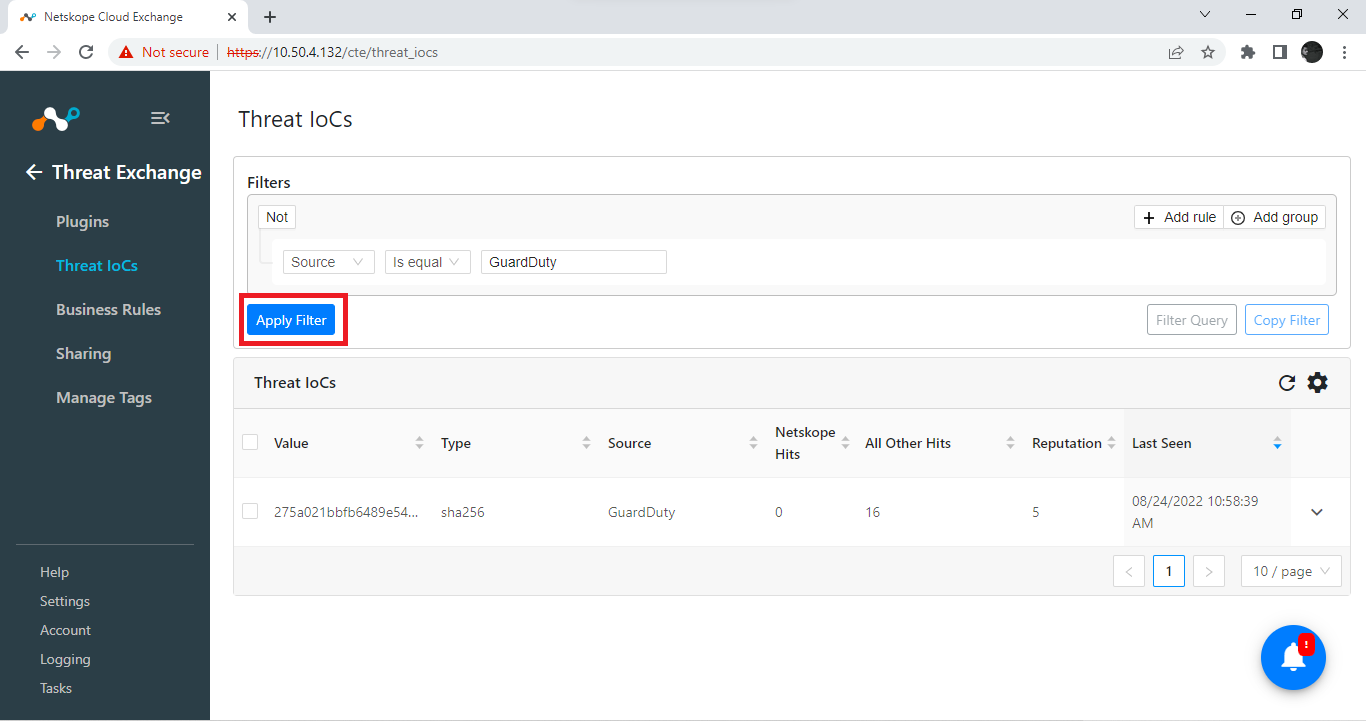
Now the only IoCs shown will be those sourced from GuardDuty.
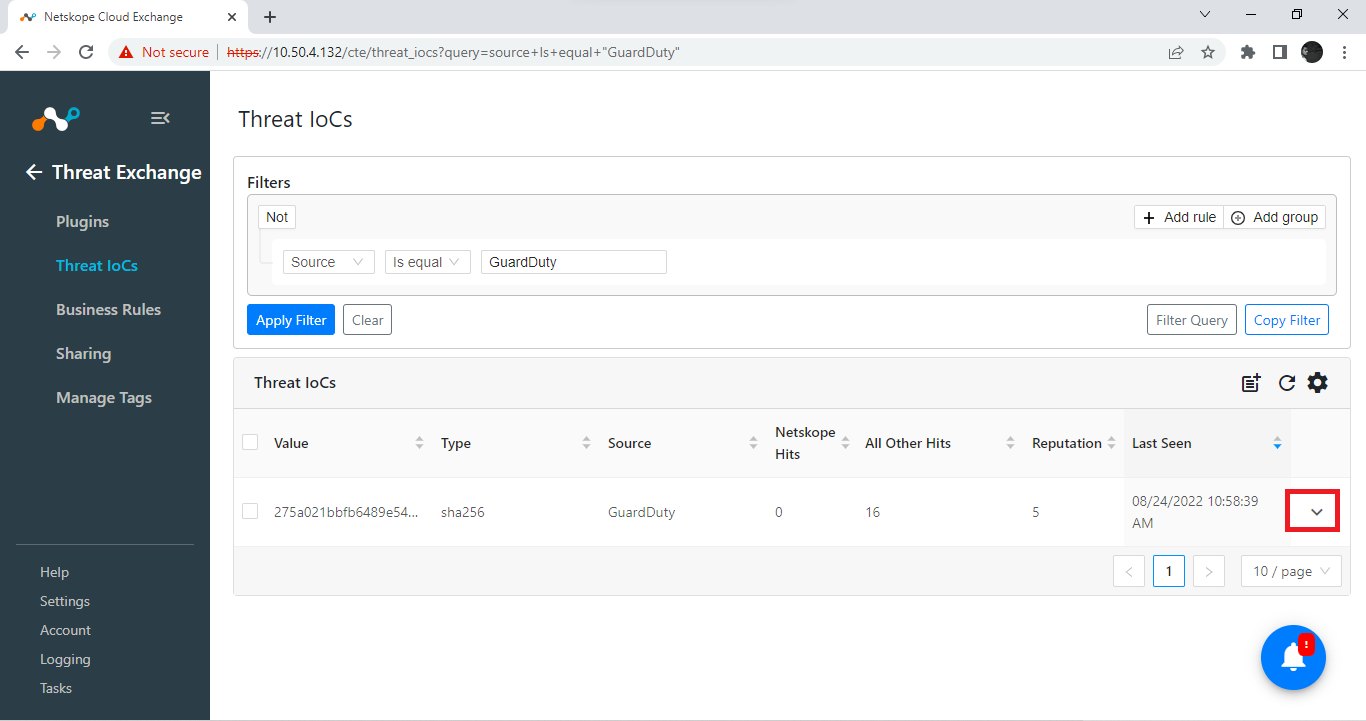
Click the down carrot (v” button to explore matching IoC.
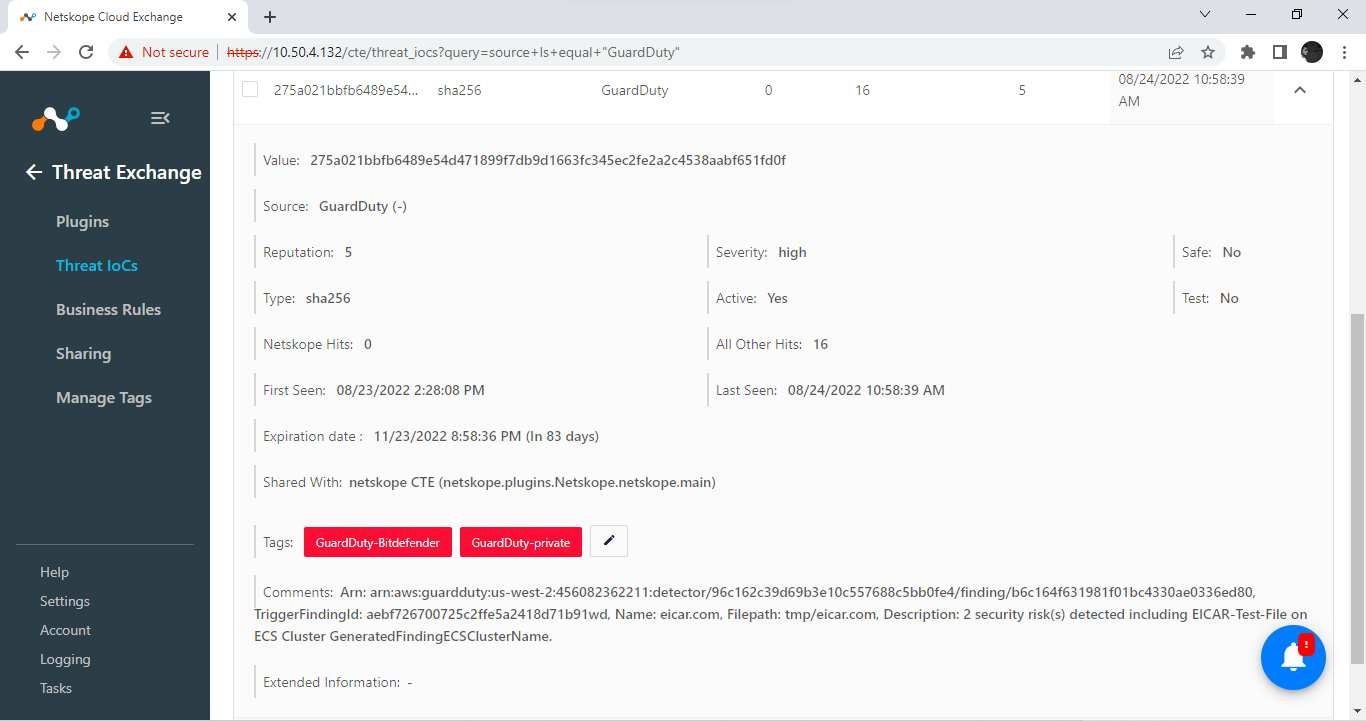
Now you’ll see all the mapped fields that apply to each IoC, including tags that match to categories from GuardDuty, as well as from the original source (in this example, from BitDefender and from Private).
The comments field will include other data from GuardDuty associated with each filehash. Any or all of these can be used to create a filter for a business rule. For example, you could match on Comments contains any in eicar, and NOT share those IoCs used for testing.
 |
Validation from GuardDuty Console
Validate Number of Findings
Open the GuardDuty Console. You’ll see a screen similar to this.
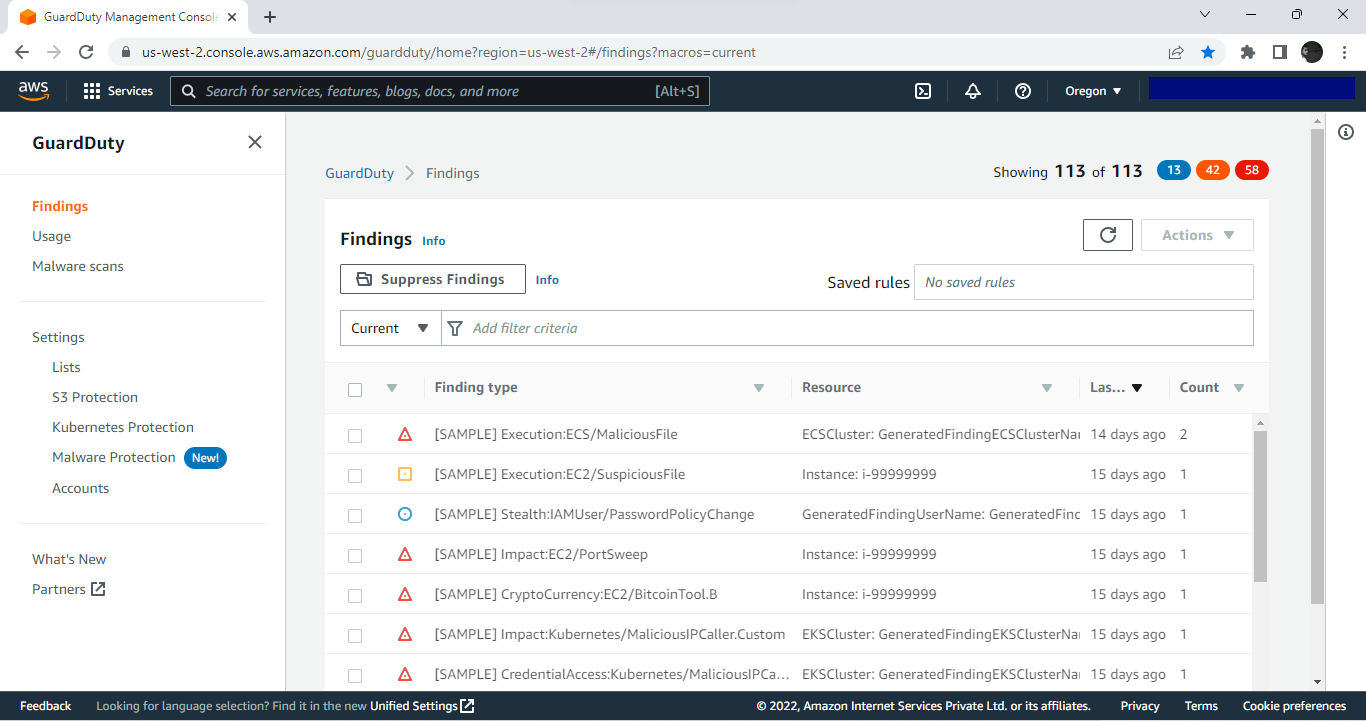
See the number of findings (showing 113 of 113).
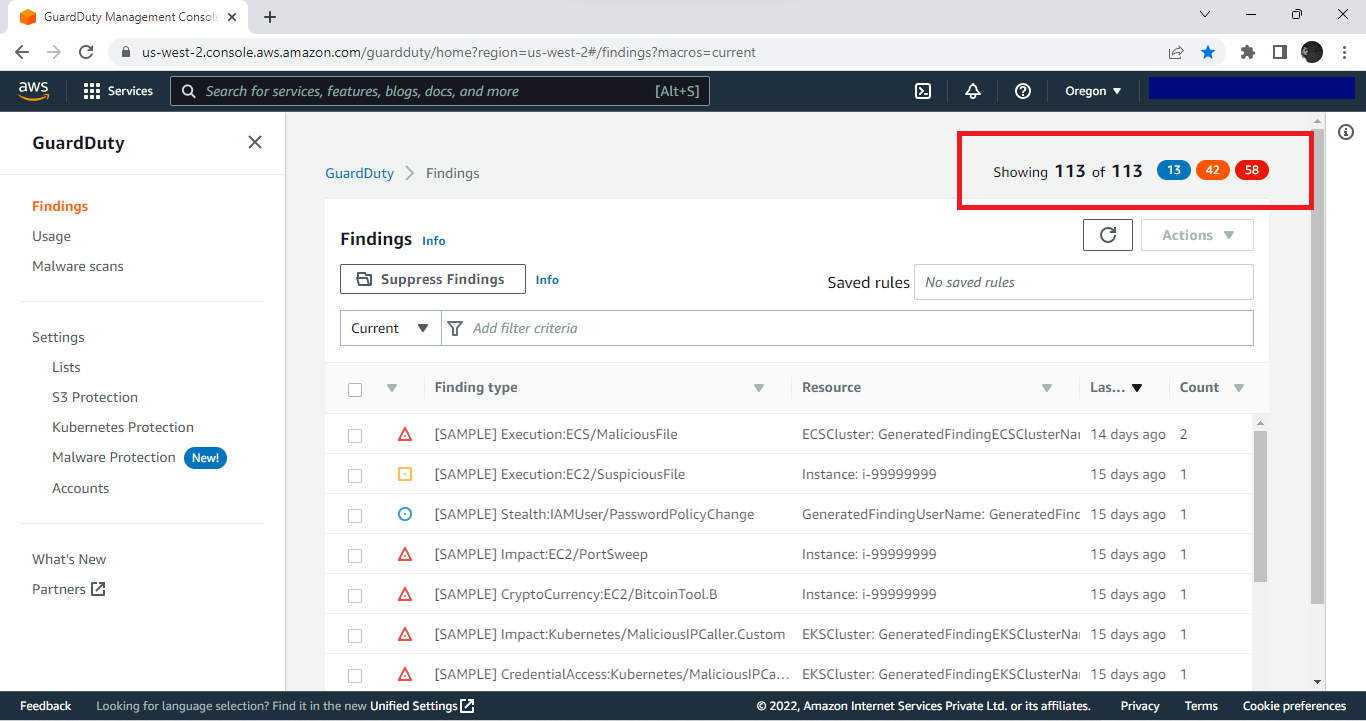
These findings should be able to match with the number of findings Cloud Exchange is retrieving.
Note
This may vary depending on initial sync. For that you can use a filter.