MobileIron Cloud
Netskope supports using MobileIron Cloud for mobile device management (MDM) to allow iOS and Android devices access to the Netskope cloud using the per-app VPN mode. This document explains how to deploy Netskope for iOS devices using the on-demand and per-app VPN mode.
Note
Refer to MobileIron Cloud documentation for additional help.
Prerequisites
To deploy MobileIron for iOS VPN, you can get the Netskope Root and Intermediate CA certificates from Netskope, or use your own Root and Intermediate certificates.
In the Netskope tenant UI, go to Settings > Security Cloud Platform> Netskope Client > MDM Distribution. In the Certificate Setup section of this page, download the Netskope Root and Intermediate certificates. If using your own certificates, downloading these certificates are not necessary. In either case, copy the tenant OU and Organization Name here. These are needed when enrolling the local certificate.
In the Create VPN Configuration section, copy the VPN Server Name, Organization ID, and PAC URL. These are needed for configuring the VPN profile. This page also shows the current VPN mode configured. Optionally, your administrator can have the on-demand VPN function set to always on therefore not requiring the connection to be triggered each time.
In the Upload Certificate section, upload new certificates to Netskope, or view and replace an existing certificate using the icons to the right of the registered certificate.
The following sections explain how to upload and enroll certificates and how to configure an iOS profile for MobileIron Cloud for on-demand or per-app VPN. For information about iOS VPN fail-open, refer to iOS VPN Fail Open.
Create Certificates in MobileIron Cloud
To configure MobileIron Cloud, you need to create a local standalone CA, or use a 3rd-party CA, and also Identity certificates in MobileIron Cloud.
Create a Standalone CA Certificate
To create a standalone CA certificate:
In the Mobile Iron Cloud admin console, go to Admin > Certificate Authority and click Add.
Click Continue under Create a Standalone Certificate Authority.
Click Actions, and then select Download Certificate.
Note where you saved the certificate.
Open a Mac OS X terminal window, and then openssl to convert the certificate from .cer format to .pem format. To do this, open a terminal window and use openssl to convert the certificate format with this command:
sudo openssl x509 -inform der -in cert.cer -out cert.pemAfter it's converted, verify the .pem file using this command:
cat cert.pemUpload the certificate to Netskope using the tenant UI. Go to Settings > Security Cloud Platform > Netskope Client > MDM Distribution, and then scroll down the page until you see the Upload Certificate to Netskope section.
Click Upload/Replace Certificate, and then click Select Certificate to locate and select your certificate file.
When finished, click Upload.
When the Preview message box opens, click Save.
Create an Identity Certificate
To create an identity certificate:
In the Mobile Iron Cloud admin console, select Configurations and click Add.
Select Identity Certificate.
Enter these parameters:
Name: Enter a unique name for the certificate.
In the Configuration Setup section, select Dynamically Generated from the Certificate Distribution dropdown list.
Source: Select the standalone certificate you created.
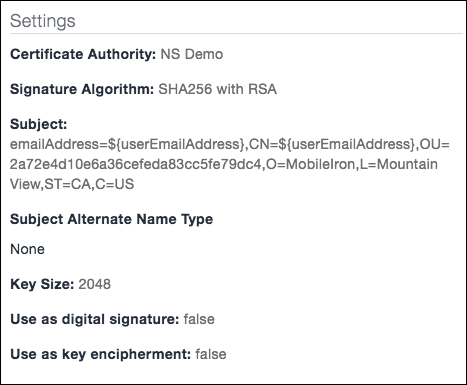
Signature Algorithm:
SHA256 with RSASubject:
emailAddress:
${userEmailAddress}CN:
${userEmailAddress}OU:
<Tenant OU from the Netskope UI>O:
<Organization Name from the Netskope UI>L:
<Your city>ST:
<Your state>(in two letter format)C:
<Your country>(in two letter format)
Subject Alternate Name Type: (Optional)
Key Size:
2048
Save this configuration and distribute this certificate to relevant devices.
Here's an example of an identify certificate configuration:
 |
Provision Certificates to Devices
To provision certificates to devices:
Locate the Netskope Root certificate you downloaded from the Netskope UI (Settings > Security Cloud Platform > Netskope Client > MDM Distribution).
In the Mobile Iron Cloud admin console, select Configurations and click Add.
Select Certificate, enter a name, and then upload the Netskope Root certificate.
Distribute the certificate configuration to relevant devices.
Configure an On-Demand VPN
To configure an on-demand VPN:
In the Mobile Iron Cloud admin console, select Configurations and click Add.
Select VPN On-Demand.
Enter these parameters:
Name: Enter a unique name.
Connection Type:
IPSec (Cisco).Server:
<VPN Server name from your Netskope tenant>.Account: Leave blank.
Machine Authentication:
Certificate.Credential: Select the identity certificate you created.
Include User PIN:
OffProxy Setup:
AutomaticProxy Server URL:
<PAC URL from your Netskope tenant>Enable VPN On Demand:
OnEnable iOS Rules:
Selected
Choose to apply this configuration to All Devices, No Devices, or use Custom to specify devices.
When finished, click Done.
Distribute to Devices
To distribute this configuration to devices:
In the Mobile Iron Cloud admin console, select Devices.
Force device check in.
Select Configurations to view the device details.

Configure a Per-App VPN
By default all Netskope tenants are set to On-Demand iOS VPN. If you want to use the Per-App iOS VPN profile, contact your sales rep, professional services rep, customer success manager, or Support to have Per-App VPN enabled.
To configure a Per-App VPN:
In the Mobile Iron Cloud admin console, select Configurations and click Add.
Select Per-App VPN.
Enter these parameters:
Connection Type:
IPSec (Cisco)Server:
<VPN Server name from your Netskope tenant>Account: Leave blank.
Machine Authentication:
CertificateCredential: Select the identity certificate you created.
Include User PIN:
OffProxy Setup:
AutomaticProxy Server URL:
<PAC URL from your Netskope tenant>Enable VPN On Demand:
OnEnable iOS Rules:
OnOn Demand Match App Enabled:
OffProvider Type:
app-proxy
When finished, click Save.
Select Apps for the Per-App VPN
To select apps for the Per-App VPN:
In the Mobile Iron Cloud admin console, select Apps and click Add.
Select App Catalog to go through the wizard to select the apps to be distributed to the devices.

Select App Configurations, and then select Per-App VPN.
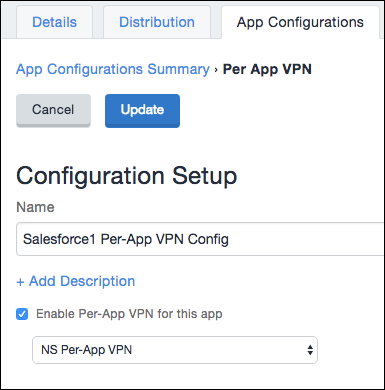
Enter these parameters:
Name: Enter a name.
Enable Per-App VPN for this App:
OnDropdown list: Select the Per-App VPN configuration you created.
When finished, click Update.
Distribute to Devices
To validate the device has the necessary configurations:
In the Mobile Iron Cloud admin console, select Devices.
Force device check-in.
Select Configurations to view the device details.

iOS VPN Fail Open
Fail open function allows traffic from a device using iOS VPN to bypass Netskope and directly go to an app or service. When fail open is enabled, all iOS devices will no longer steer traffic to Netskope. Fail open occurs when Netskope initiates it due to a service interruption and when an admin enables it in the Netskope UI.
To enable fail open for iOS VPN:
In the Netskope UI, go to Settings > Security Cloud Platform > MDM Distribution.
In the Create VPN Configuration section, confirm that your iOS VPN is operational. If so, click the
 icon to open the Advanced Configuration dialog box.
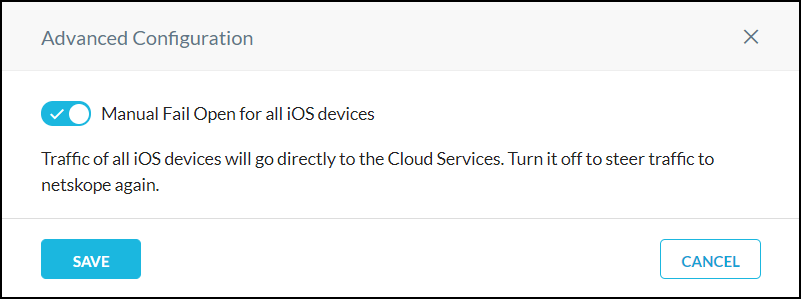
Enable the toggle and then click Save.
Netskope supports two methods prescribed by MobileIron to enable Android Enterprise devices in MobileIron Cloud:
Using Managed Google Accounts.
Using Managed Google Play Accounts (Recommended method).
Managed Google Accounts
To use Android Managed Configurations in MobileIron Cloud, first set up Android for Work in Google. After Android for Work is configured, copy the MDM token from admin.google.com and .json file generated from console.developer.google.com. When you have these, follow these instructions.
To configure Android Managed Configurations in MobileIron Cloud:
Log in to your MobileIron Cloud Admin Portal.
Click Admin in the top menu bar, and then click Android Enterprise in the left nav panel.
In the Android Enterprise window:
Enter the MDM token generated from
admin.google.com.Enter the domain for your google account.
Upload the .json file from
console.developer.google.com.
Click Connect, and then authorize the G Suite account.
Click Users in the top menu bar, and then click + Add > Single User.
Create a new user with the domain used for Android Enterprise above, and then enable Google Sync for the user.
Click Apps.
On the App Catalog page, click Add+.
Enter
Netskopein the Find Apps field.Select Netskope Client, and then enter these values:
User Email Address:
${userEmailAddress}Host:
addon-<tenant hostname>.goskope.com.Token:
<OrgKey>. Use the Organization ID from the VPN Configuration section in the Netskope UI for theOrgKeyvalue (Settings > Security Cloud Platform > Netskope Client > MDM Distribution).
Click Done and then click Publish.
Managed Google Play Accounts
To use Android Enterprise devices in MobileIron Cloud, first setup a Managed Google Play account.
Prerequisite: Register your Android enterprise in MobileIron through Managed Google Play Accounts. To learn more, view MobileIron Cloud.
Environment
Netskope Client Playstore Version: 96.0.0.1009
Android Enterprise Modes
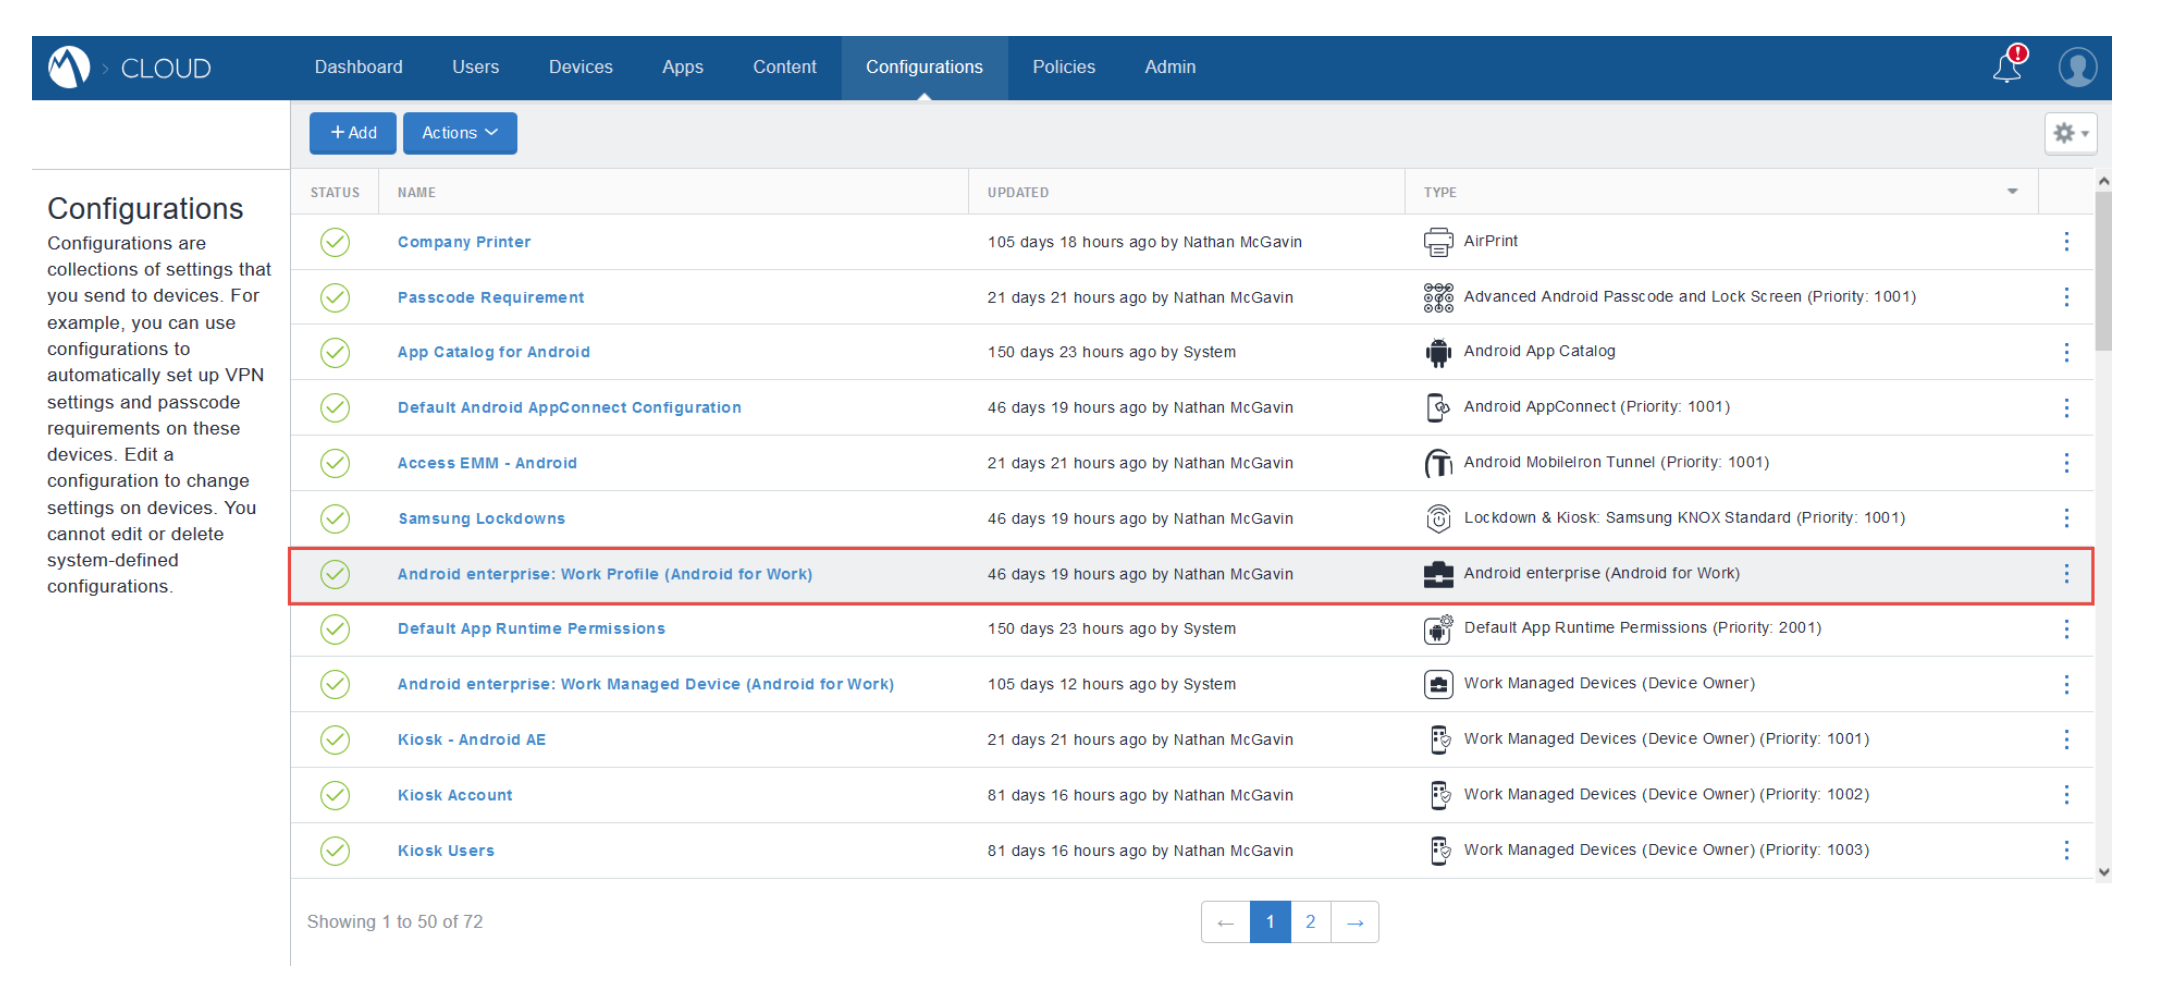
Android enterprise devices enabled in MobileIron supports one of the following device modes:
Work Managed Device (Company Owned)
Work Profile (BYOD)
Managed Device with Work Profile (Company owned personally enabled devices)
To learn more, view Device Modes.
Netskope supports the Work Profile (BYOD) variant of the Android Enterprise and you can modify the default configuration to only apply to select device groups- for instance a subset of Android devices.
Deploying Android Applications
Perform the following steps to deploy your Android applications:
Go to Apps > App Catalog.
Click the +Add.
Select Google Play.
Search and select Netskope Client.
Add Netskope configuration.
Enter User Email Address and {EmailAddress} for the Configuration Key and Configuration Value, respectively.
Enter token and your < Orgkey > value (Organization ID in the Netkkope UI) for the Configuration Key and Configuration Value, respectively.
Enter host and the addon-< tenant hostname >.goskope.com value for the Configuration Key and Configuration Value, respectively.
Click Approve.
To learn more, view Android Enterprise.
Perform the following to setup BYOD with the work profile:
Download and Install the Mobileiron Go app from Playstore.
Open the MobileIron Go app and select CONTINUE.
Enter in the username and password.
Select CONTINUE again to create the Work Profile.
Accept the Terms and Conditions.
Select SET UP.
Wait for the profile to finish set up.
The application will restart and the MobileIron Go application will be moved to the Work Profile.
Select FINISH to complete the setup.
The device is now fully registered and configured with Android For Work.
Device Classification for Android
You can classify Android devices based on these criteria:
Minimum OS version
Passcode required
Device not compromised
Primary storage encrypted
Managed configuration
Go to Settings > Manage > Device Classification and select Android on the New Device Classification dropdown list, and then follow these steps to classify your Android device. Select options and enter the requested parameters.
Rule Name: Enter a name for this classification rule.
Classification Criteria: Select an Any or All criteria match.
Minimum OS Version: Select an OS version from the dropdown list or create a custom OS version.
Passcode Required: No parameters required.
Device Not Compromised: No parameters required.
Primary Storage Encrypted: No parameters required.
Managed Configuration: If you already added a managed configuration for this device on the MDM Distribution page, the key-value pair is shown here. This key-value pair is sent from the MDM to the device so the Netskope app can validate the key-value pair and mark it as Managed or Unmanaged. To regenerate the key-value pair, click Regenerate.
Note
Managed Configuration does not work when an app is installed on an Android device using the onboarding email or with the AirWatch SDK.
When finished, click Save.
After creating a device classification rule, you can use it in a Real-time Protection policy.
To use this Device Classification in a Real-time Protection policy, click Policies > Real-time Protection in the Netskope UI. Select an existing policy or click New Policy and choose a policy type.
Proceed through the Users, Cloud Apps + Web, DLP/Threat Protection, and Select Activities sections.
For Additional Attributes, click Access Method and select either Client, Mobile Profile, or Reverse Proxy, and then click Save. Click Device Classification, and then select Managed or Unmanaged, based on the devices you just classified.
Managed means the device is managed; the device information sent by the Client matches at least one of the device classification checks configured for that Client's OS.
Unmanaged means the device is unmanaged; the device information sent by the Client matches none of the device classification checks configured for that Client's OS.
When finished, click Save and then Next.
Combine device classification with other policy elements, like using the Block Action for specified applications for activities like uploading files from managed or unmanaged devices. Finish creating or updating this policy to establish this device classification. Click Apply Changes for this policy.
After the policy has been created, perform the process for which the policy was created. Next, go to Skope IT > Application Events and click the magnifying icon for an event to open the Application Event Details panel. In the User section you'll see a Device Classification field, which shows one of these device classifications.
This section describes the procedure to configure MobileIron Cloud for macOS.
Prerequisites:
Download Netskope Root and Intermediate certificates and convert them to .cer extension. To learn more, see Certificates.
Download MobileIron Packager (MIP) from the MobileIron Support portal. To install MIP, install the MobileIron Packager (MIP) app and then download the Netskope agent .pkg file. Upload the Netskope package in the tool to convert it to .mip.
Create Script for App Deployment
You can create your scripts in the All Scripts section. Netskope Client use the instructions held in the script to enroll the user to a device.
Perform the following steps to create the script:
Go to Admin > Scripts > All Scripts.
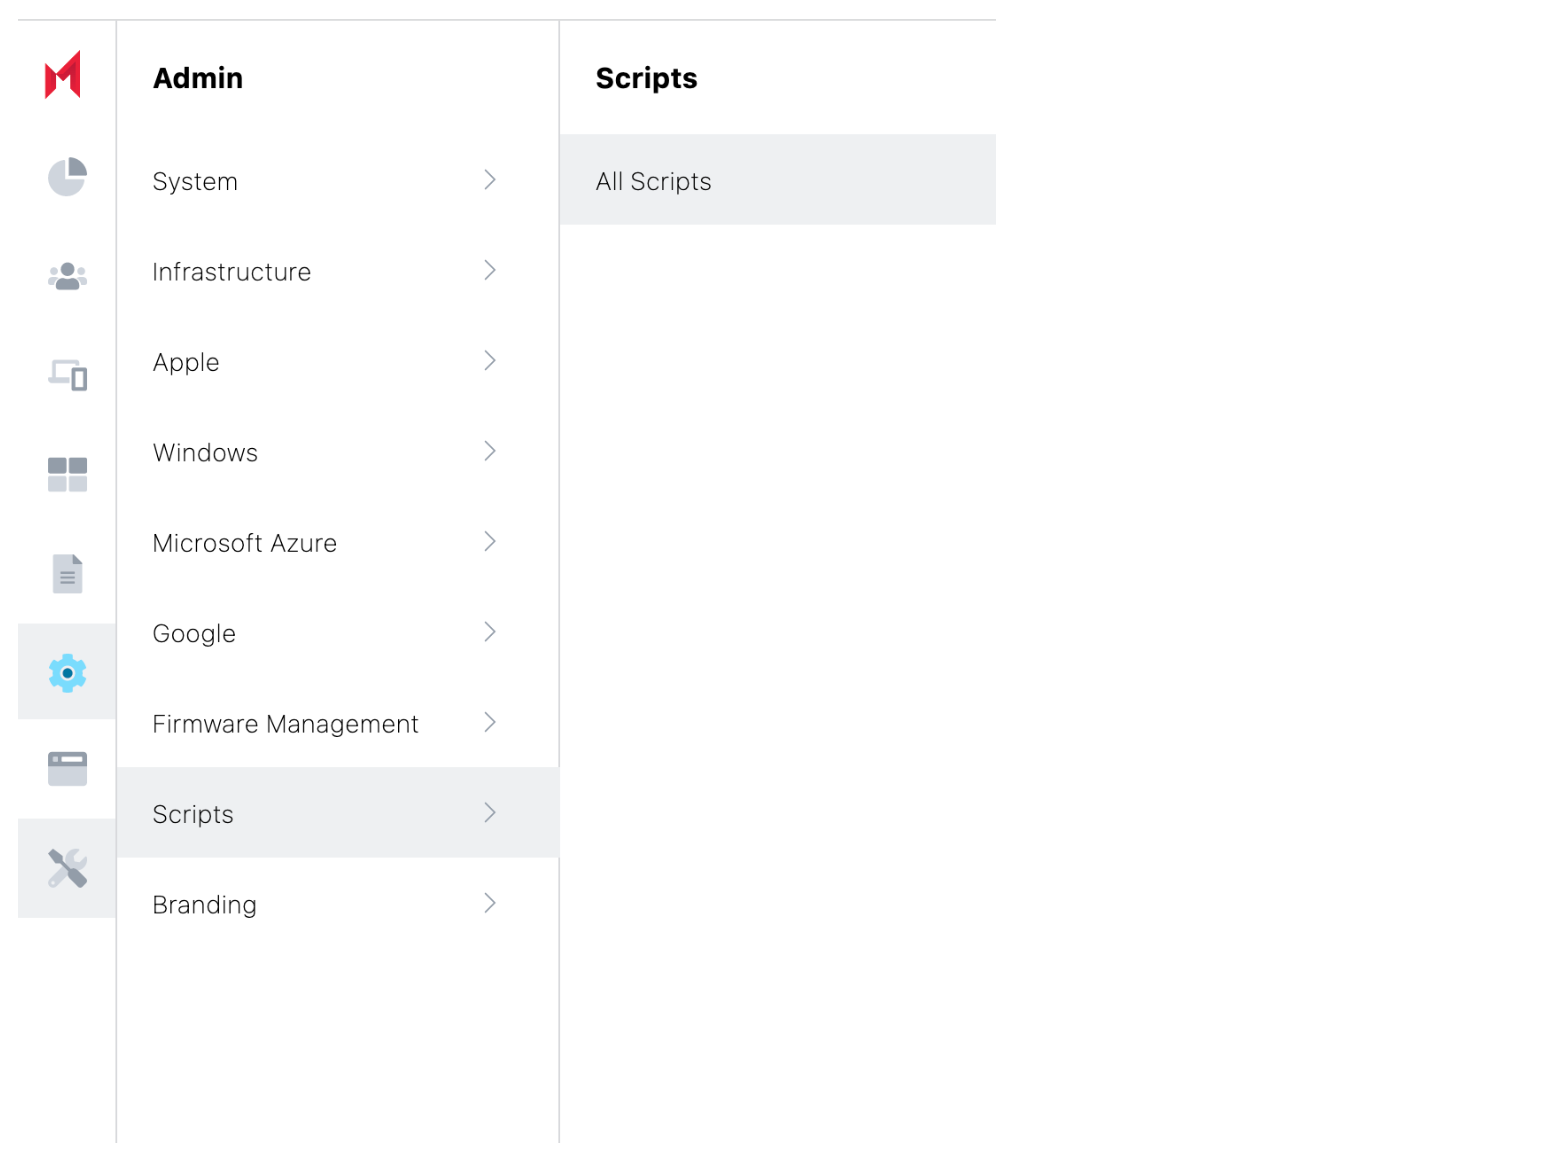
Click Add to create the Installation Script.
Enter the Script Name, Description, and select Script Type as 'bash'.
Click On Import code from script and upload the minsclientconfiig_<version-number>.sh script.
Click Add in Script Input to define the Input Environmental Variables.
Provide the Environment Variable Name and Environment Default value.
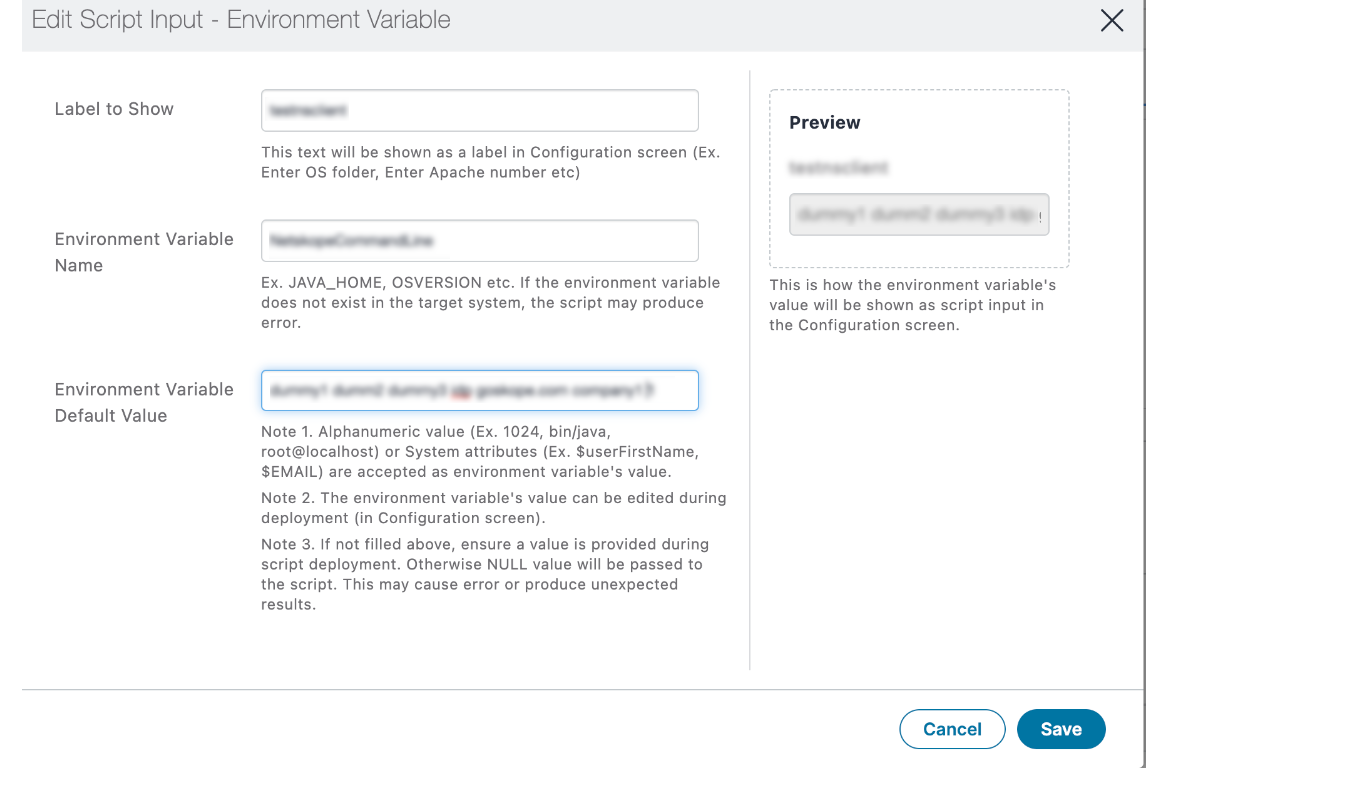
Click Save.
MacOS Configuration Script for Installation
Here, you can define a configuration to distribute the script to the end-user device.
Go to Configuration > Add > Search and select Mobile@Work for macOS Script.
Enter Name and select your script in the Configuration Setup.
After the script Execution select Execute Once On Deployment.
Click Next.
Select the Device/Users/Custom.
Adding Netskope App in App Catalog
Adding the Netskope application to Vmware Workspace ONE for deployment in the mac Device.
Go to Apps > App Catalog.
Click Add.

Select In-house app.

In the Choose section, upload .mip netskope client pkg
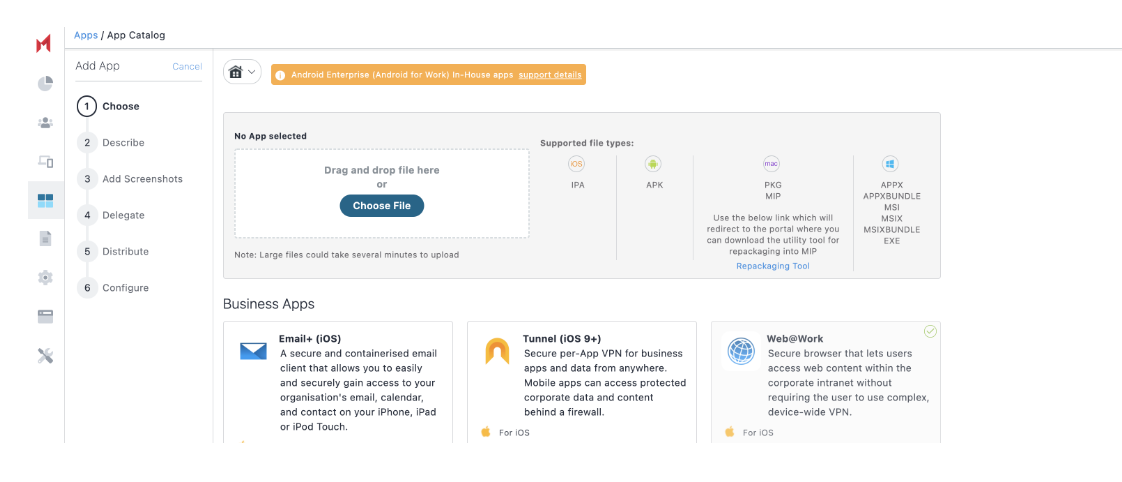
Click Next. Ensure the file upload is successful.
In the Describe section, ensure to update the Package ID as.com.netskope.client.Netskope-Client when importing Packager in-house macOS apps and click Next.
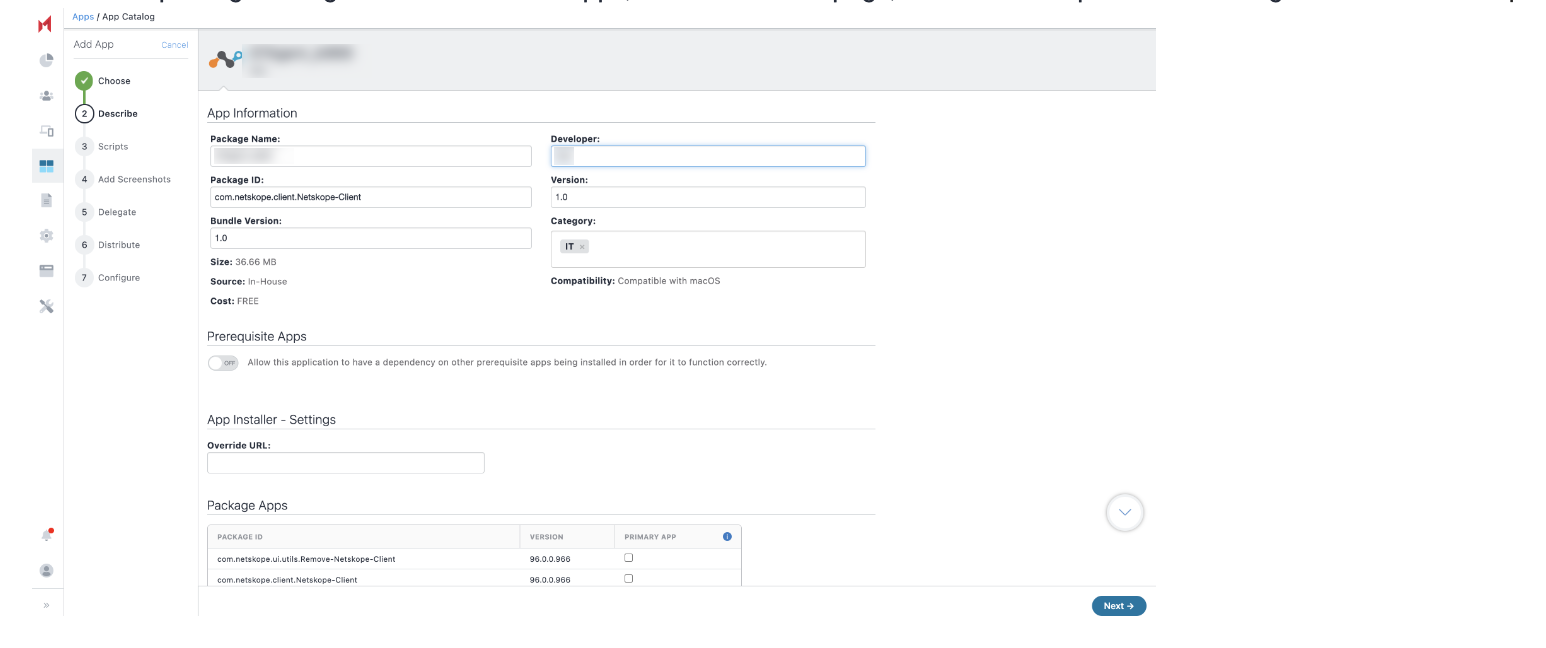
In the Scripts section, define or select the application scripts.
Pre Install Scripts - Enter the script name to select the script to run before app installation. The preinstall scripts execute or rerun until the script execution success status is received from the client. Once the script execution is completed, the app install command is sent. You can view the script run status in the device details page in the Logs tab.
Uninstall Scripts: Enter the script name that server sends to a device when it detects an app that is no longer distributed to the device.
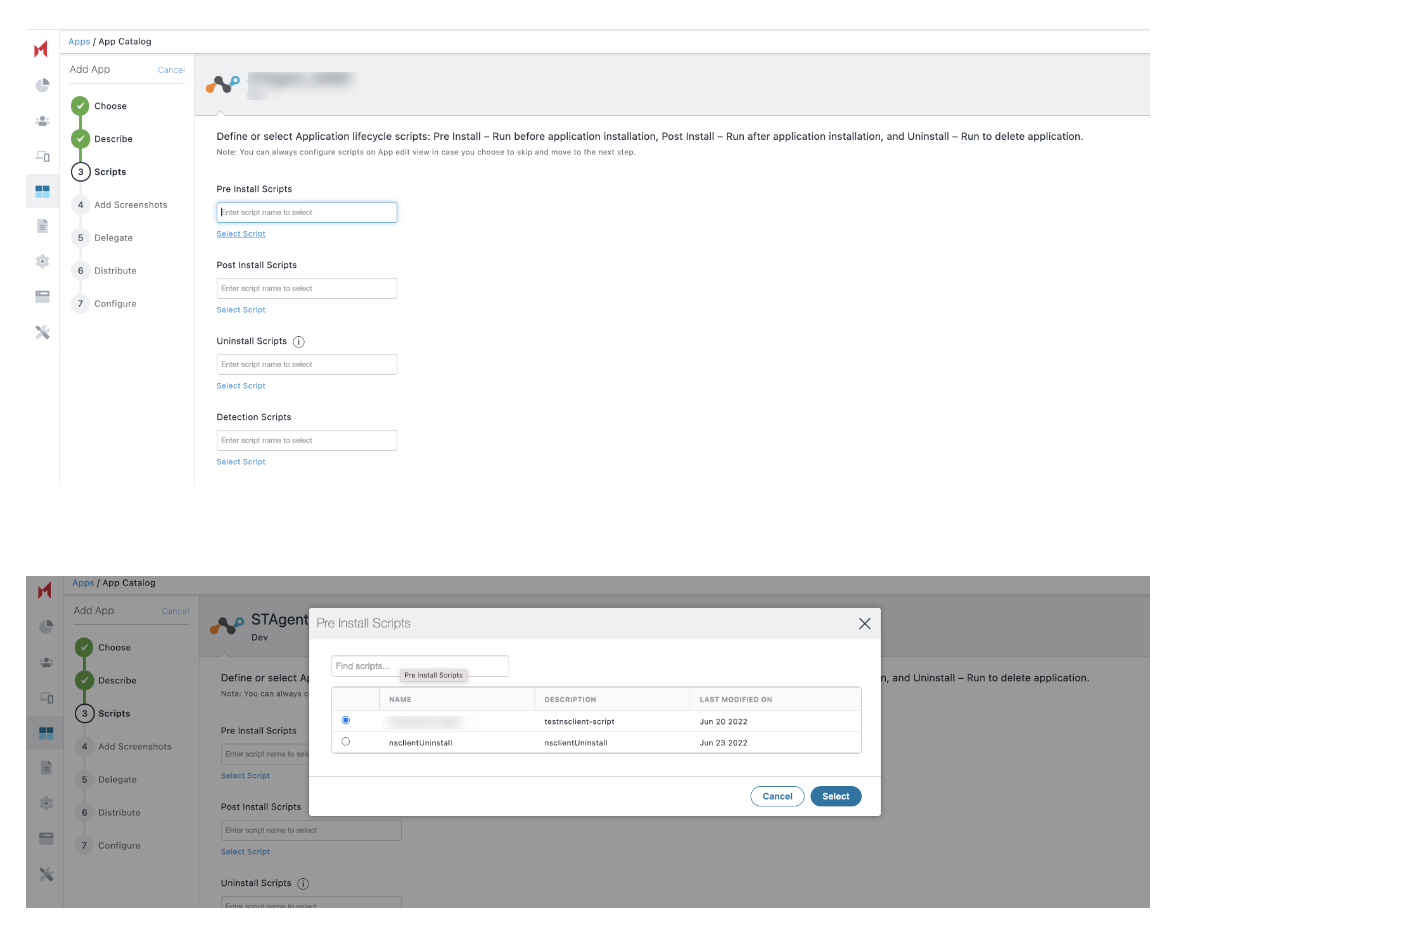
Select the desired options in Add Screenshots, Delegate, and Distribute sections.
In the App configuration section, click Install Application configuration settings and toggle on Install on Device and select High from the Set App install Priority dropdown menu.
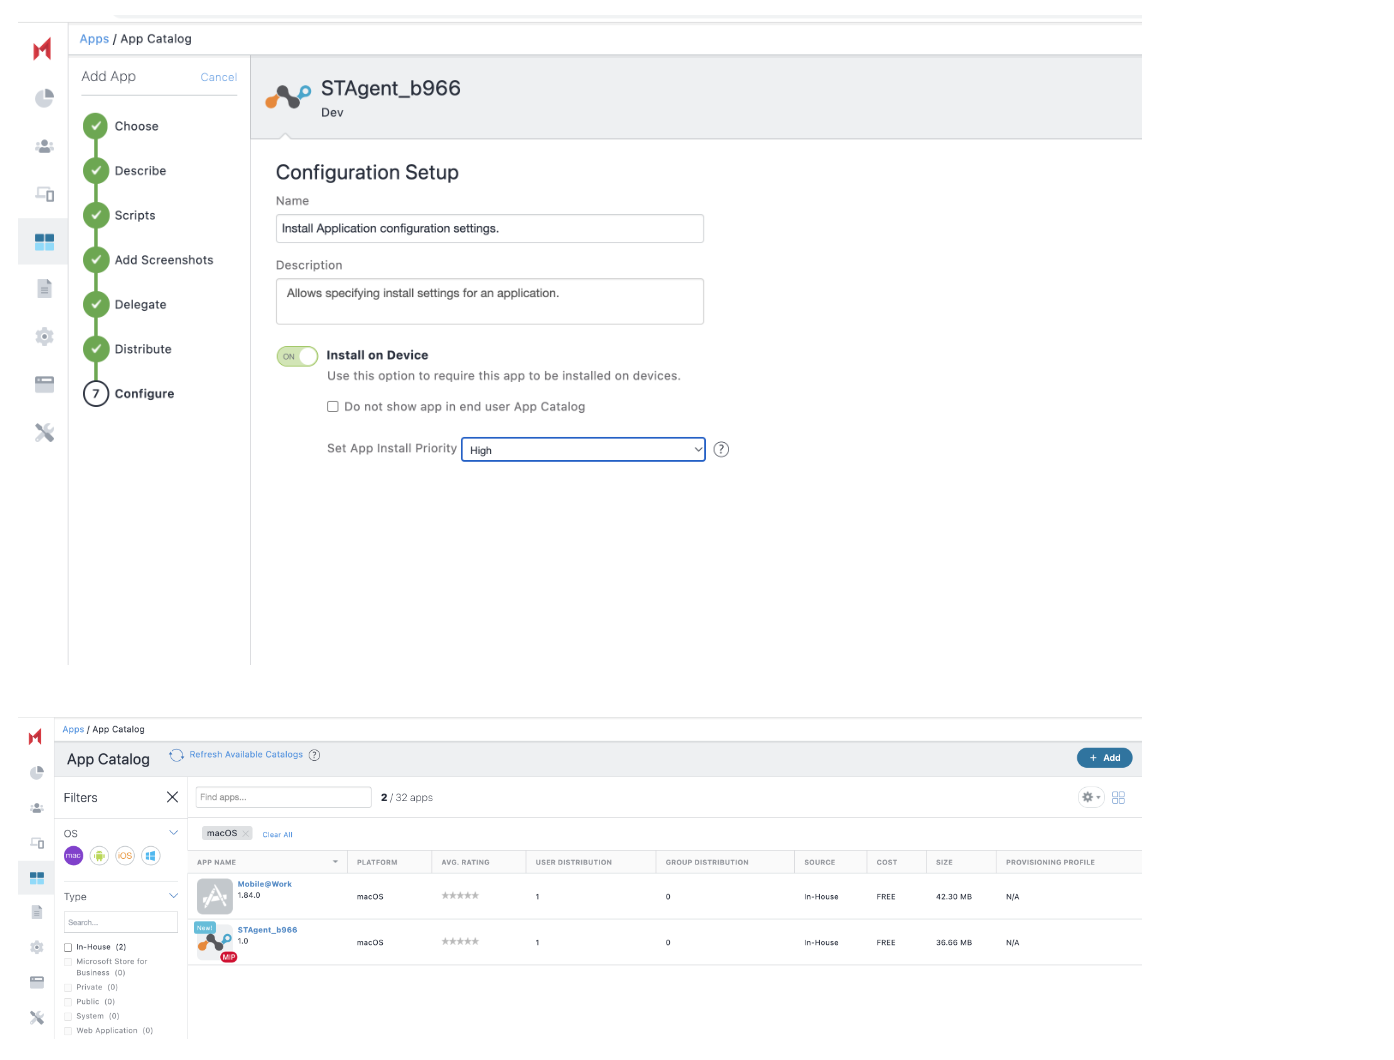
Click Done.
Approve Network Extension
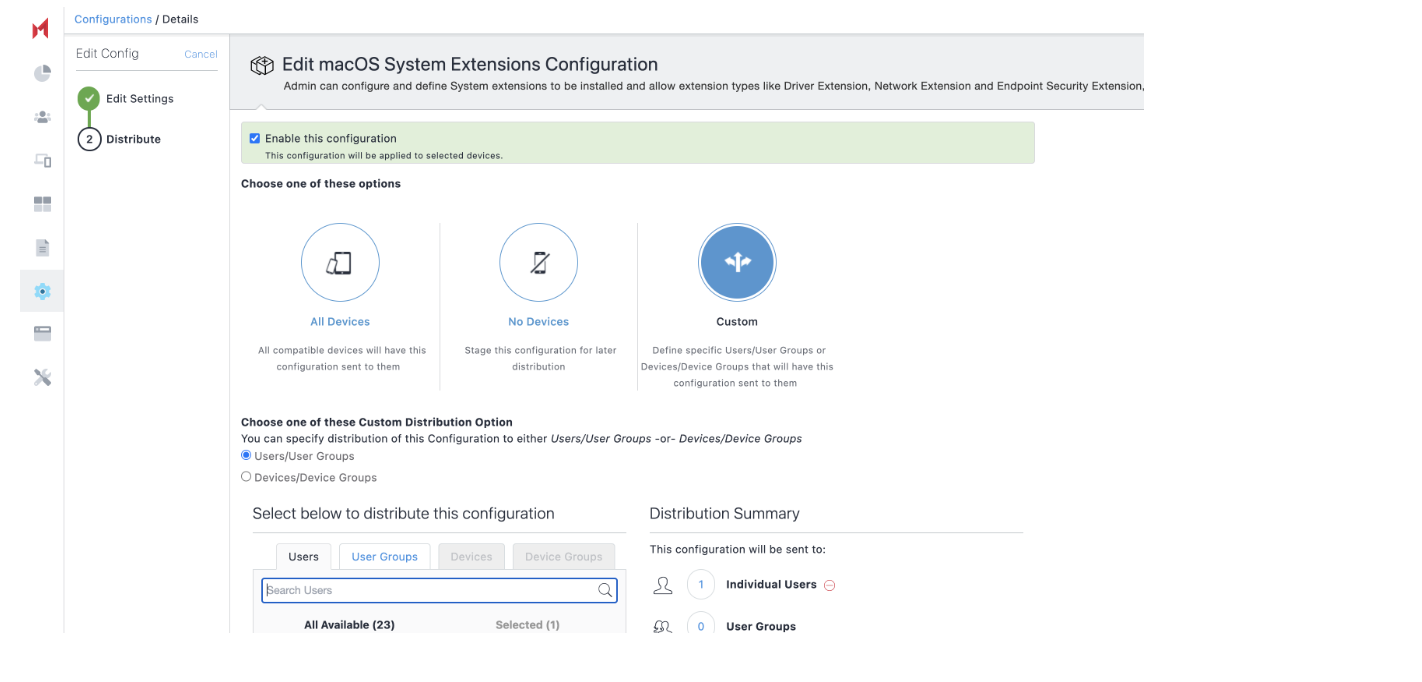
System Extension configuration allows installation of extension types like Driver Extension, Network Extension and Endpoint Security Extension, without kernel-level access.
Go to Configuration > Add Configuration > Search for 'MacOS System Extensions.
Under Allowed System Extensions, add Allowed Team Identifiers and Allowed System Extensions.
Add Network Extension Team ID: 24W52P9M7.
Click Add to add the following System Extension:
com.netskope.client.Netskope-Client.NetskopeClientMacAppProxy
com.netskope.client.Netskope-Client.NetskopeClientMacDNSProxy
Also provide the same details in Remove System Extensions.
Select the Allow user overrides option.
Click Next.
Associate to Device/Users/Custom.
Onboarding the Mac OS device with Mobileiron Cloud
Perform the following steps to onboard the macoS device:
Click Getting Started in the Welcome email to Onboard your endpoint.
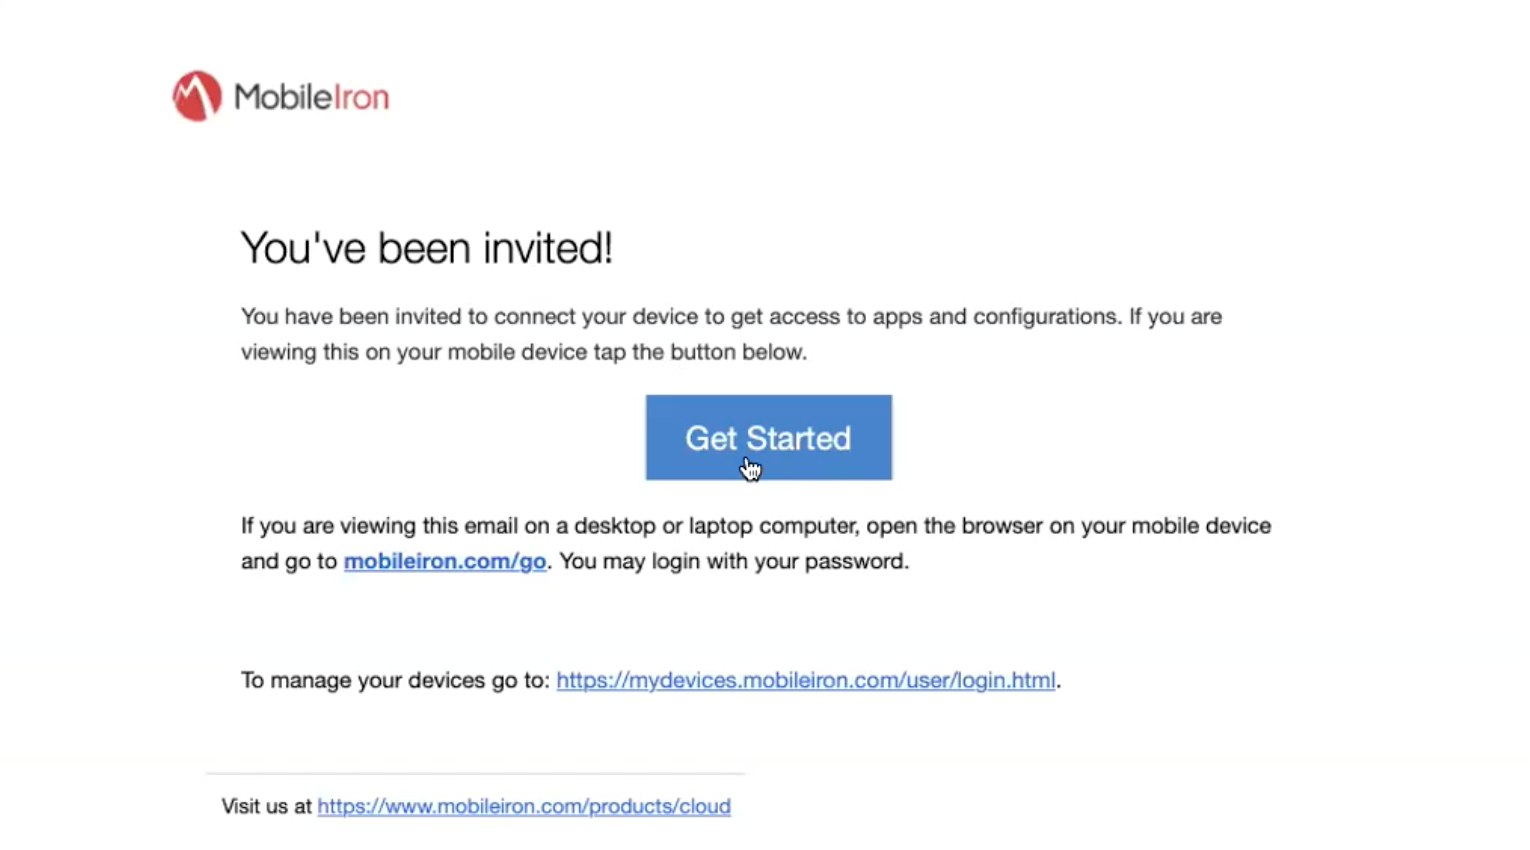
Enter the Email and password.
Choose one of the following options:
I own the Device.
Company owns the Device.
Install the MDM Profile.
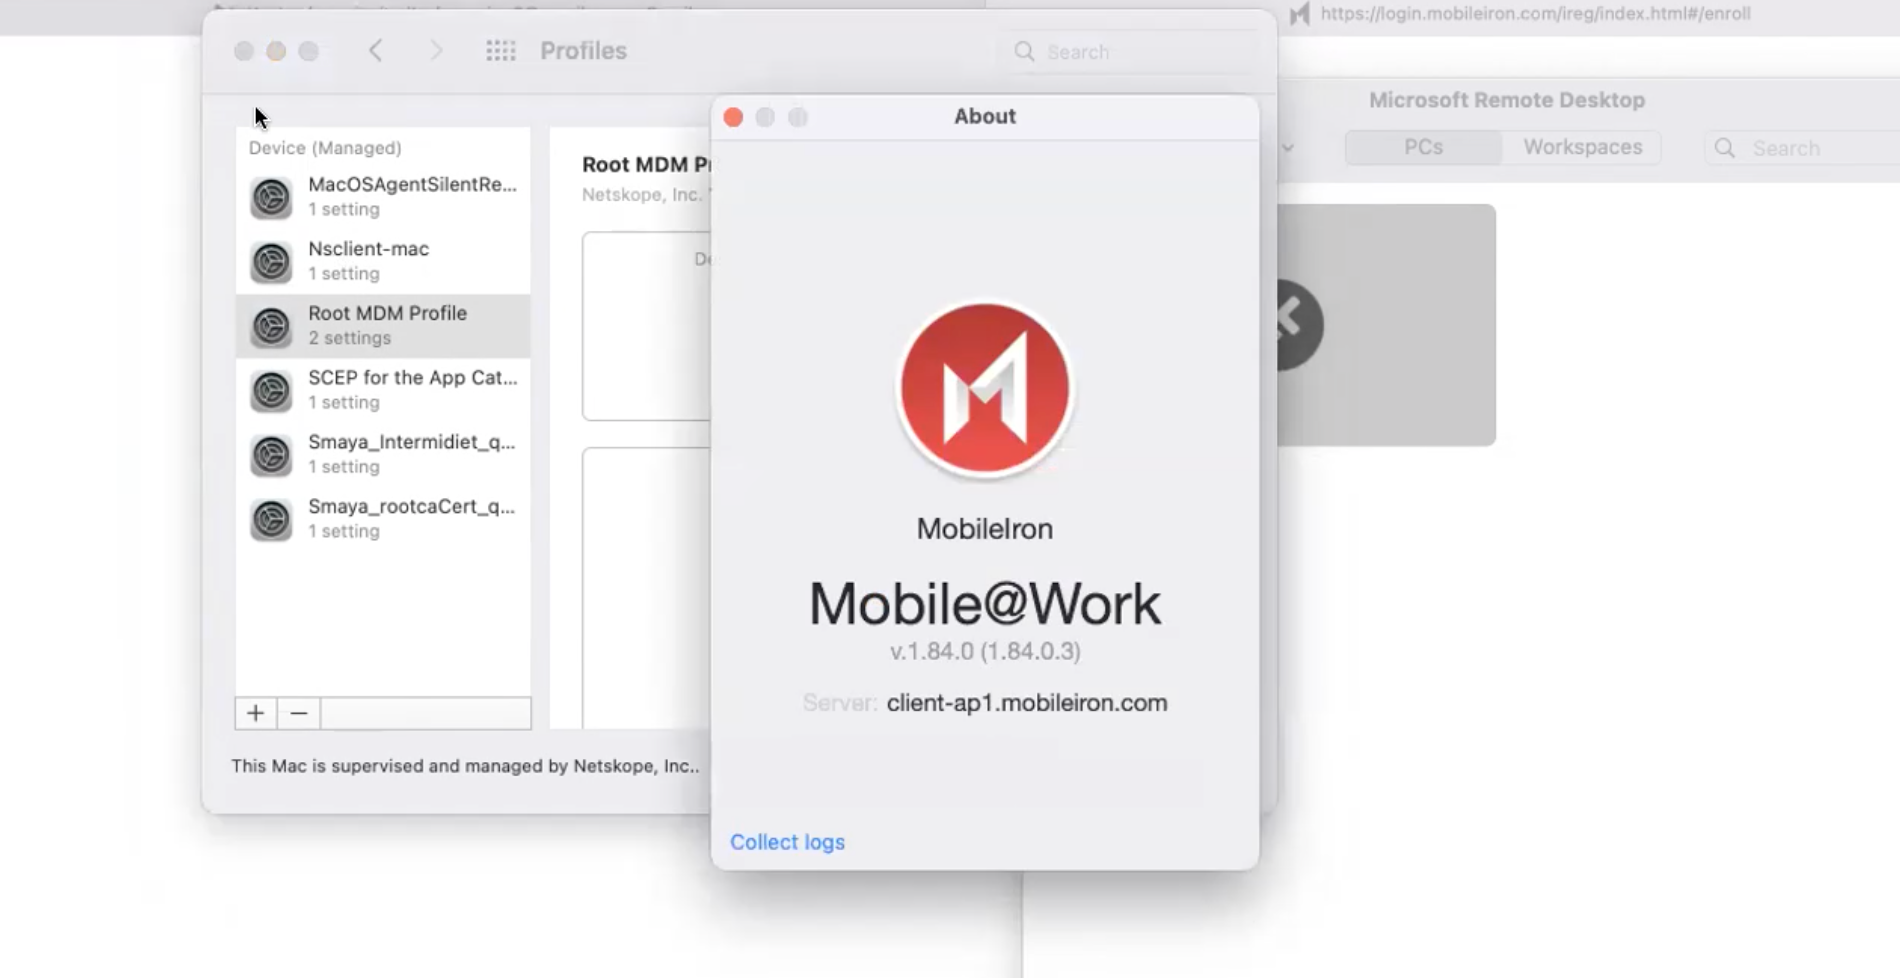
Select Allow to accept the Permission to allow the Netskope Client.
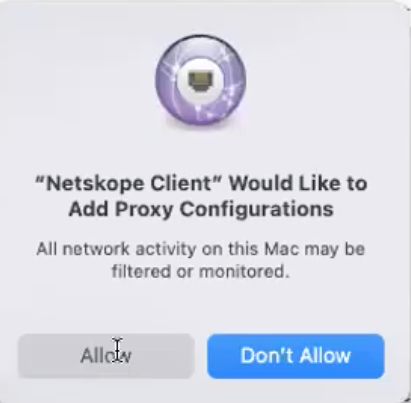
Verify the app installation process in the 'install.log' file.
Enter the IDP login details such as email address.