Microsoft Defender for Endpoint Plugin for Threat Exchange
This document explains how to configure the Microsoft Defender ATP integration with the Threat Exchange module of the Netskope Cloud Exchange platform. This integration allows for sharing of file hashes with Netskope.
Fetched indicator types: URL, MD5, SHA256
Shared indicator types: URL, MD5, SHA256
High-level use cases:
Indicators of the types IP, Domains, and URL from Microsoft Defender for Endpoint will be fetched as URLs in Netskope Cloud Exchange.
Indicators of the type URL will be differentiated as IP, URL, or Domain, and then ingested to Microsoft Defender for Endpoint.
Actions in plugin v1.1.0 | Action in plugin v1.2.0 |
|---|---|
unknown | Audit |
allow | Allowed |
block | Block |
alert | Alert |
Warn | |
AlertandBlock | |
BlockandRemediate |
Note
For Actions Audit, Alert, and AlertandBlock, select the Generate Alert checkbox in Microsoft Defender for Endpoint and Alerts to be generated.
To complete this configuration, you need:
A Netskope Tenant (or multiple, for example, production and development/test instances).
A Secure Web Gateway subscription for URL sharing.
A Netskope Cloud Exchange with the Threat Exchange module already configured.
A Microsoft Defender for Endpoint account.
Your Microsoft Azure Tenant ID, Client ID, and Client Secret.
A Microsoft Azure Application with the
Ti.ReadWrite.AllPermission. For more information, go to this article.
Create a custom File Profile.
Get your Directory Tenant ID, Application Client ID, and Client Secret.
Configure the Microsoft Defenderfor Endpoint Plugin.
Configure sharing between Netskope and Microsoft Defender for Endpoint.
Validate the Microsoft Defenderfor Endpoint Plugin.
Click play to watch a video.
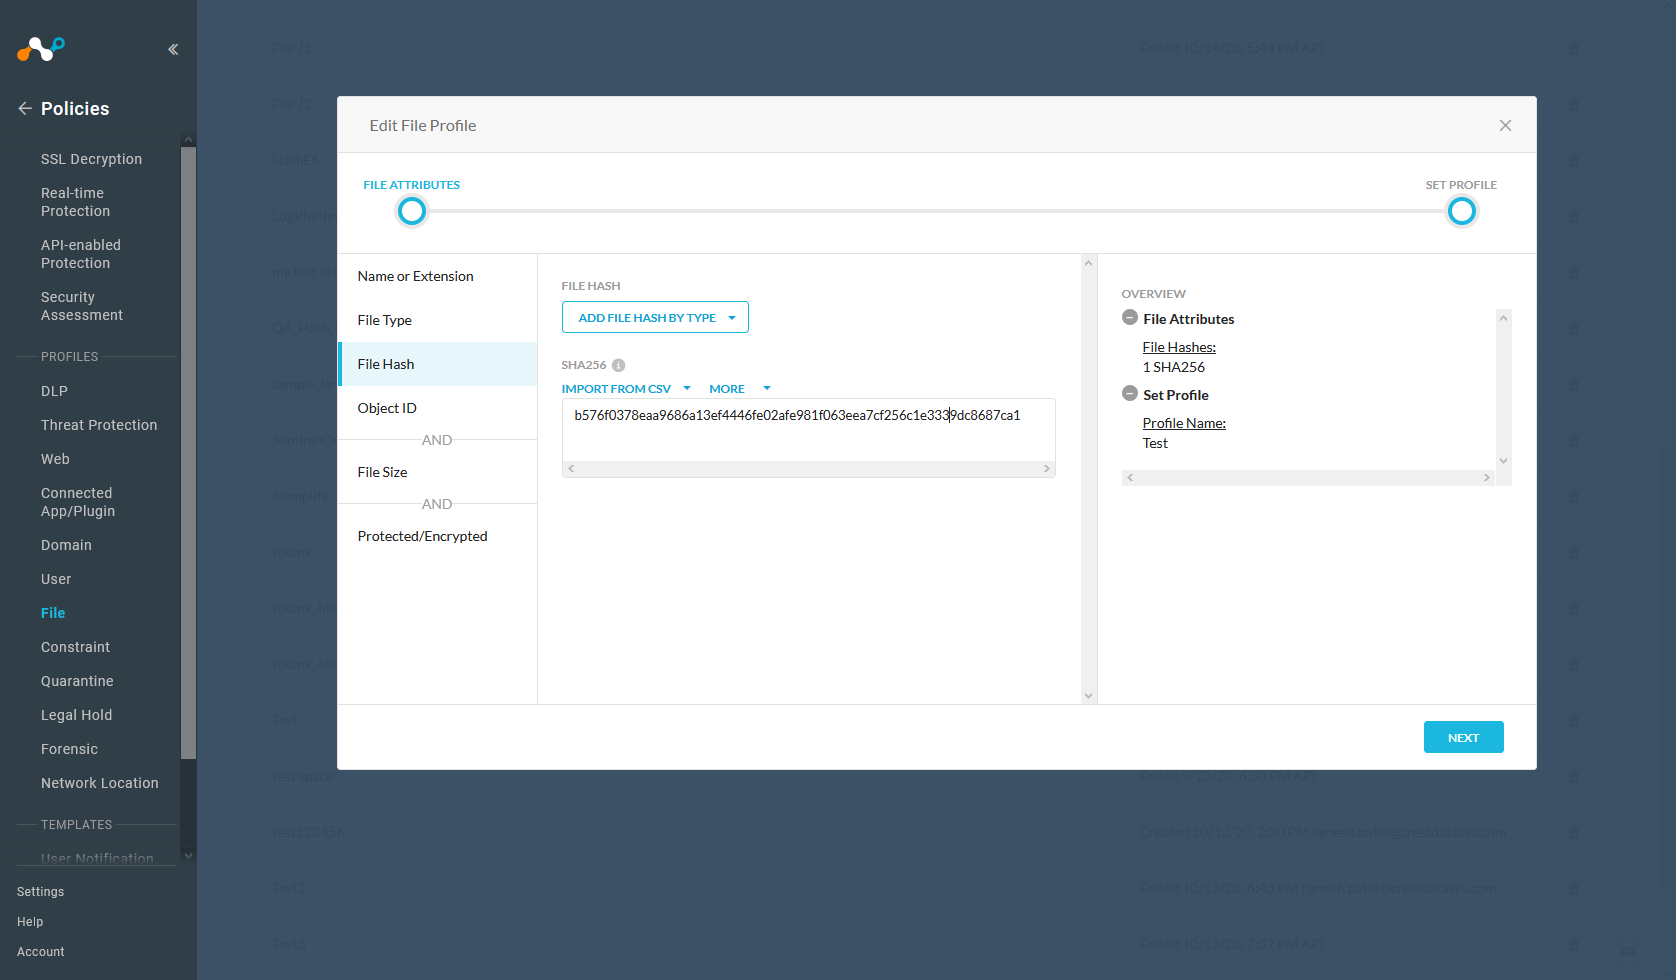
In the Netskope UI, go to Policies , select File , and click New File Profile.
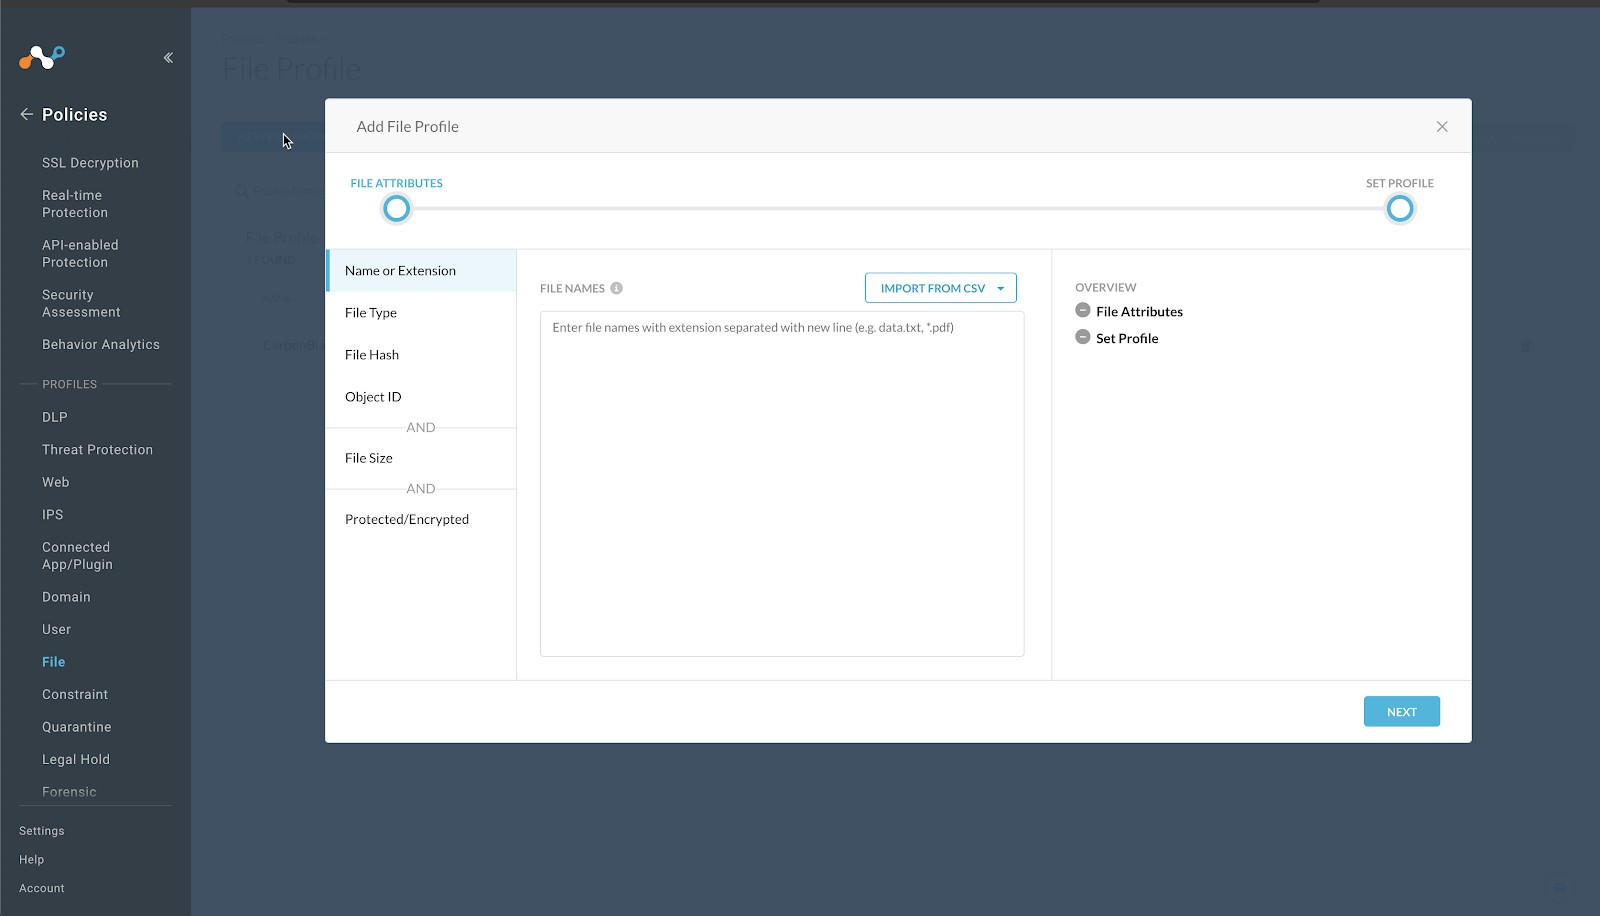
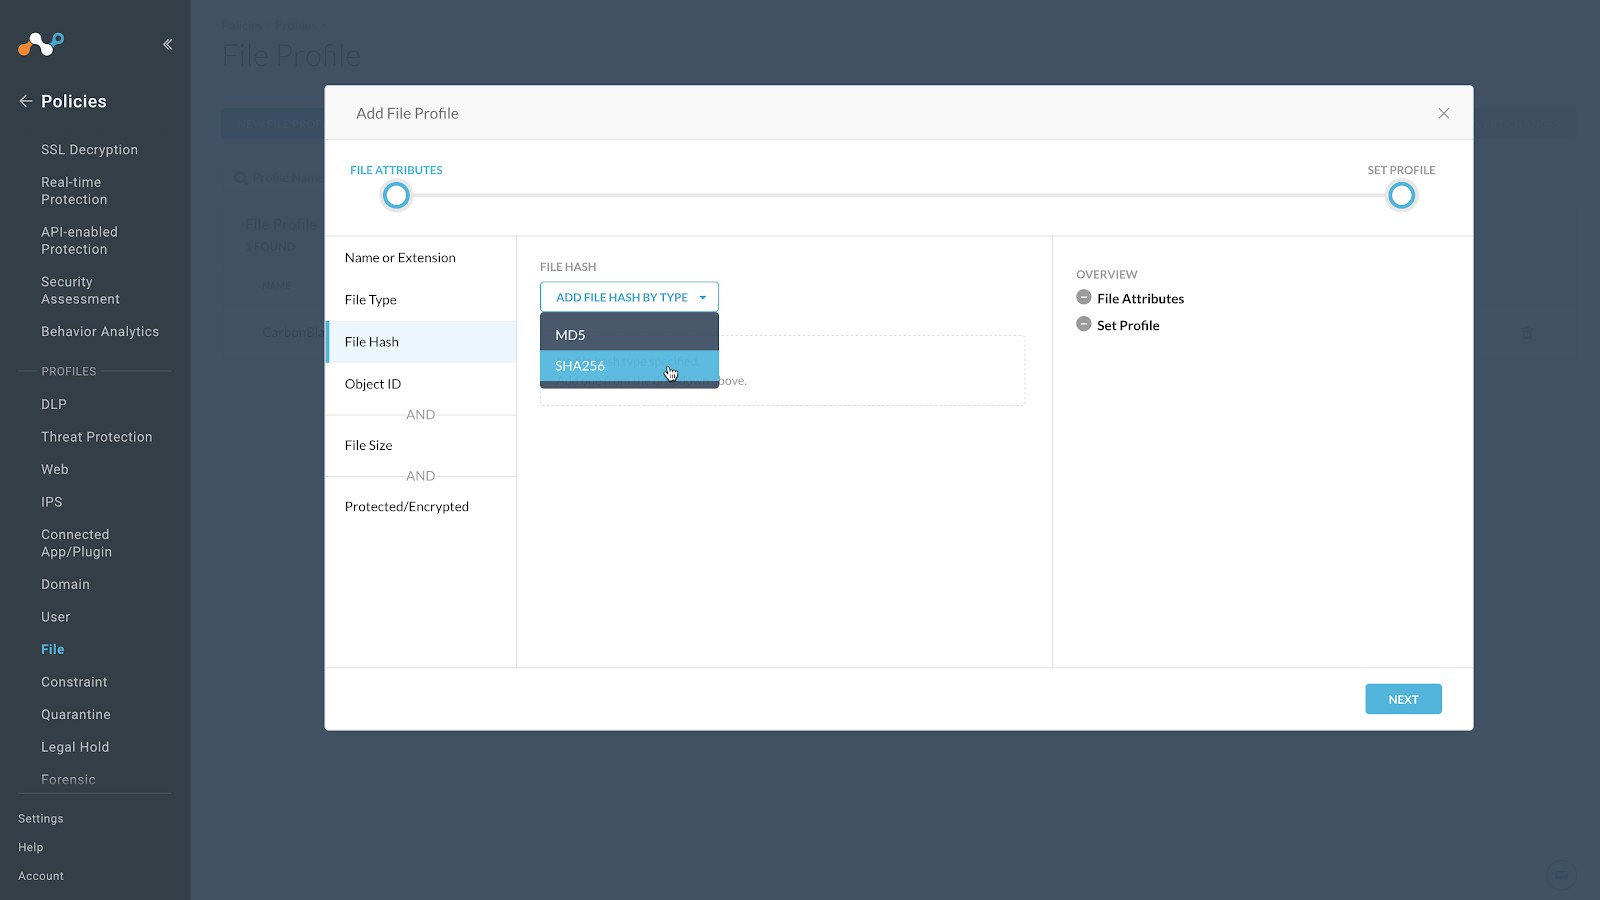
Click File Hash in the left panel, select SHA256 from the File Hash dropdown list.
Enter a temporary value in the text field. Netskope does not support progressing without having a value in this field, and recommends entering a string of 64 characters that consists of the character
f. For example,ffffffffffffffffffffffffffffffffffffffffffffffffffffffffffffffff. This will have a very low possibility of matching a valid file format.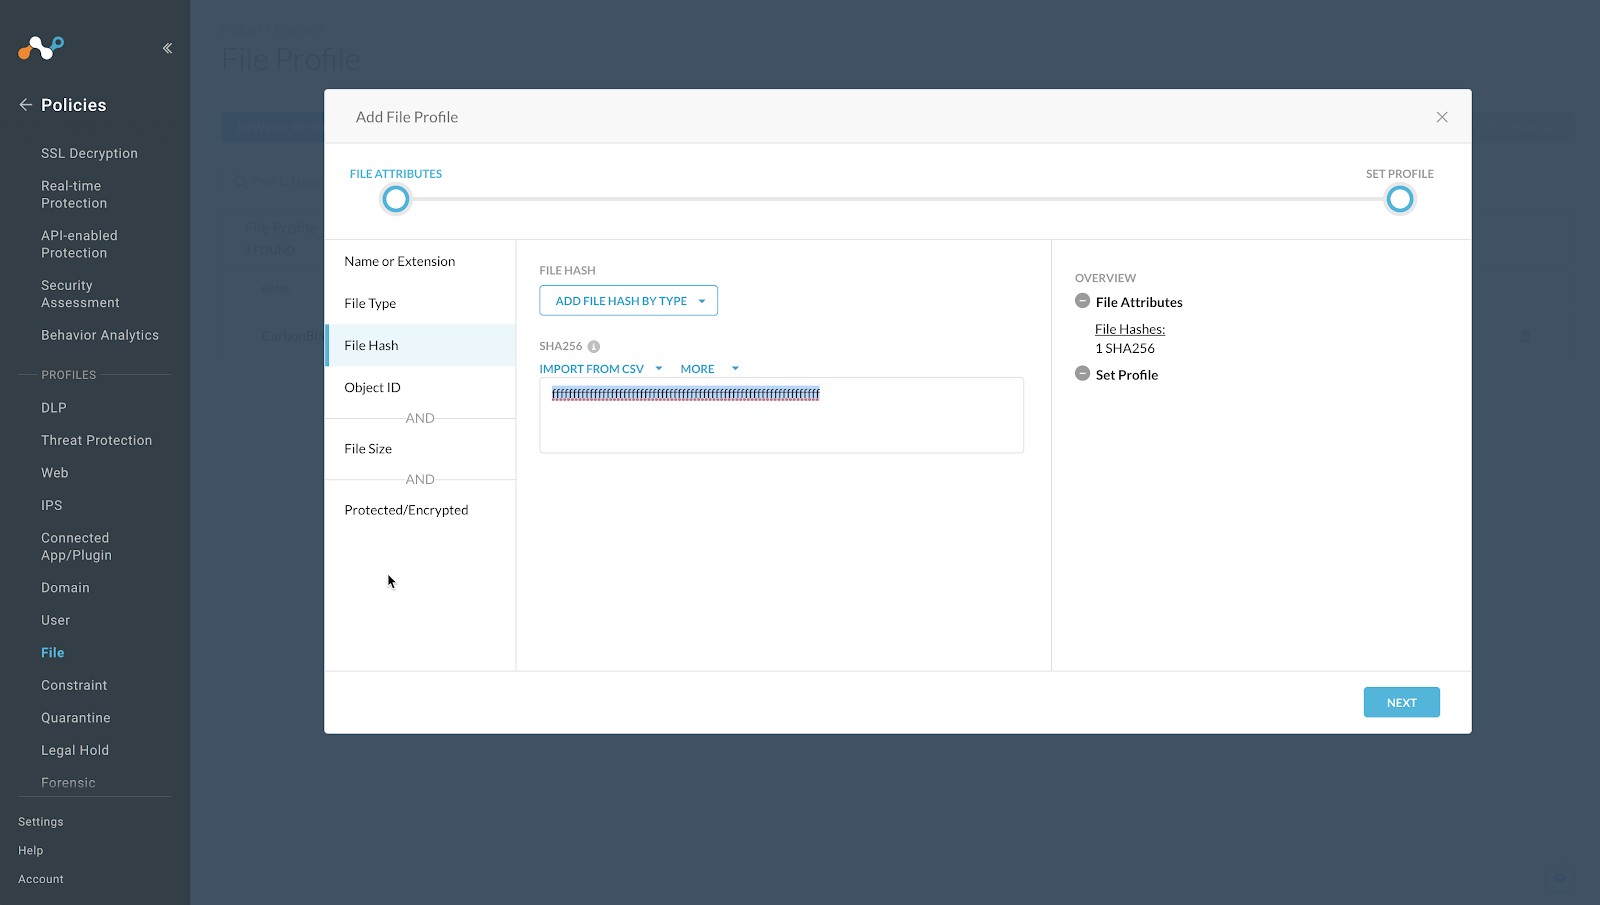
Click Next.
Enter a Profile Name and a Description. We recommend not having blank spaces in your profile name; use underscores for spaces.
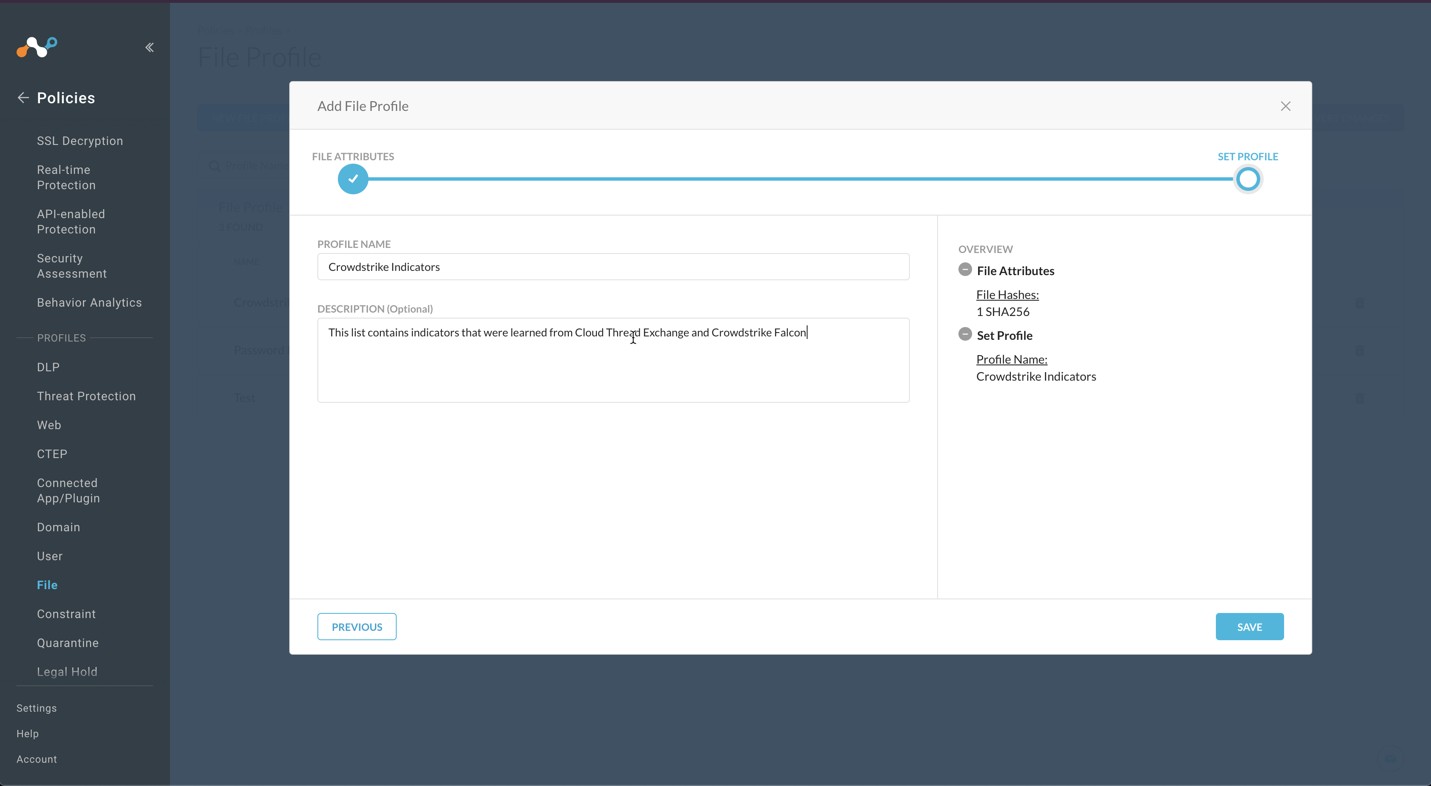
Click Save.
To publish this profile into the tenant, click Apply Changes in the top right.
Log in to Azure with an account that has the Global Administrator role.
Go to Azure Active Directory > App registrations.
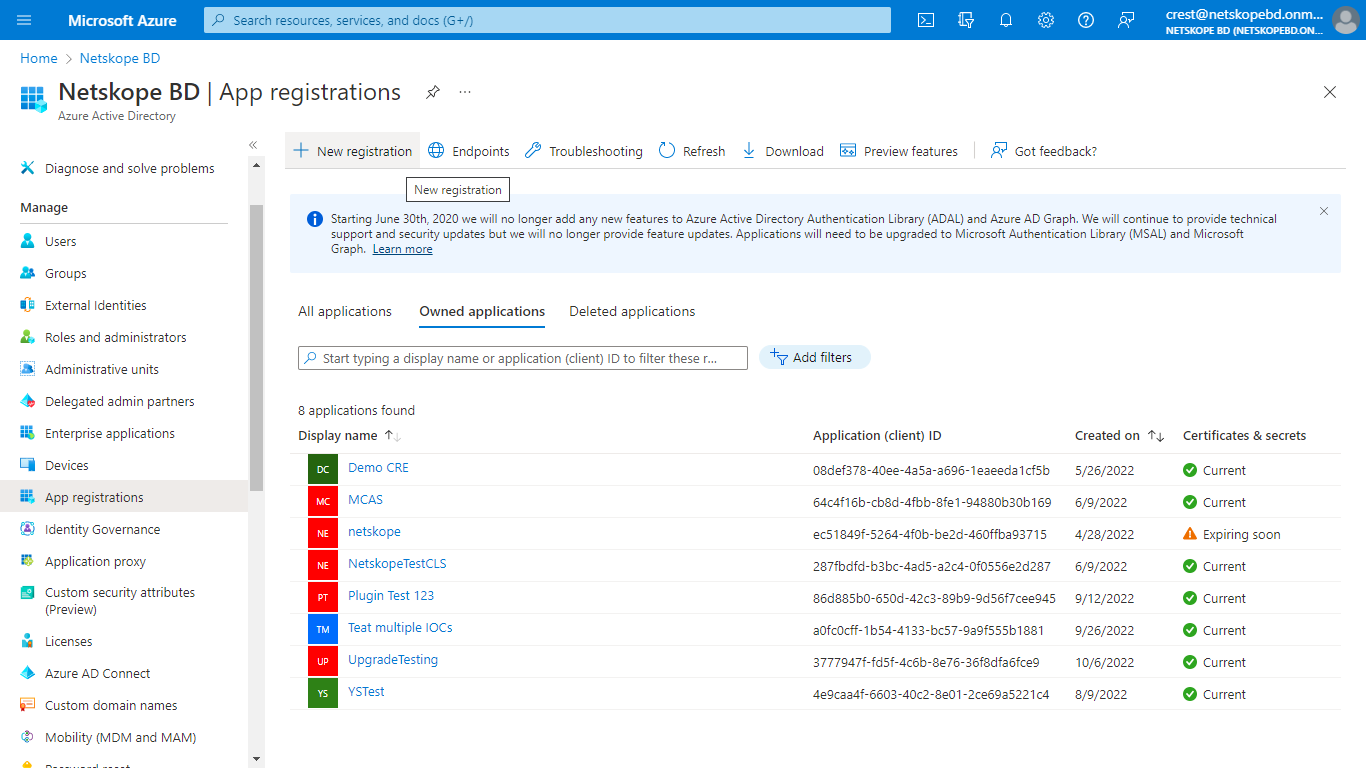
In the registration form, enter a name for your application, and then click Register.
Copy your Directory (tenant) ID and Application (client) ID from the application page.
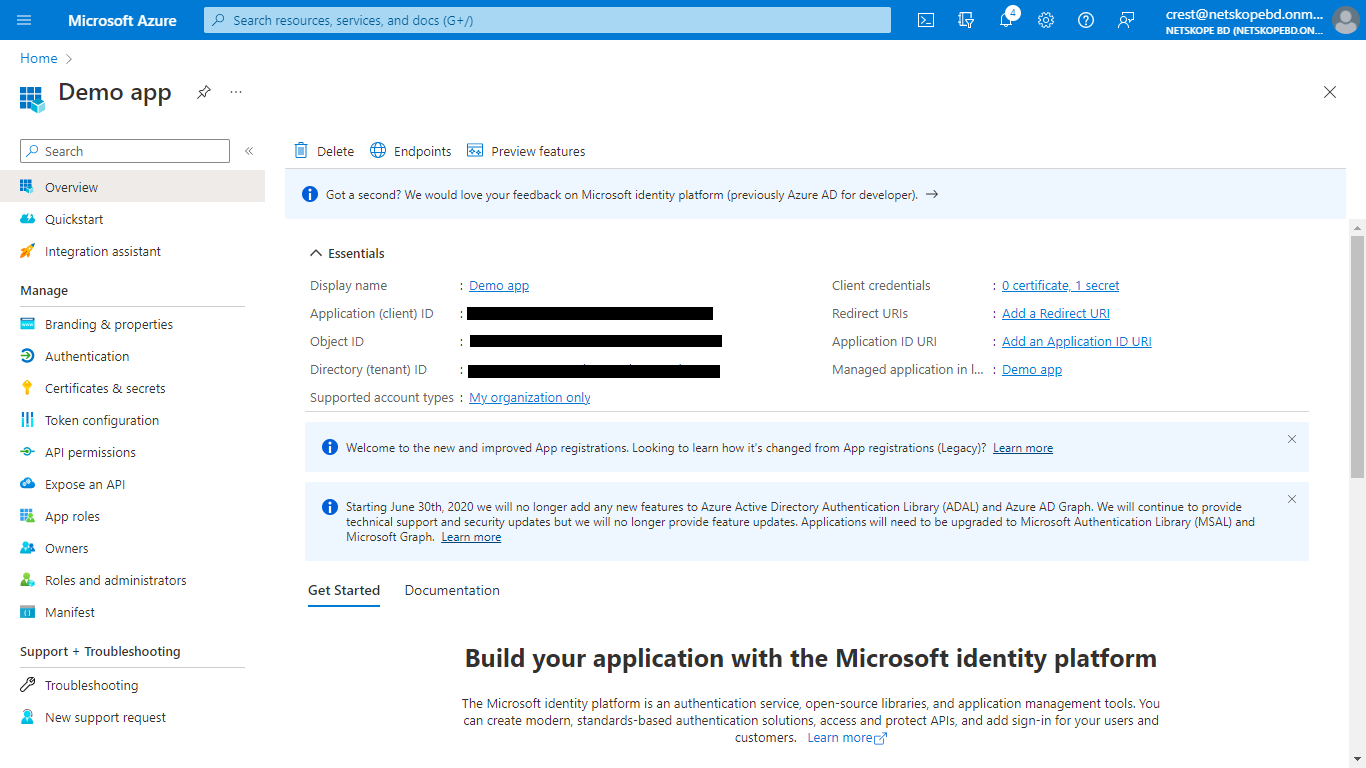
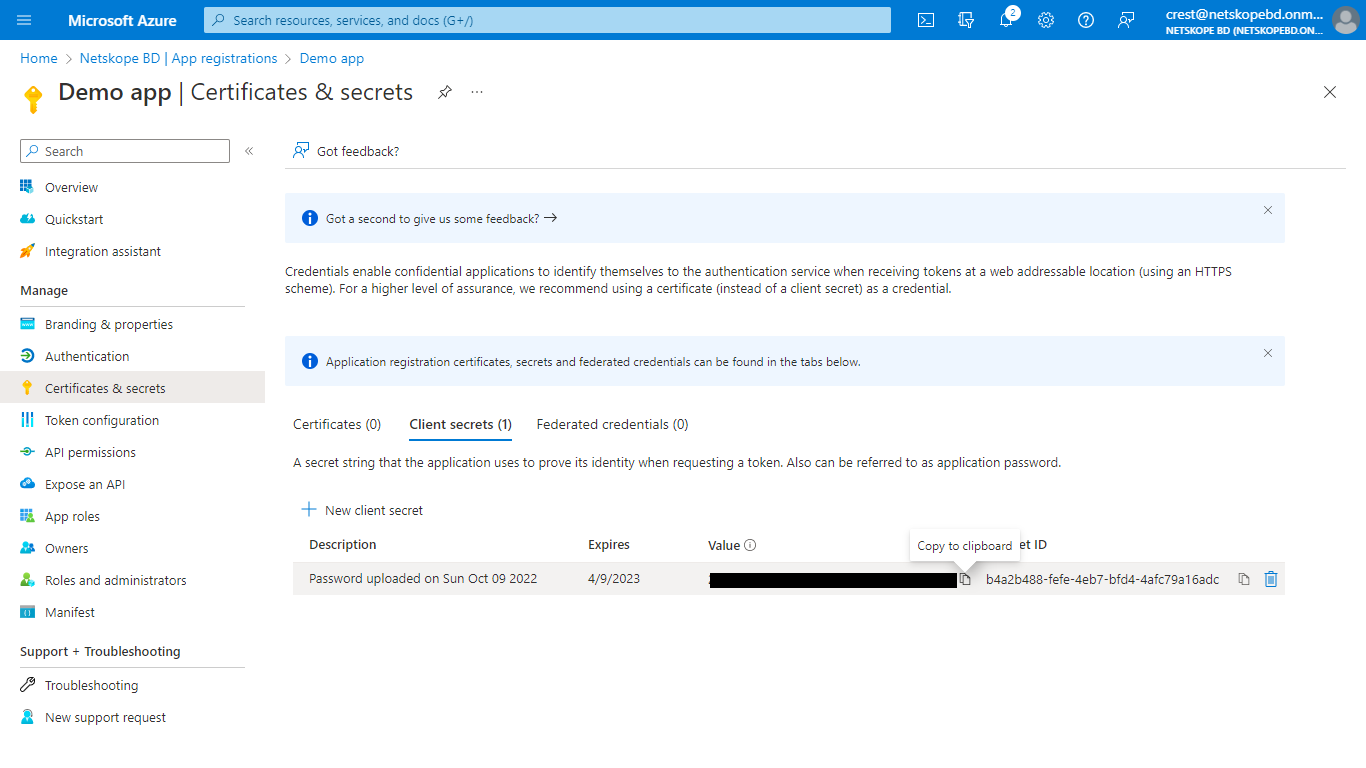
Click Add a certificate or secret and then click New client secret to generate a Client secret. Add description and an expire time, and the. click Add.
Copy the Secret Value; it will be displayed only once.
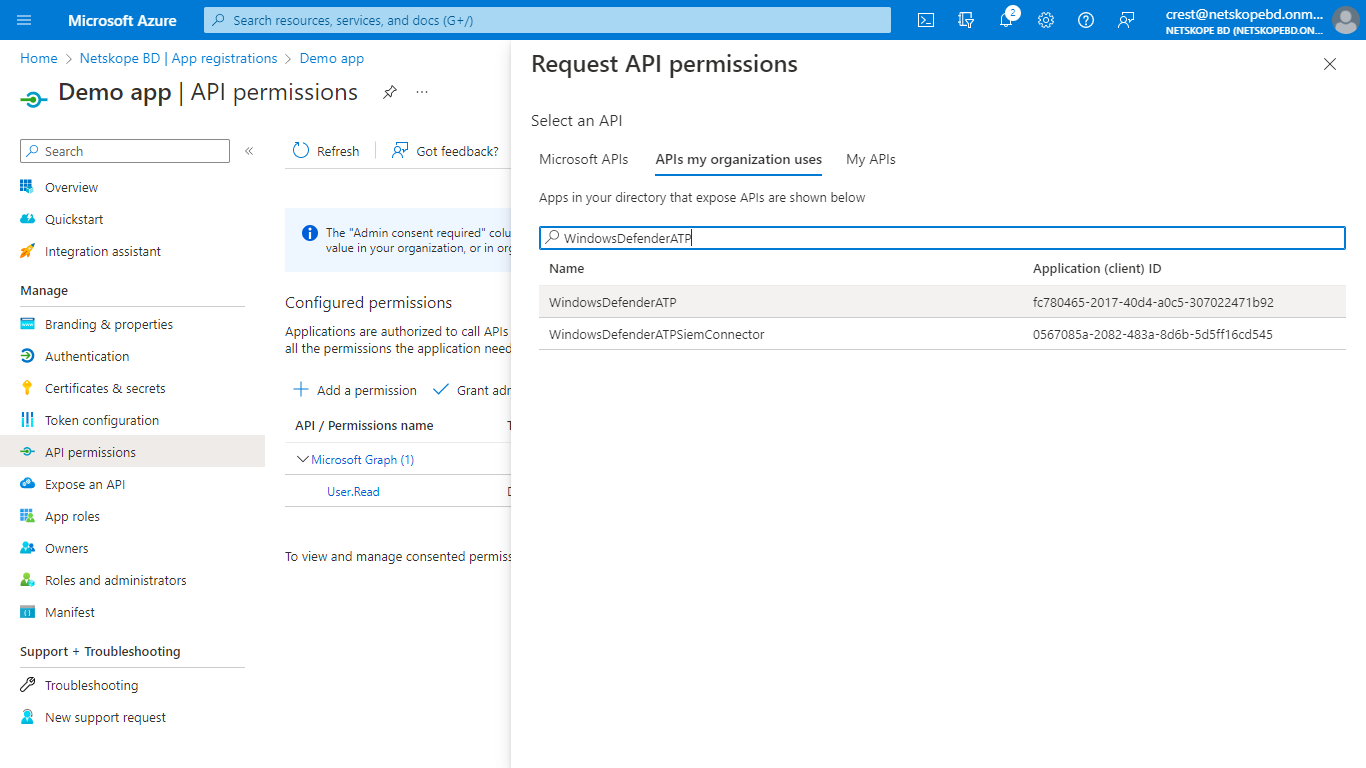
To enable your app to access Defender for Endpoint, on your application page, select API Permissions > Add permission > APIs my organization uses , enter WindowsDefenderATP, and then select WindowsDefenderATP.
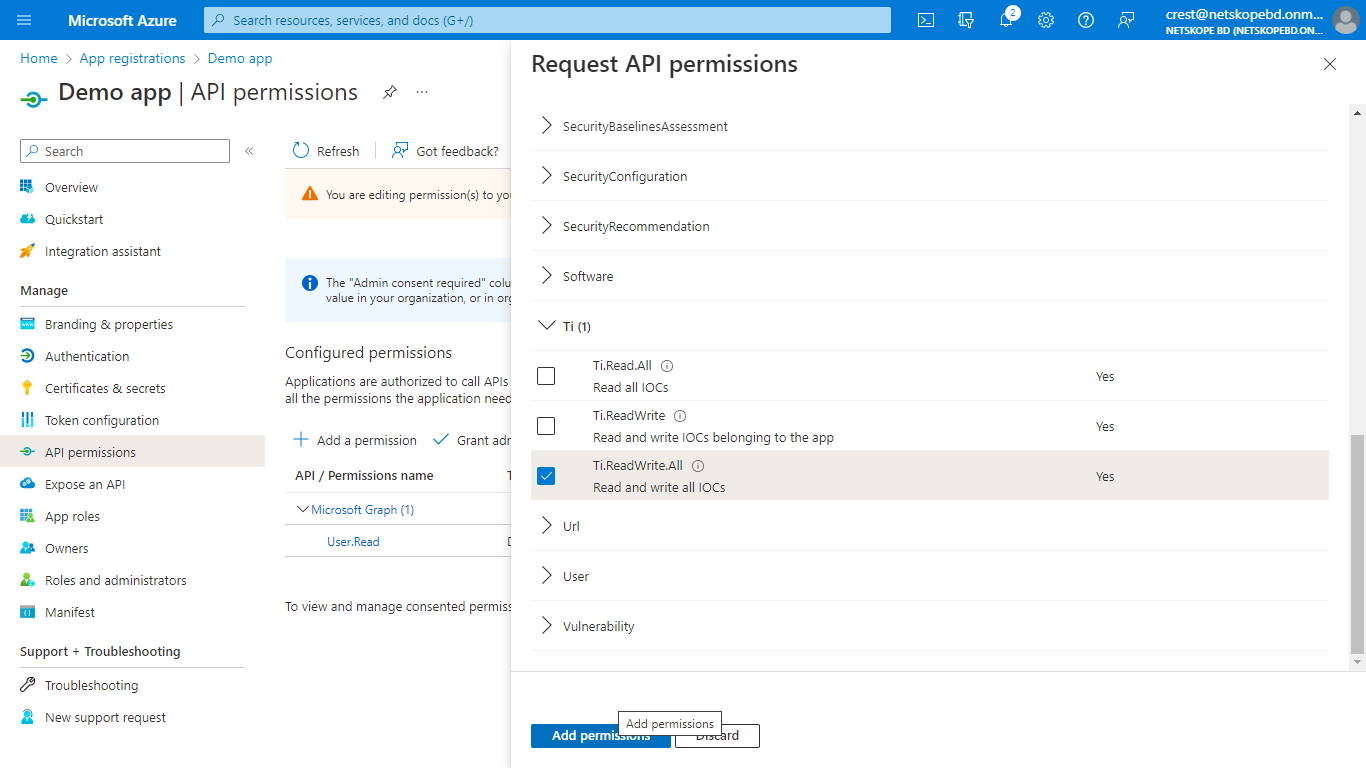
On the Application Permission tab, select Ti from the permissions list, enable the Ti.ReadWrite.All checkbox on the basis of your requirement, and click Add permissions.
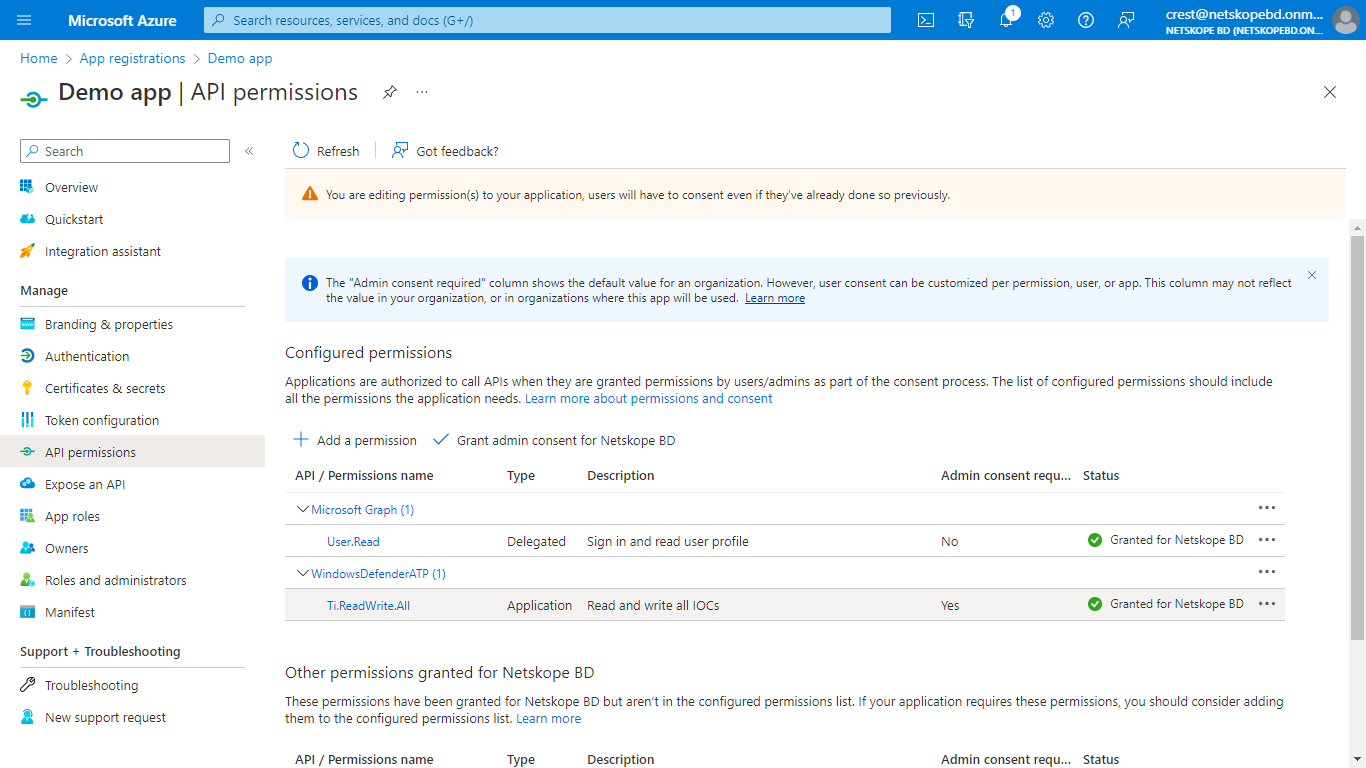
Select Grant admin consent for your application, and click Yes for confirmation.
In Cloud Exchange, go to Settings and click Plugins.
Search for and select the Microsoft Defender for Endpoint Plugin box to open the plugin creation pages.
Enter and select the Basic Information on the first page:
Configuration Name: Enter a name appropriate for your integration.
Poll Interval: Adjust to environment needs. We recommend not to go below 5 minutes for production environments.
Aging Criteria: Leave the default.
Override Reputation: Leave the default.
Enable SSL Verification: Leave the default.
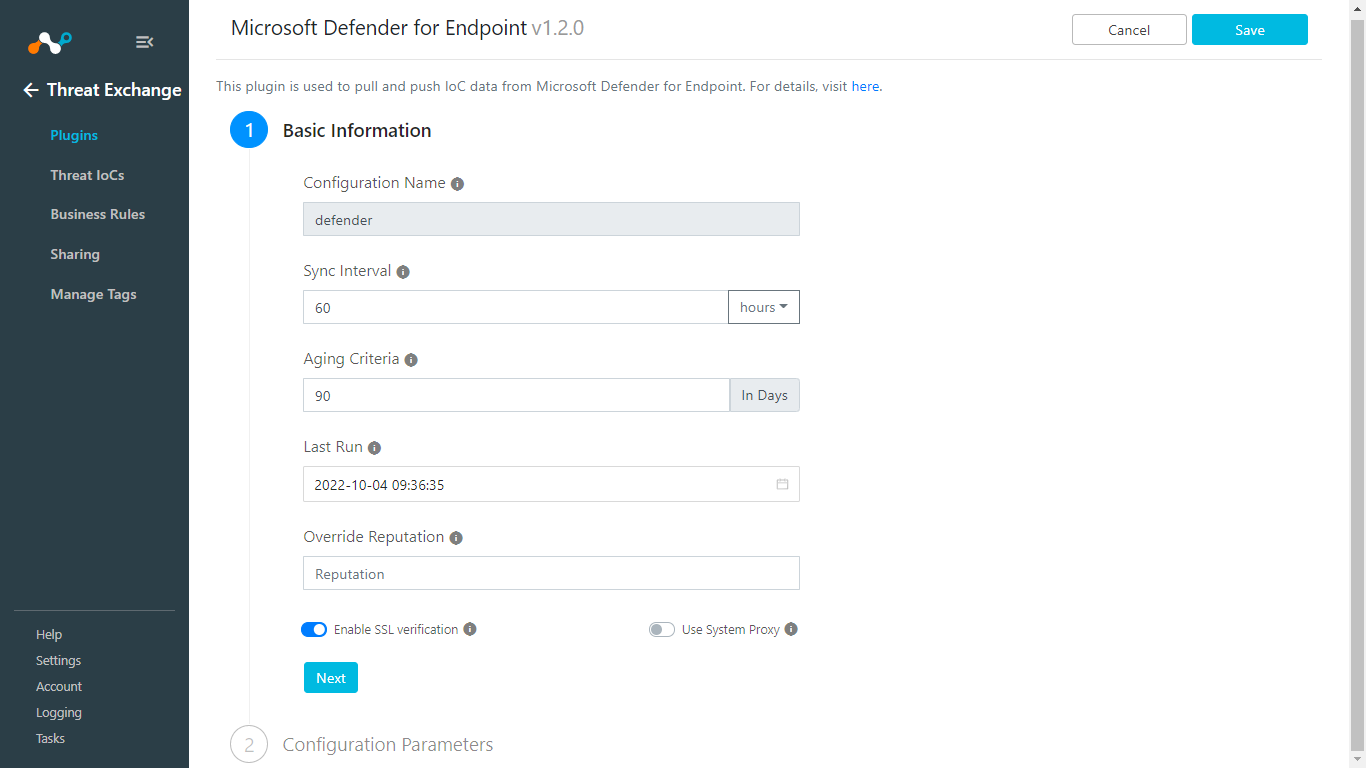
Click Next.
Enter and select the Configuration Parameters on the second page:
Tenant ID: Enter your Directory (Tenant) ID.
App ID: Enter your Application (Client) ID.
App Secret: Enter your Client Secret values.
Region: Select the appropriate region.
IoC Source: Enter what to use in the description field while sharing IOCs to Defender.
Initial Range (in days): Leave the default.
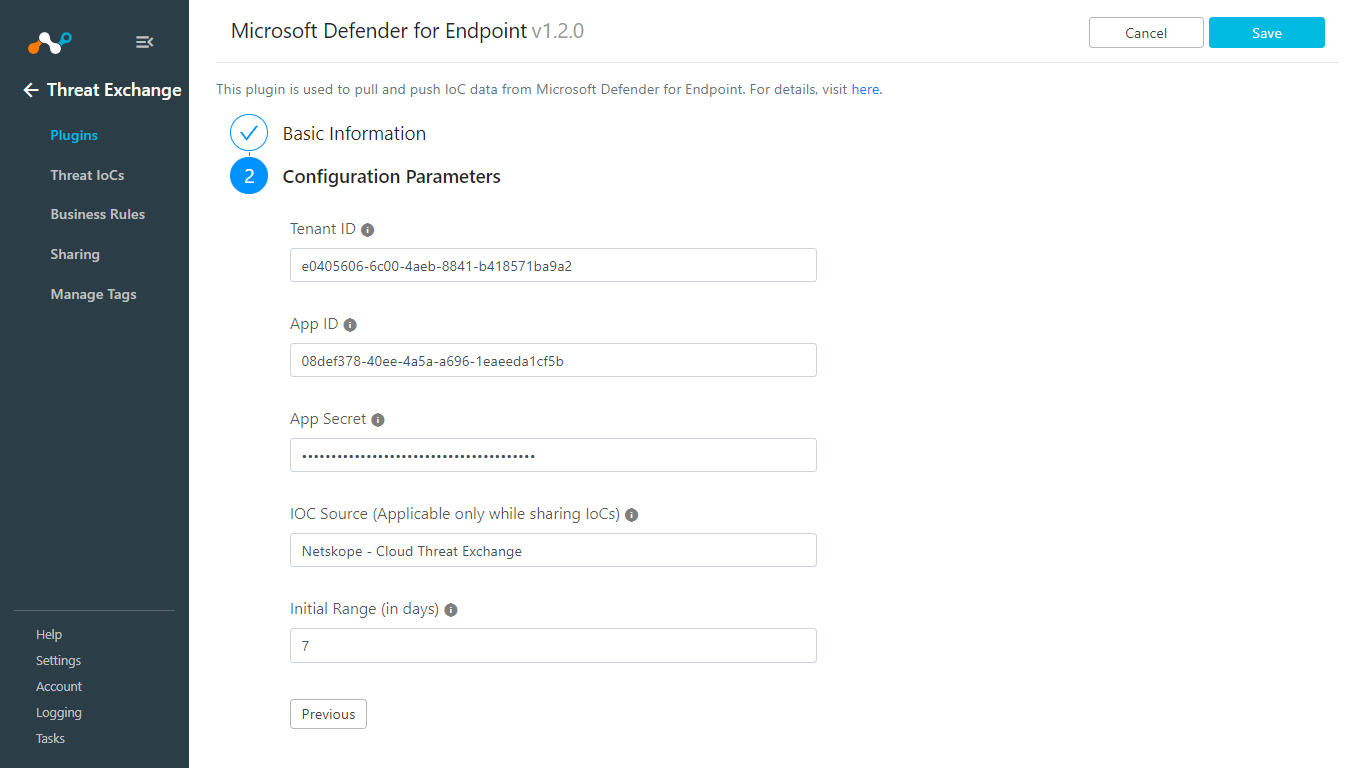
Click Save. Go to Threat Exchange > Plugins to see your new Defender for Endpoint plugin.
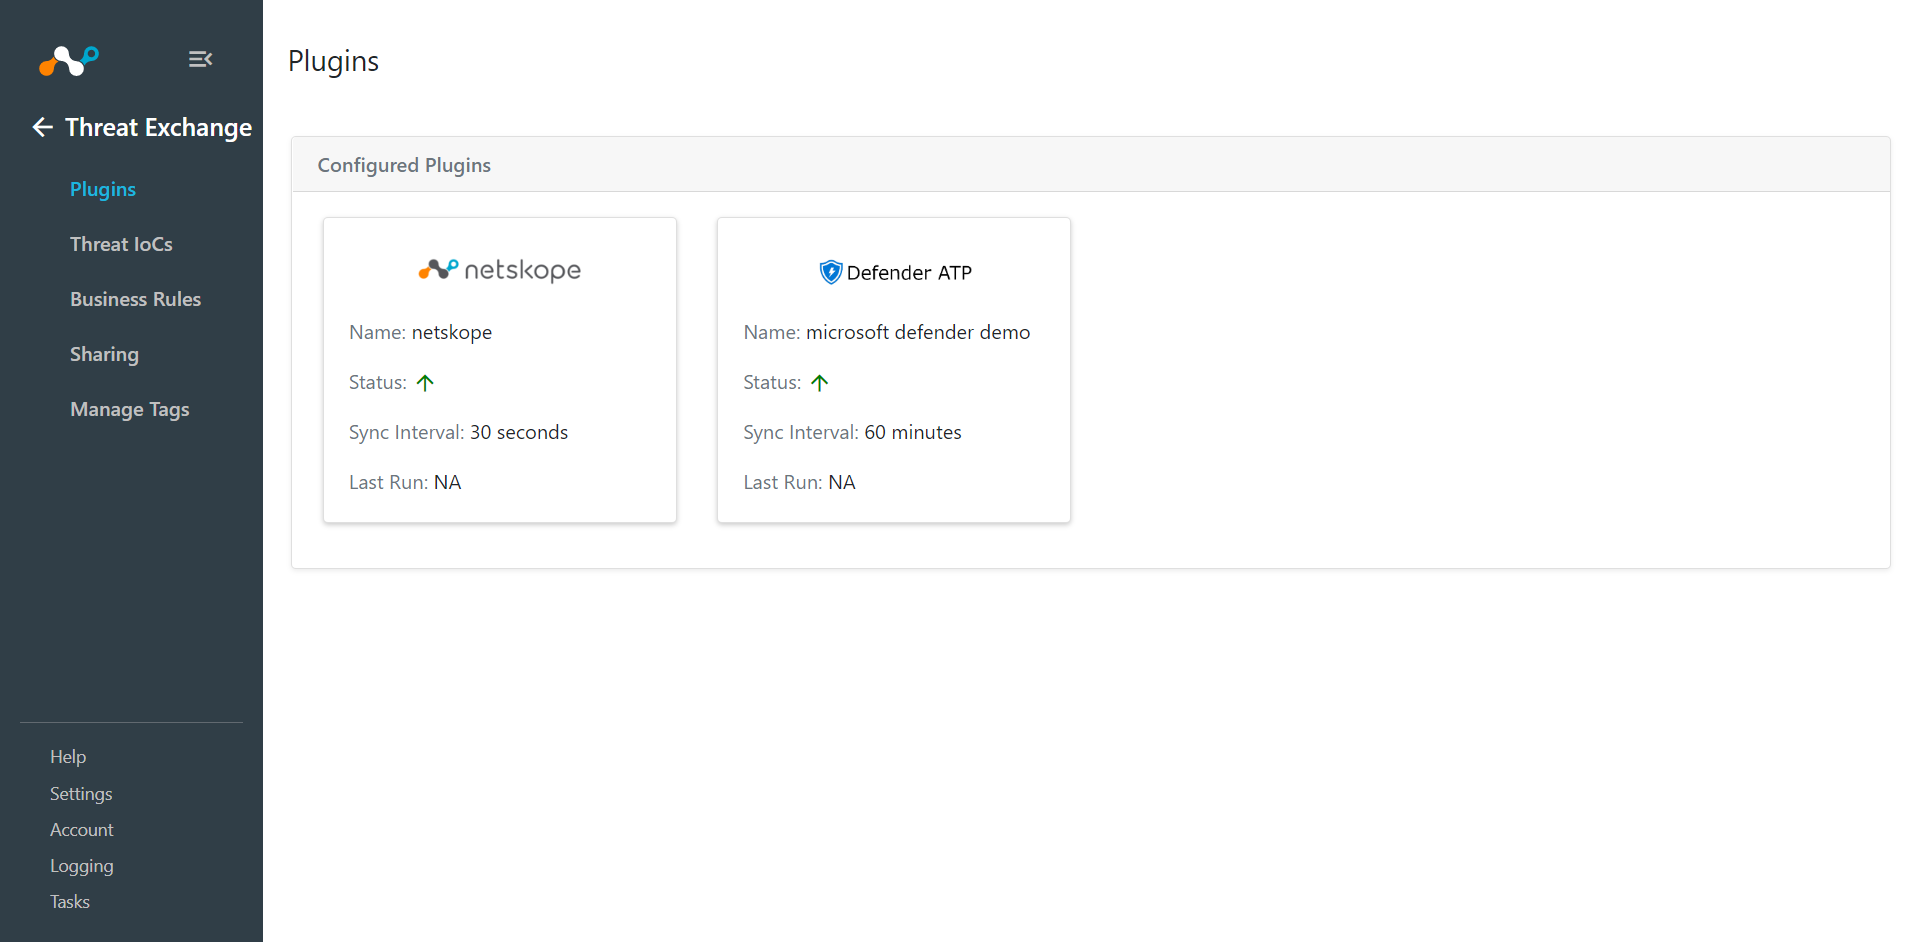
First create sharing from Microsoft Defender for Endpoint to Netskope, and then from Netskope to Microsoft Defender for Endpoint.
Sharing from Microsoft Defender for Endpoint to Netskope
In Threat Exchange go to Sharing.
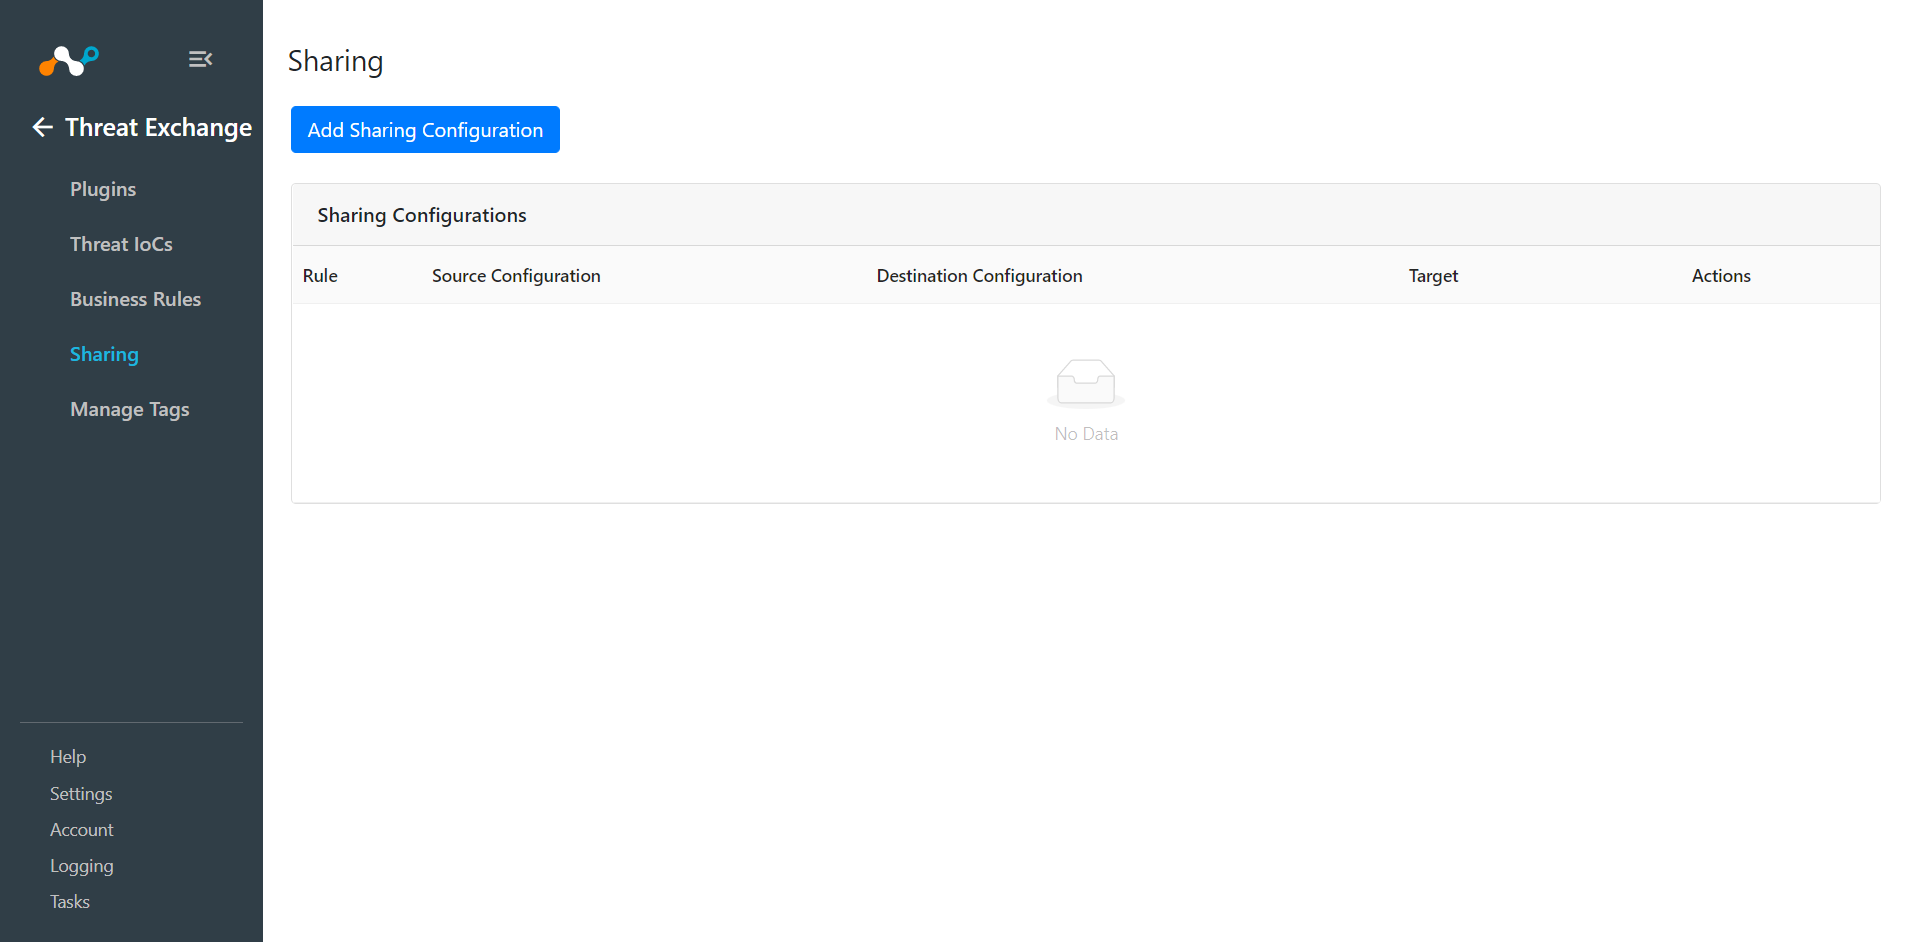
Click Add Sharing Configuration.
For Source Configuration, select the Microsoft Defender plugin you created earlier.
Select a Business Rule, and then select Netskope for the Destination Configuration. Sharing configurations are unidirectional. data obtained from one plugin is shared with another plugin. To achieve bi- or multi-directional sharing, configure each separately.
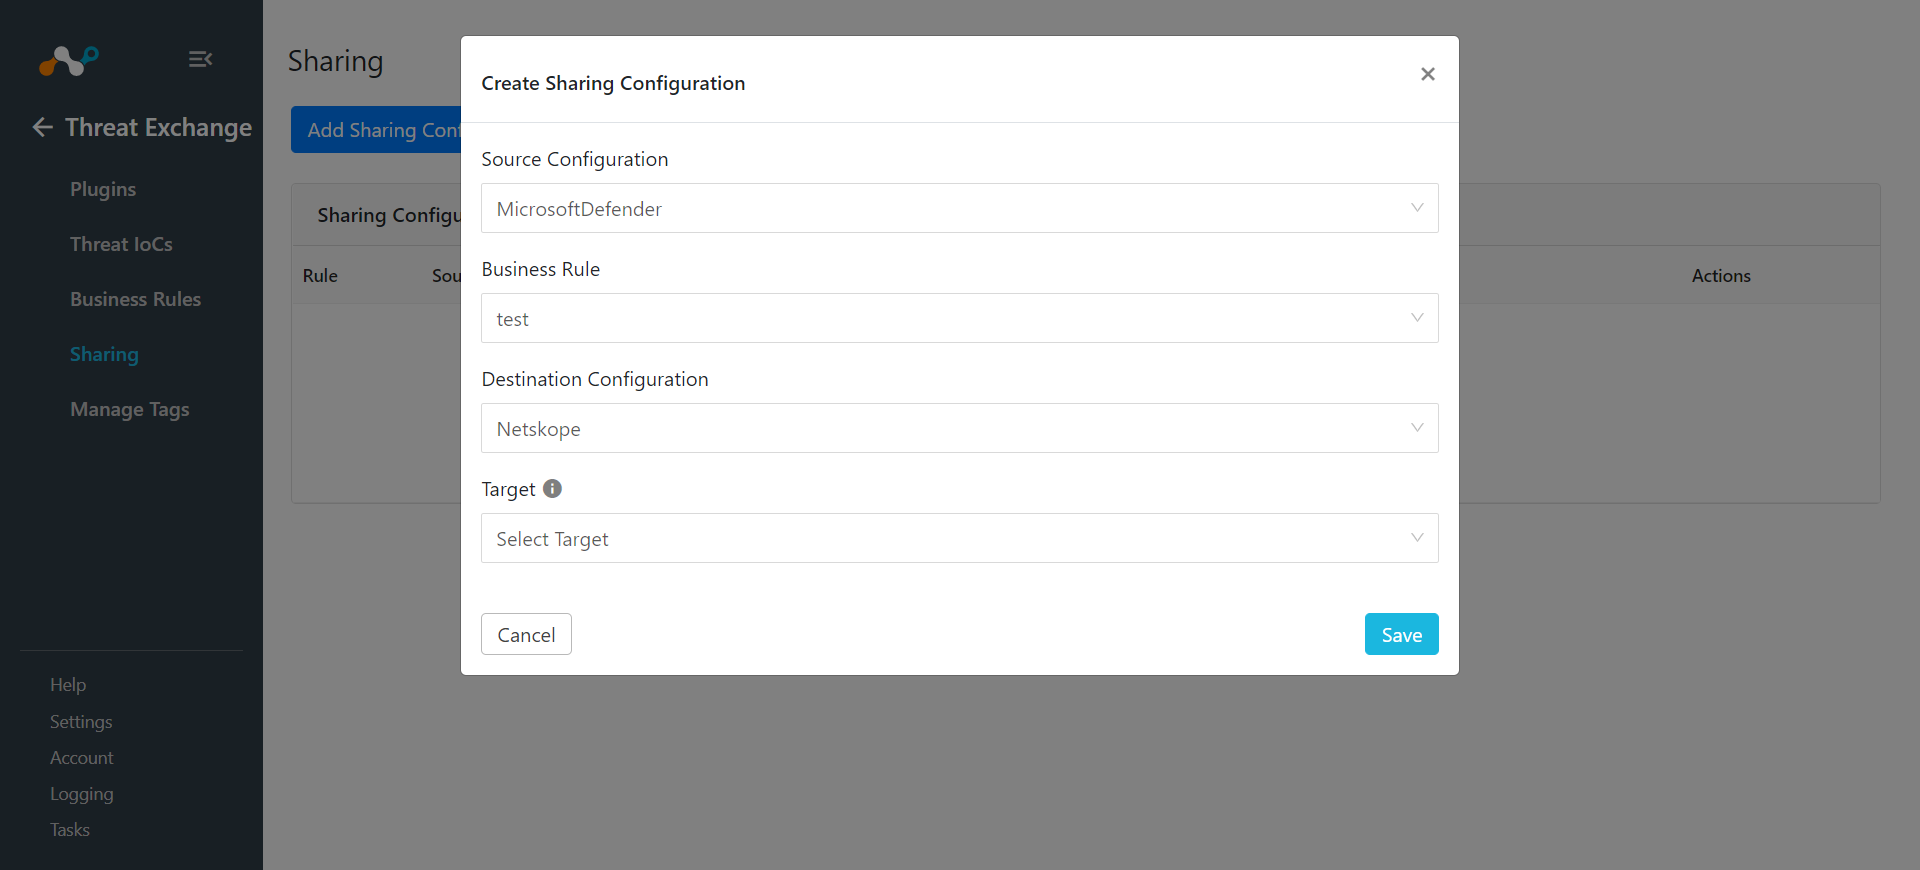
Select a Target from the dropdown. The next two steps explain how to use a URL or a Hash List.
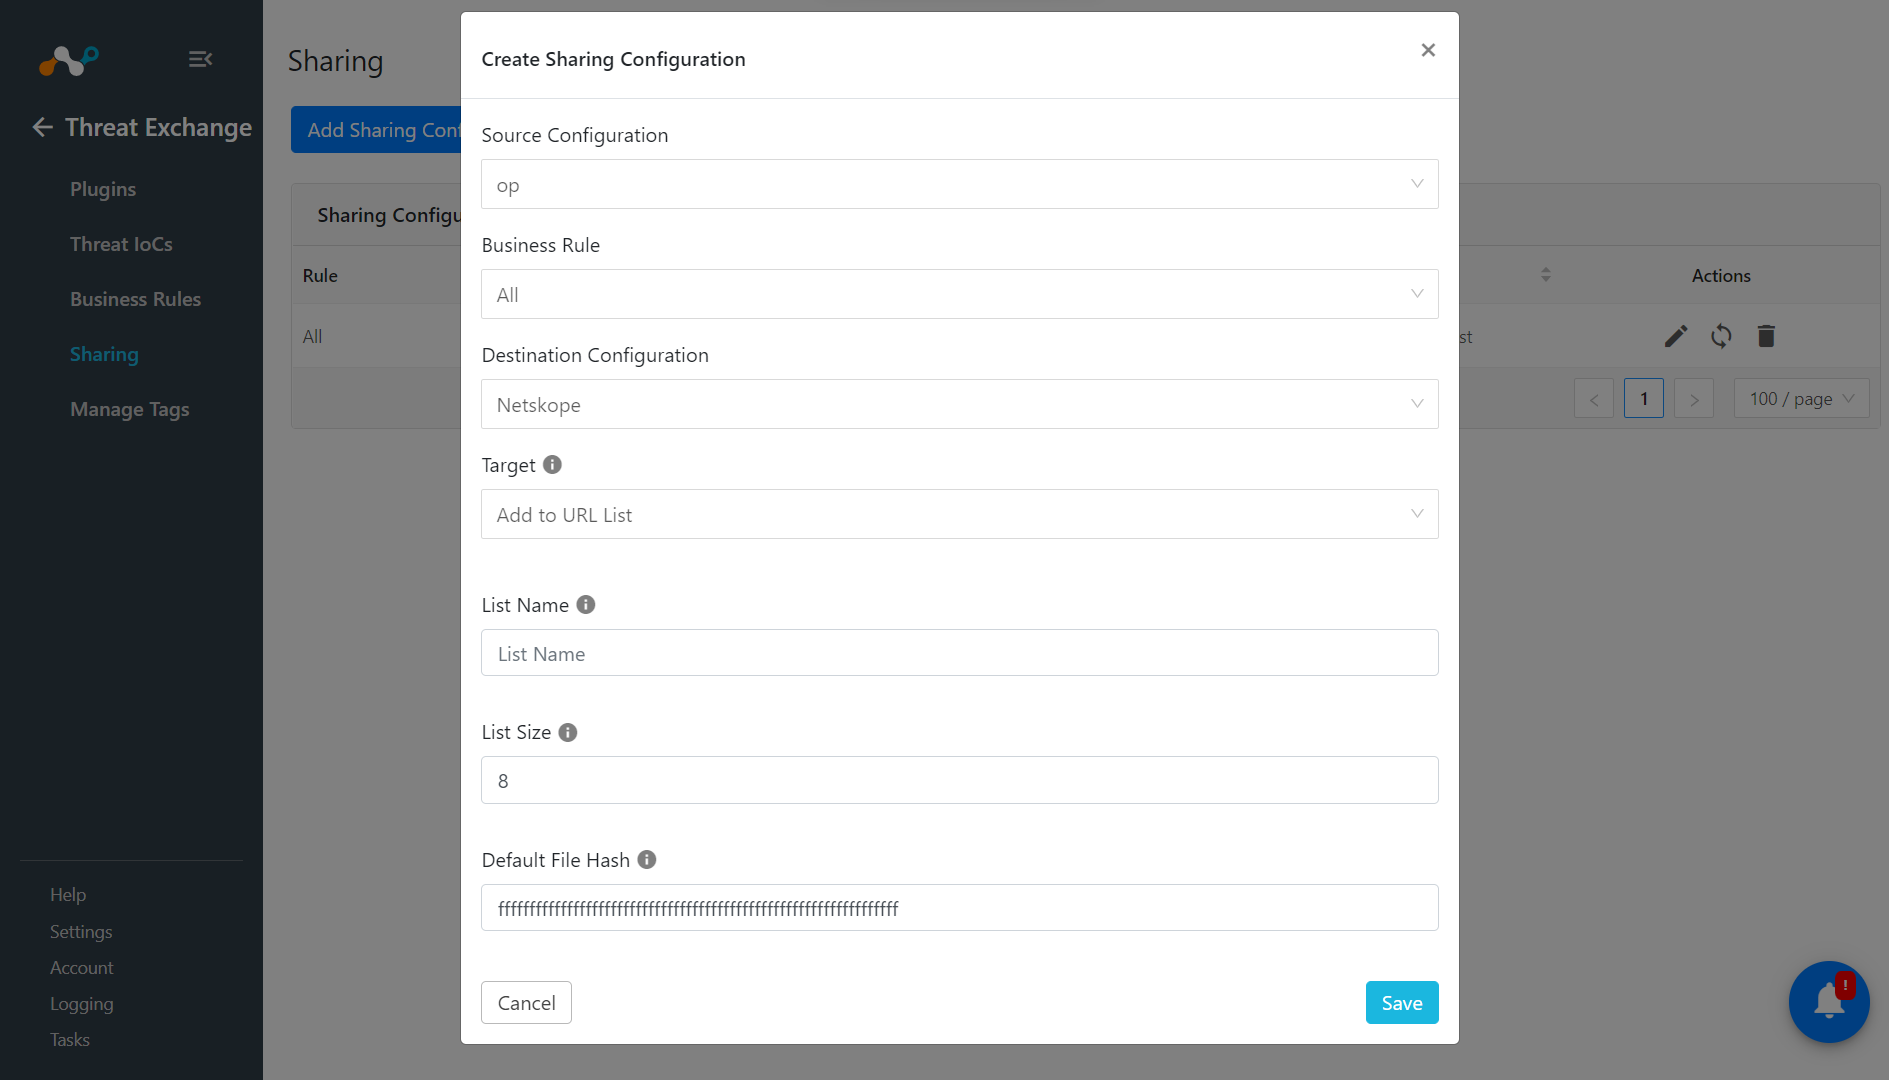
If you Select Add URL List for Target, then enter these parameters:
Select the List Name
Enter a List Size.
Enter the Default URL.
Click Save.
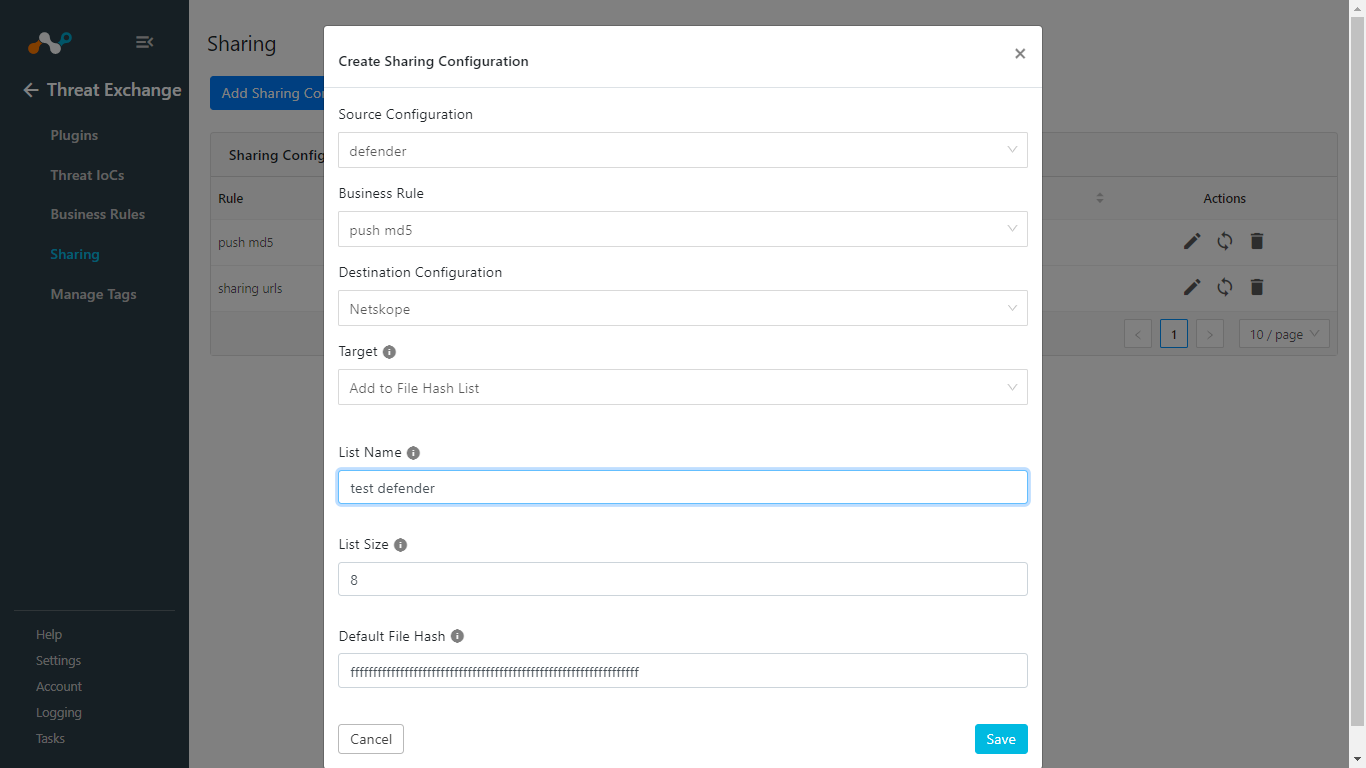
If you Select Add File Hash List for Target, enter these parameters:
Enter a List Name.
Enter a List Size.
Enter the Default File Hash.
Click Save.
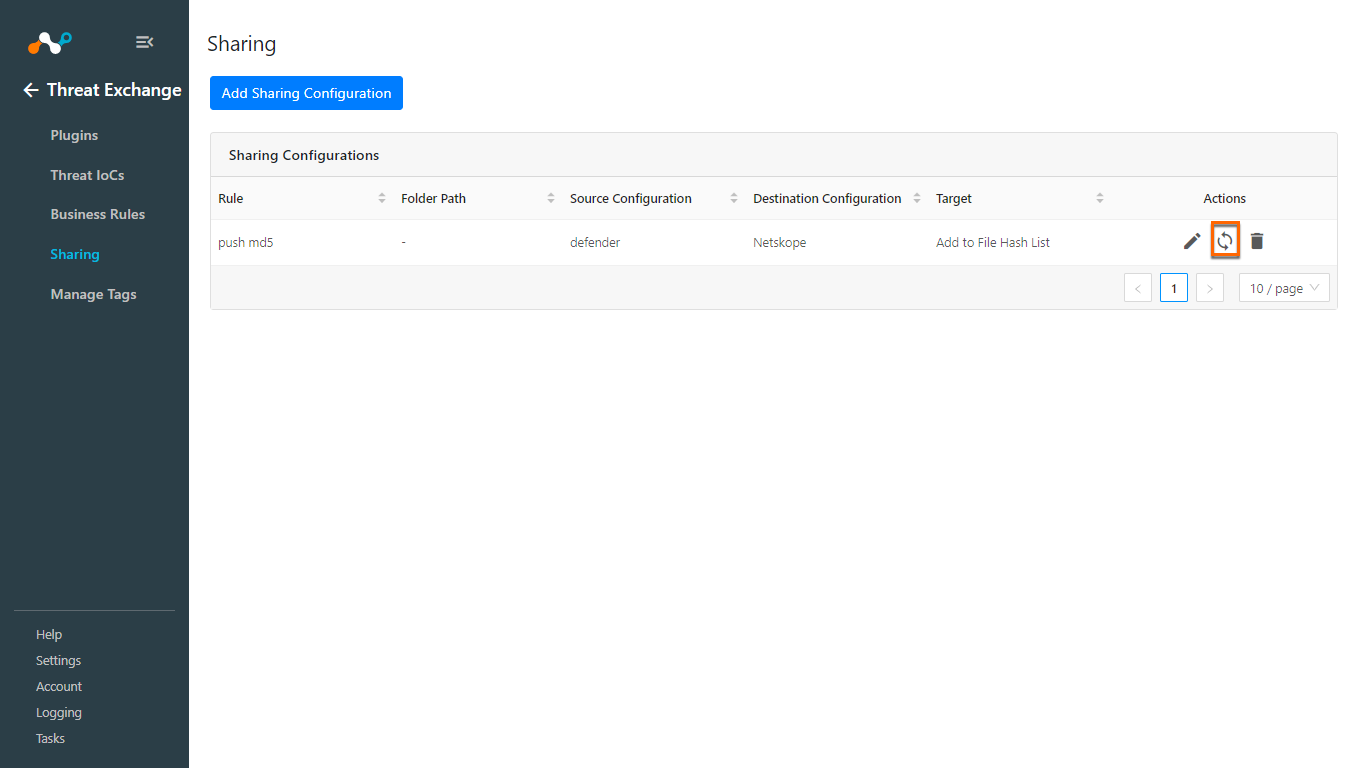
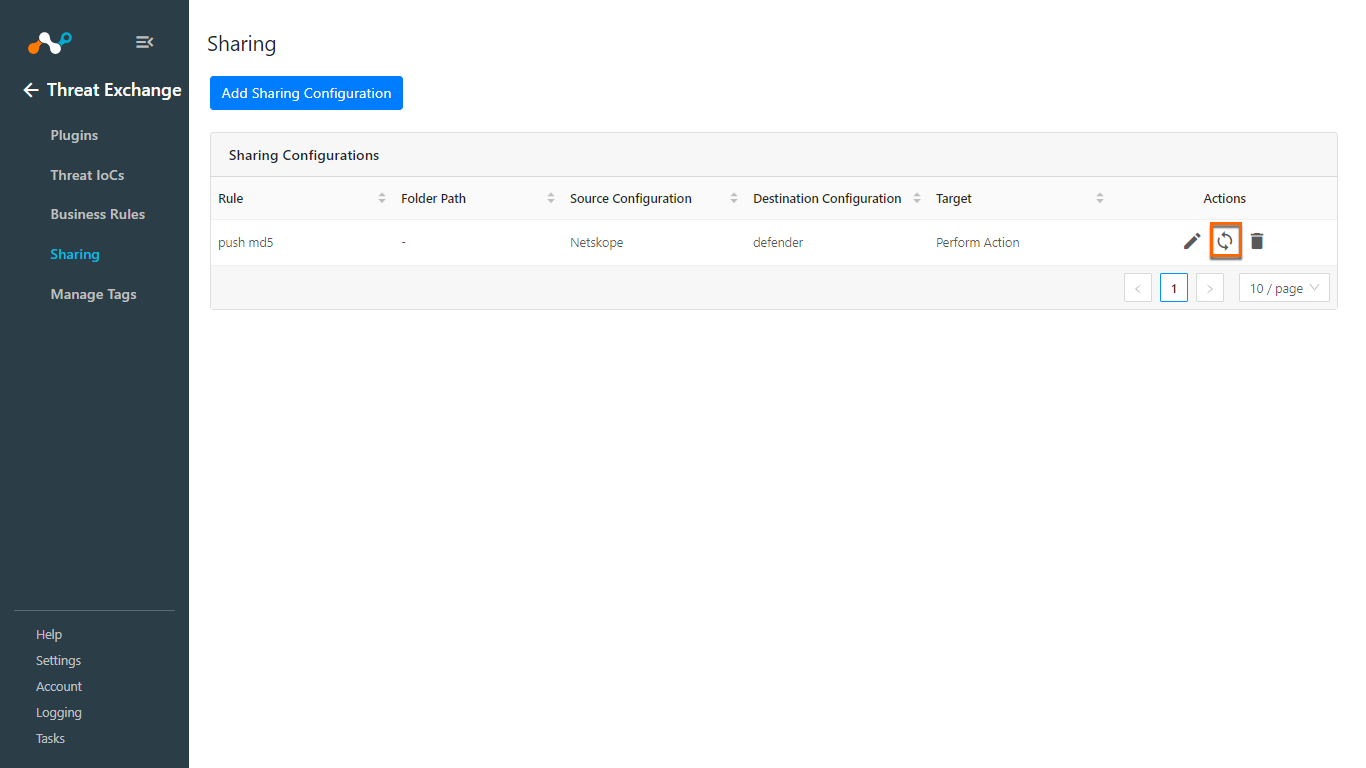
After saving your sharing configuration, click the Sync icon.
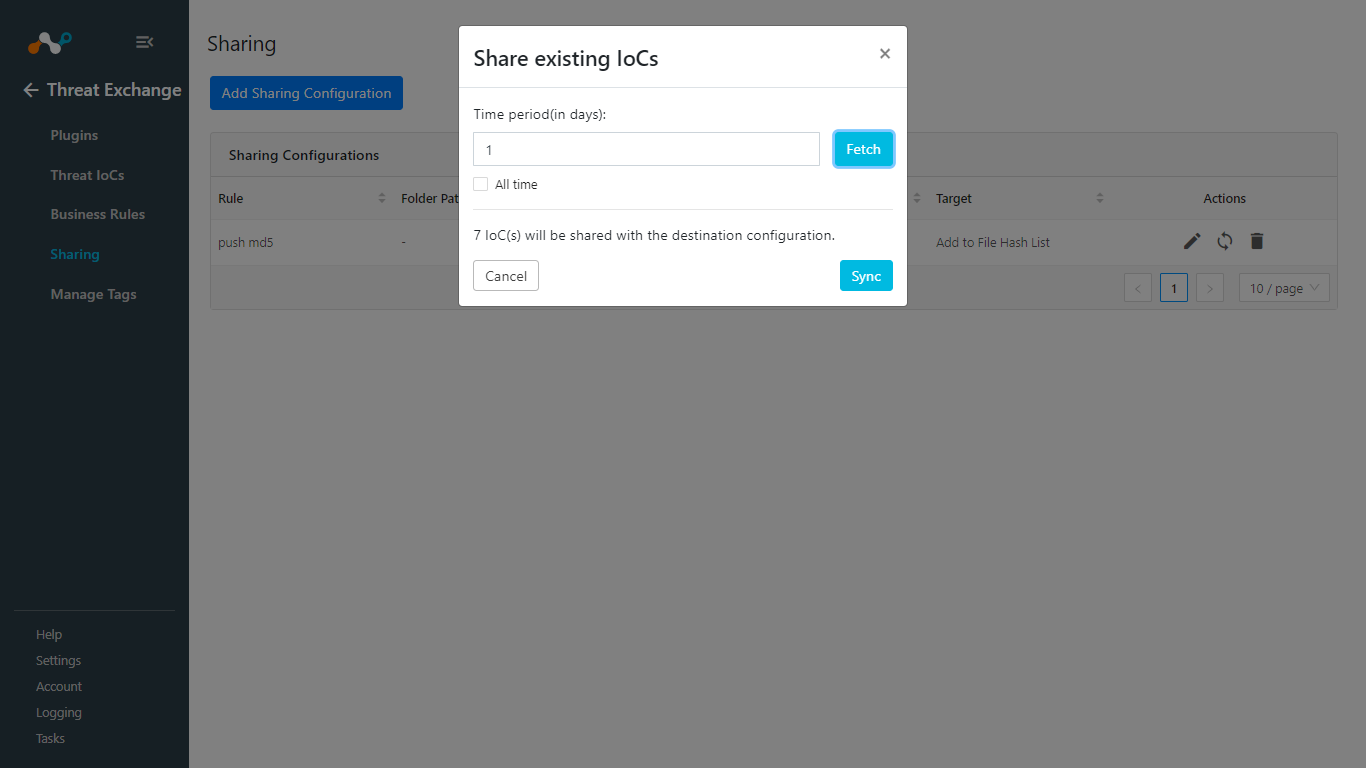
Enter a Time Period for how long you want to share data. Enable All time to share all the data from the source plugin. Click Fetch, and then click Sync.
Sharing from Netskope to Microsoft Defender for Endpoint
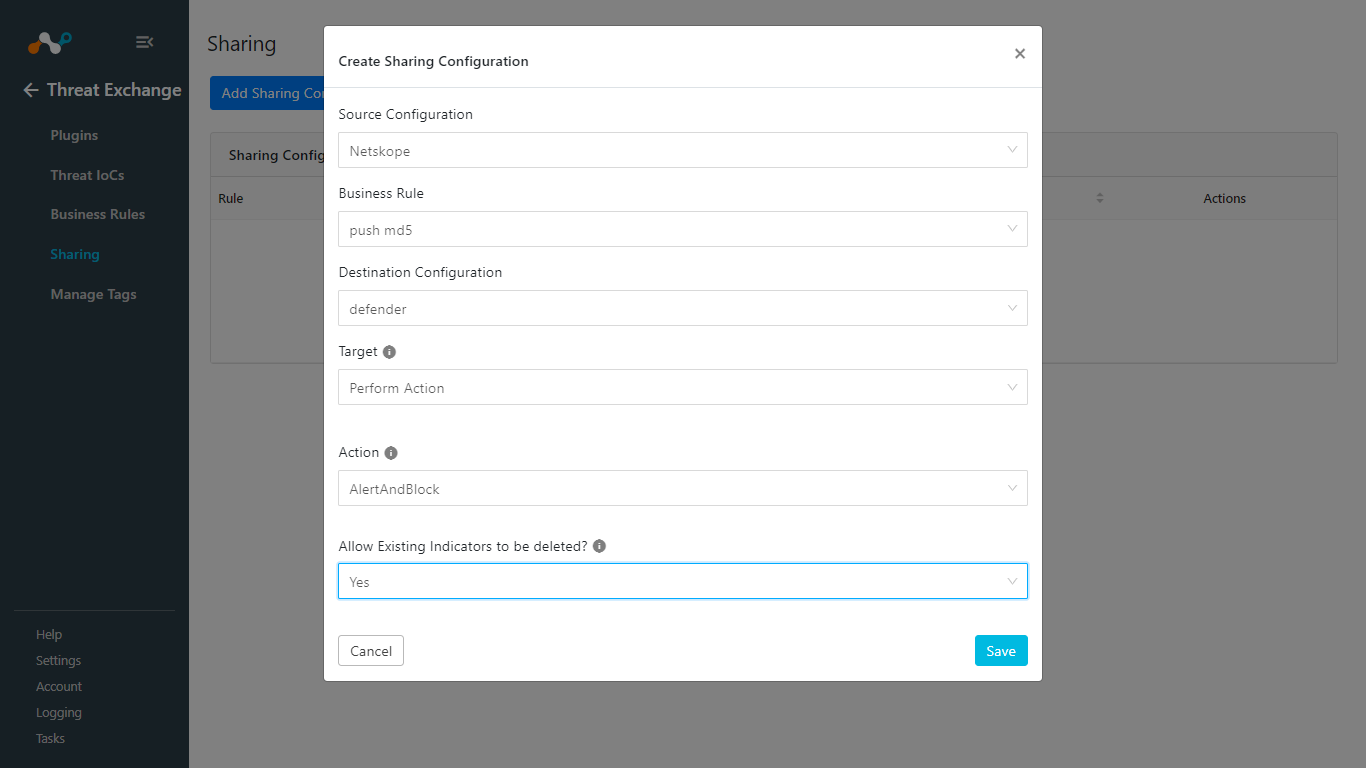
For the Source Configuration, select the Netskope plugin.
Select a Business Rule, and then select your Microsoft Defender for the Destination Configuration.
For Target, select Perform Action
Select an appropriate Action.
Choose if you want to Allow Existing Indicators to be deleted, If Yes is selected, existing IoCs on Microsoft Defender will be deleted for ingesting new IOCs to the platform.
Click Save.
After saving the sharing configuration, click the Sync icon.
Enter a Time Period for how long you want to share data. Enable All time to share all the data from the source plugin. Click Fetch, and then click Sync.
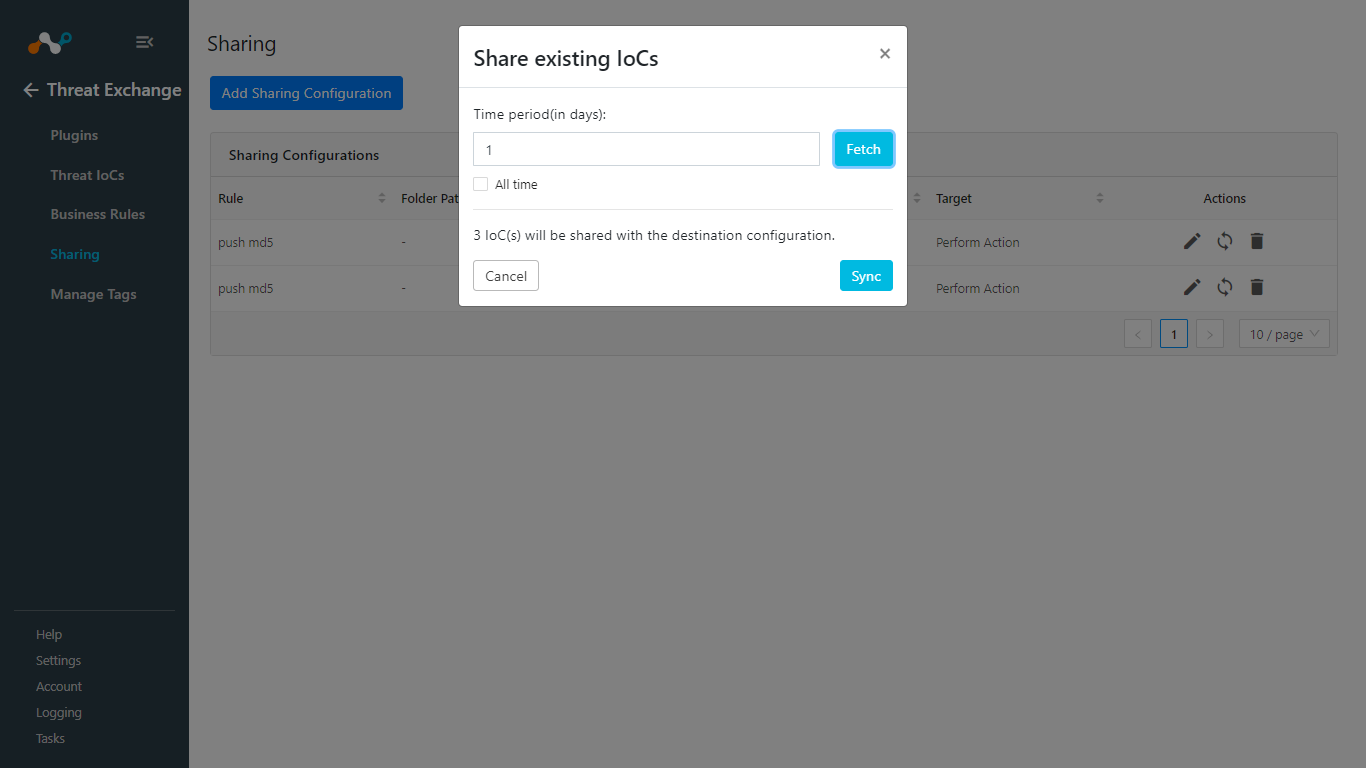
Adding a new sharing configuration on the active source poll will share the existing IoCs of the source configuration to the destination configuration. Whenever a new sharing configuration is built, all the active IoCs will also be considered for sharing if they match the source/destination combination.
Note
Plugins that do not have API for ingesting data cannot receive threat data. This is true of the installed plugin API Source, which provides a bucket associated with an API endpoint for remote 3rd-party systems to push data to. Once a Sharing policy has been added, it takes effect.
After a sharing configuration has been created, the sharing table will show the rule being invoked, the source system providing the potential IoC matches, the destination system that will receive matching IoC, and the target applicable to that rule. Multiple Sharing configurations can be made to support mapping certain IoC to multiple targets even on the system destination system.
Modify, Test, or Delete a Sharing Configuration
Each configuration supports 3 actions:
 |
Edit the rule by clicking on the pencil icon.
Test the rule by clicking on the synchronization icon. This tests how many IoC will actually be sent to the destination system based on the timeframe and the rule.
Delete the rule by clicking on the garbage can icon.
In order to validate the workflow you must have alerts generated on Microsoft Defender for Endpoint. Defender polling intervals are defined during plugin configuration.
Pulling of Indicators
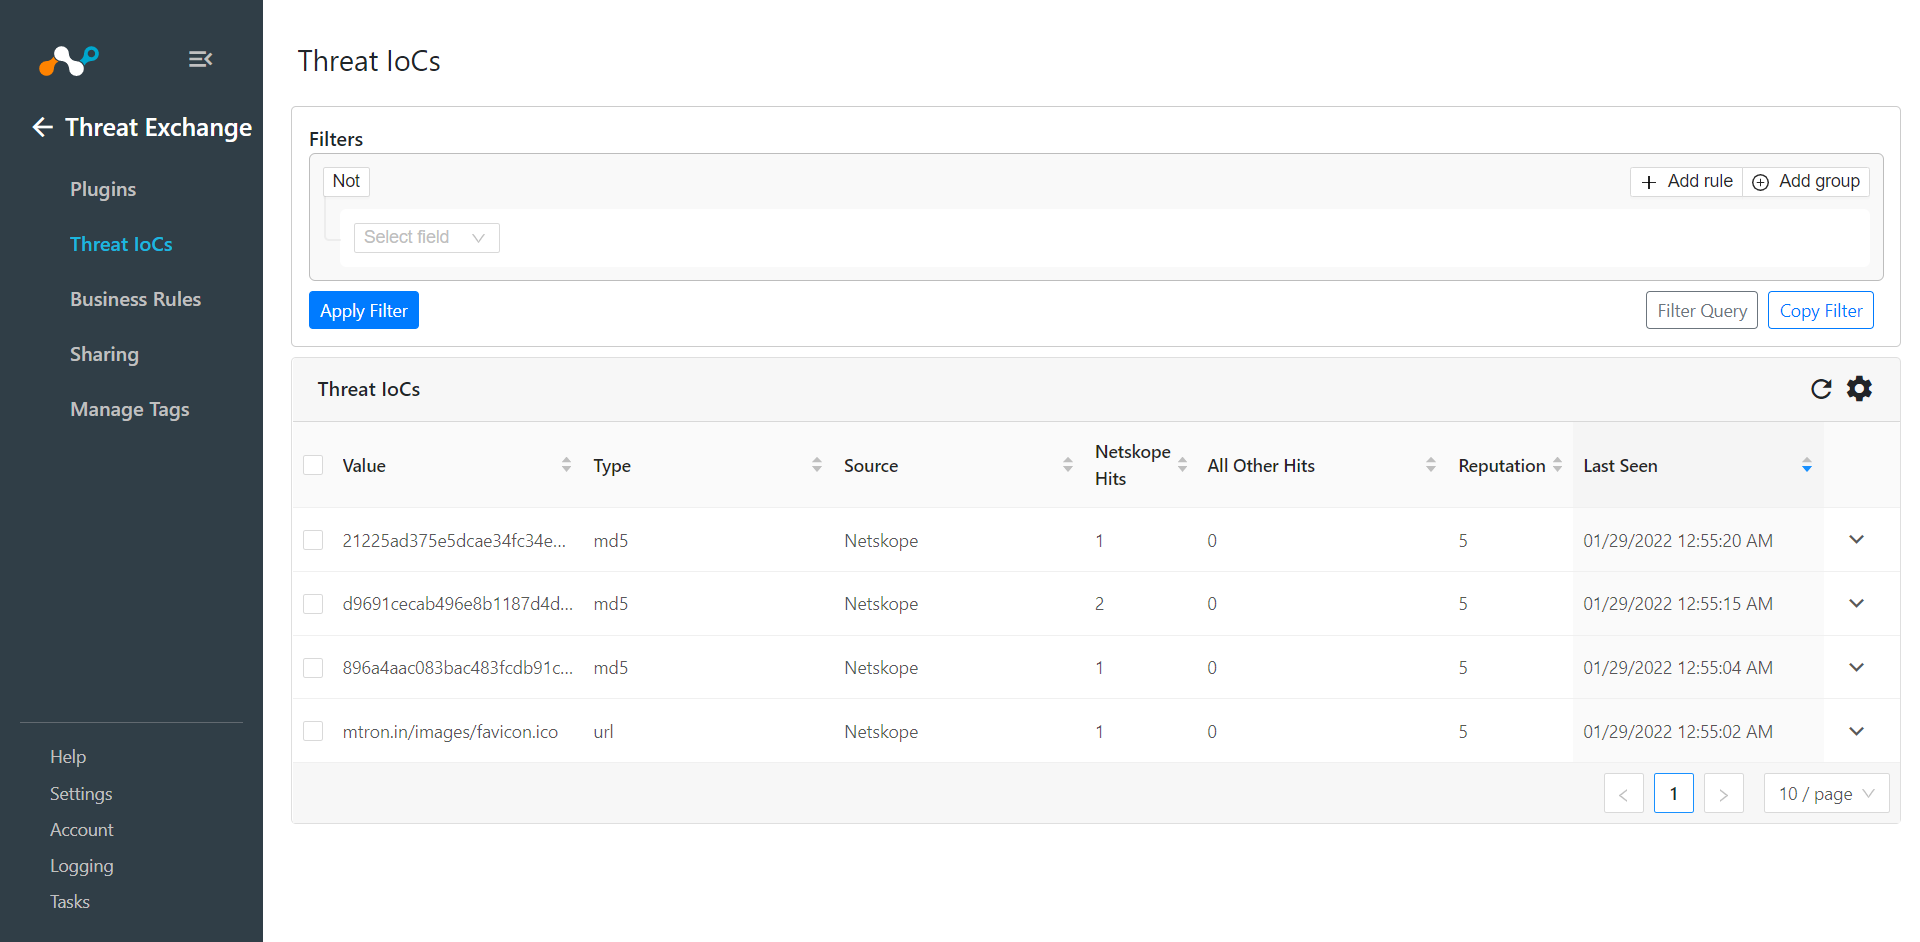
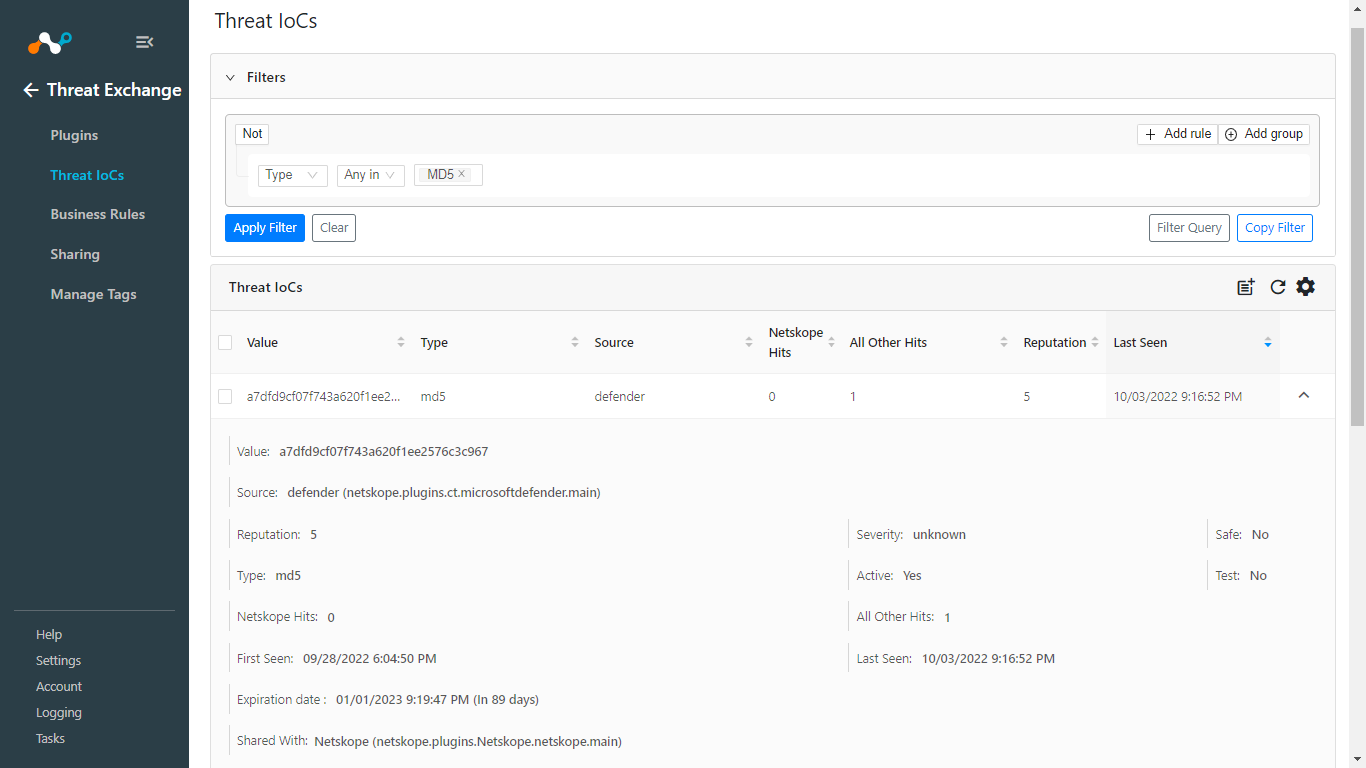
In Threat Exchange, go to Threat IoCs. This will show the pulled IoCs.
In your Netskope Tenant, go to Policies > File (Profile) and click New File Profile.
Sharing of Indicators
Verify sharing of indicators from Threat Exchange > Threat IoCs. Expand one of the Source plugin IoCs and check the status of Shared with Parameter.
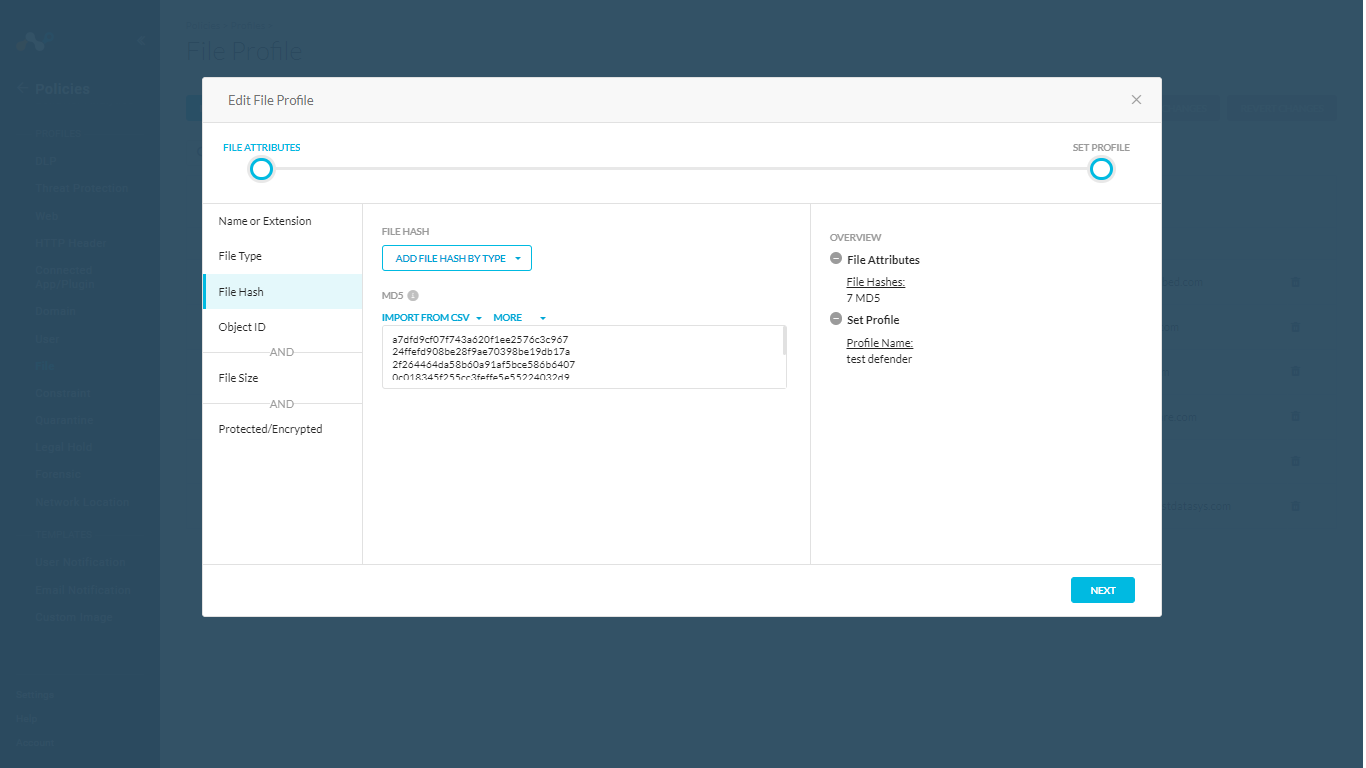
Log in to your Netskope tenant and go to Policies > File, and then locate your File Hash list and verify the Indicators shared.
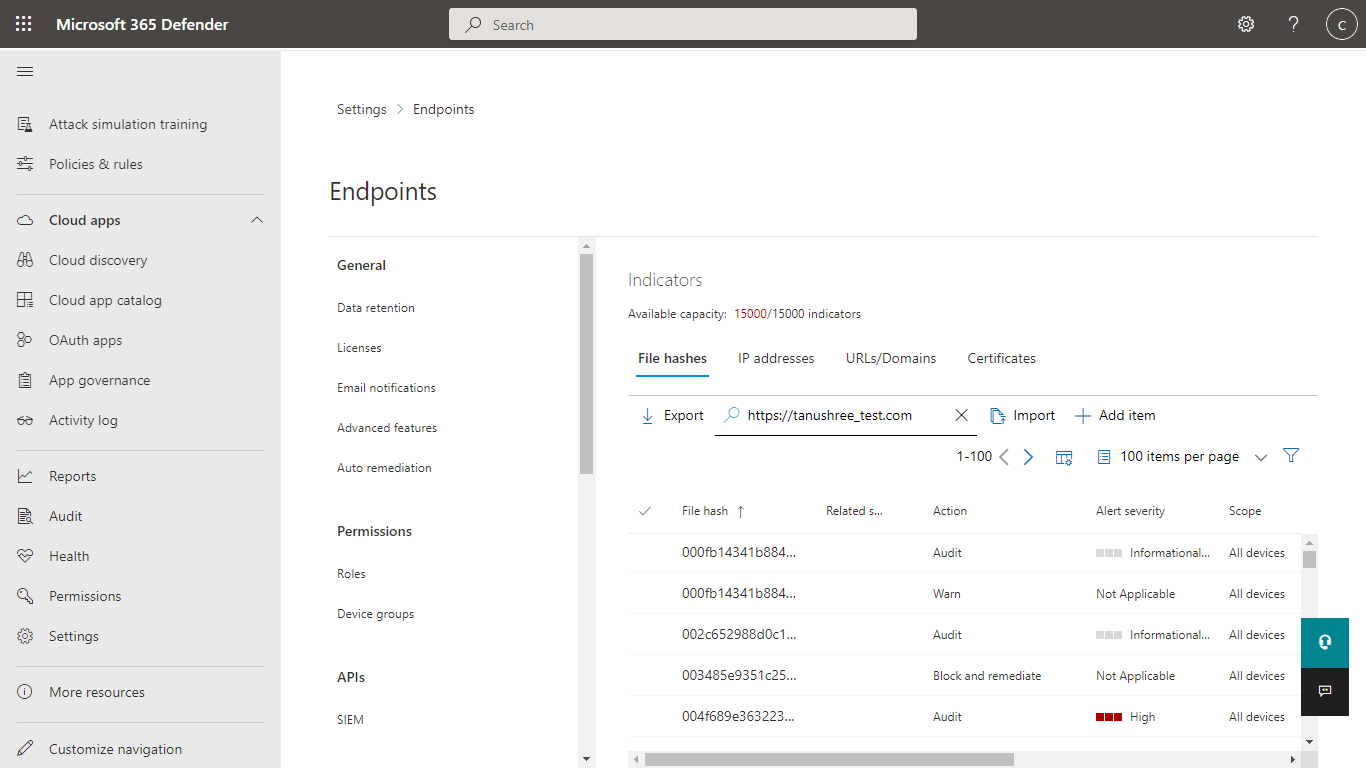
Log in to Microsoft Defender and go to Settings > Endpoints > Indicators.
Select File Hashes tab to verify the md5 hashes shared from Netskope to Defender for Endpoint.
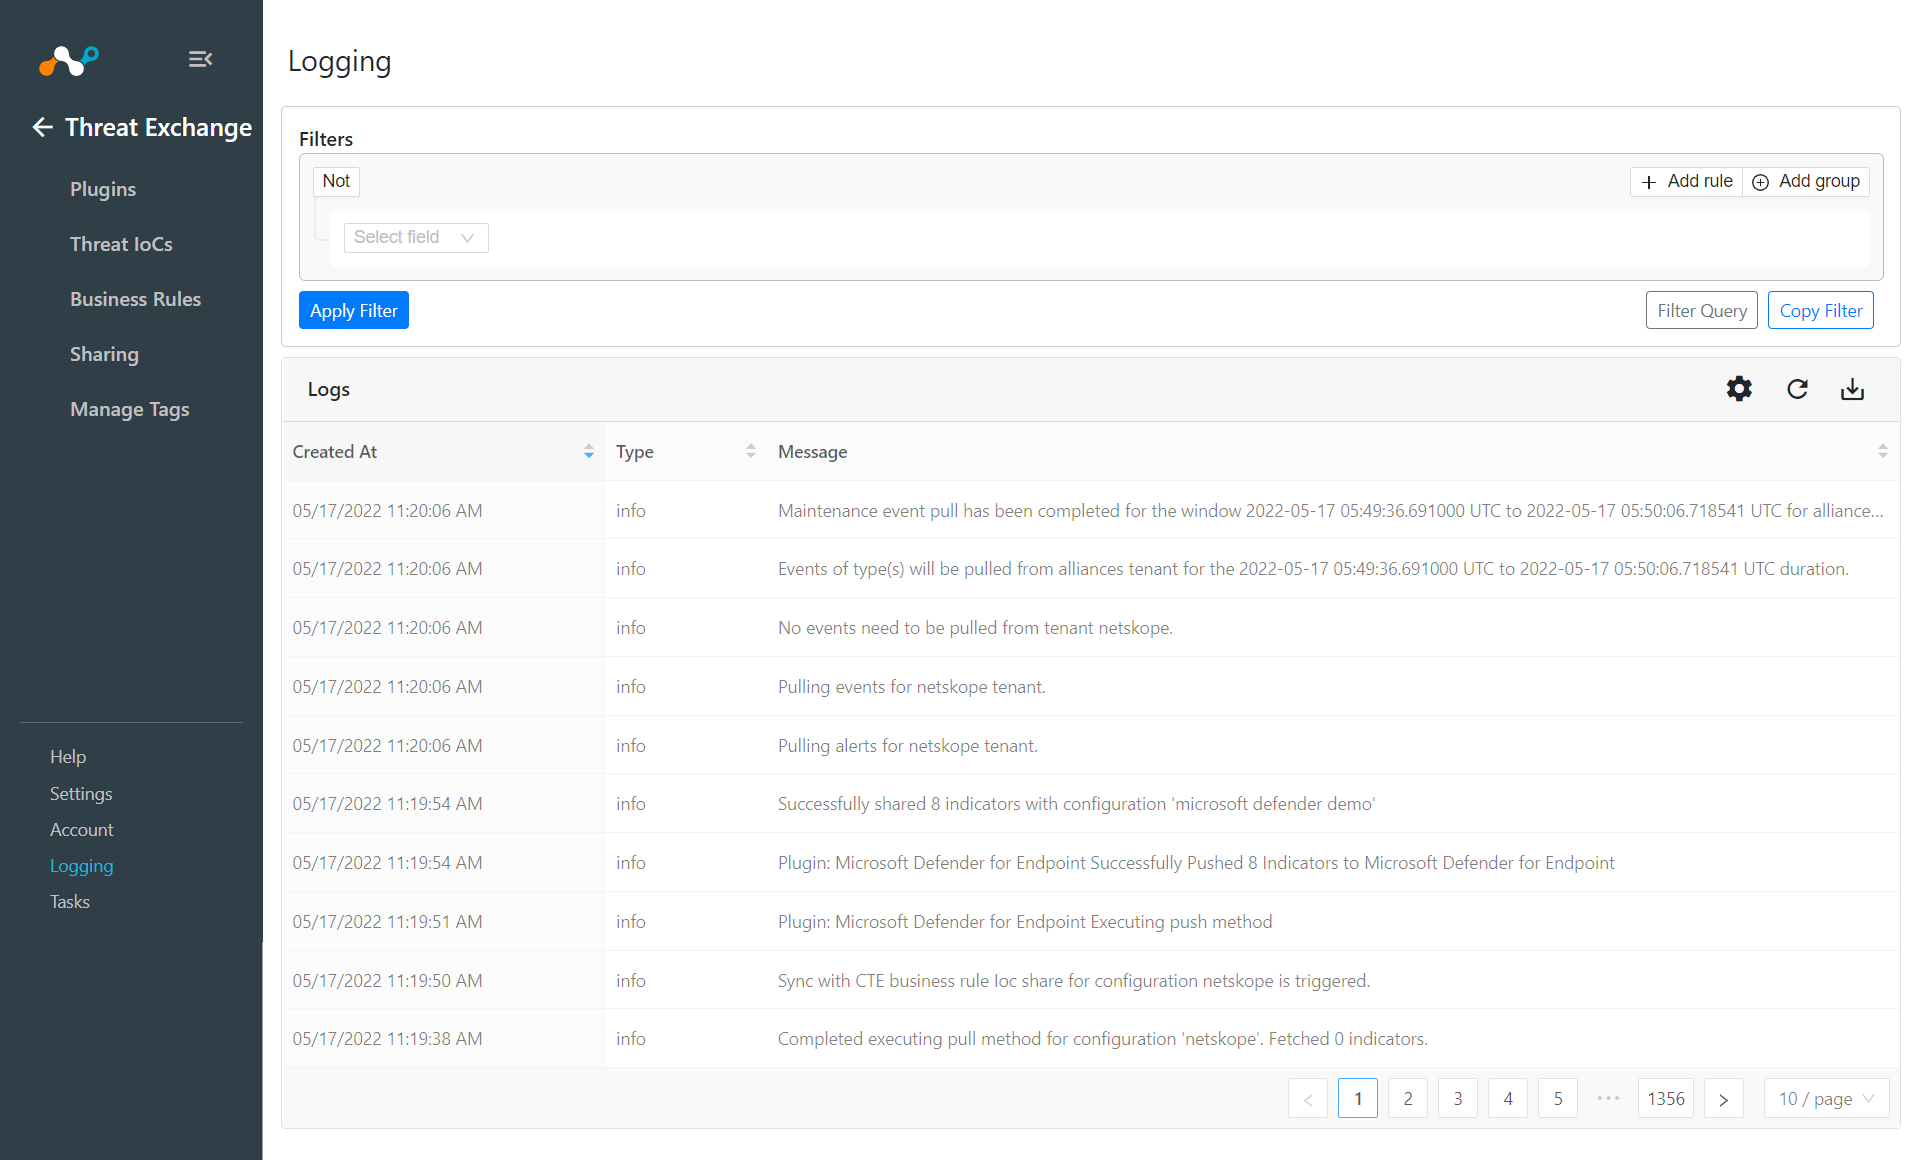
If data is not being brokered between the platforms, look at the logs in Cloud Exchange. In Threat Exchange, go to Logging
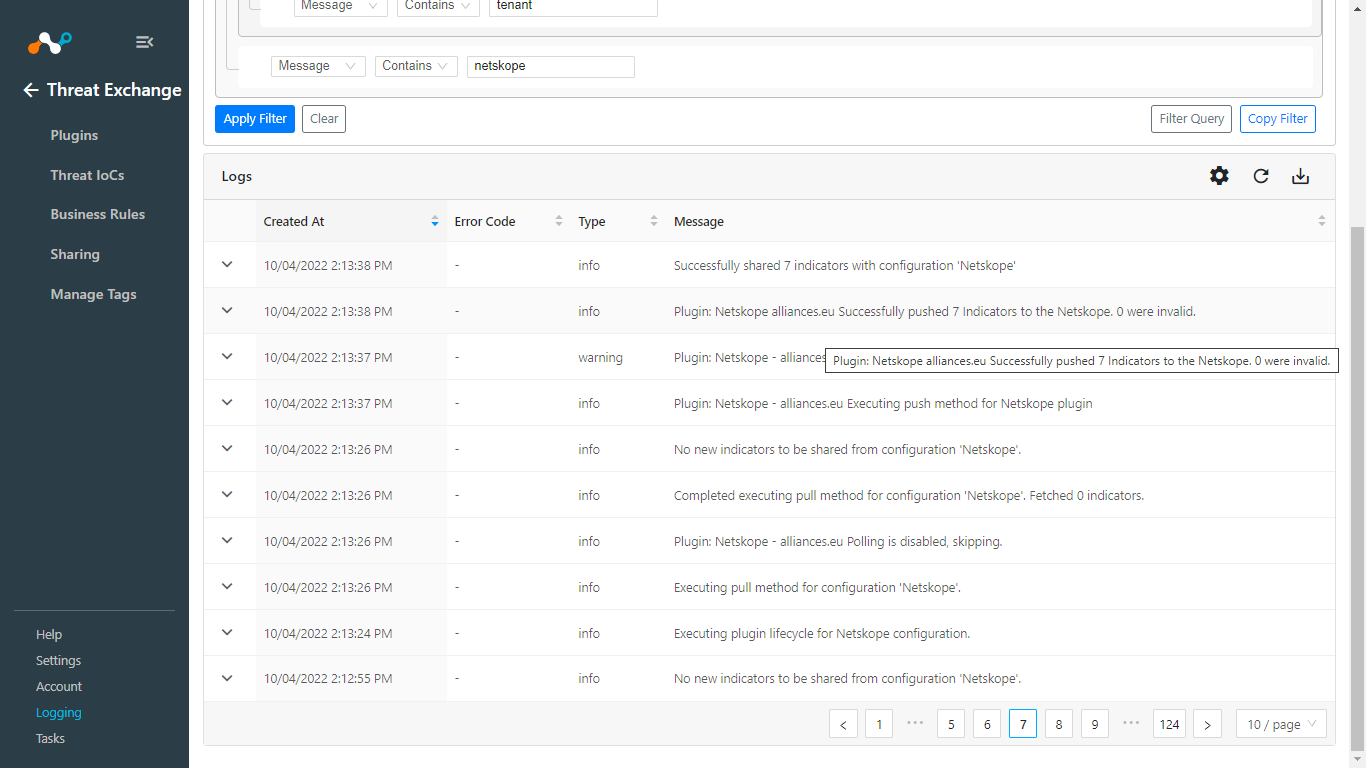
Look through the logs for errors. If unable to successfully troubleshoot, open a Support ticket with Netskope.
