Use Client Re-authentication
The Netskope Client can require a user to re-authenticate for access to private apps. IdP federation must be configured to use this feature. The Client and IdP prerequisites are:
All users must be authenticated via the IdP and imported into your Netskope tenant. The email address of the user must be available for all IdP authenticated users.
Configure your IdP in the Settings > Security Cloud Platform > SAML (under the Forward Proxy section ) in your Netskope Tenant UI. See SAML Forward Proxy for details.
Ensure that the URL
nsauth-<tenantname>.goskope.comis publicly accessible. If not, please reach out to Netskope Support.Re-authentication is configured and enabled on the Netskope Client.
To configure Client re-authentication:
Go to Settings > Security Cloud Platform > Netskope Client > Devices and click Client Configuration. Click New Client Configuration.

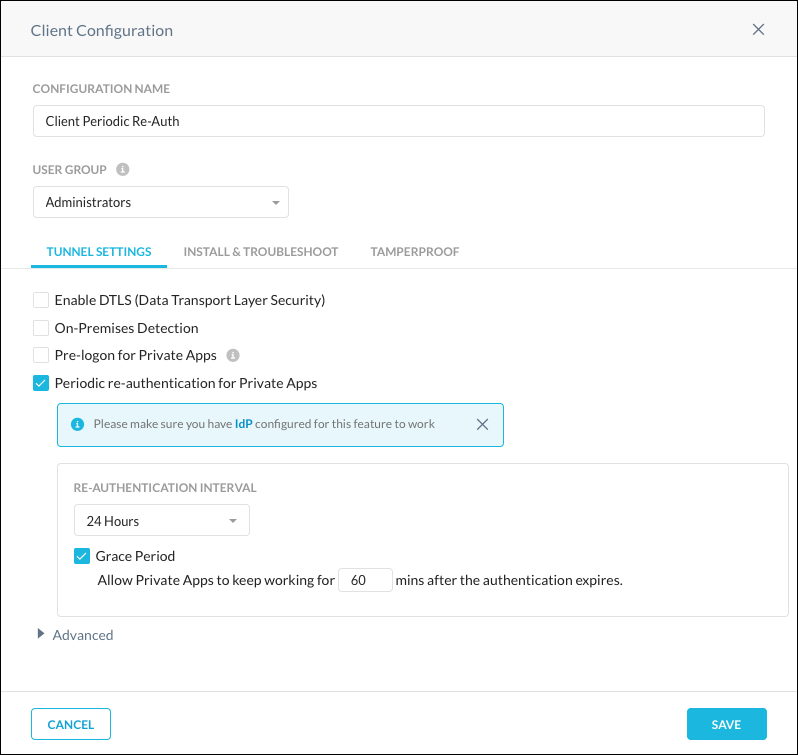
On the Tunnel Settings tab, enter a configuration name and select a user group (or OU) from the dropdown.
Enable the Periodic re-authentication for Private Apps checkbox.
Select a time period from the Interval dropdown for how often you want re-authentication to occur.
To allow a user time to re-authenticate after the specified interval time has expired, enable the Grace Period checkbox and enter the amount of minutes. The grace period must be less than the interval.
The Netskope Client menu shows when re-authentication is enabled, and allows you to re-authenticate by clicking that option on the menu.
If the interval expires, the Netskope Client prompts the IdP sign-in window for re-authentication. If the grace period expires, the Netskope Client disconnects from Netskope Private Access.
Re-authenticate on Logon
Netskope Private Access supports the ability to force a user to re-authenticate into the Netskope Client if the user’s device has restarted, or if the user logs out of the PC and logs back into the device. Contact Support to enable this functionality in your tenant.