Configure Workday for the Next Generation API Data Protection
To configure Workday for the Next Generation API Data Protection, follow the instructions below.
Enable User Activity Logging
This enables user activity to be recorded in the secured Workday database. To enable it, follow the steps below:
Log in to your Workday account.
On the search bar, search for Edit Tenant Setup -System, and click Edit Tenant Setup - System.
Under User Activity Logging, check Enable User Activity Logging.
Figure 34. Workday User Activity Logging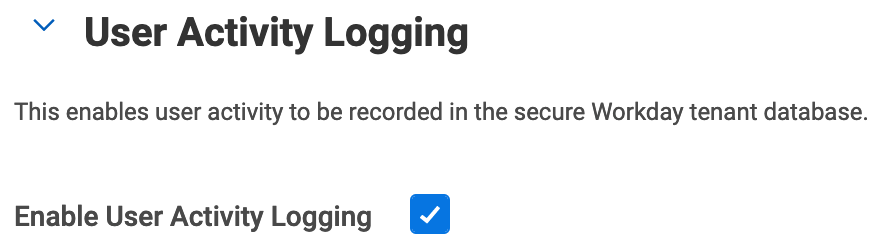
Create an Integration System User
Important
If you already have an integration system user, you can skip these steps.
Netskope integration with Workday requires an integration system user. To do so, follow the steps below:
Log in to your Workday account.
On the search bar, search for Create Integration System User, and click Create Integration System User.
On the Create Integration System User pop-up window, enter the following details:

Enter the User Name of the integration system user.
Enter the New Password and New Password Verify.
Click OK, then Done.
Configure Permissions for Integration System User
To configure an integration system user to authenticate the Next Generation API Data Protection, follow the steps below.
Create an Integration System Security Group
This section explains how to create a new integration system security group and assign it to the integration system user. For more information on security groups, see Concept: Security Groups. You will need a community account to access the Workday documentation.
Important
If you already have an integration system security group, edit the security group and assign an integration system user you created in the previous step.
To do so, follow the steps below:
Log in to your Workday account.
On the search bar, search for Create Security Group, and click Create Security Group.
On the Create Security Group pop-up window, enter the following details:

For Type of Tenant Security Group, select Integration System Security Group (Unconstrained).
Enter the name of the security group.
Click OK.
On the Edit Integration System Security Group (Unconstrained) window, enter the following details:

For Integration System Users, select the integration system user you created earlier. This will be the user who will authenticate the Next Generation API Data Protection.
Click OK, then Done.
Add Domain Security Policy to Security Group
This section explains how to add domain security policies and map it to the newly created integration system security group. To do so, follow the steps below:
Log in to your Workday account.
On the search bar, search for Maintain Permissions for Security Group, and click Maintain Permissions for Security Group.
On the Maintain Permissions for Security Group pop-up window, enter the following details:

Keep the Operation radio button set to Maintain.
In Source Security Group, select the newly created integration system security group.
Click OK.
On the Maintain Permissions for Security Group window, under the Domain Security Policy Permissions tab, click the + icon.

Enter the following details:

View/Modify Access
Domain Security Policy
View Only
System Auditing
Get Only
Workday Account Monitoring
Get and Put
Special OX Web Services
View and Modify
Workday Query Language
View Only
Workday Accounts
Get Only
Reports: Drive Admin
Get and Put
Drive Web Services
View Only
Worker Data: Active and Terminated Workers
View Only
Worker Data: Current Staffing Information
View Only
Person Data: Work Contact Information
Note
On adding this domain security policy, additional child/inherited polices get added too.
Click OK, then Done.
Activate Pending Security Policy Changes
Once you have added the domain security policies, it's time to commit the pending security policy changes. To do so, follow the steps below:
Log in to your Workday account.
On the search bar, search for Activate Pending Security Policy Changes, and click Activate Pending Security Policy Changes.
On the Activate Pending Security Policy Changes window, enter a comment and click OK.

Check Confirm and click OK.

You should get an acknowledgment.

Register an API Client for Integrations
To integrate Netskope with Workday, you should create a new API client in Workday. To do so, follow the steps below:
Log in to your Workday account.
On the search bar, search for Register API Client for Integrations, and click Register API Client for Integrations.
On the Register API Client for Integrations page, enter the following details:
Note
Only the mandatory fields (asterisk mark) should be configured. Rest of the fields can be left unchanged.

Enter a Client Name.
Select the Non-Expiring Refresh Tokens checkbox.
Under Scope (Functional Areas), select Contact Information, Implementation, Staffing, and System.
Click OK.
Note down the values of Client ID and Client Secret. These values will be required when you set up the Workday instance in the Netskope UI.

Client ID
Note
Ensure that you do not use this client ID in any other 3rd party integration. The client ID should be used exclusively for Netskope integration.
Client Secret
Note
Client secret is visible as soon as you register the API client. Once you move away from the registration page, the client secret is not visible anymore. If you miss noting it down, you can generate a new client secret. To do so, search Generate New API Client Secret in the Workday search bar and follow the steps to create a new API client secret.
While on the Register API Client for Integrations page, click the horizontal ellipsis beside the client name, then navigate to API Client > Manage Refresh Tokens for Integrations.

On the Manage Refresh Tokens for Integrations pop-up window, select the Workday account and click OK.
Note
The Workday account should be the integration system user created as part of Create an Integration System User.

On the Delete or Regenerate Refresh Token page, check Generate New Refresh Token and click OK.

Note down the value of Refresh Token. The value will be required when you set up the Workday instance in the Netskope UI.

View API Client
Before you can configure the Workday instance in Netskope UI, you will need the Workday REST API Endpoint and Token Endpoint values. To find the values, follow the steps below:
Log in to your Workday account.
On the search bar, search for View API Clients, and click View API Clients.
On the View API Clients page, note down the Workday REST API Endpoint and Token Endpoint values. These values will be required when you set up the Workday instance in the Netskope UI.

Configure Workday Instance in Netskope UI
To authorize Netskope to access your Workday instance, follow the steps below:
Log in to the Netskope tenant UI: https://<tenant hostname>.goskope.com and go to Settings > API-enabled Protection > SaaS > Next Gen.
Under Apps, select Workday and click Setup Workday Instance.
The Setup Instance window opens.
Enter the following details that you already noted after registering the API client in Workday:
Client ID
Client Secret
Refresh Token
Token Endpoint
Workday REST API Endpoint
Click Grant Access.
Refresh your browser, and you should see a green check icon next to the instance name.
Next, you can view the Next Generation API Data Protection Inventory page to get deep insights on various entities on your Workday account. For more information on the Inventory page, see Next Generation API Data Protection Inventory.
You can receive audit events and standard user behavior analytic alerts in Skope IT. To know more: Next Generation API Data Protection Skope IT Events.
Next, you should configure a Next Generation API Data Protection policy. To do so, see Next Generation API Data Protection Policy Wizard.