Create a Netskope Support Admin
You can grant Netskope personnel temporary access to your account through Netskope IdP. This feature is helpful when working with Netskope Support, Professional Services, Customer Experience, etc.
Prerequisite:
Ensure SSO integration is enabled in your account. Navigate to Settings > Administration > SSO.
To grant access:
Navigate to Settings > Administration > Admins > Netskope Personnel Access. The Edit window displays.
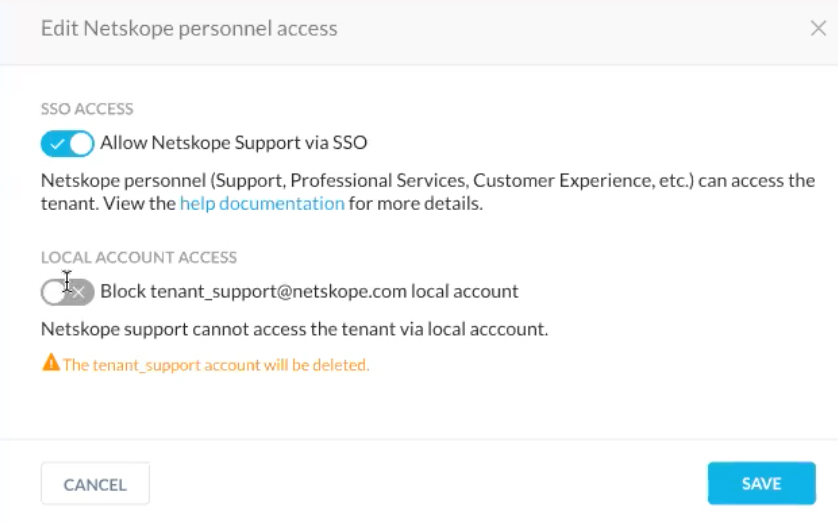
Enable the Allow Netskope Support via SSO radio button. This allows Netskope personnel to log in to your account. Note: Local Account Access is a default account. You can enable / disable this local account irrespective of the SSO Access feature.
Note
You can disable Local Account Access without affecting your data.
Click Save.
To disable access:
Navigate to Settings > Administration > Admins > Netskope Personnel Access. The Edit window displays.
Disable the Allow Netskope Support via SSO radio button.
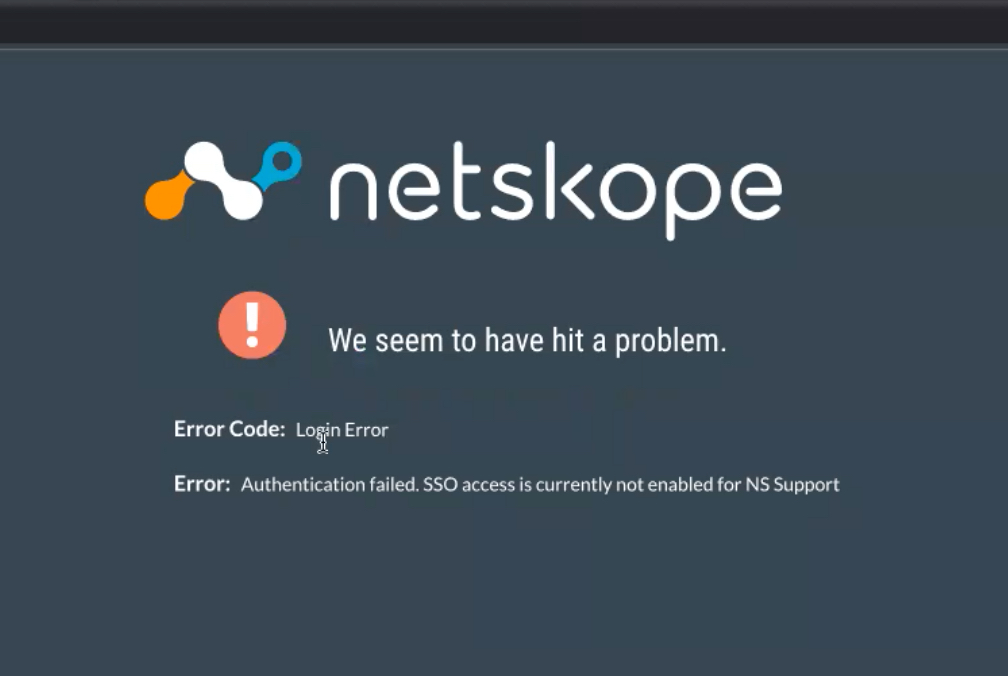
Click Save. Once access is disabled, any user that tries to log in will see the following error message.
You can view and filter access in the Audit Log.
To view access:
Navigate to Settings > Administration > Audit Log.
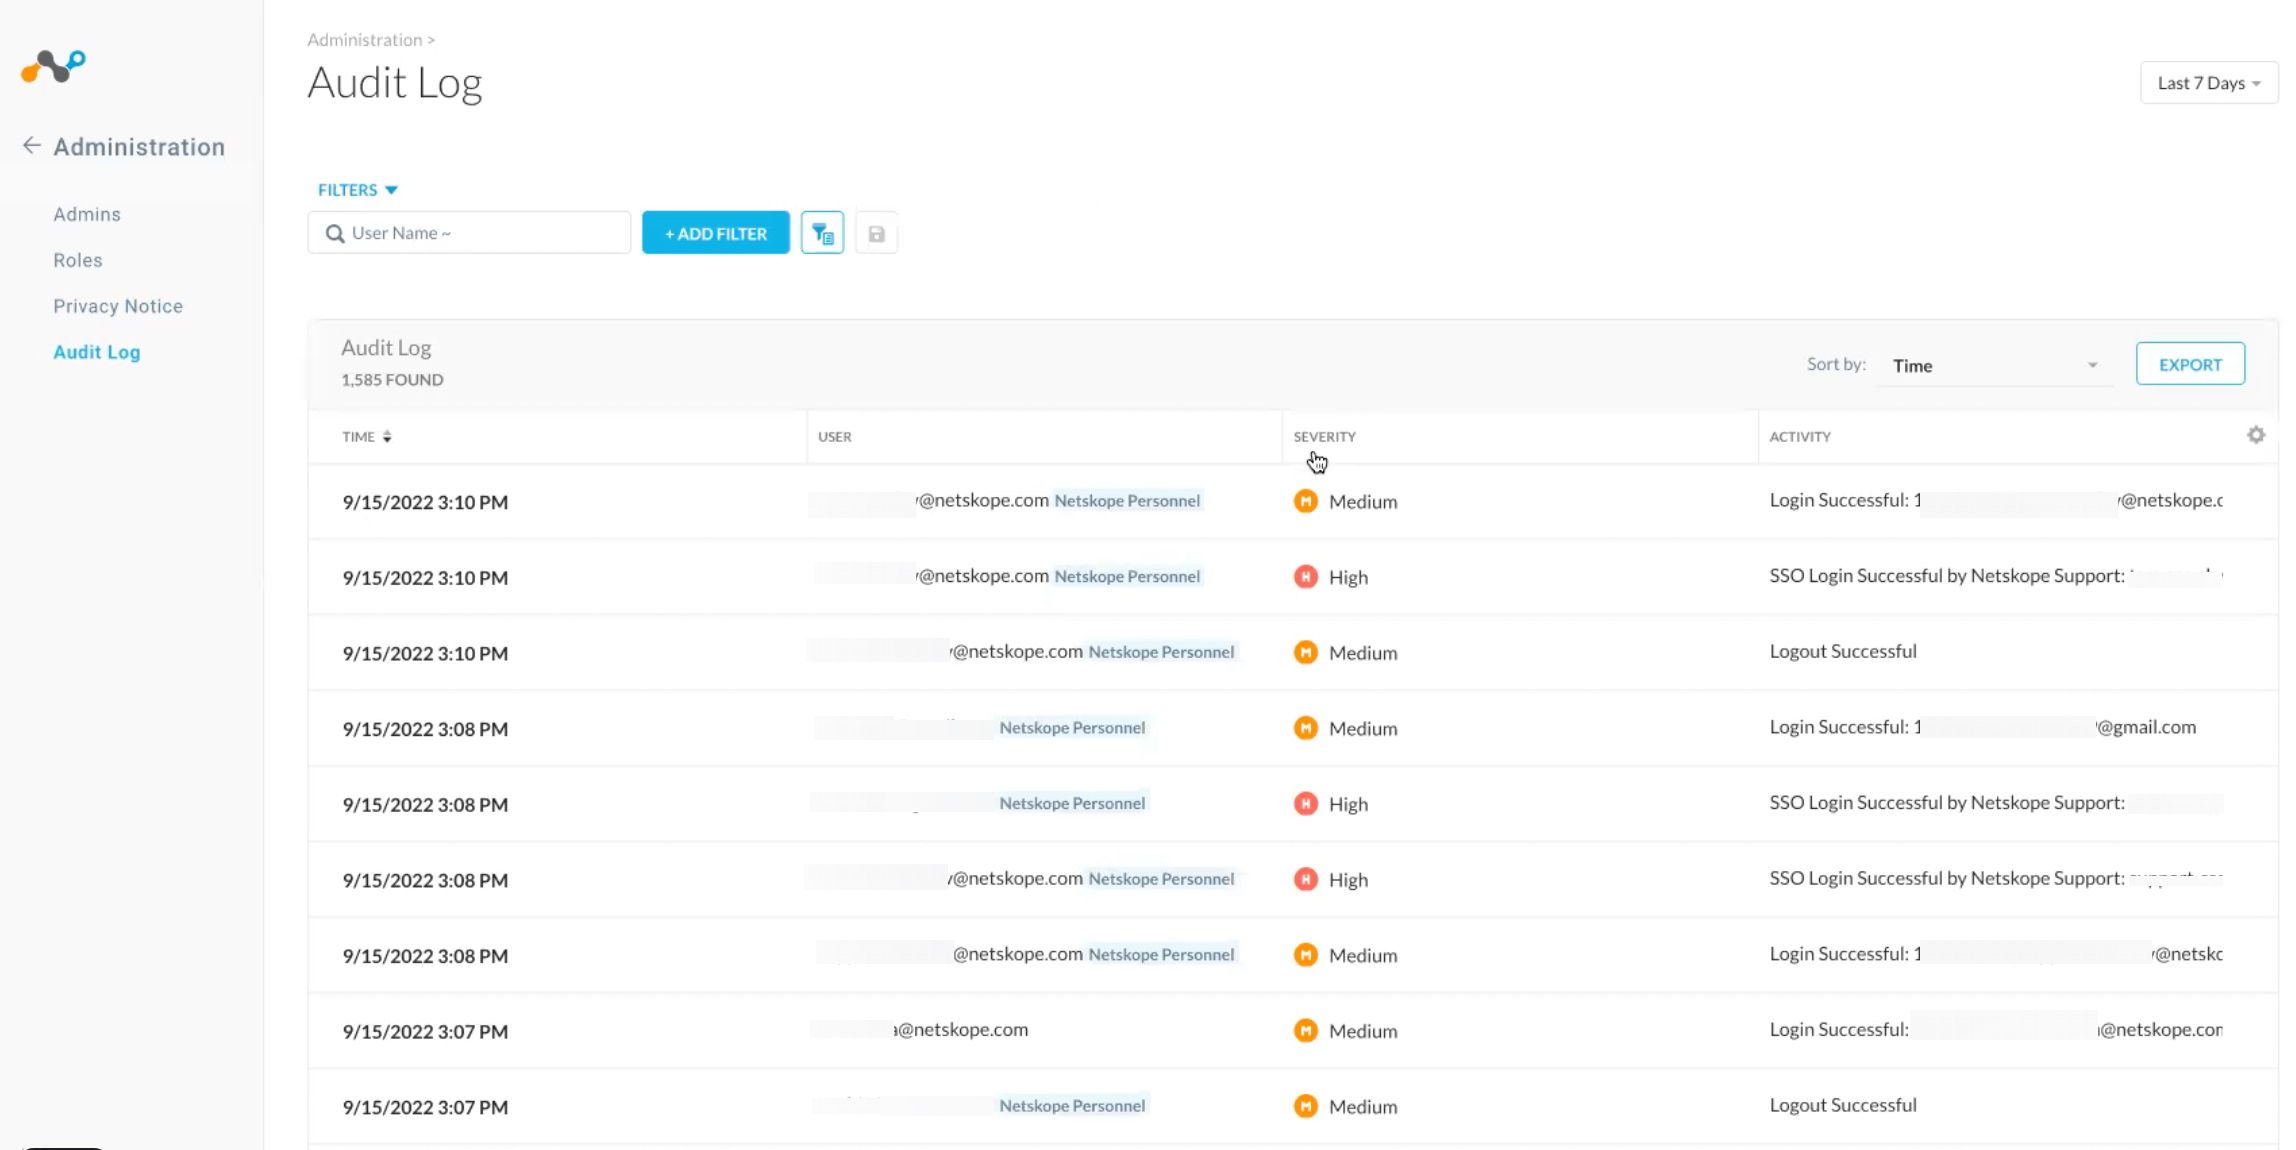
The Audit Log shows all users that have admin access to your account. This list includes all internal users and delegated SSO and Local Account (tenant_support@netskope.com) access.
Note
The Last Login column may be blank but that means the delegated admin was last active or logged in prior to this column being added to the UI.
To filter access:
Navigate to Settings > Administration > Audit Log.
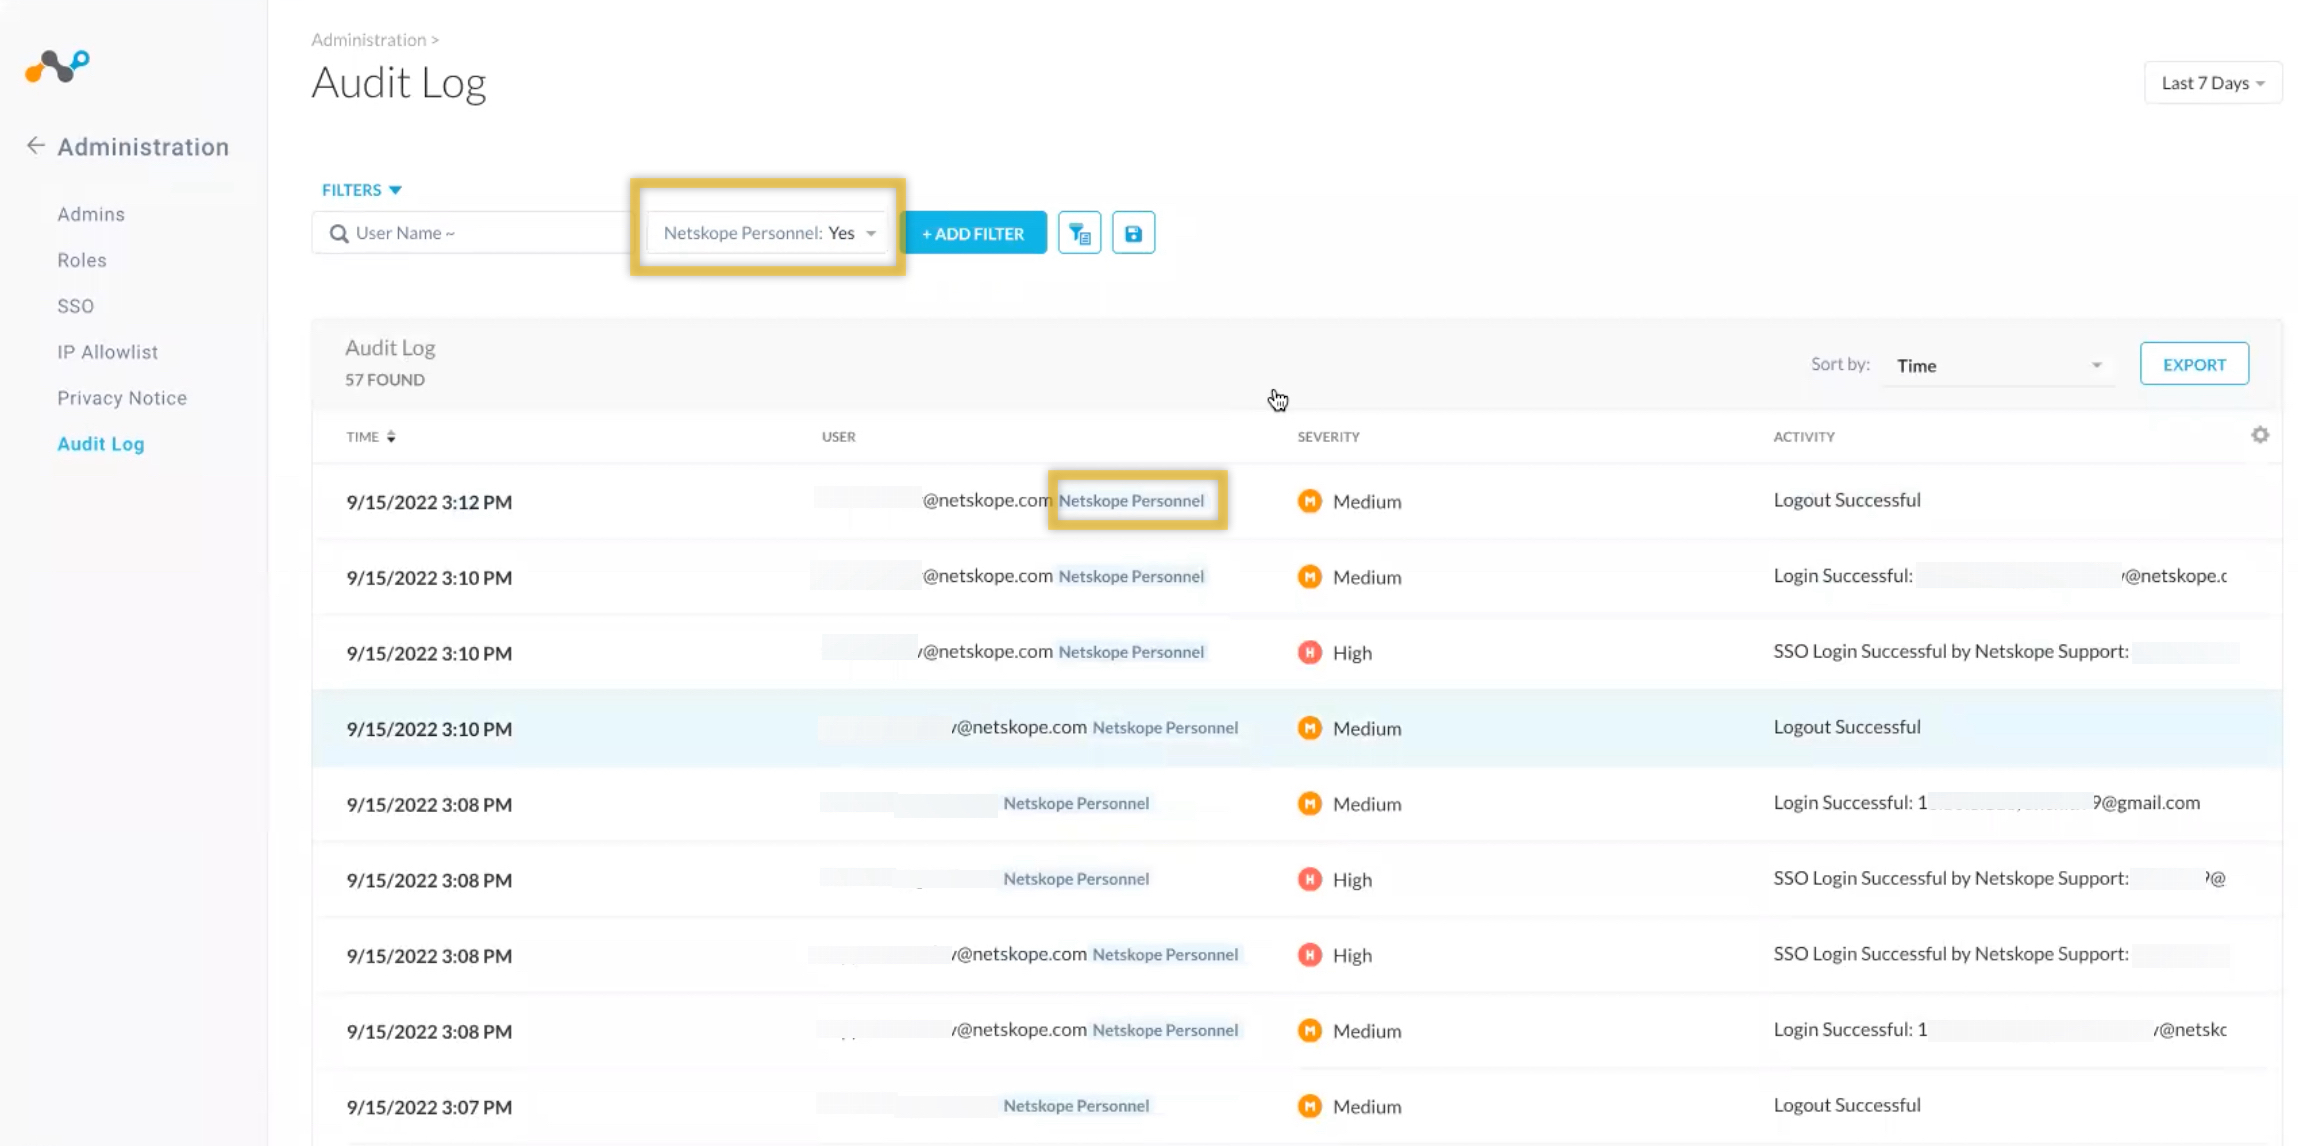
Click +Add Filter > Netskope Personnel > Yes.
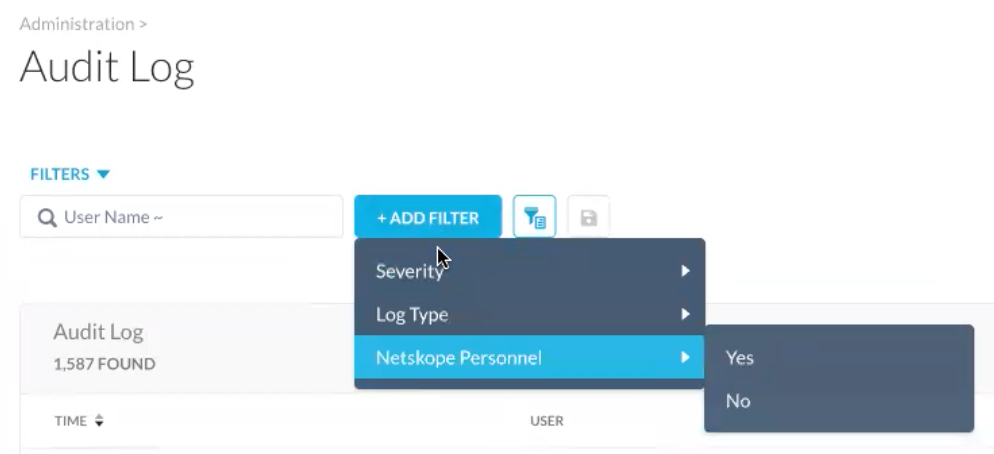
The Audit Log page displays with a filtered view showing only the Netskope Personnel users. Note, the email address reflects the individual user which may be different than the Local Account Access user (tenant_support@netskope.com).
