Create Roles
With role-based administration, you can easily add admins and assign them specific roles, with differing levels of access to the Netskope platform.
Netskope recommends adding roles before adding admins because you will need to select a role for each admin that you create.
When configuring roles:
You must have the proper permissions to do so
You can only create, edit, or delete roles with the same or less privileges
Note
You can only view roles for which you have higher permissions.
You must have organization-wide access permissions
To configure admin roles:
Navigate to Settings > Administration > Roles.
Click New Role.
The New Role window displays.
In the New Role window:
Role Name: type a name for the admin role.
Role Description: type a short optional description for the admin role. This description is visible in the Roles list page.
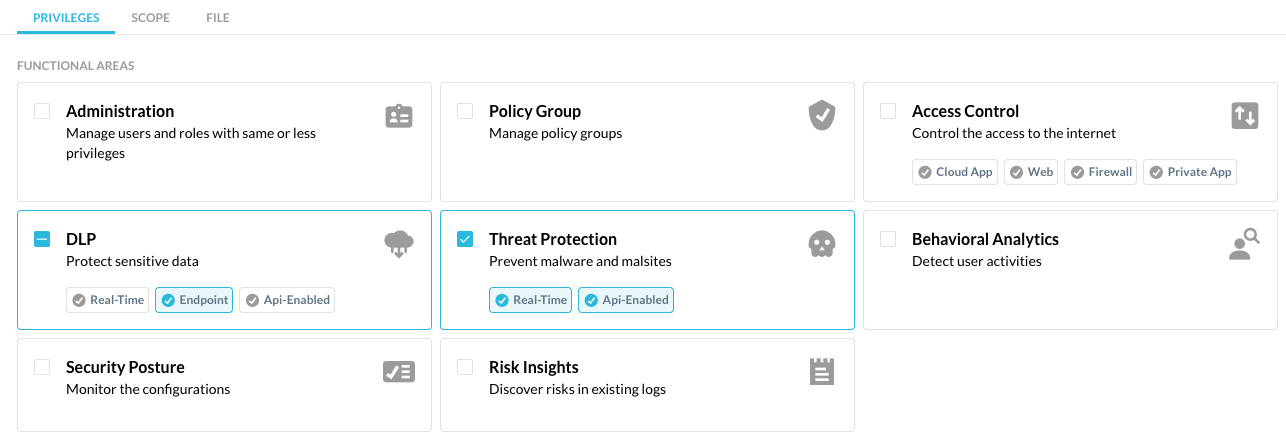
Privileges tab: select the functional areas the admin can access. You must select at least one functional area. NOTE: The available Page Permissions for this new role vary based on your choices in this section. Also, click the sub-choices within the Access Control, DLP, and Threat Protection category to provide even more granular control.

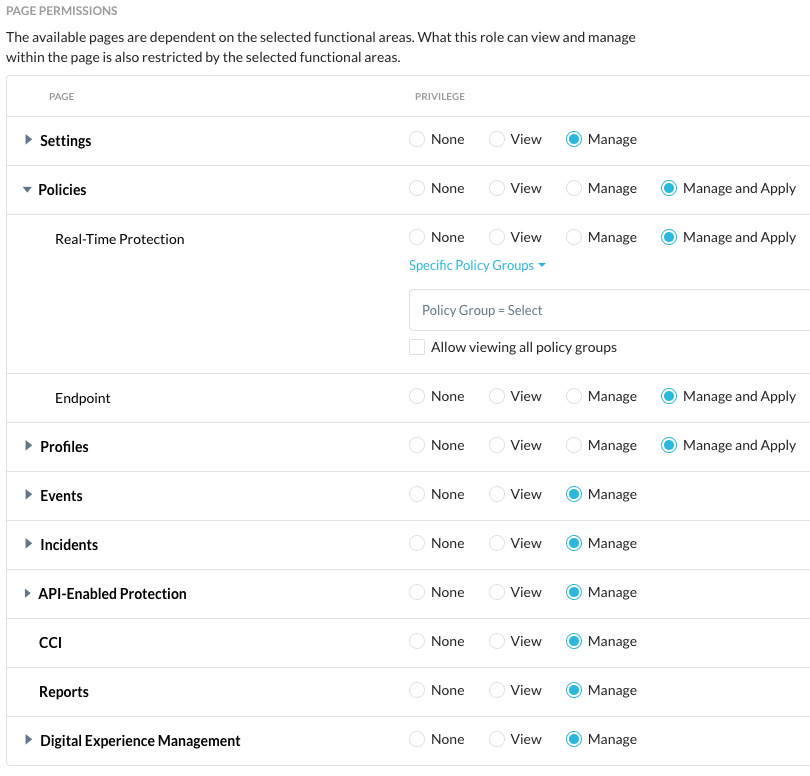
Page Permissions: select pages the admin can access.

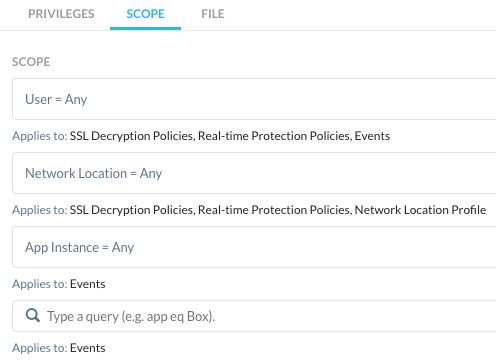
Scope tab: the admin's scope specifies which areas of the platform an admin can manage. The tenant admin has scope over the entire platform. For each additional role you create, you must select one of the following scopes:

User: select a user, user group, or organizational unit. The user selection applies to SSL Decryption Policies, Real-time Protection Policies, Events, and Roles.
Network Location: click in the field to search for a network location. The network location selection applies to SSL Decryption Policies, Real-time Protection Policies, Network Location Profile, and Roles.
App Instance: click in the field to search for an app instance. The app instance selection applies to Events and Roles.
Query: type in the field to add a query. The query applies to Events.
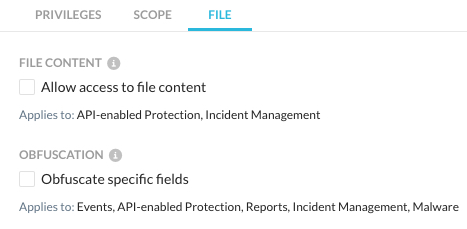
File tab: select the checkbox for the following:

File Content: selecting this checkbox allows admins to download, preview, and view files. This applies to API-enabled Protection and Incident Management.
Obfuscation: select this checkbox to mask sensitive data in the UI for the following:
Usernames
Source location information
User IPs
File and object names
App names, URLs, and destination IPs
The obfuscation choices apply to Events, API-enabled Protection, Reports, Incident Management, and Malware.
Click Save.
Tip
Based on the defined role and accompanying choices, when your admins create Real-time Protection policies, Roles, and SSL Decryption Policies, some fields will auto-populate. This is helpful in streamlining the workflow.