Configure Netskope SMTP Proxy with Microsoft O365 Exchange
When you configure Netskope SMTP Proxy with Microsoft O365 Exchange, all outgoing emails from Microsoft O365 Exchange are sent to Netskope SMTP Proxy for policy evaluation.
The configuration involves the following two steps,
Configure the Microsoft O365 Exchange server and the upstream MTA in the Netskope tenant
In the Netskope UI, go to Settings > Security Cloud Platform > SMTP.
Under Microsoft Office 365 Exchange, click Edit.
In the Edit Microsoft Office 365 Exchange Settings window:
Email Server Setting: Copy and enter this FQDN in Microsoft Office 365 Exchange to route emails through the Netskope Cloud. You will require this FQDN when configuring Netskope SMTP Proxy as a connector in the Microsoft Exchange admin center.
Email Domain Next Hop: Enter the following information. Netskope will use this information to associate emails with your Real-Time Protection policies.
Domain: Enter and verify the primary domain you want to use for email processing. You can enter a domain, subdomain, or a wildcard domain (e.g., abc.com, cde.abc.com, and *.abc.com). To learn more about finding the primary domain in Microsoft O365: Finding the Microsoft O365 Exchange Tenant ID and Primary domain.
Caution
Configure each of your MAIL FROM domains. If not, emails from the domain will be rejected.
Tenant ID: Enter the tenant ID, which you can find in the Directory ID box on the Properties page. To learn more about finding the tenant ID in Microsoft O365: Finding the Microsoft O365 Exchange Tenant ID and Primary domain.
Next Hop: Enter the IP address/FQDN and port of the upstream MTA where you want the emails to be routed.
Click +Add to add multiple domain entries. Select Set Tenant ID and Next Hop for Each Domain if you want to enter a unique tenant ID and next hope for each domain entry.
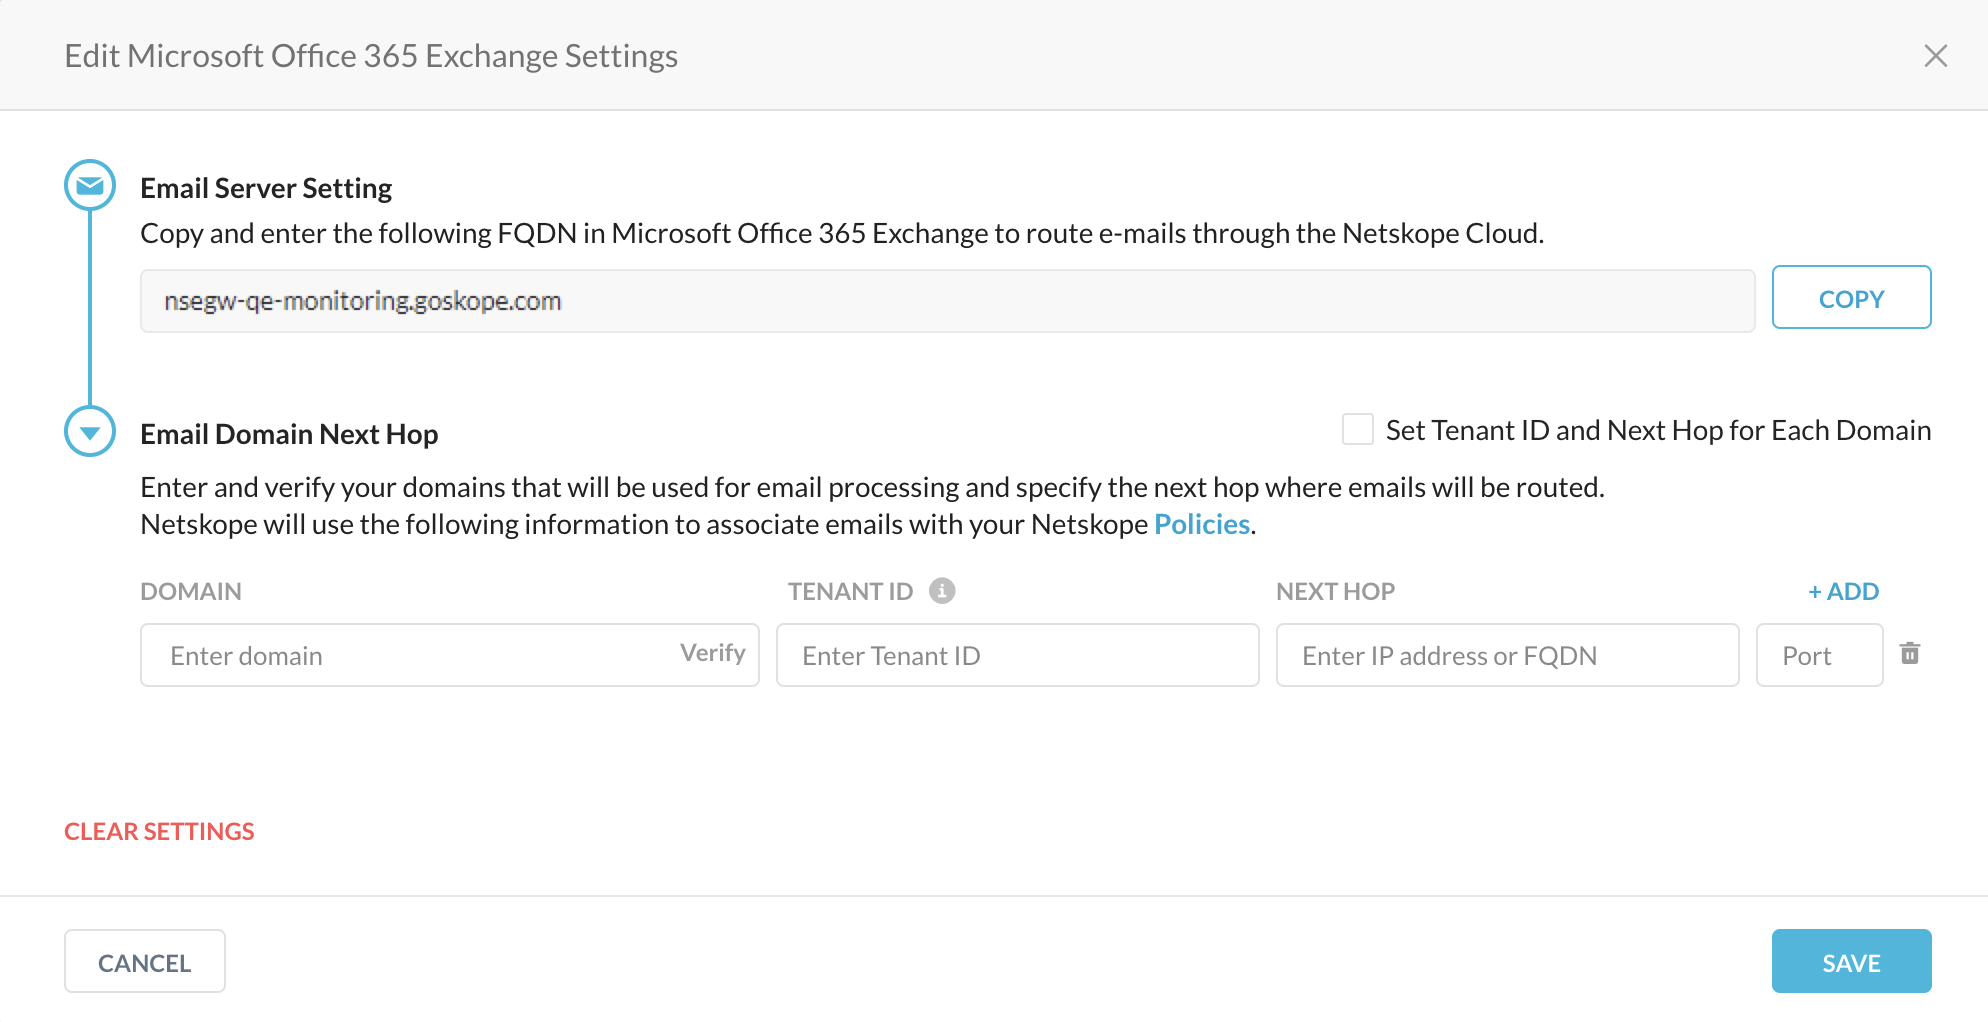
Click Save.
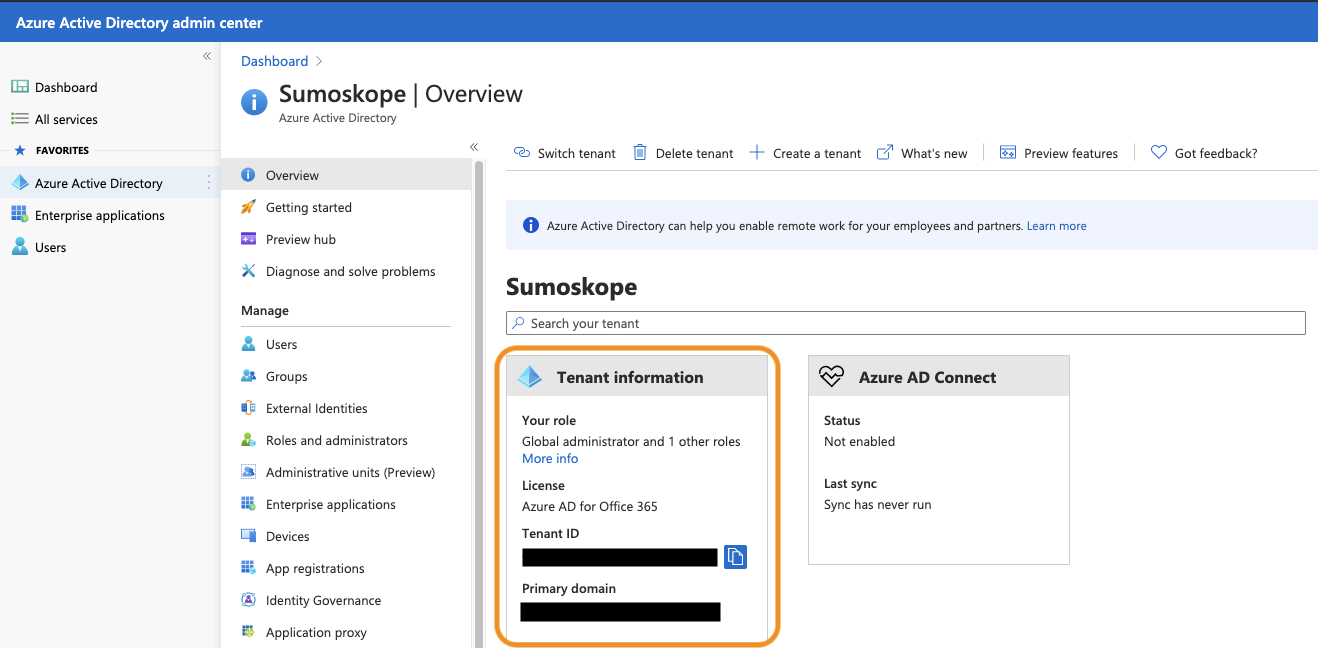
Finding the Microsoft O365 Exchange Tenant ID and Primary domain
Log into Microsoft O365 Administration and in the left pane select Admin. The Microsoft 365 admin center page is displayed.
In the left pane of the Microsoft 365 admin center page, click ... Show All to view all the options and select Azure Active Directory. The Azure Active Directory admin center page is displayed.
Click Azure Active Directory in the left pane and copy the Tenant ID and Primary domain. You must specify the tenant ID and primary domain in your Netskope tenant.
Configure Netskope SMTP Proxy as an outbound connector in Microsoft's Exchange admin center
Log into Microsoft O365 Administration and in the left pane select Admin. The Microsoft 365 admin center page is displayed.
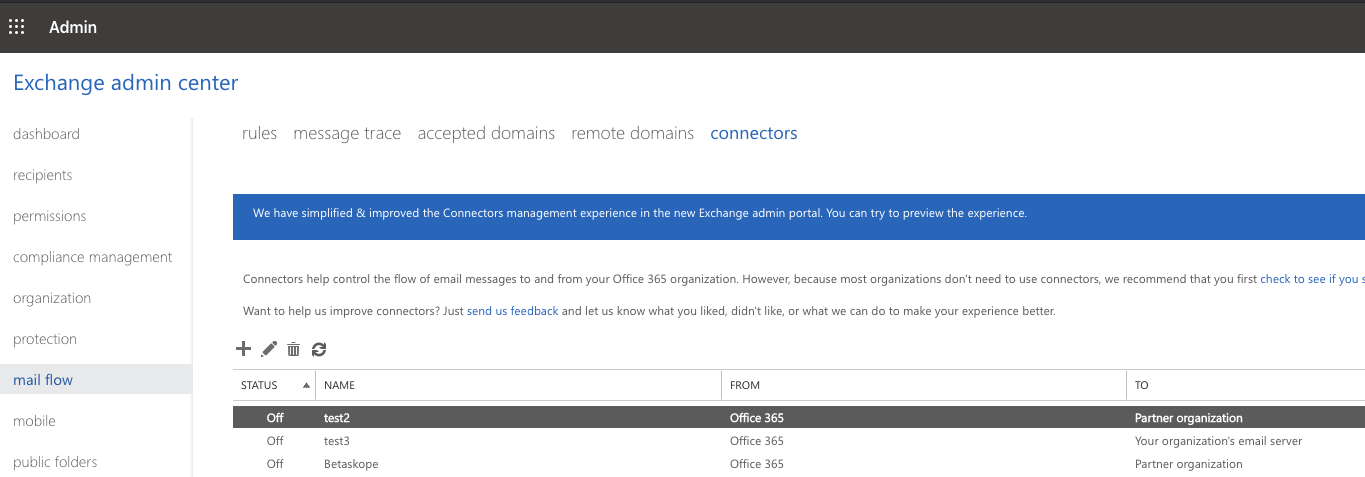
In the left pane of the Microsoft 365 admin center page, click ... Show All to view all the options and select Exchange. The Exchange admin center page is displayed.

In the left pane of the Exchange admin center page, click mail flow. By default, the rules are displayed on the screen.
You can create a new rule for Netskope routing that will enable you to disable the Netskope connector at any time without impacting your existing routing rules.
Click the + icon to create a new rule.
Select connectors. Click the + icon to create a new connector.
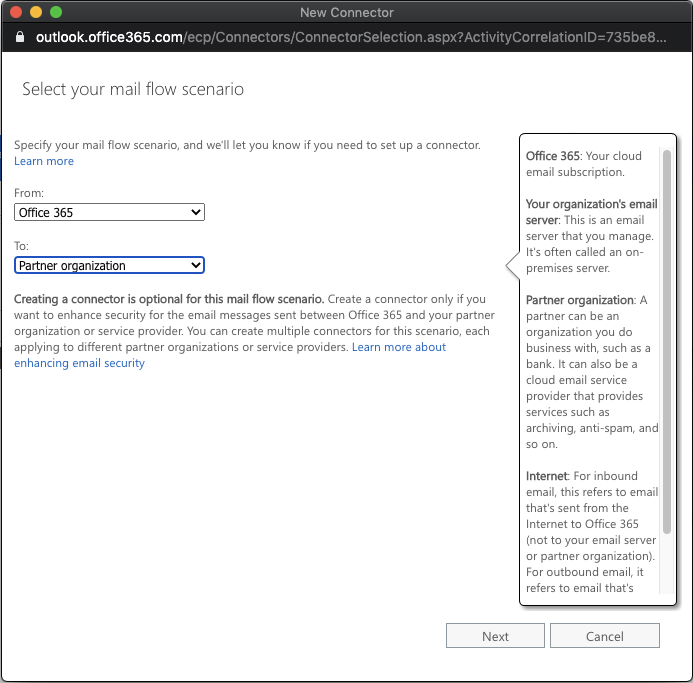
In the New Connector window, select your mail flow. In the From field select Office 365 and in the To field select Partner organization. Click Next.
Specify a name to identify this connector and provide a description. Click Next.
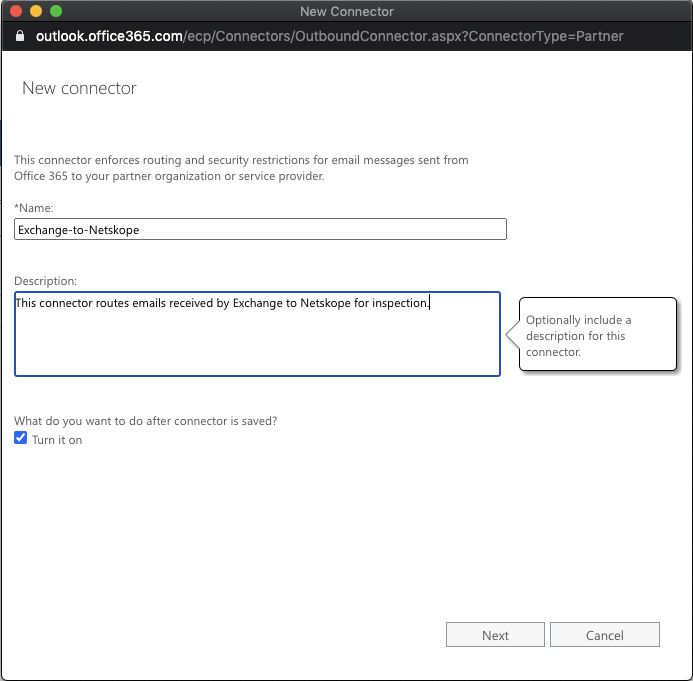
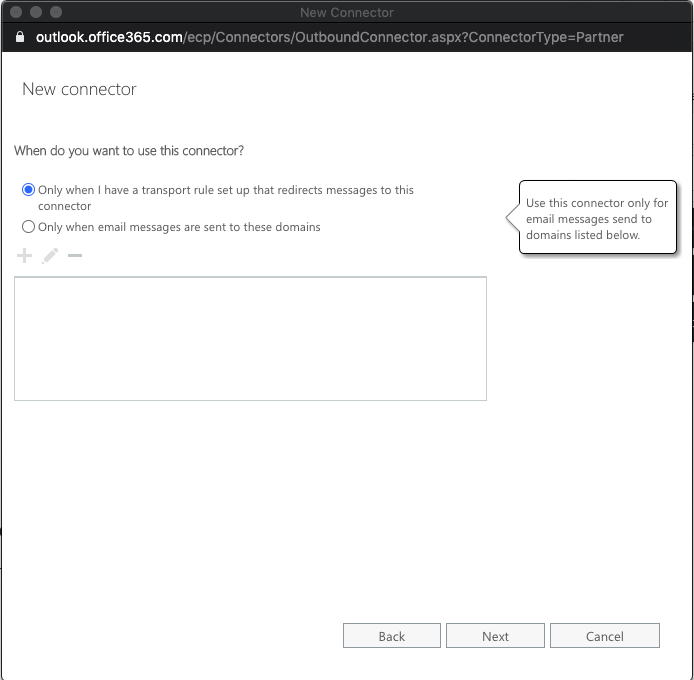
In the following screen choose to use this connector only when a transport rule is set up. Click Next.
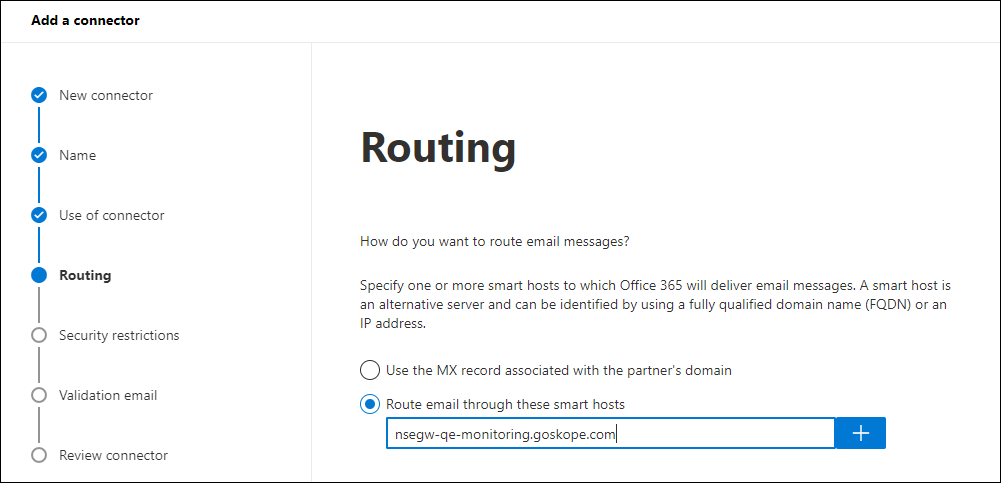
In the following screen, choose a method to route the email messages. Select Route email through these smart hosts and click the + icon to add the hosts.
Provide Netskope's domain name you copied previously as the host name of the partner organization.
In the next screen, select the security options as shown in the image below to enable Office 365 to securely connect to Netskope's SMTP proxy.

To ensure that the traffic is going to Netskope cloud you can specify the CN of the certificate. The connection between Exchange and Netskope cloud uses a TLS connection over SMTP. During the TLS handshake the exchange uses a CA certificate. The CN of the CA certificate is *.goskope.com.
Click Next.
Review your settings and click Next. The new connector is created.
You can specify a test email and click Validate to validate the connector.
When the connection between Microsoft O365Exchange and Netskope SMTP Proxy is up, Netskope SMTP Proxy replies with a 250 OK in the message to indicate that the connection was successful.
Note
Currently, the "send test email" between Microsoft O365 Exchange and Netskope SMTP Proxy fails with an error even though the connection is successful.