Create Policy Groups
A group is a logical collection of Real-time Protection policies. It's helpful to group policies to simplify workflow, allowing exact access to a set of policies, which helps eliminate bottlenecks. For example, your company may have hundreds of policies, you can use groups to split up the policies by region, business unit, or any function that makes sense for a group of users. In addition, creating policy groups makes it easier for admins to manage their own policies.
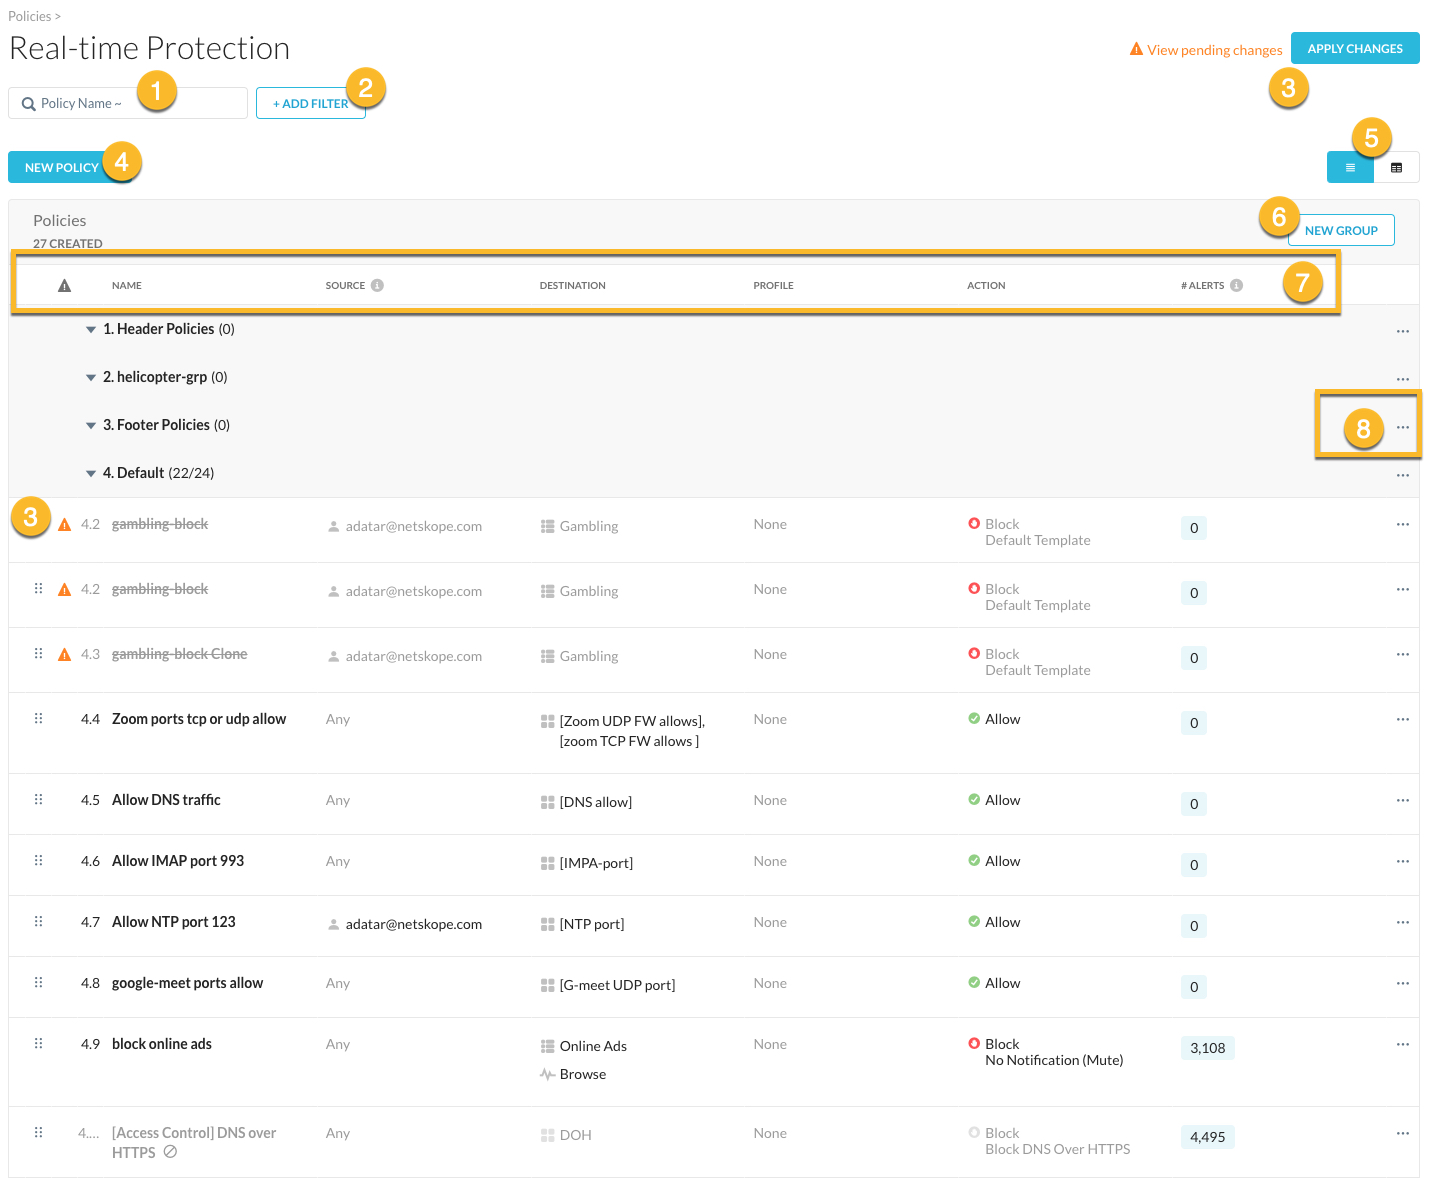
On the Policies > Real-time Protection page, you can do the following:
Note
Available actions may be limited based on your role. For example, policies may be view only if the policy is assigned to a group which is outside of your group.
Search for a specific policy.
Add a to see view data based on specific criteria.
Apply and/or view pending changes.
Create a new policy.
Toggle between default or custom views of the page.
Create a new group.
Note
The create button may be enabled / disabled based on your role permissions.
View a list of all policies configured for your organization. For each policy, you can see the following:
Name: policy group name
Source: displays source criteria such as user attributes, machine attributes, and access method
Destination:
Profile:
Action:
Alerts: displays number of alerts generated in the last 30 days.
Rename, move, or delete a policy.

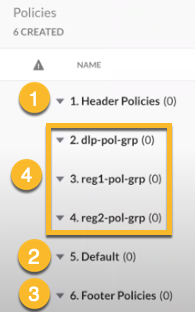
Netskope provides three types of default policy groups:

Header Policies: policy group that the Super Admin creates and applies to all users. This is a type of global policy that can be added at the top or bottom of the policy list.
Tip
Header and footer policy groups cannot be renamed or deleted.
Default Policies: All you current Real-time Protection policies appear in this section if you already have an existing account. If you're a new customer and don't have any existing policies, this section is visible but will not show a policy count.
Footer Policies: this is also a global policy similar to header policies that can be added at the bottom of the policy list which applies to all users but should be applied as a lower priority to the other listed policies.
Tip
Policies are applied according to the numbered order in this policy list.
Group Policies: The following is an example of new policy groups, policies appear according to the order you assign. However, default and custom policy groups cannot be moved before or after a footer policy group.
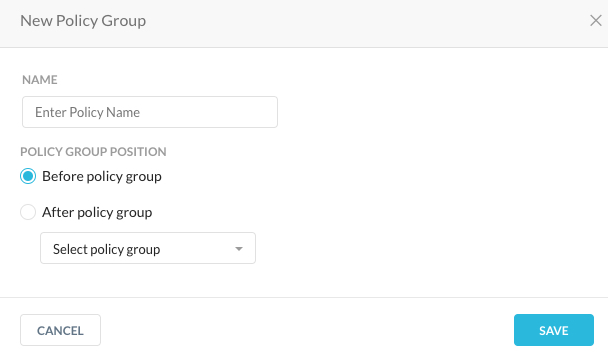
To create a policy group, navigate to Policies > Real-time Protection > click New Group.

Type a policy group name.
Select a policy group position:
Before policy group: adds this policy to the top of the list.
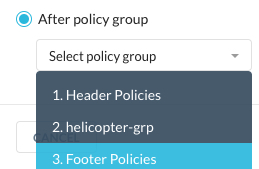
After policy group: select from the dropdown after which policy you want this new policy group to be added. The dropdown shows all your policy groups. The groups may be a subset visible to you based on your permissions.

Click Save.
Note
During policy creation there is an option to choose the policy group to which this policy should be assigned.