Create a Custom DLP Profile
Creating a DLP profile involves selecting a file profile and then providing a DLP rule, content classification, or fingerprint rule.
File profile section allows you to include or exclude specific files based on different attributes of a file. You can use existing file profiles or create a new file profile.
Rule|Classification section allows you to include predefined DLP rules, custom DLP rules, Machine Language (ML)-based file classifiers, or a fingerprint rule. You can combine the DLP rules and Classifiers to match all or any of the above to detect sensitive content.
Using predefined DLP rules simplifies the task of creating DLP profiles. To use custom DLP rules, first go to Select Custom Entities and create the rules, so they appear under DLP rules in the Create Profile dialog box. Alternatively, you can click the ‘+’ symbol under DLP Rule in the Rule|Classification section to create a new rule from here.
To include ML-based file classifiers in the profile, select from the list of predefined classifiers.
To include Fingerprint rules in the DLP profile, go to Use Fingerprint Classification and create the Fingerprint rules so they appear in the fingerprint rules text box in the Rule|Classification section. Alternatively, you can click the ‘+’ symbol under Fingerprint Rule in the Rule|Classification section to create a new rule from here.
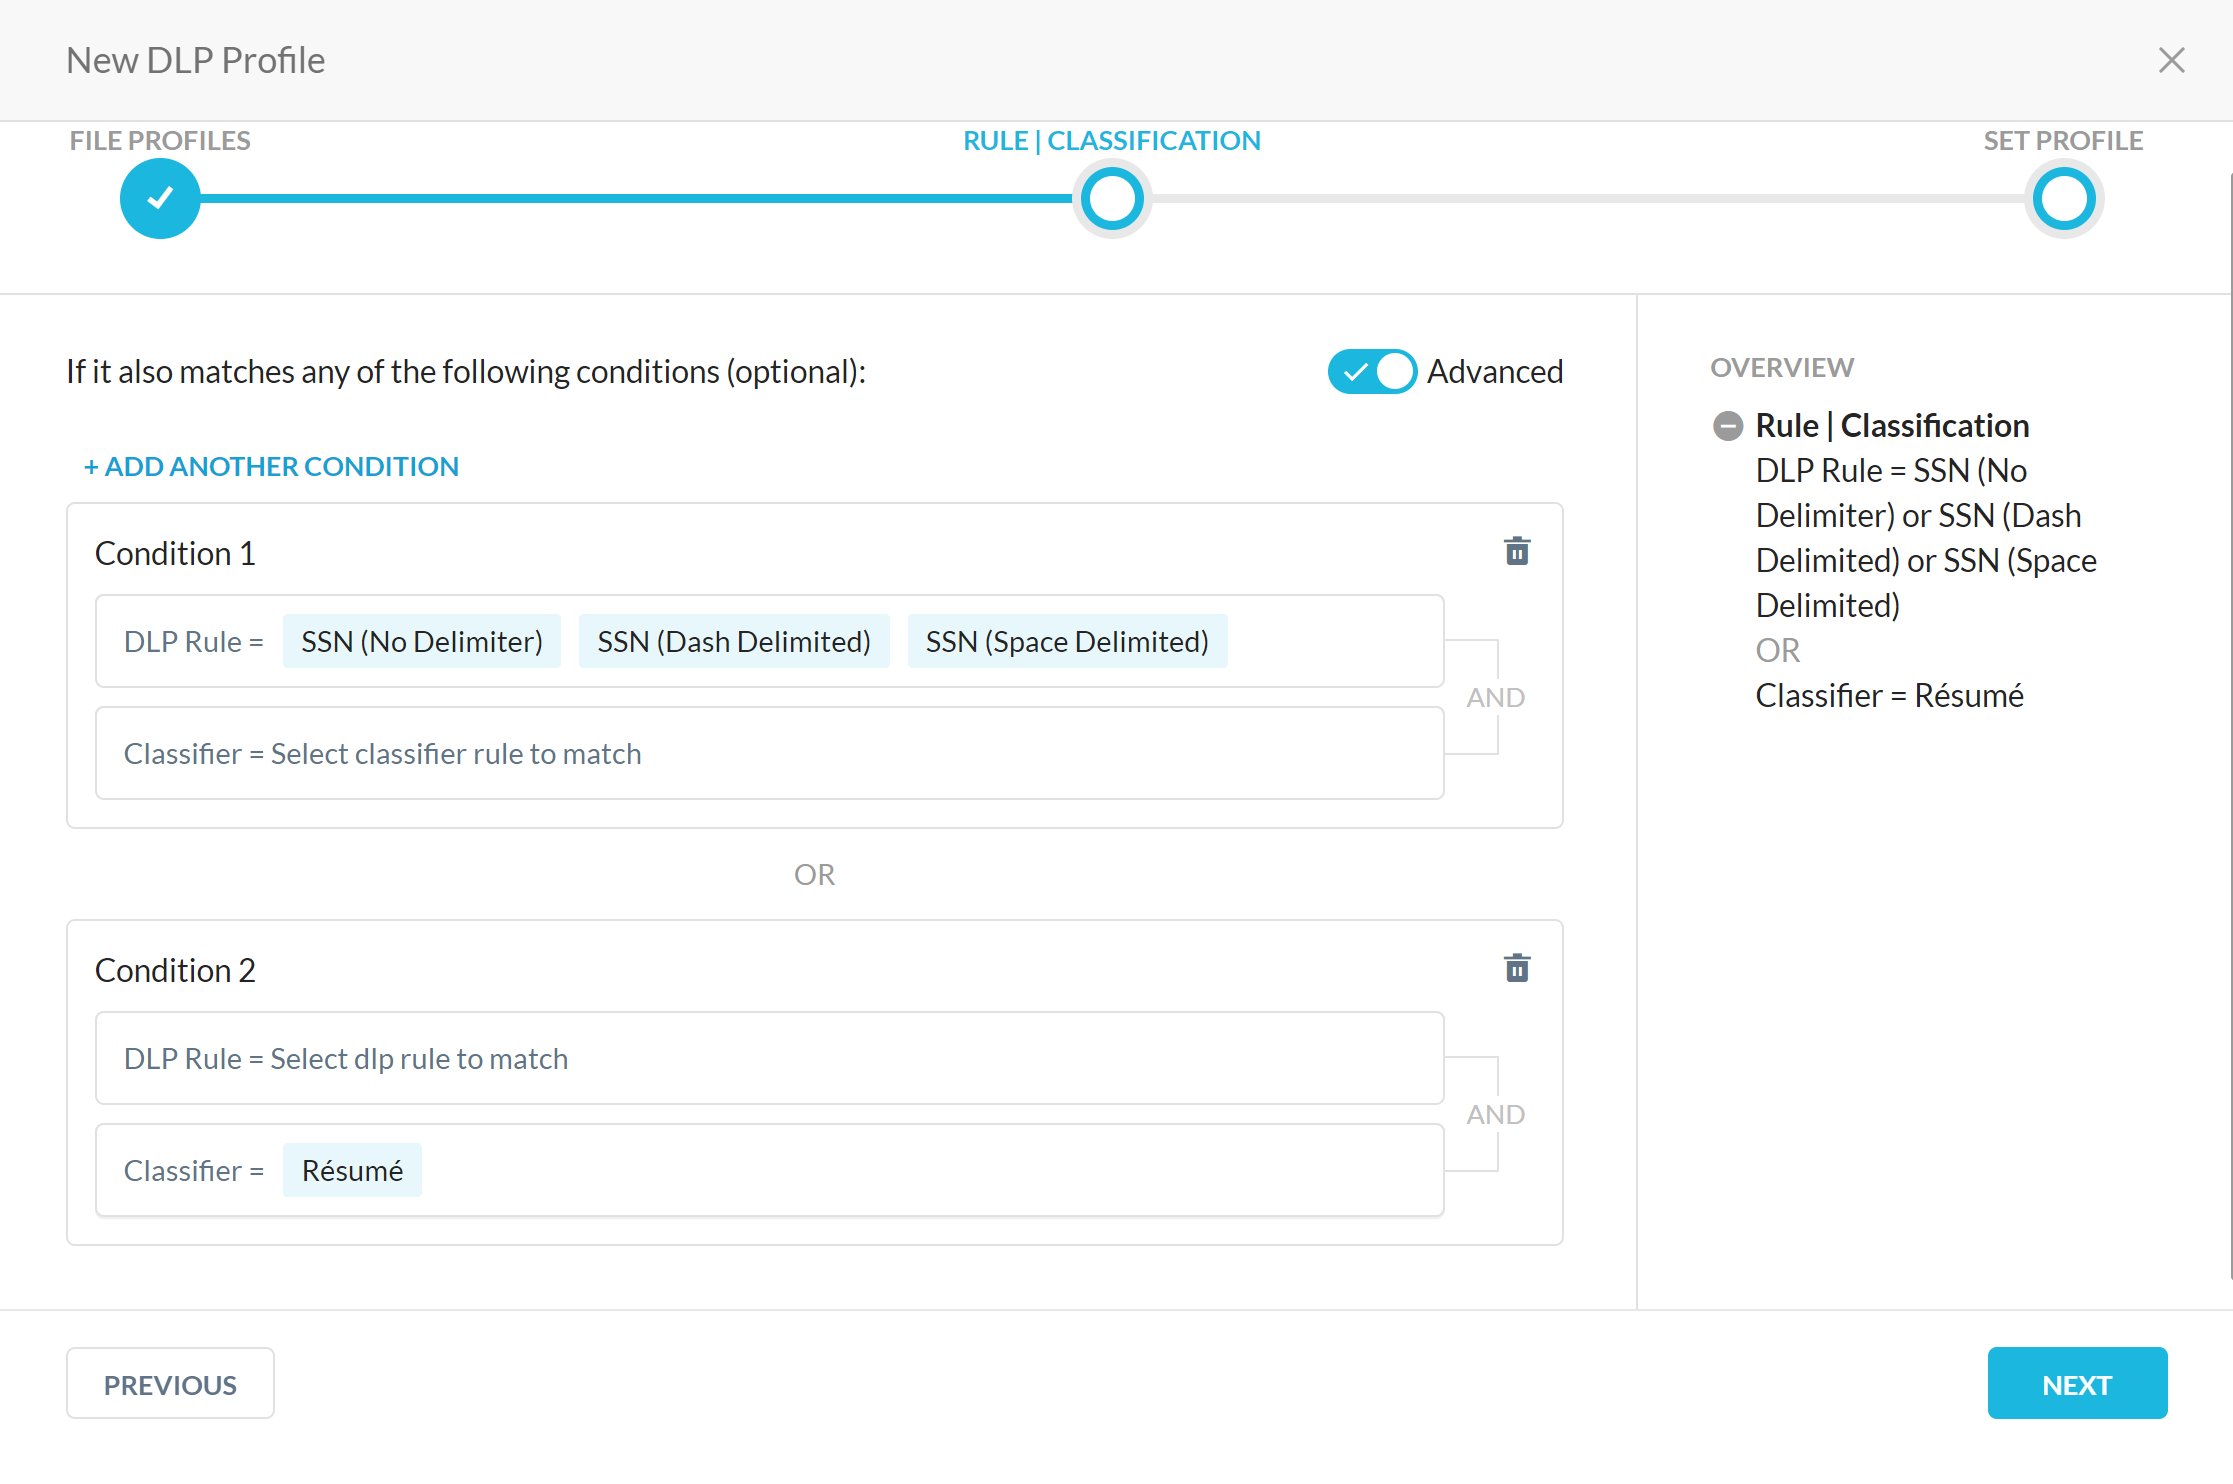
Rules within a condition are evaluated on an AND-basis and conditions are evaluated on an OR-basis against other conditions.
To create a custom DLP profile,
Go to Policies > Profiles > DLP in the Netskope UI.
Click New Profile.
Under File Profiles, select a file profile you want to include or exclude using the match criteria. You can select from the list of file profiles or create a new file profile. For information on creating a new file profile, see Adding a File Profile. Click Next.
Under Rule|Classification, select predefined or custom DLP rules. Let's say you want to match content that contains the social security number (SSN) with a dash-delimited no delimiter, and a space delimiter. Select the following predefined DLP rules, SSN (Dash Delimited), SSN (No Delimiter), and SSN (Space Delimited).
Click the '+' symbol to create a new custom DLP rule.
Select the ML based classifiers to be included in the content match so that text in images can be identified using the machine language-based models. For example, to match a Résumé, select the Résumé classifier in the Personal Identifiers classification which identifies résumés.

Select a fingerprint rule to improve the accuracy of the content match. The rule identifies content that resembles the content defined in the fingerprint classification included in the fingerprint rule.
Click the '+' symbol to create a new fingerprint rule.
Select the Advanced button on the Rule|Classification screen to trigger a policy when you want the content to match either or both, the selected DLP rules and ML based classifiers. Click Next.
Enter a profile name and click Save.
Clone a DLP Profile
Cloning allows you to create new DLP profiles from existing DLP profiles. When you clone a predefined or custom DLP profile, the profile properties are copied and displayed in the Edit DLP Profile dialog box. The DLP profile can be modified to create a new custom DLP profile.
To clone a predefined or custom profile, on the DLP Profiles page click the menu icon (three dots) and then click the clone icon.