Using Table Calculations
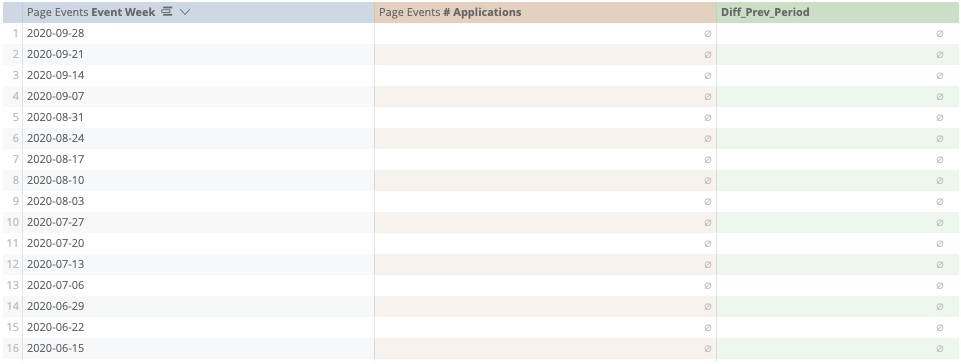
Table calculations make it easy to create on-the-fly metrics. They are similar to formulas found in spreadsheet tools like Excel. Table calculations appear as green columns in the data table, rather than as blue columns (dimensions) or orange columns (measures). Table calculations provide a powerful way for any user to manipulate and analyze data, without having to create new custom fields.
The last column in the table below uses a table calculation to combine three fields in the data using the concat function.

Table calculations can perform mathematical, logical (true/false), lexical (text-based), and date-based calculations on the dimensions, measures, and other table calculations in your report. The formulas that you use to execute these calculations are called expressions.
Table Calculations Are Different from Regular Fields
Although table calculations are similar to dimensions and measures, there are some important differences:
Table calculations operate on the results from your report, as opposed to regular fields, which are part of the report itself. In other words, you’ll select a set of dimensions and measures and run your report as normal, then you can base table calculations on the data in that report.
Creating Table Calculations
The Explore page has a built-in expression editor to help you create table calculations, custom fields, and custom filters.
Warning
Before you create a table calculation, make sure that all the fields you want to use in the table calculation have been selected from the field picker, and that you have run the report.
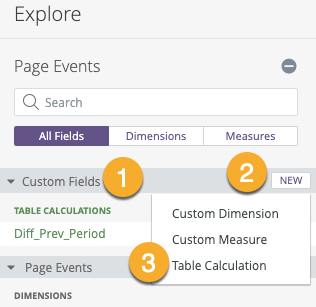
You can open the expression editor by opening the Custom Fields section of the Field Picker and clicking New, then choosing Table Calculation:

In the Table Calculations pop-up window, you can start constructing your custom metrics. The expression you create can evaluate to a number, date, string (text), or Boolean (true/false).
If you already have some table calculations defined, click the Add Table Calculation button to create another. You are able to add as many table calculations as you need.
Then, for each table calculation:
Rename your table calculation if desired.
Optionally, click Default Formatting to choose a predefined format or create a custom format for the results. If you create a custom format, use Excel-style formatting as described on this documentation page.
Start typing an expression into the large text box to form your calculation. Expressions can be quite simple, or they can use as many fields, functions, and operators as your business logic requires. The Creating Expressions documentation page explains how to create expressions and how the editor helps you.
If you are finished adding table calculations, click Save Table Calculations.
Your table calculation fields appear next to your dimensions and measures in the table. If you want to reuse your table calculations in the future, be sure to save your widget or copy the table calculation formula into another document.
Using the Data Bar to Create Table Calculations
In addition to using the Custom Fields section of the field picker, you can open the Create table calculation pop-up by selecting the Add calculation button from the Data bar.
Admins can add table calculations by using the Add Calculation button on the Data Bar, in addition to accessing shortcut calculations.
Sorting Table Calculations
To sort on a table calculation, click the field name at the top of the column, just as you would a dimension or measure.

When Table Calculations Cannot Be Sorted
Sorting on a table calculation works similarly to sorting on a dimension or measure. However, there is one important difference that prevents sorting in some scenarios:
Table calculations are created after the data is retrieved from the database, which means that when you sort a table calculation, you can only sort the data that is already displayed.
The specific scenarios when you can’t sort a table calculation are:
Calculations that hit a row limit, as described below.
Sorting a dimension or measure after you’ve already sorted by a table calculation, as described below.
Sorting a table calculation that makes use of an offset, as described below.
Calculations That Hit a Row Limit
If the number of rows in your report exceeds the row limit that you’ve set, you will not be able to sort table calculations. This is because table calculations are only based on the rows that are displayed. Therefore, if you hit a row limit, the table calculation might be missing some rows that it should be sorting into your results. If you run into this issue, you can try increasing your row limit (up to 5,000 rows).
Sorting a Dimension or Measure after Sorting a Table Calculation
As indicated above, table calculations are only based on the rows that are displayed. In contrast, sorting by a dimension measure goes back to the database to make sure it finds the correct rows. As a result, you should start sorting with dimensions and measures. Then, when the correct data has been returned from the database, you can sort those results based on a table calculation.
Using Table Calculations in Visualizations
Just like regular dimensions and measures, table calculations are automatically displayed in visualizations.
In addition, you can use table calculations to decide which rows of your data should be displayed in a visualization.