Deploy Client on macOS Using VMware Workspace ONE
Deploying Client on macOS Using VMware Workspace ONE (Domain-joined)
Deploying Client on domain-joined macOS devices using VMware Workspace ONE utilizes the logged in user’s UPN and pulling the branding file based on the UPN.
Perform the following steps to deploy the client:
Login to your Workspace One admin console.
Go to Devices > Provisioning > Components > Files/Actions.
Click Add files/Actions and select macOS.
In the General tab, enter the required information.
In the Files tab, upload the preinstall script, pkg file, and scripts. Also, mention the local path where these files should be downloaded.
In Manifest, under Install Manifest, add the below steps in the same order.
Step 1
Action to perform: Run
Command Line and Arguments to run:
chmod +x <Install script local path>(Refer point 4 )Timeout: As you wish (default 0)
Step 2
Action to perform: Run
Command Line and Arguments to run:
sudo <Install script local path> param1 param2 param3 param4Timeout: As you wish (default 0)
For UPN mode, the params are:
<adonman url> <Org Key> upnFor peruserconfig mode, params are:
<adonman url> <Org Key> < peruserconfigFor Email based, params are:
<tenant url> <AD domain name> <Rest API token>
Step 3
Action to perform: Install
File Path and Name to Install <pkg file local path>
Then go to Devices > Provisioning > Product List View and click Add Product.
Select MacOS as the platform.
In the General tab, enter the required details.
In manifest, under the policy action, specify the following:
Action to perform: Install Files/Actions
Files/Actions: Select the files/action created above
Deploying Client on macOS Using VMware Workspace ONE (Non-Domain Joined)
Deploying Client on non-domain joined macOS devices using VMware Workspace ONE utilizes a preferences list (plist) file containing the email attribute to enroll the Client.
Prerequisites: Download Netskope Root and Intermediate certificates and convert them to .cer extension. To learn more, see Certificates.
Push email from Workspace ONE user profile to device
Here, you can add the Plist file containing the email variable in Workspace Sensor. Perform the following steps to add the Plist file:
Log into your Workspace One admin console.
Go to Resources > Sensors.
Click Add > macOS.
On the New Sensor window, provide Name and Description in the General section.
Click Next.
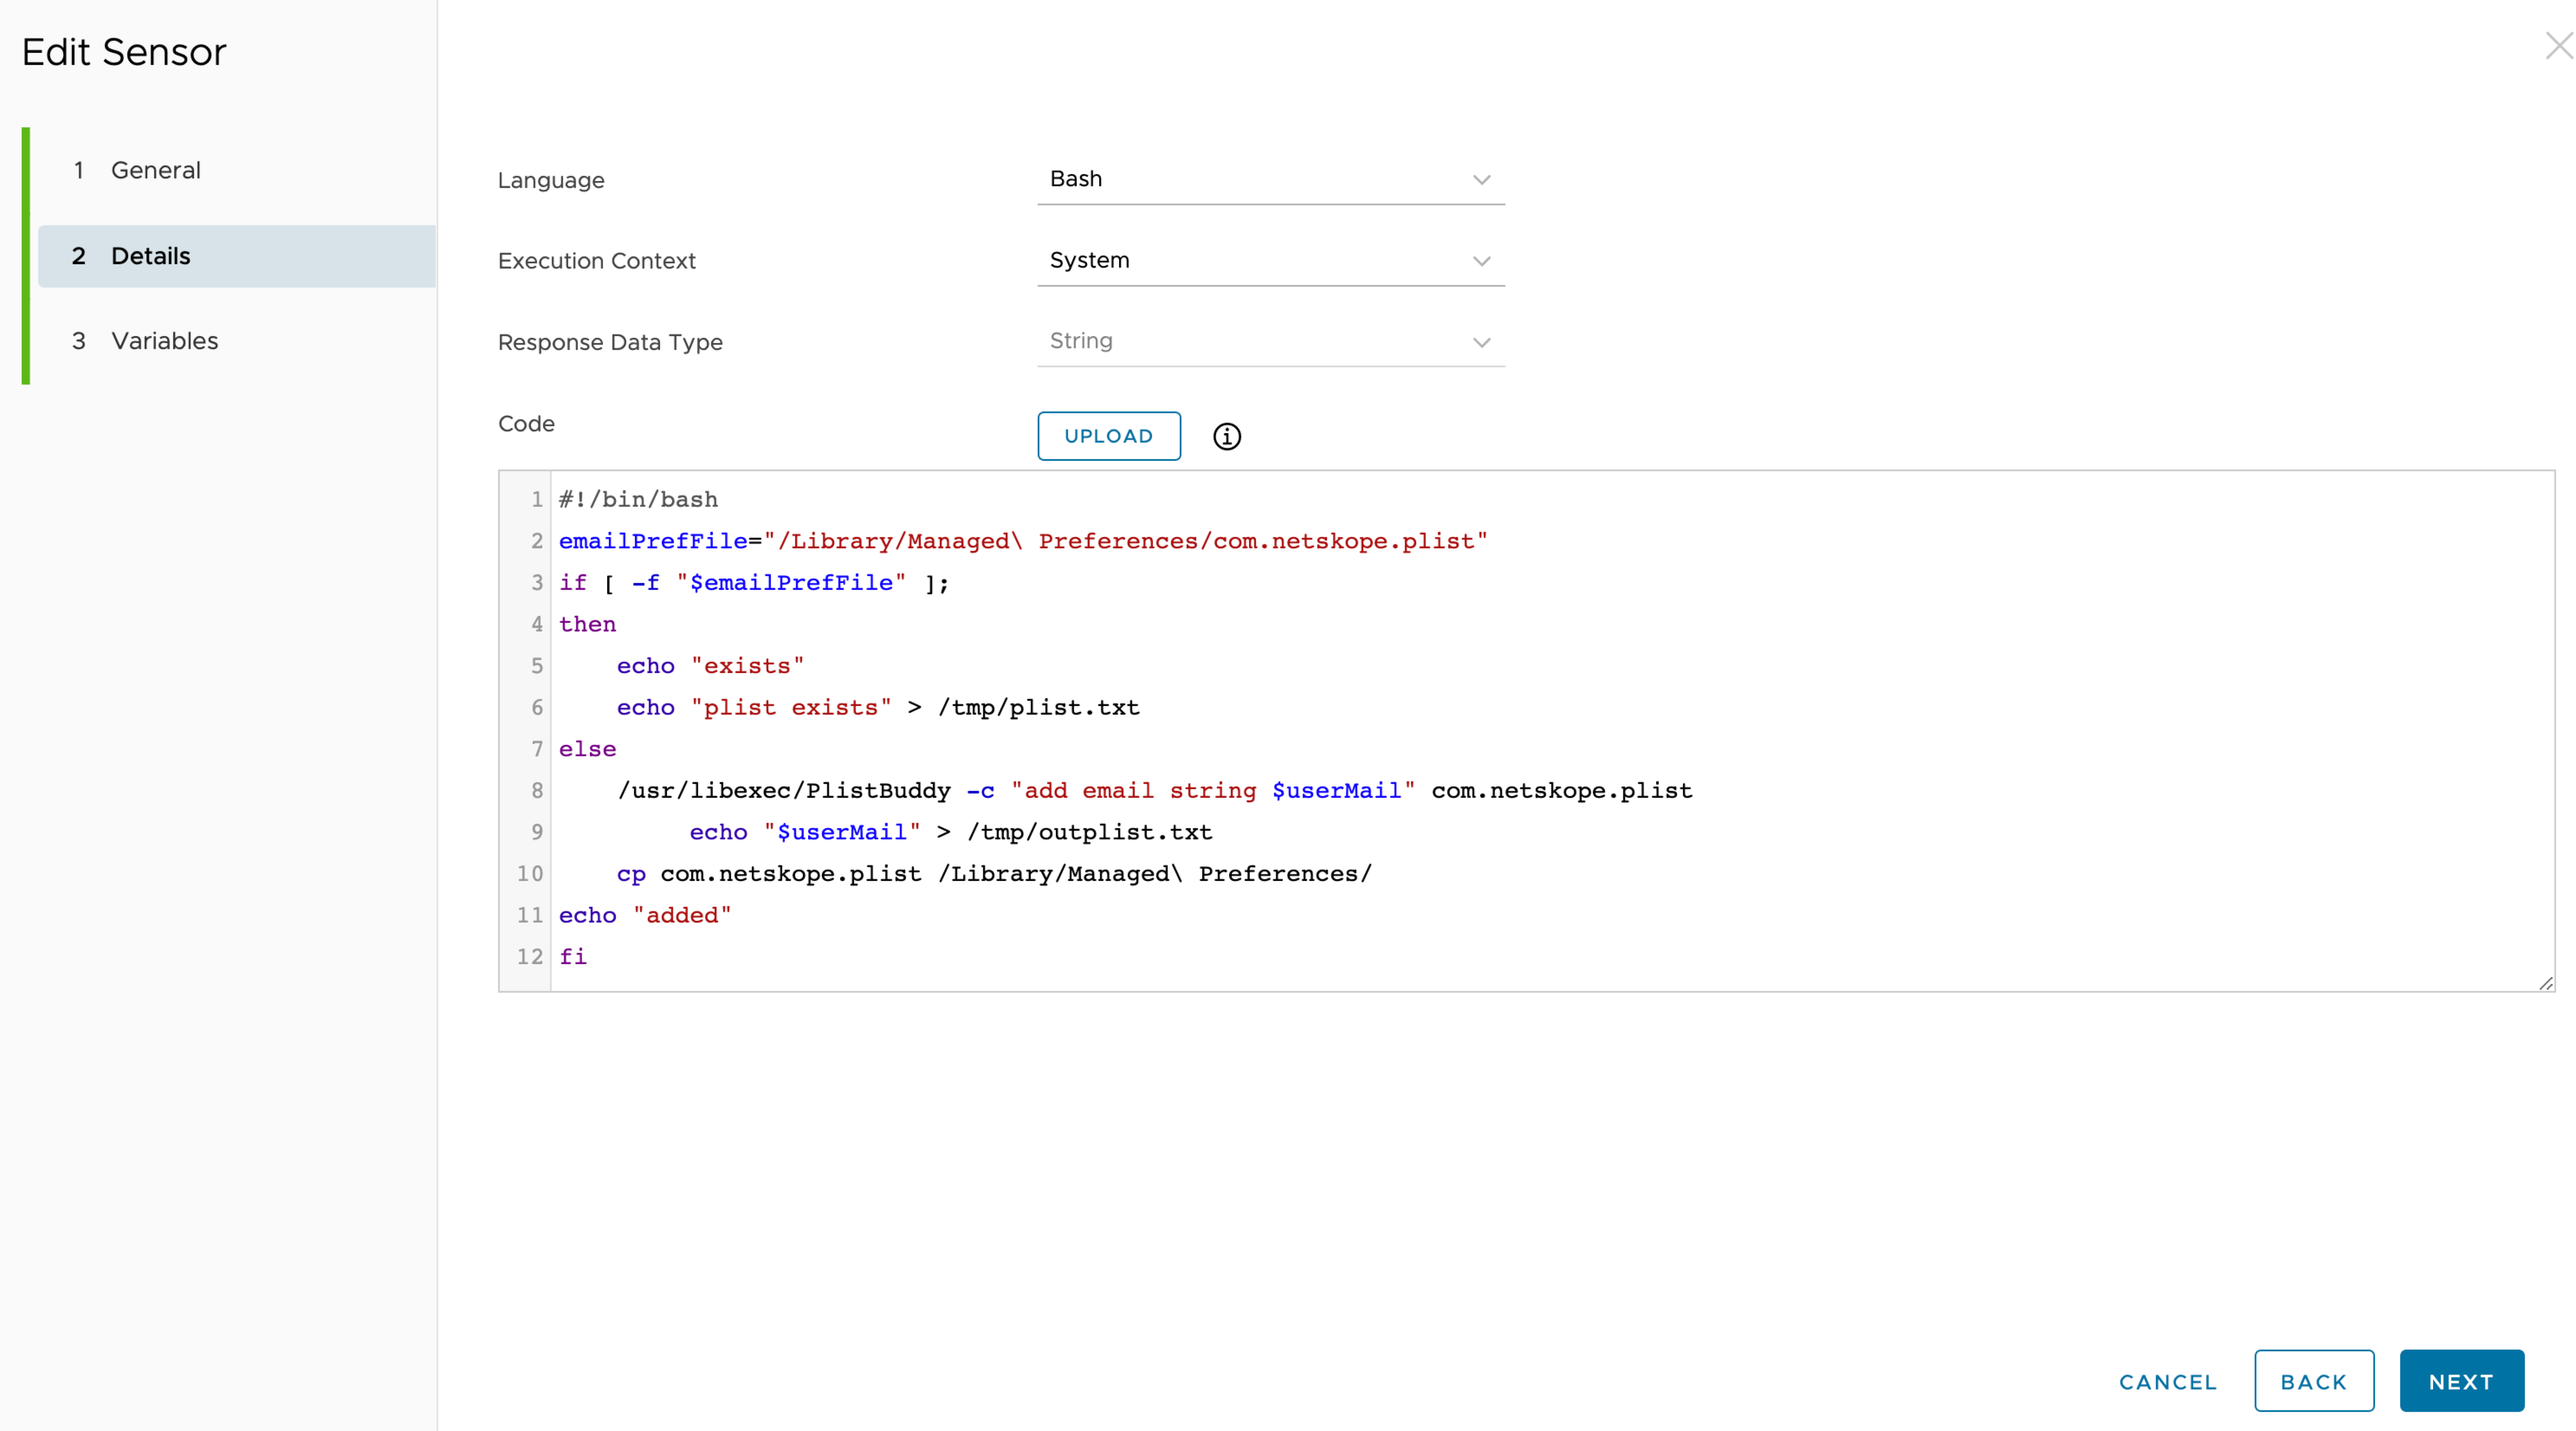
In the Details section, select the following:
Language: Bash
Execution Context: System
Response Data Type: String
Code:
#!/bin/bash
emailPrefFile=”/Library/Managed\ Preferences/com.netskope.plist”
if [ -f “$emailPrefFile” ];
then
    echo “exists”
    echo “plist exists” > /tmp/plist.txt
else
    /usr/libexec/PlistBuddy -c "add email string $userMail" com.netskope.plist
    cp com.netskope.plist /Library/Managed\ Preferences/
echo “added”
if
In the Variables section, create a variable to be used in the script during execution. Add userMail and select {EmailAddress} in the Key and Value fields respectively. You can add other variable names. However, ensure to add the same variable name as provided in the ‘bash’ script.

Click Save.
Important
You can see the file: com.netskope.plist under the directory: /Library/Managed\Preferences/ in your macOS device. This file contains the user email address. Ensure to check if an email address is assigned to the user, if you cannot find the email address in the plist file. To learn more, view Collect Data with Sensors in macOS.
Pre-install script and package
Here, we are adding Netskope Client script and packages along with the instructions to run the script on the device.
Go to Devices > Provisioning > Components > Files/Actions.
Click Add Files/Actions and select macOS.
In the General tab, enter the required information.
In the Files tab, upload the preinstall script, pkg file, and scripts. Also, mention the local path to download these files. For example, /tmp/JamfLatest.sh. Download the latest scripts and Netskope package from Netskope Support.
In Manifest, under Install Manifest, add the following steps in the same order.
Step 1
Action to perform: Run
Command Line and Arguments to run: chmod +x <Install script local path> (Refer point 4 )
Timeout: Desired value (default 0)
Step 2
Action to perform: Run
Command Line and Arguments to run: sudo <Install script local path> param1 param2 param3 param4. For example, run: sudo /tmp/<Your JAMFScript>.sh d1 d2 d3 addon-<TENANTNAME>.goskope.com ORGANISATION-ID com.netskope.plist preference_email silent_mode
Timeout: Desired value (default 0)
Step 3
Action to perform: Install
File Path and Name to Install <pkg file local path>
Go to Devices > Provisioning > Product List View.
Click Add Product.
Select MacOS as the platform.
In the General tab, enter the required details.
In Manifest, under the policy action, specify the following:
Action to perform: Install Files/Action.
Files/Actions: Select the files/action created above.
Click Save.
Add VPN and System extensions
Customize and extend the core networking features of macOS to enable content filtering, VPN, and other functionality.
Go to Resources > Profiles & Baselines > Profiles.
Click Add Profile from the Add dropdown options.
Select Apple macOS from the platform list.
Select Device Profile in Select Context.
Start typing 'System' in the search text box of the configuration profile.
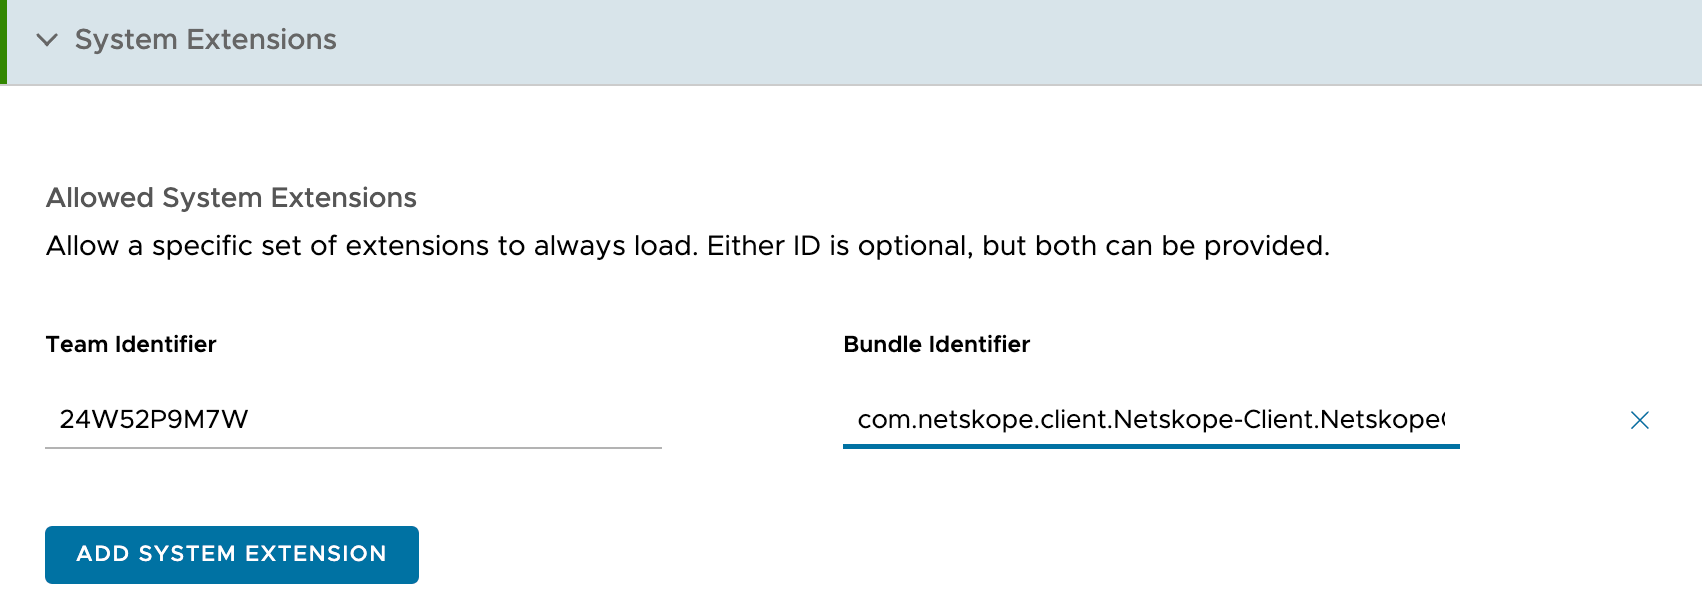
Expand System Extensions option and click Add.
Configure Allow Systems Extensions as follows:
Bundle Identifier: com.netskope.client.Netskope-Client.NetskopeClientMacAppProxy
Team Identifier: 24W52P9M7W

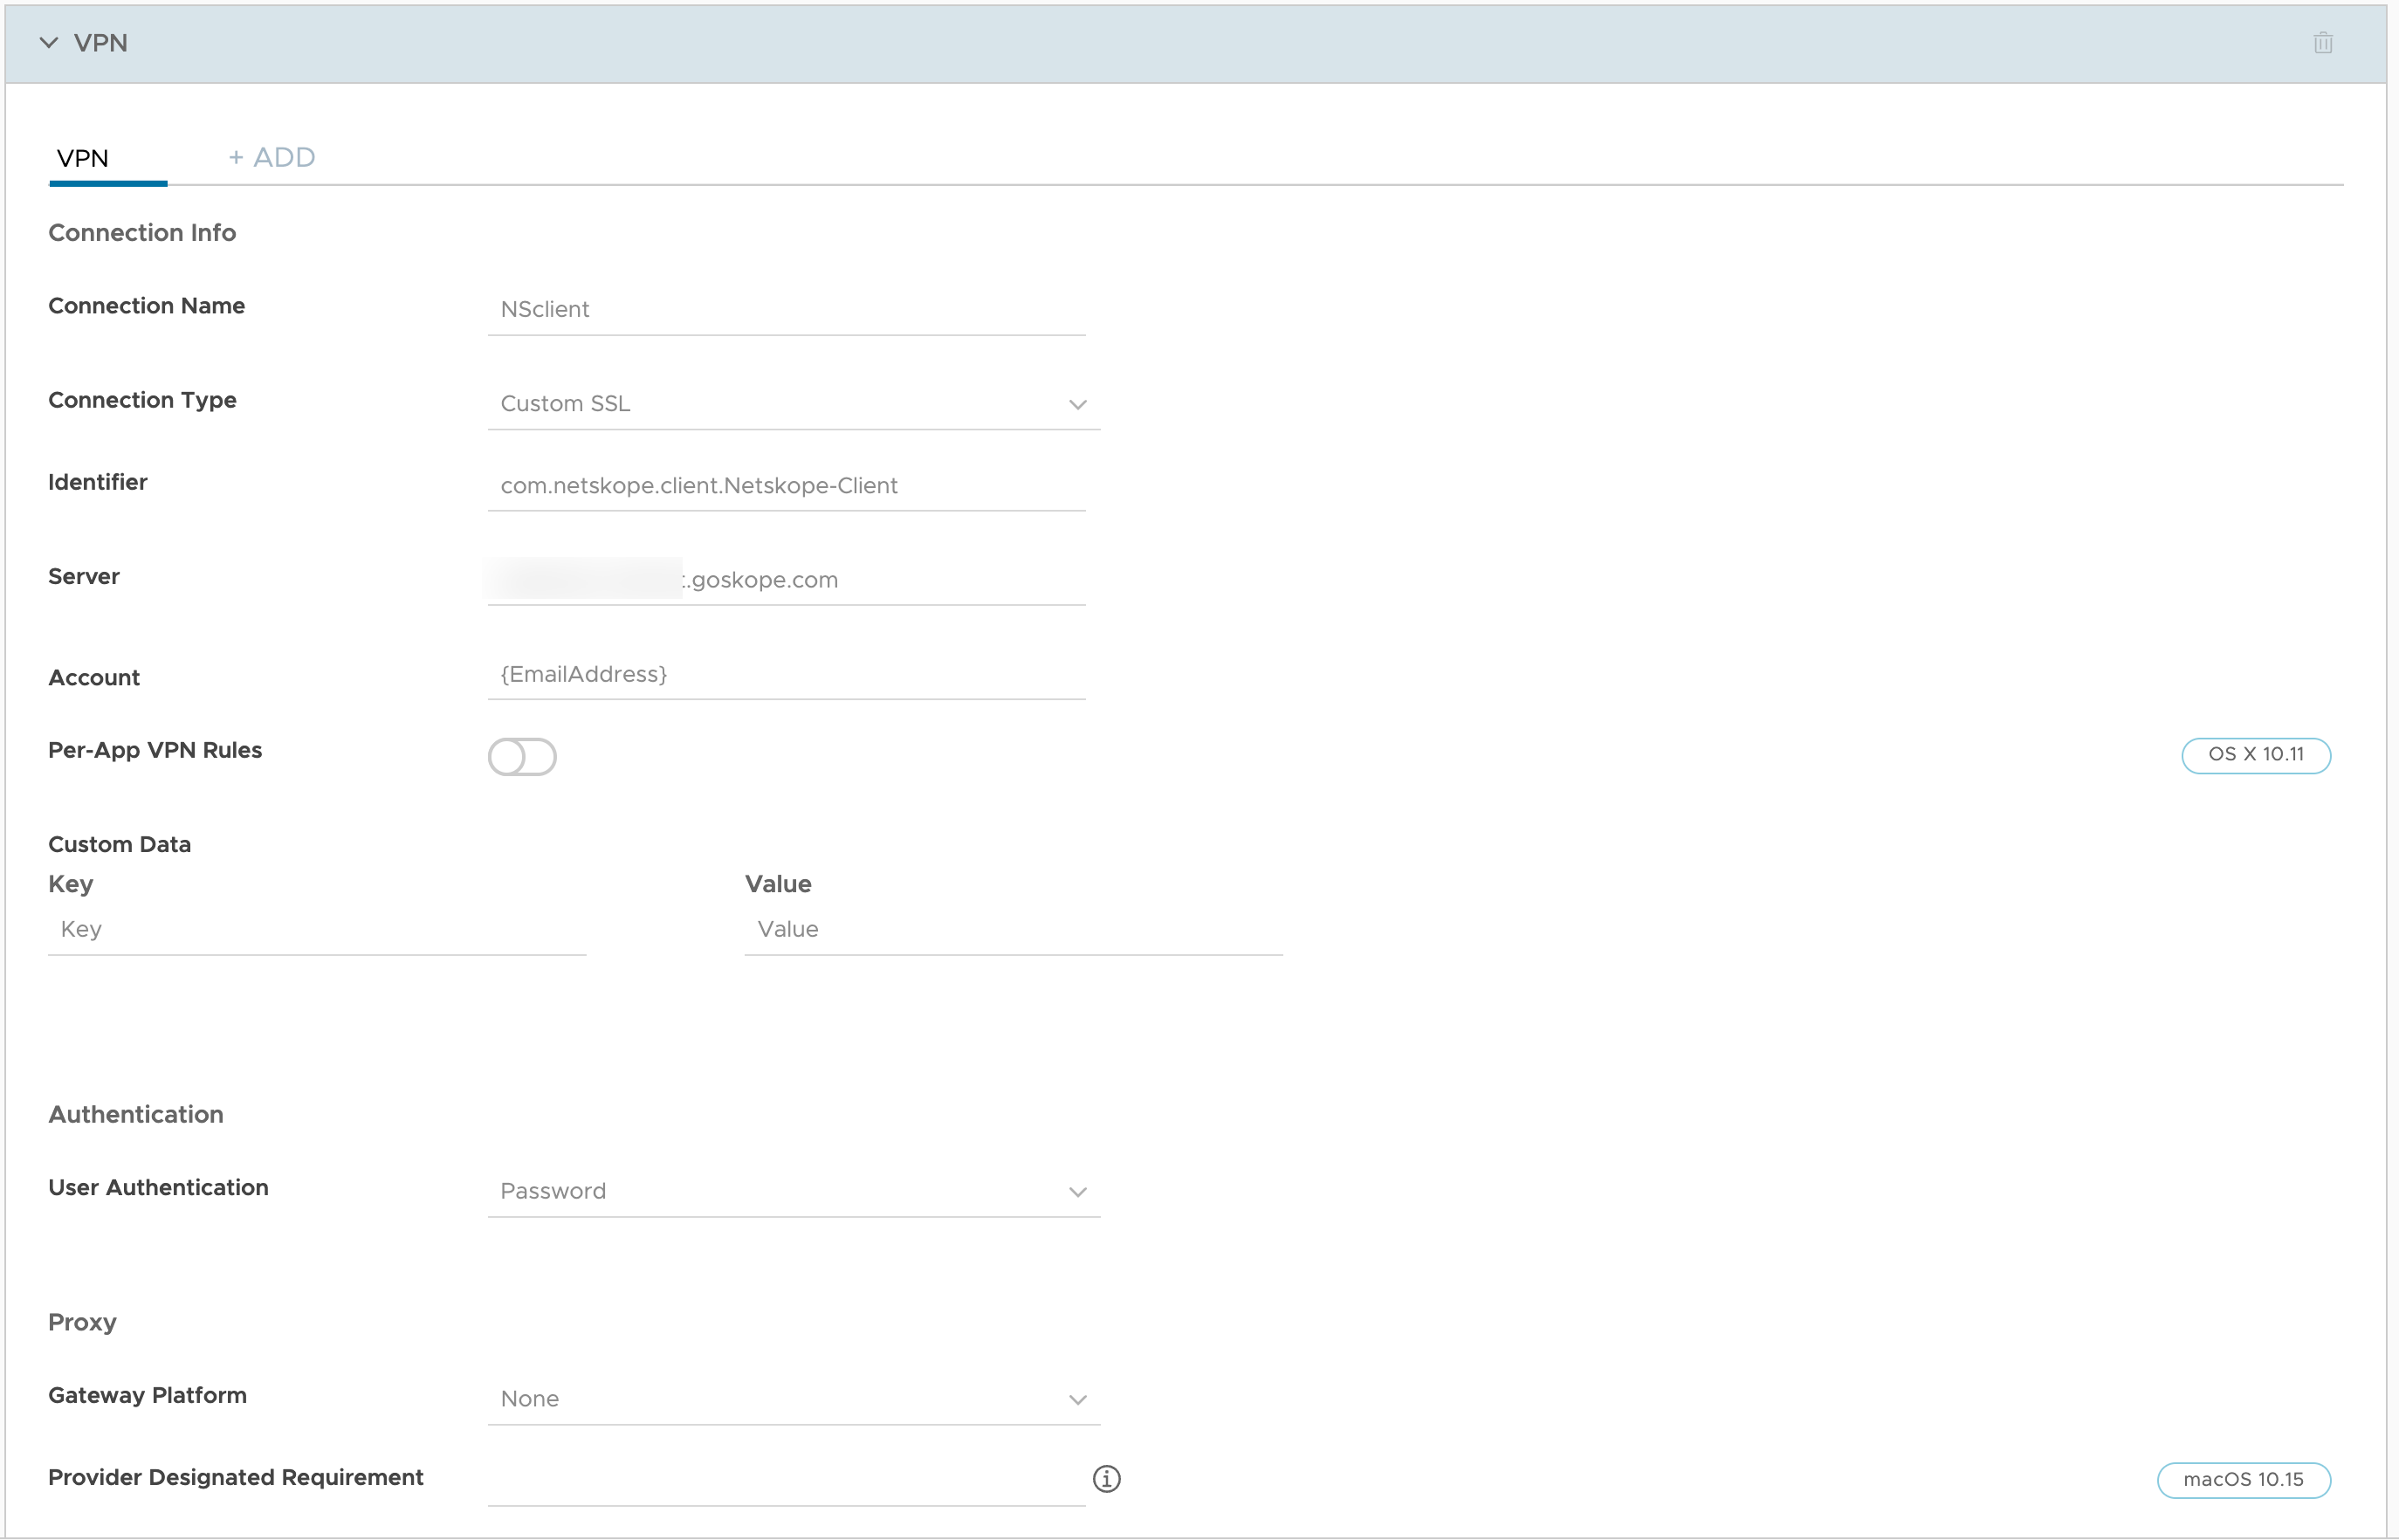
Expand VPN and click Add to enter the following details
Connection Name: Enter a descriptive name for the Connection Name.
Connection Type: Select Custom SSL.
Identifier: com.netskope.client.Netskope-Client.
Server: gateway-<tenant-name>.goskope.com

Enrollment Workflow
The user is enrolled using the email address from the Plist file configured in VMware Workspace ONE while running the script. The user need not perform any steps during the enrollment process.
The following steps illustrate the client enrollment workflow in VMware Workspace ONE:
After you complete the steps to deploy Netskope Client in VMware Workspace ONE, log into the Workspace ONE server.
Click Install on the Profile in System Preferences and follow the system prompts.
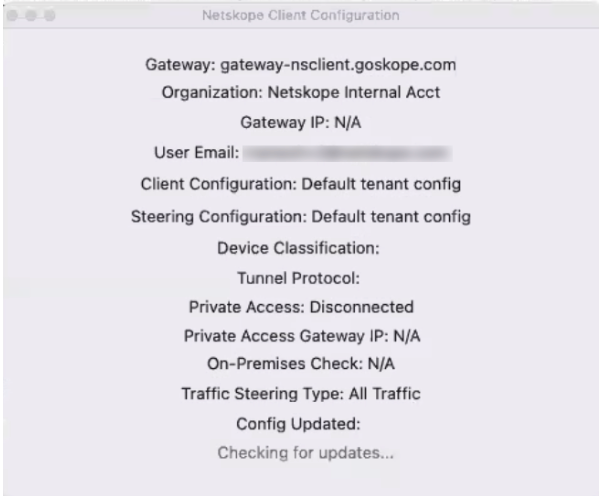
Once the installation is complete, Netskope Client Configuration is displayed on screen.
