ServiceNow Plugin for Application Risk Exchange
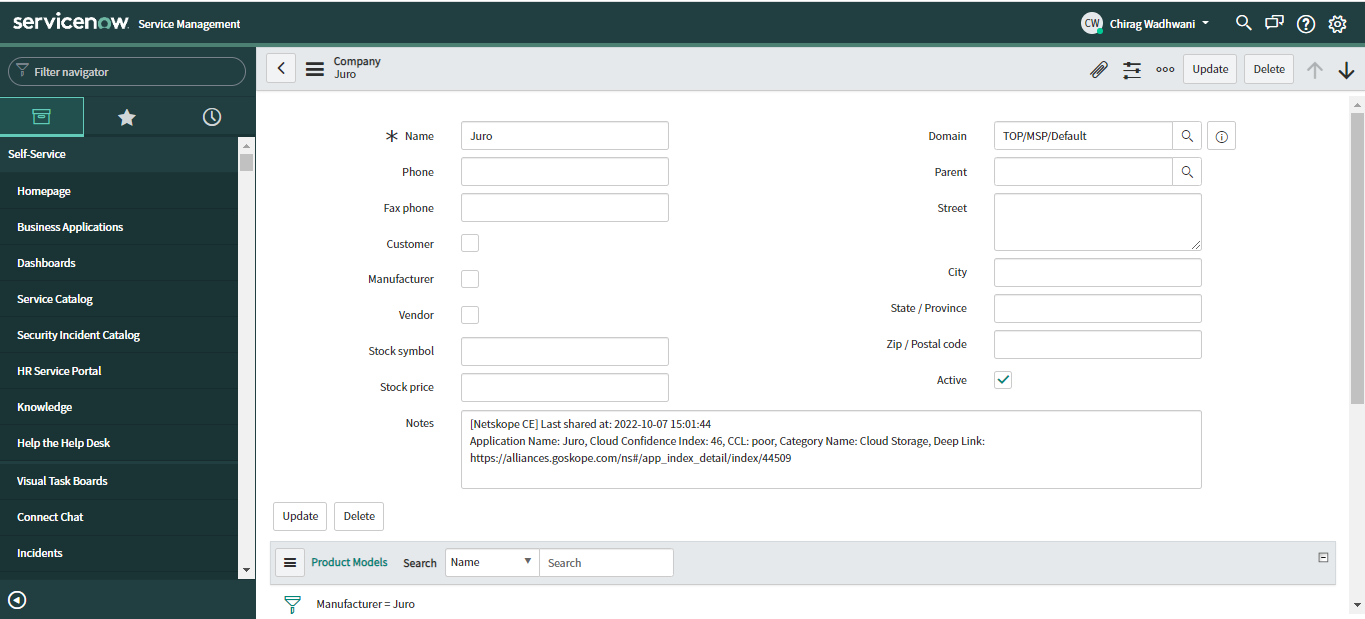
The ServiceNow Threat Intelligence application has a core_company table that stores the vendor details across the enterprise. This plugin provides a mechanism to send the application data of Netskope tenant to the Companies table (core_company) for risk analysis. This plugin requires a ServiceNow account that has access to the Companies (core_company) table.
To complete this configuration, you need:
A Netskope Tenant (or multiple, for example, production and development/test instances).
A Secure Web Gateway subscription for URL sharing.
A Netskope Cloud Exchange tenant with the Application Risk Exchange module already configured.
A ServiceNow instance with admin access.
Connectivity to the following host: https://ven02207.service-now.com/.
Create a ServiceNow user.
Configure the ServiceNow plugin for Application Risk Exchange.
Configuration Sharing for the ServiceNow plugin.
Validate the ServiceNow plugin.
To watch a demo, click play.
Log in to your ServiceNow instance.
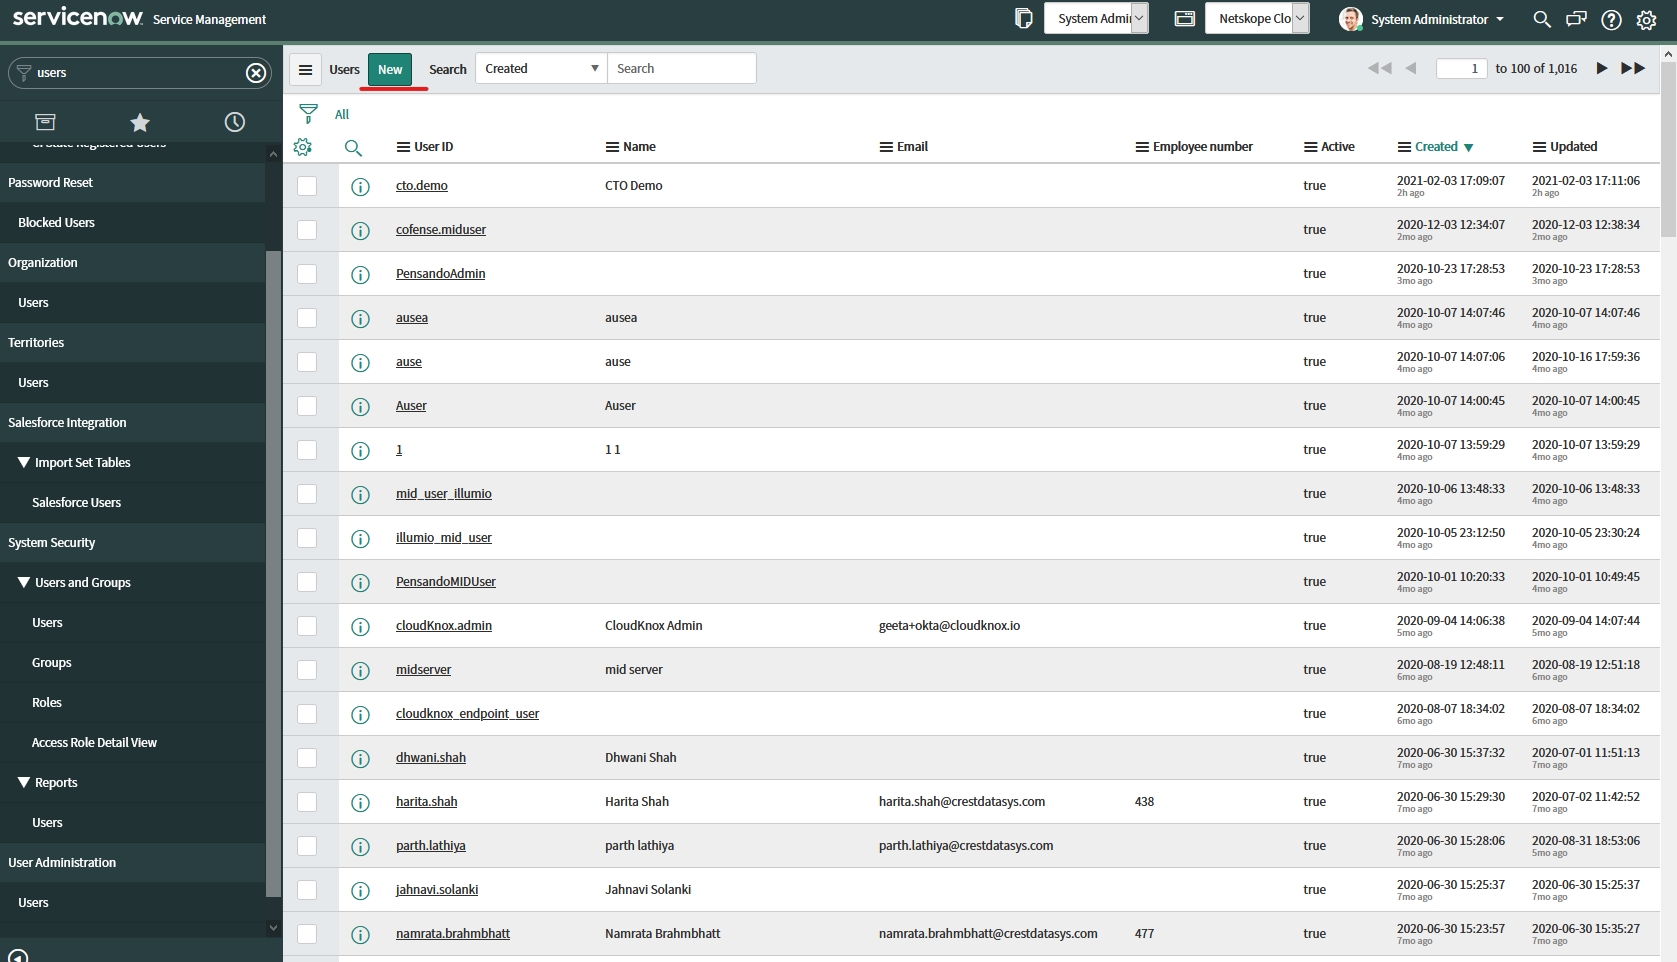
Go to System Security > Users and Groups > Users.
Click New.
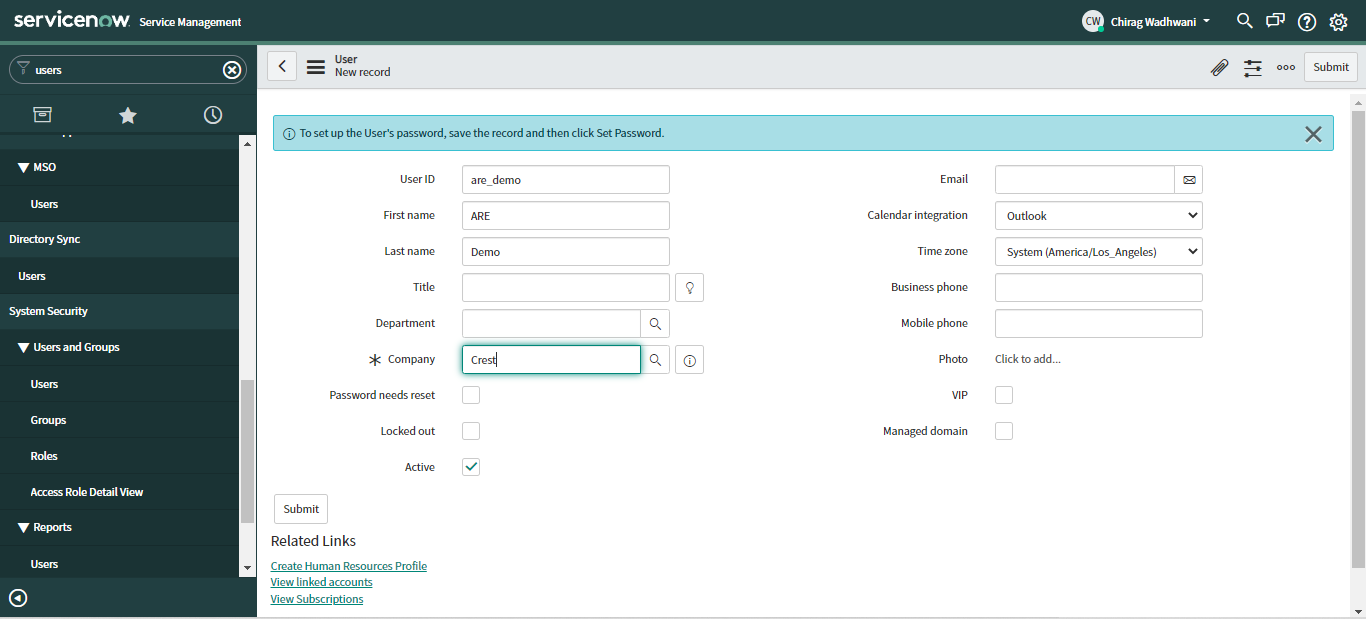
Fill in the required information, and make sure to copy the User ID. Click Submit.
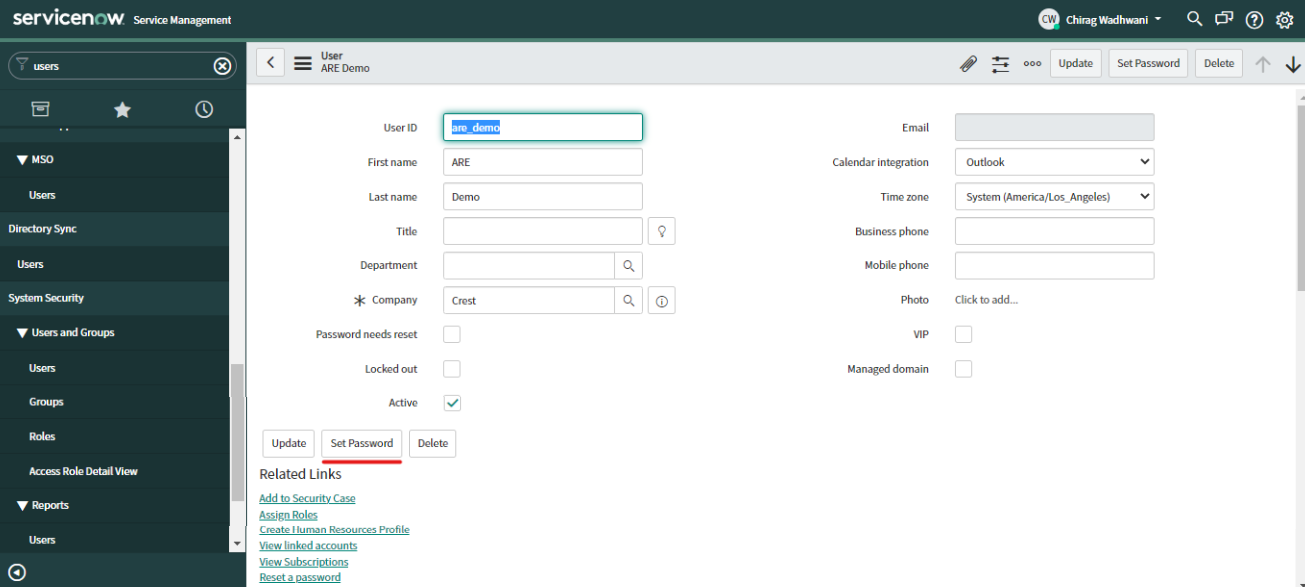
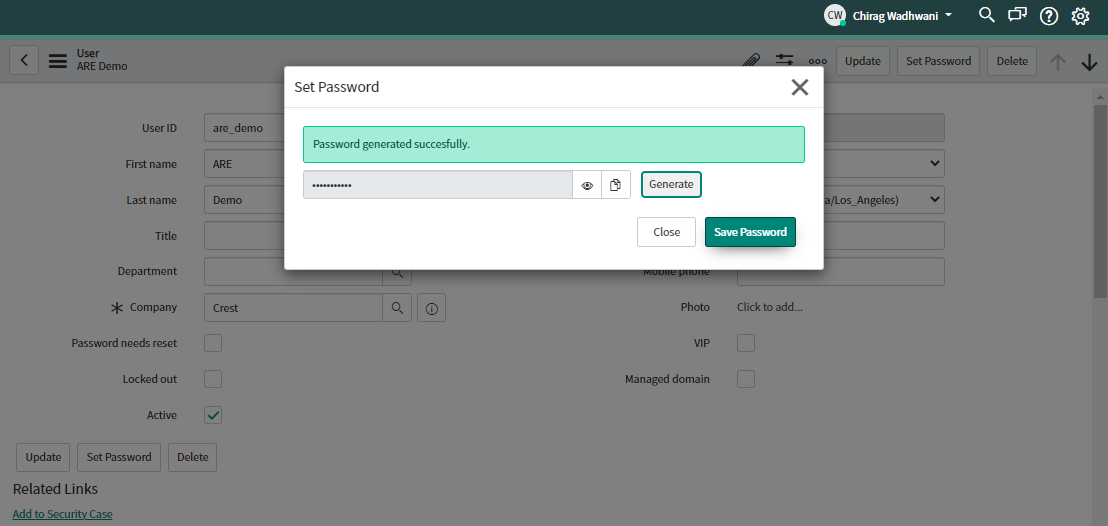
After submitting the user, open the user record to set the password and roles. Click Set Password.
Click Generate to generate a new password, and make sure to copy the password.
Click Save Password.
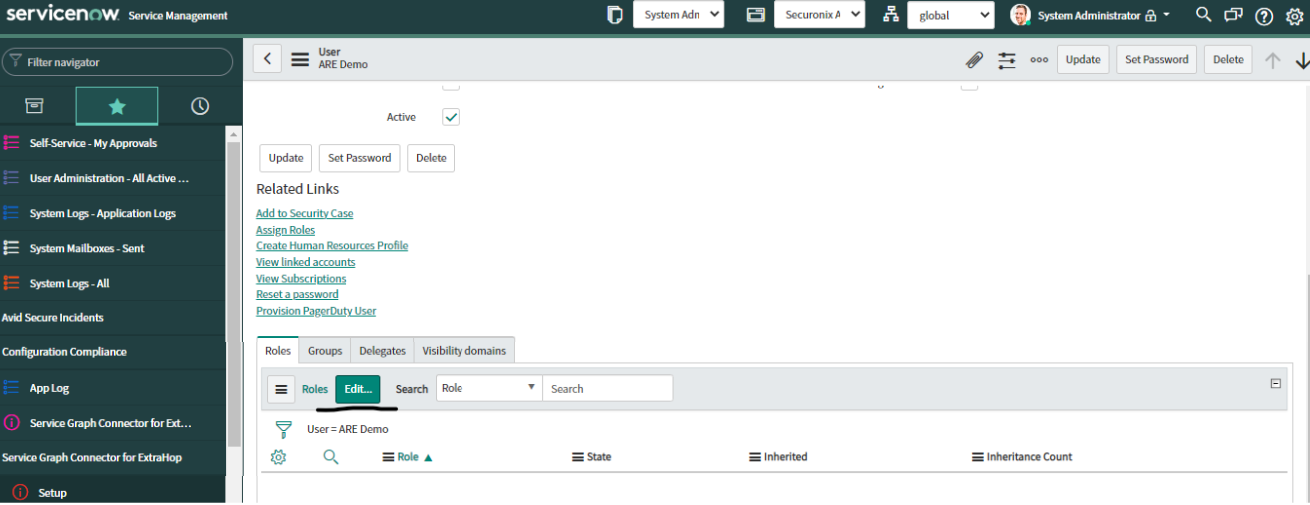
Click on the Roles tab, and then Edit….
Add the user_admin role. Click Save.
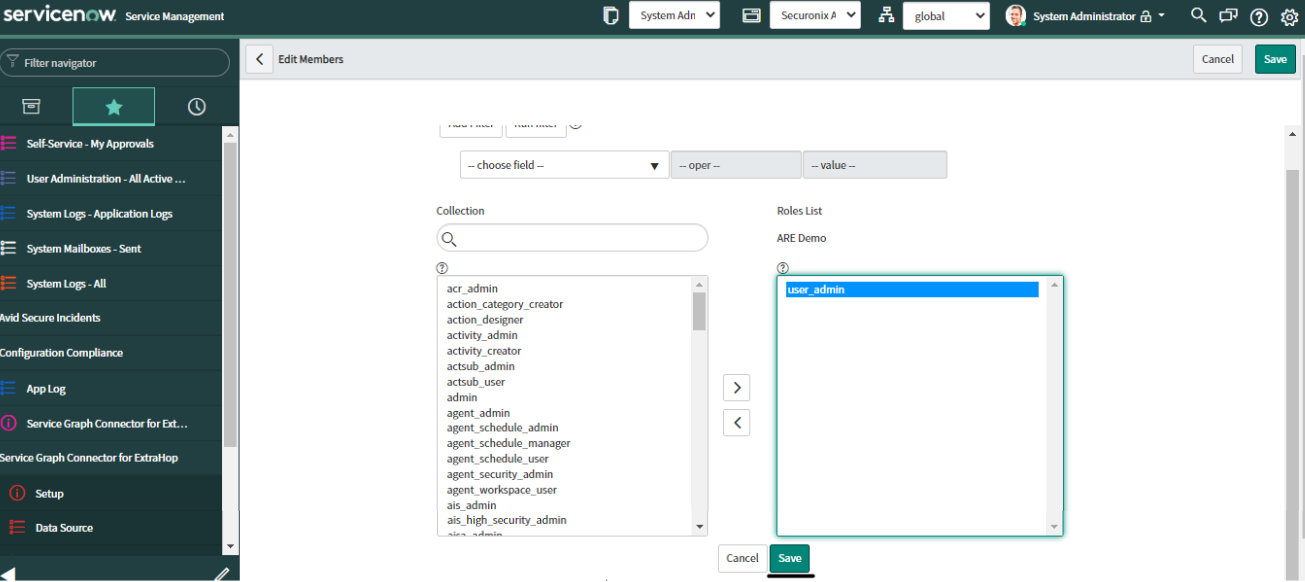
The User should have Admin role.
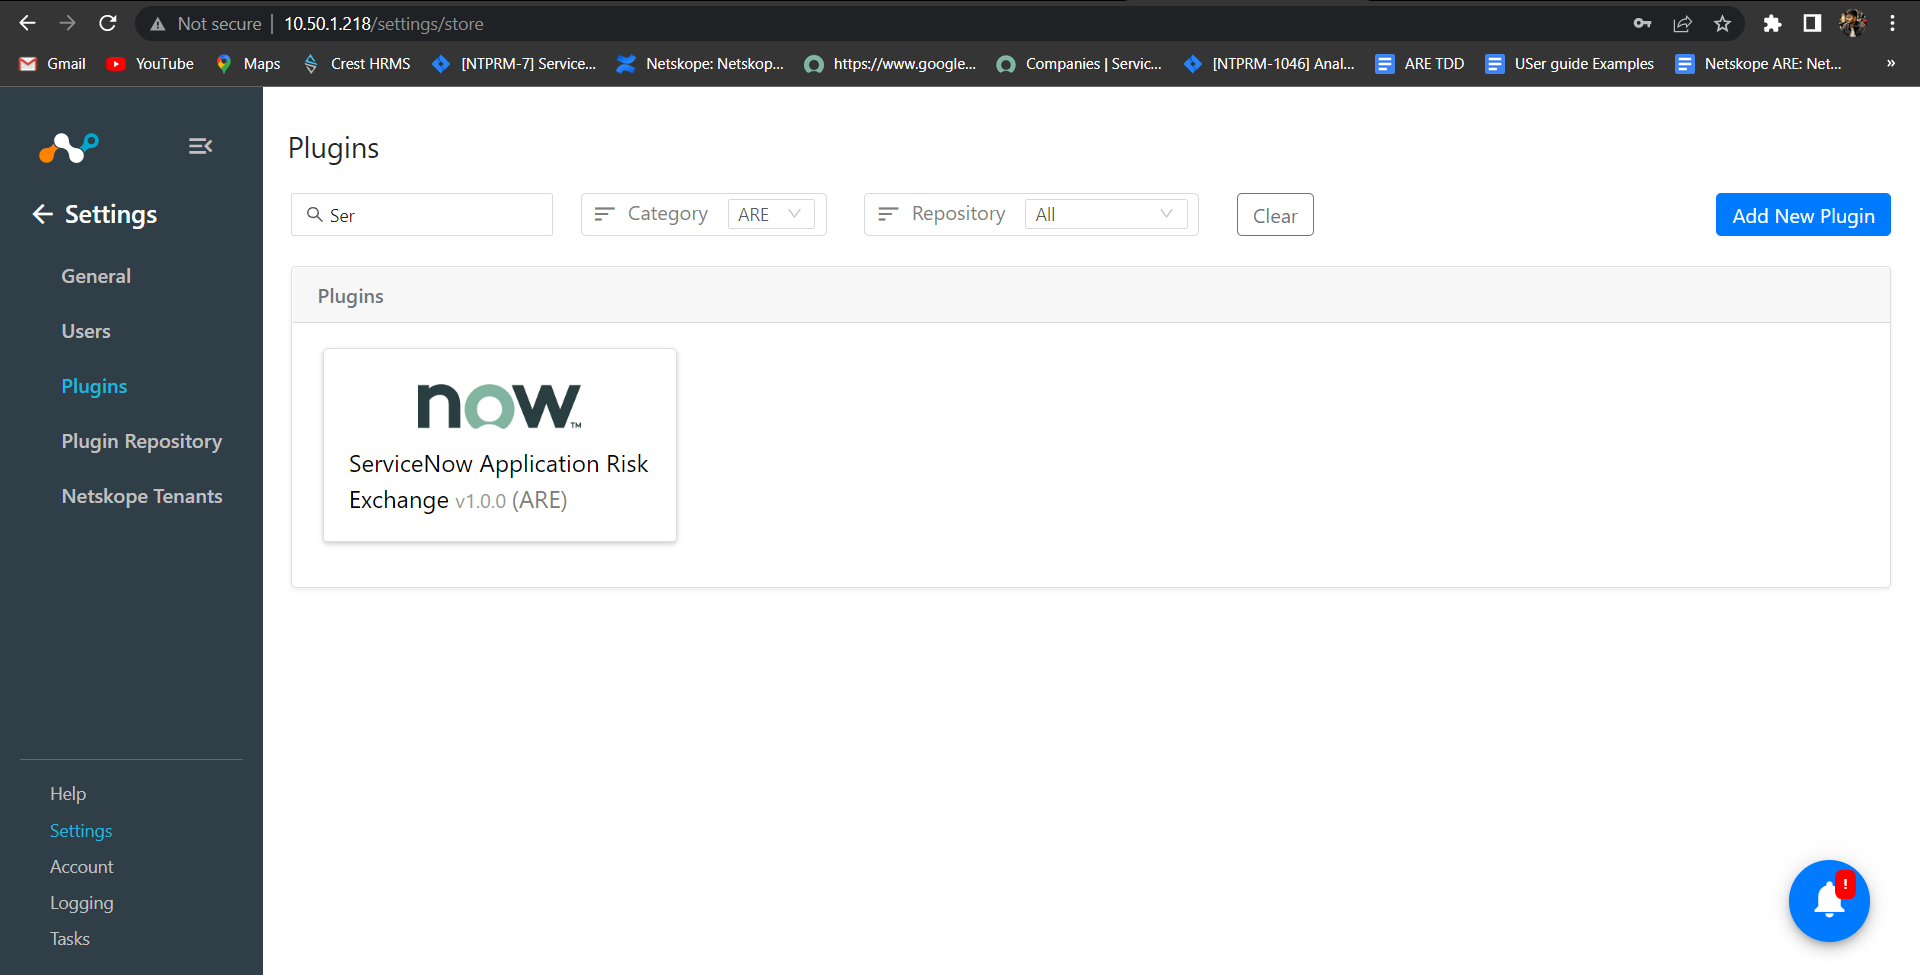
In Cloud Exchange, go to Settings > Plugins
Search for and select the ServiceNow (ARE) box to open the plugin creation pages.
On the Basic Information page, enter a Configuration Name.
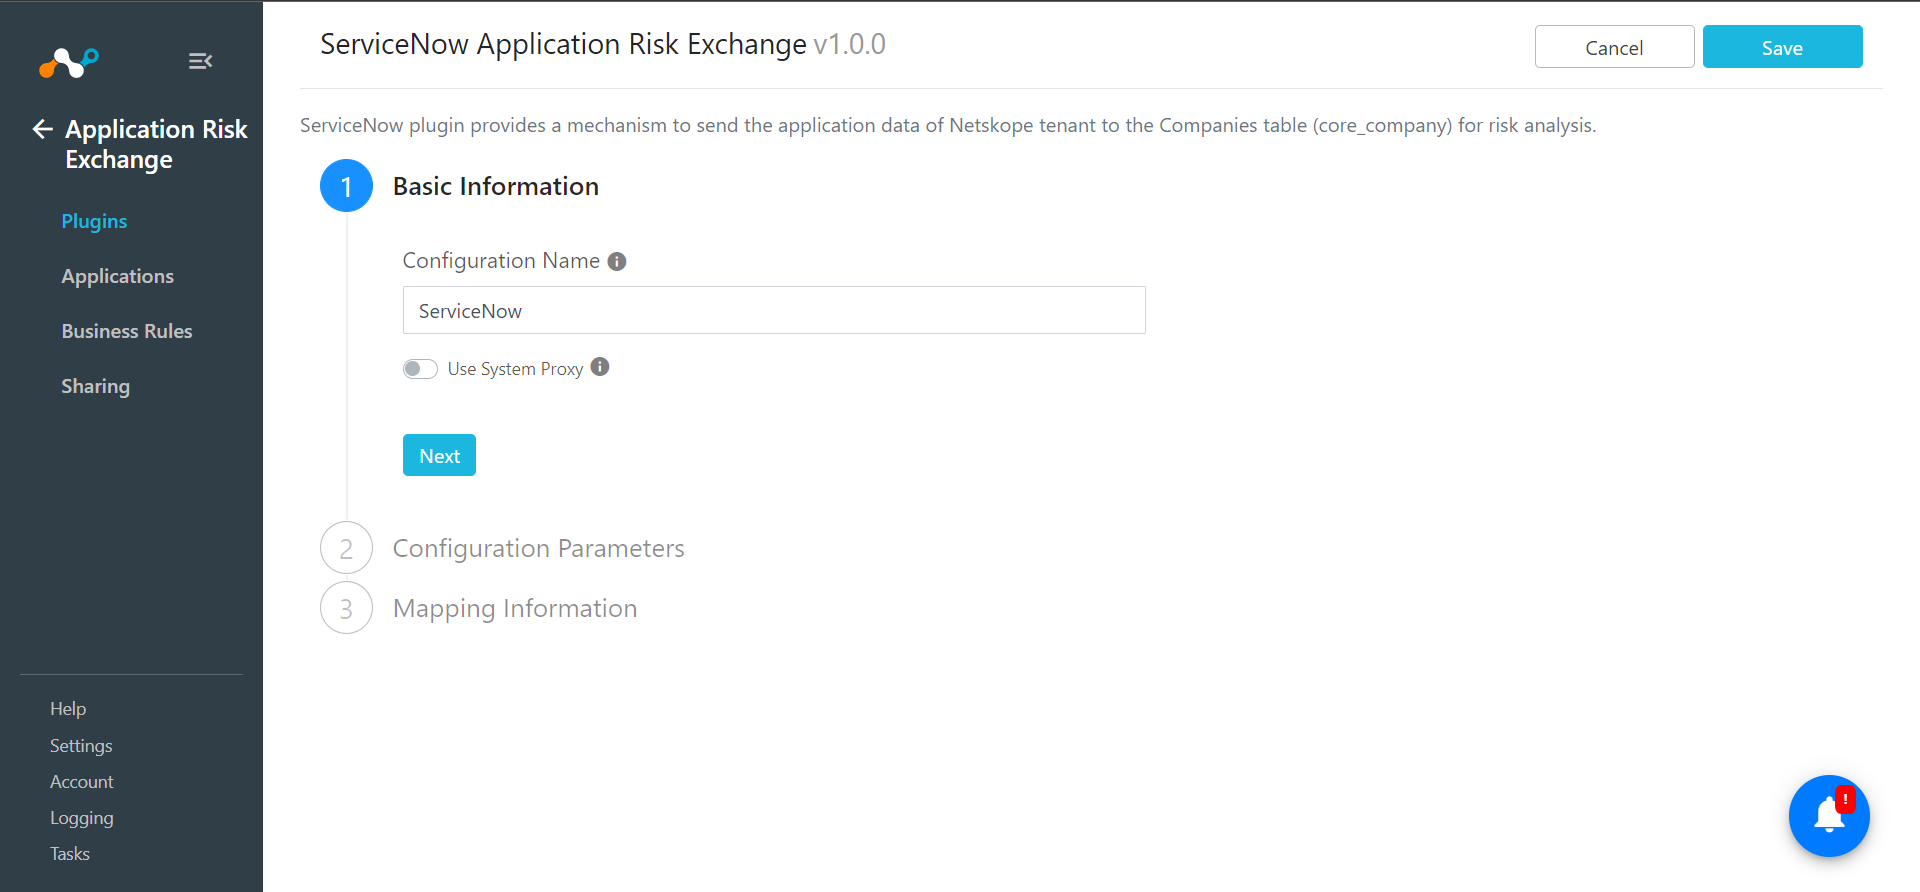
Click Next.
Enter your ServiceNow Instance URL.
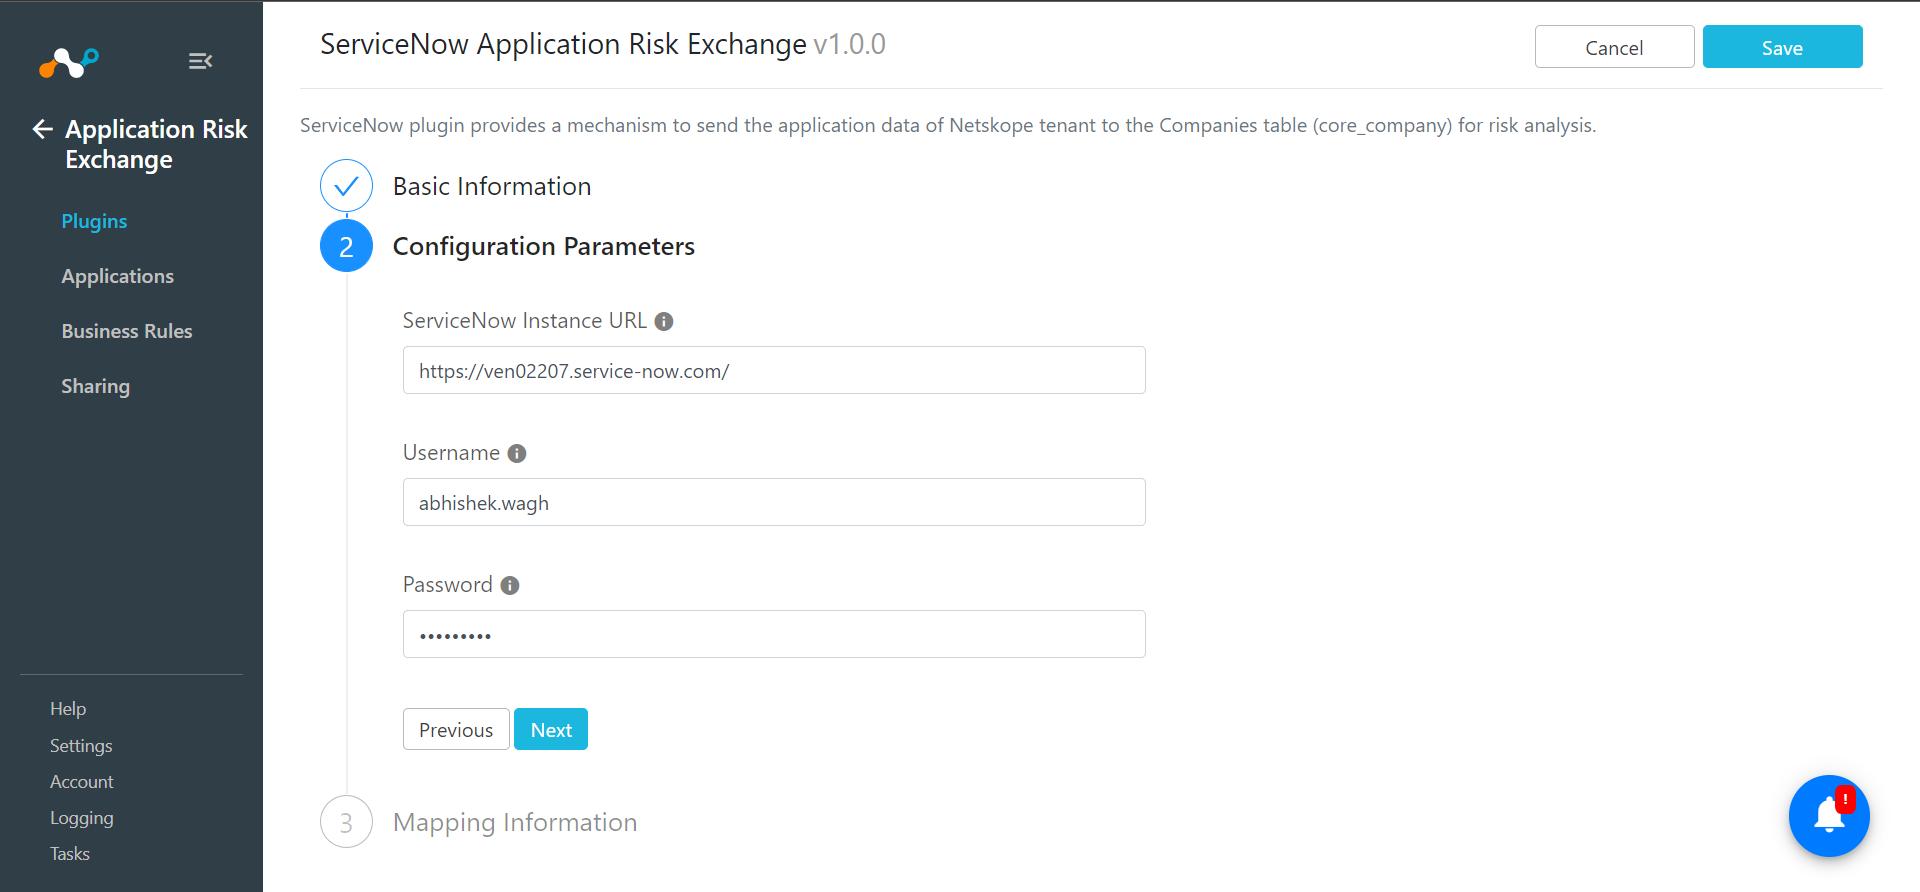
Enter your Username and Password obtained while creating a ServiceNow user.
Click Next.
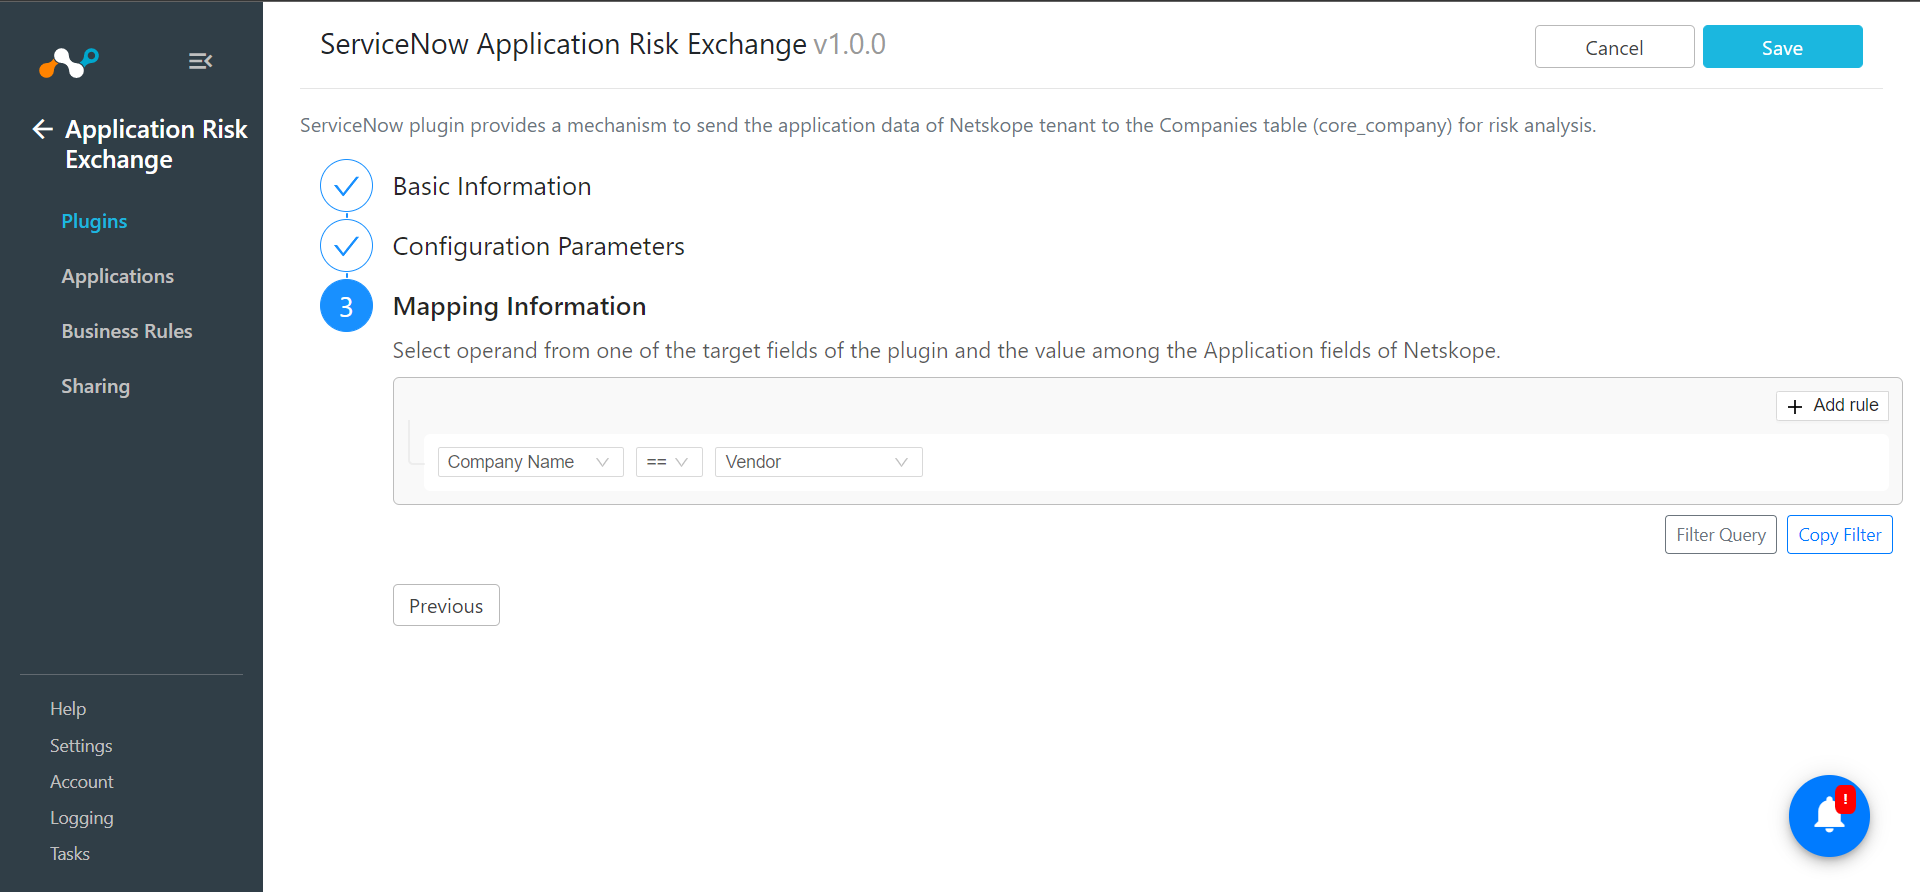
Select the Mapping information. For example,
Name == Vendor.Click Save.
In Application Risk Exchange, go to Sharing.
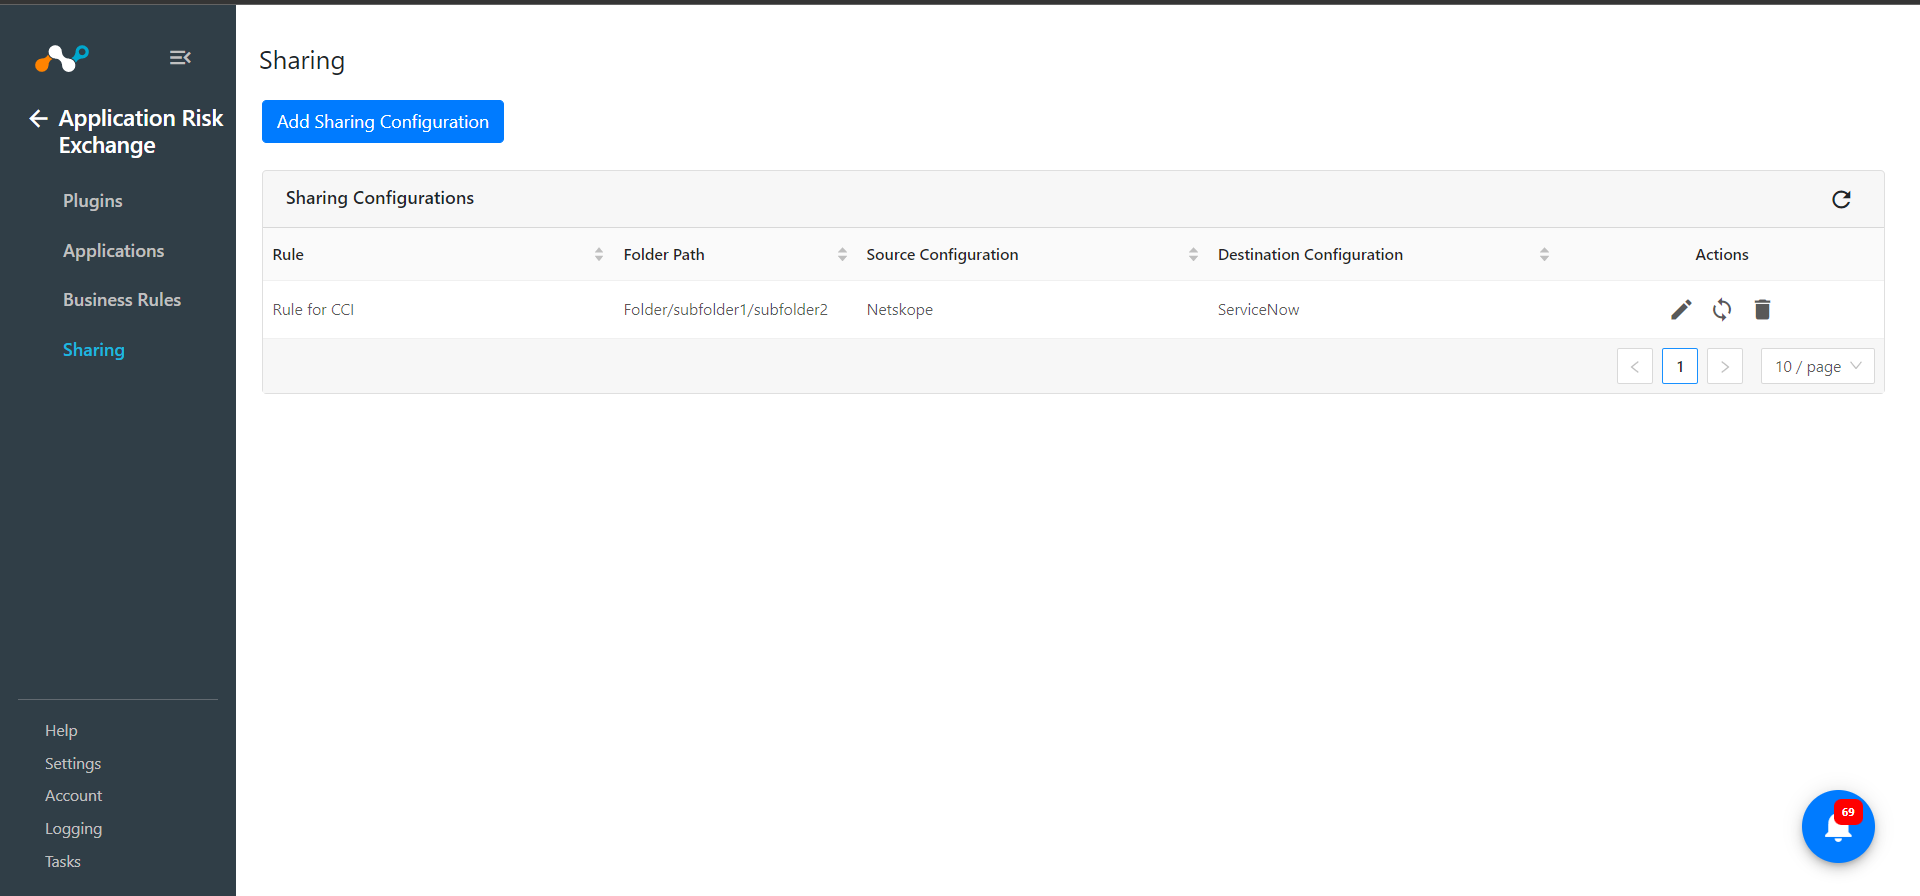
Click Add Sharing Configuration.
In the first dropdown box of Source Configuration, choose Netskope.
Select an appropriate Business Rule from second drop down.
In the third drop down box of Destination Configuration, select the ServiceNow plugin you created previously.
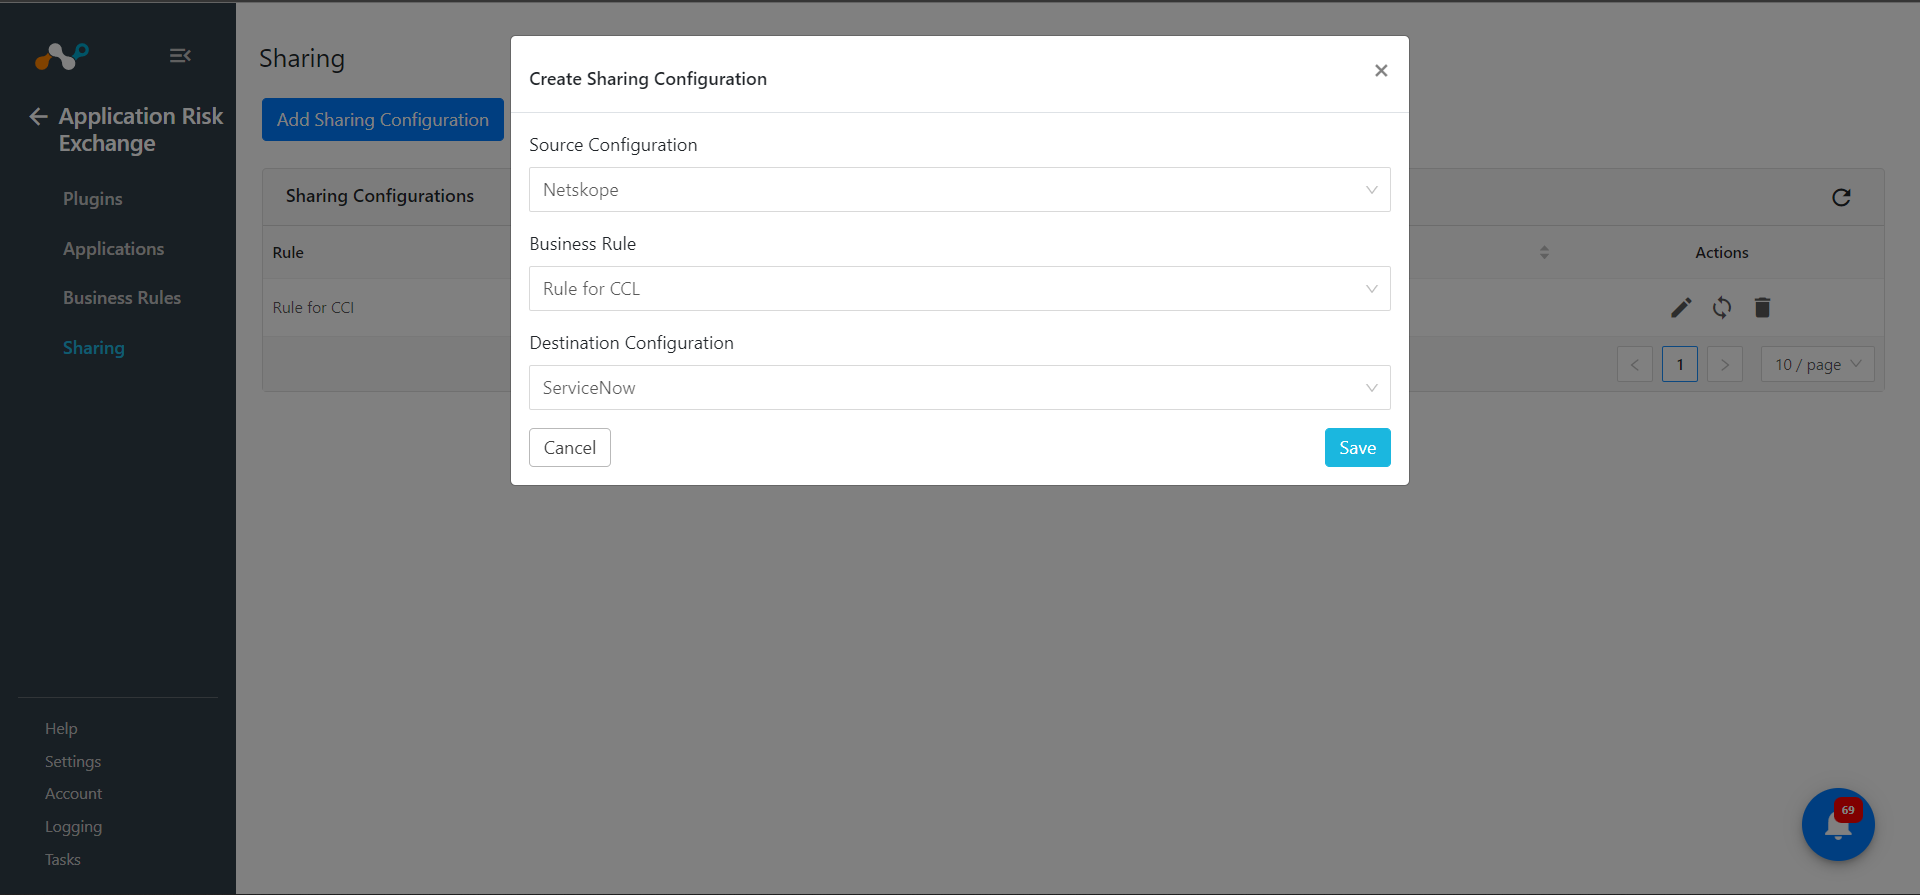
Click Save.
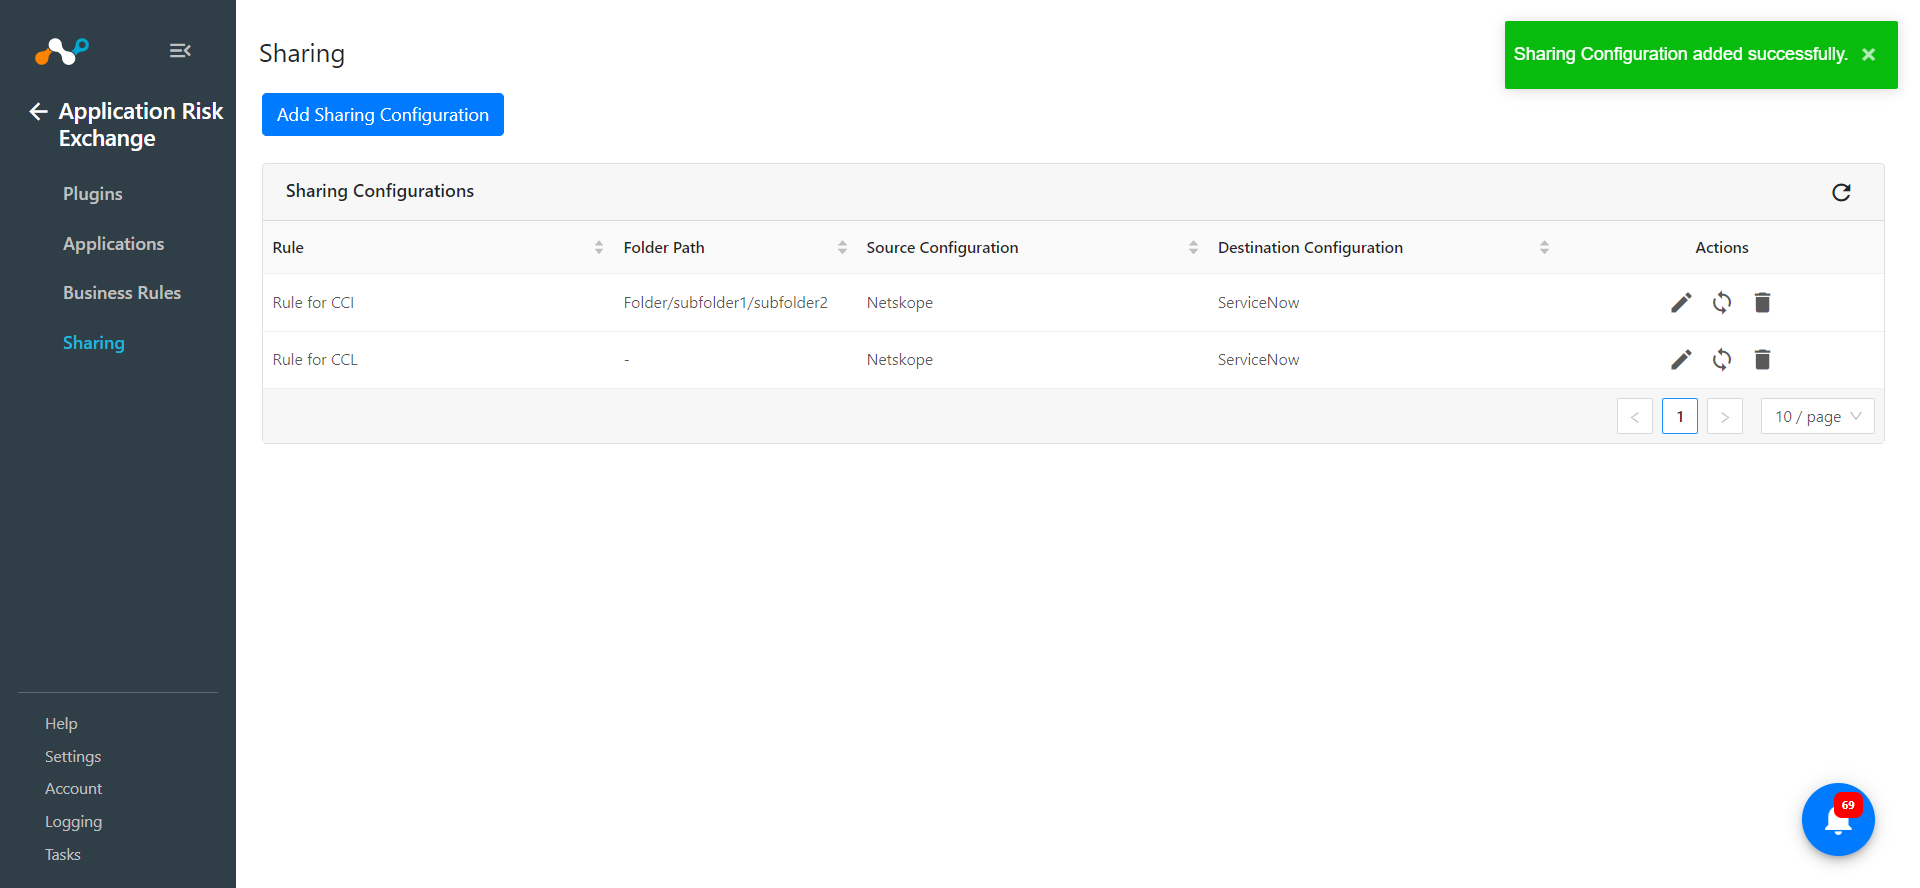
Automatic sharing will be triggered every 30 minutes after the Netskope ARE plugin is configured.
Automatic sharing will share all the applications that are updated after the execution of the previous automatic sharing task.
If the sharing is configured within 30 minutes of configuring Netskope ARE plugin, then all the applications that are stored will be shared in automatic sharing.
Note
If the sharing is not configured within 30 minutes, the user will have to share the existing data manually for the first time and then can rely on the automatic sharing.
Click on the Sync button to set the time period of sharing applications.
Add a time period in days.
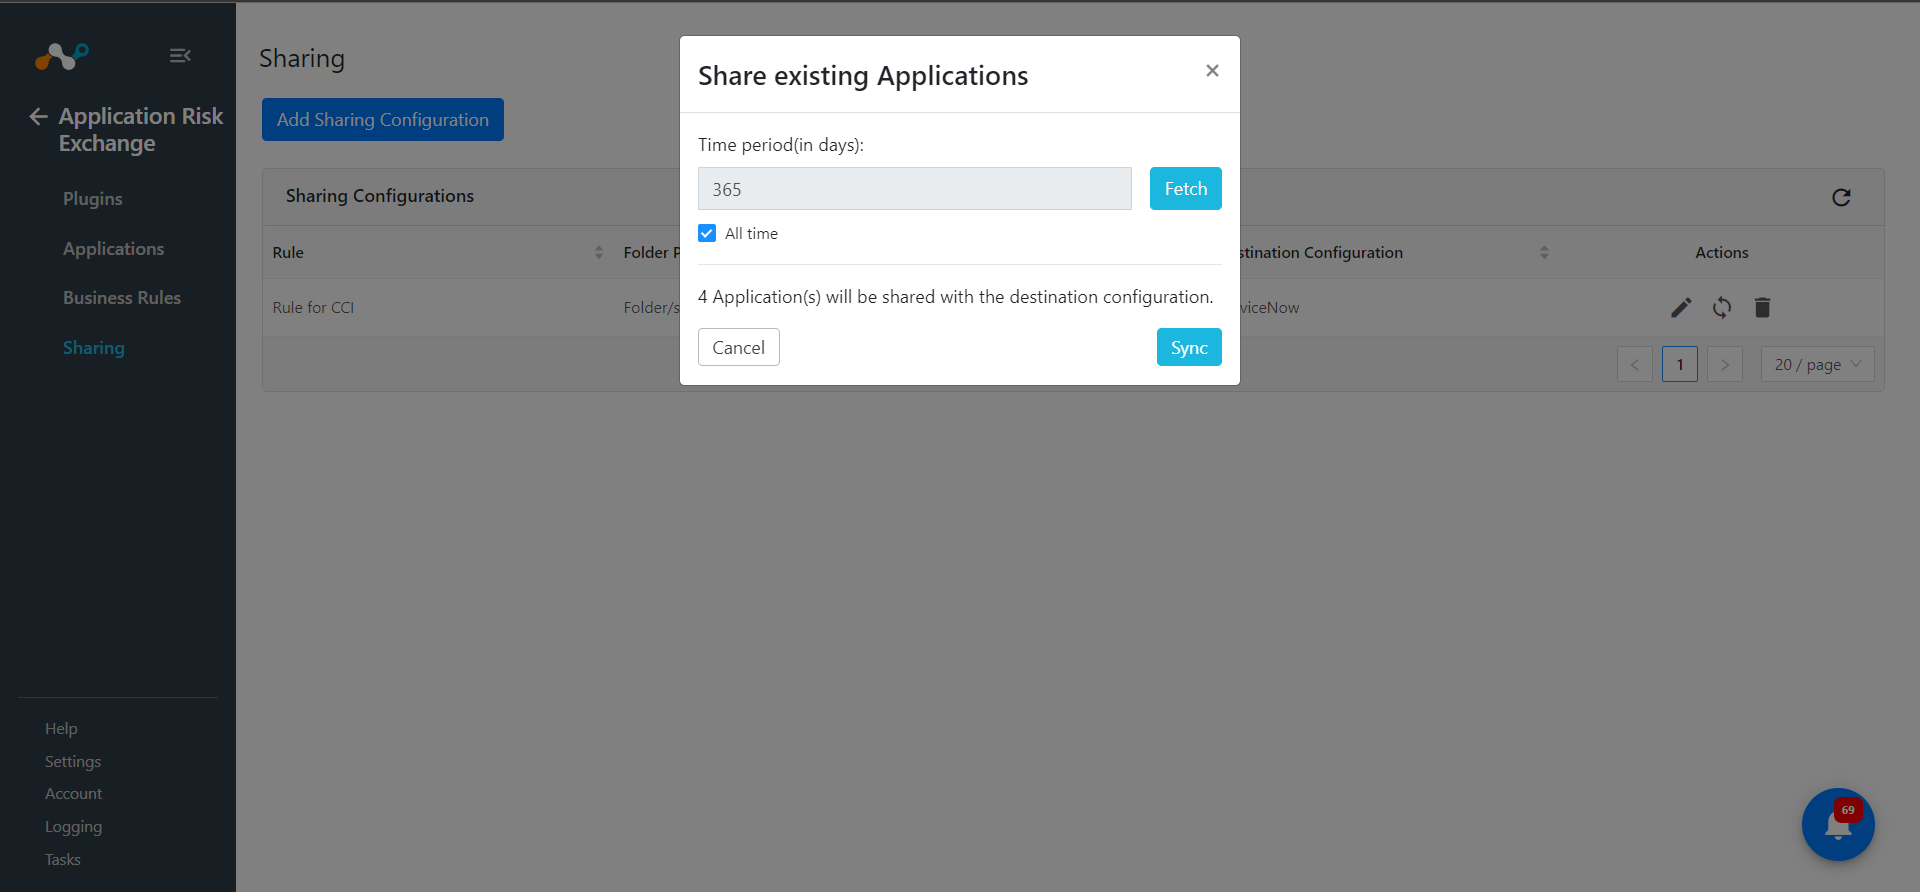
Click on the Sync button to share the applications.
To validate the application data was shared from Netskope to ServiceNow, follow these steps:
Log in to your ServiceNow instance.
Go to the Companies table by typing companies in the Filter Navigator, and then select Companies under User Administration.
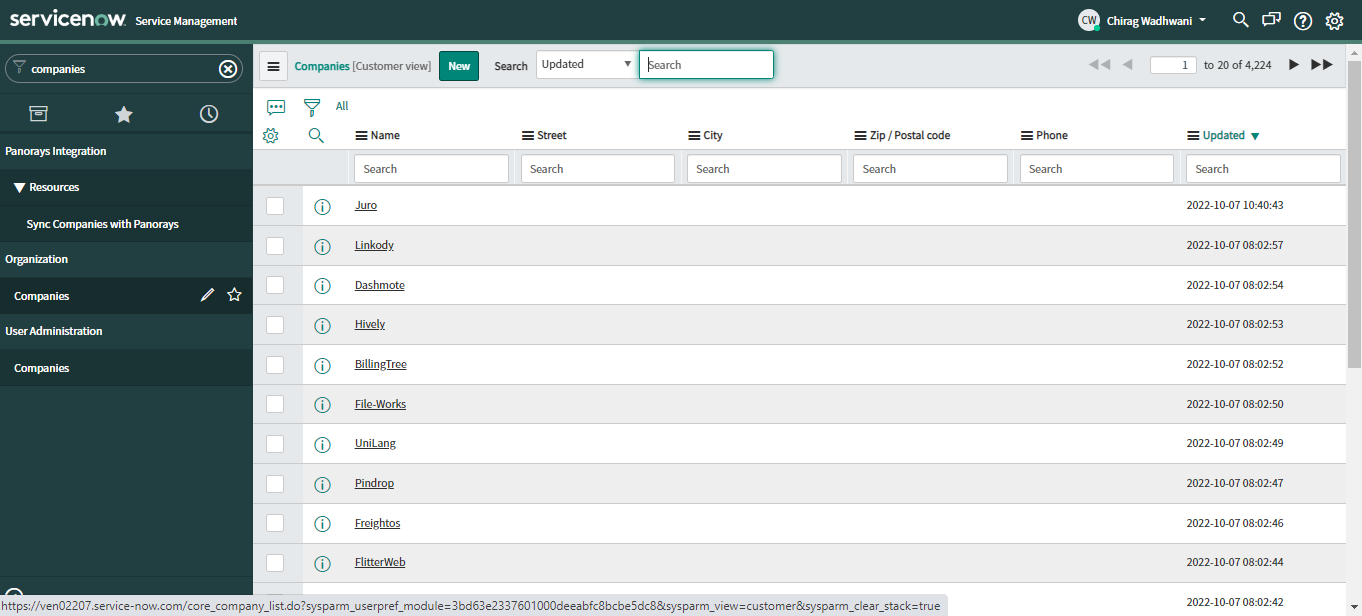
Go to the Company that got updated.
Check the Notes section to get the Netskope tenant details.
